Would you like to save this?
As the holidays approach and the air fills with the promise of festive cheer, few treats evoke the warmth and joy of the season quite like Christmas Cherry Bars. This recipe is a cherished favorite in our family, carrying with it a delightful blend of sweet and tart flavors that perfectly encapsulates the essence of the holiday spirit. The first time I encountered these bars was at a holiday gathering, where their inviting aroma and vibrant cherry topping immediately drew me in. The simplicity of the ingredients and the ease of preparation make these bars an ideal choice for busy holiday schedules, while their rich flavor profile ensures they’re a hit at any gathering.
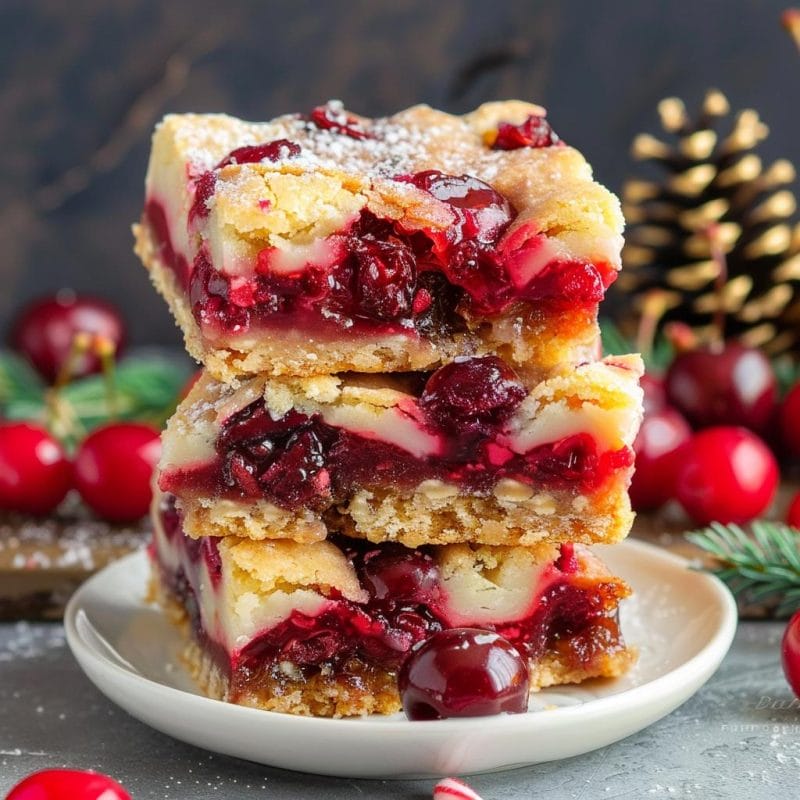
These bars are more than just a dessert; they’re a symbol of togetherness and celebration. Picture this: a soft, buttery base topped with a layer of luscious cherry pie filling, and perhaps a drizzle of sweet glaze that adds the perfect finishing touch. Each bite is a harmonious blend of textures and flavors that will make any holiday gathering feel just a little more special. Whether you’re serving them at a family Christmas party, bringing them to a potluck, or simply enjoying them with a cup of coffee by the fire, these Cherry Bars are sure to be a beloved addition to your holiday repertoire.
Ingredients:
1 cup butter, softened
2 cups sugar
4 eggs
1 tsp vanilla extract
3 cups all-purpose flour
1 tsp salt
1 can (21 ounces) cherry pie filling
Optional Glaze:
1 cup powdered sugar
2 tbsp milk
½ tsp vanilla extract
Christmas Cherry Bars
Christmas Cherry Bars are a festive treat that features a buttery, tender base topped with sweet and tangy cherry pie filling. Easy to make and perfect for holiday gatherings, these bars will quickly become a favorite addition to your holiday baking repertoire.
- 1 cup butter (softened (Provides the rich, buttery base for the bars.))
- 2 cups sugar (Adds sweetness and helps create a tender texture.)
- 4 eggs (Adds richness and structure to the batter.)
- 1 tsp vanilla extract (Enhances the flavor of the bars with a warm, aromatic note.)
- 3 cups all-purpose flour (The main dry ingredient that forms the structure of the bars.)
- 1 tsp salt (Balances the sweetness and enhances the overall flavor.)
- 1 can – 21 ounces cherry pie filling (Provides the sweet and tangy topping that makes these bars festive.)
- Preheat and Prepare: Preheat your oven to 350°F (175°C). Lightly grease a 9×13 inch baking pan.
- Make the Batter: In a large mixing bowl, cream the softened butter and sugar until light and fluffy. Beat in the eggs one at a time, then blend in the vanilla extract.
- Combine Dry Ingredients: In another bowl, mix together the flour and salt. Gradually mix these dry ingredients into the creamed mixture until fully incorporated.
- Assemble the Layers: Spread 3 cups of the batter evenly into the bottom of the prepared pan. Gently spread the cherry pie filling over the layer of batter. Drop small clumps of the remaining batter over the cherry filling.
- Baking: Bake in the preheated oven for 35-40 minutes, or until the top is golden brown and a toothpick inserted into the center comes out clean.
- Cooling: Allow the bars to cool completely on a wire rack before adding the glaze.
- Adding the Glaze (Optional): Whisk together the powdered sugar, milk, and vanilla extract until smooth. Drizzle the glaze over the cooled bars.
- Finish and Serve: Cut the dessert into bars after the glaze has set. Serve and enjoy.
These bars can be made ahead and stored in an airtight container for up to 3 days. For a decorative touch, drizzle with a simple vanilla glaze after cooling.

Christmas Cherry Bars
Ingredients
- 1 cup butter softened (Provides the rich, buttery base for the bars.)
- 2 cups sugar Adds sweetness and helps create a tender texture.
- 4 eggs Adds richness and structure to the batter.
- 1 tsp vanilla extract Enhances the flavor of the bars with a warm, aromatic note.
- 3 cups all-purpose flour The main dry ingredient that forms the structure of the bars.
- 1 tsp salt Balances the sweetness and enhances the overall flavor.
- 1 can – 21 ounces cherry pie filling Provides the sweet and tangy topping that makes these bars festive.
Instructions
- Preheat and Prepare: Preheat your oven to 350°F (175°C). Lightly grease a 9×13 inch baking pan.
- Make the Batter: In a large mixing bowl, cream the softened butter and sugar until light and fluffy. Beat in the eggs one at a time, then blend in the vanilla extract.
- Combine Dry Ingredients: In another bowl, mix together the flour and salt. Gradually mix these dry ingredients into the creamed mixture until fully incorporated.
- Assemble the Layers: Spread 3 cups of the batter evenly into the bottom of the prepared pan. Gently spread the cherry pie filling over the layer of batter. Drop small clumps of the remaining batter over the cherry filling.
- Baking: Bake in the preheated oven for 35-40 minutes, or until the top is golden brown and a toothpick inserted into the center comes out clean.
- Cooling: Allow the bars to cool completely on a wire rack before adding the glaze.
- Adding the Glaze (Optional): Whisk together the powdered sugar, milk, and vanilla extract until smooth. Drizzle the glaze over the cooled bars.
- Finish and Serve: Cut the dessert into bars after the glaze has set. Serve and enjoy.

