Would you like to save this?
In the kitchen, there are often small, seemingly unusual techniques that reveal big culinary benefits. While preparing a meal with my nana, one such technique left me both puzzled and fascinated: microwaving bread before putting it in the toaster. At first glance, it seemed unnecessary—after all, isn’t the toaster enough on its own? But as my nana explained her reasoning, I realized this method was a clever hack, blending old-school practicality with modern kitchen tools to create the perfect slice of toast.
Here’s why this technique works so well and how it can transform your toast from ordinary to extraordinary.
The Logic Behind Microwaving Bread Before Toasting
To the uninitiated, microwaving bread before toasting might sound redundant. But there’s a purpose—and even some science—behind this surprising trick. By warming the bread slightly in the microwave, you set it up to toast more evenly, retain moisture, and deliver better texture and flavor.
Let’s break down the key benefits:
1. Retaining Moisture in the Bread
Bread, especially if it’s a day or two old, can dry out quickly. When stale bread is toasted without preparation, it often becomes overly crunchy or even brittle. Microwaving for just a few seconds reactivates the moisture inside the bread by redistributing the water molecules, which prevents the toast from becoming too dry.
Why It Matters:
This step ensures the bread toasts with a crisp exterior while retaining a soft, slightly moist interior—a perfect balance of textures. It’s especially useful for older bread that might otherwise feel too hard or crumbly.
2. Ensuring Even Toasting
One of the most frustrating things about toasting bread is uneven results. You’ve likely experienced slices with overly browned edges while the center remains pale or chewy.
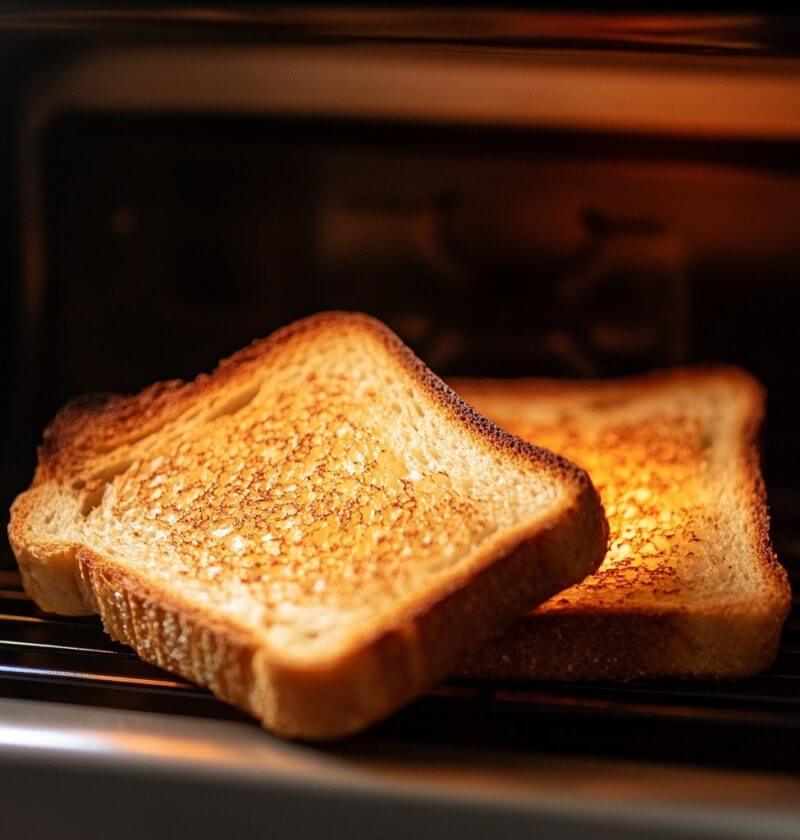
Microwaving the bread for 10–15 seconds warms it evenly before it hits the toaster. This preheating allows the toaster to work more effectively, so the bread toasts uniformly from edge to center. The result? A perfect golden-brown finish with no undercooked spots.
3. Reducing Toasting Time
By giving the bread a head start in the microwave, the toaster doesn’t need to work as long or as hard to crisp it up. This is a lifesaver on busy mornings when every second counts.
Bonus: Shorter toasting times also prevent the risk of burning the bread—no more fumbling with the toaster dial or scraping off blackened bits!
4. Enhancing the Texture
Microwaving the bread briefly gelatinizes the starches within it. Gelatinization occurs when heat causes the starch molecules to absorb moisture, creating a slightly chewy structure. When this pre-heated bread goes into the toaster, the starches set into a texture that balances chewiness and crispiness.
The result is a slice of toast with a beautifully crunchy crust and a tender, satisfying interior—a step above standard toast.
5. Preventing Sogginess
Ever bite into toast that somehow feels soggy? This happens when bread absorbs excess moisture during toasting, particularly if it starts out cold or slightly stale. Microwaving pre-warms the bread, helping it release excess surface moisture before going into the toaster.
This ensures the bread crisps up properly, avoiding that dreaded limp or soggy texture.
How to Microwave Bread Before Toasting
The great thing about this technique is how simple it is to execute. All you need is a microwave, a toaster, and a few extra seconds.
Step-by-Step Guide:
- Select Your Bread: Whether it’s white sandwich bread, sourdough, or whole grain, this method works with any type of bread.
- Microwave Briefly: Place the slices of bread on a microwave-safe plate. Microwave them on high for 10–15 seconds. The goal is to warm the bread slightly, not cook it.
- Toast as Usual: Transfer the warmed slices to the toaster and toast to your desired level of crispness.
- Enjoy the Results: Top with butter, jam, avocado, or any of your favorite spreads, and savor the improved texture and flavor.
The Science Behind It
The magic of this technique lies in how microwaves interact with the structure of bread. Bread is primarily made up of starches and water. Over time, the starch molecules recrystallize, which causes bread to lose its softness and become stale.
When you microwave bread, the heat disrupts the starch structure, breaking down the crystals and redistributing moisture throughout the bread. This process, known as retrogradation reversal, restores the bread’s softness.
Additionally, microwaving lightly evaporates surface moisture, setting the bread up for a perfect toasting process. The toaster then crisps the exterior while locking in the remaining moisture inside, creating that ideal texture we crave in good toast.
When Should You Use This Method?
This technique isn’t necessary for every slice of bread, but it’s particularly useful in the following situations:
- Stale Bread: Revive bread that’s a few days old and bring it back to life before toasting.
- Dense Bread: For heartier bread types like rye or whole grain, microwaving helps warm the dense center for even toasting.
- Cold Bread: If your bread has been stored in the fridge or freezer, microwaving ensures it toasts evenly and doesn’t remain cold or soggy in the middle.
Why This Old-School Hack Still Works
My nana’s seemingly unconventional habit of microwaving bread before toasting is rooted in practicality and decades of experience. It’s a small step that ensures the toast is consistently delicious—soft on the inside, crisp on the outside, and perfectly golden every time.
In a world filled with fancy toasters and high-tech gadgets, this technique reminds us that sometimes, the simplest solutions are the most effective. So, the next time you reach for a slice of bread, try giving it a quick microwave zap before toasting. You just might find yourself hooked on toast that’s better than ever!

