Would you like to save this?
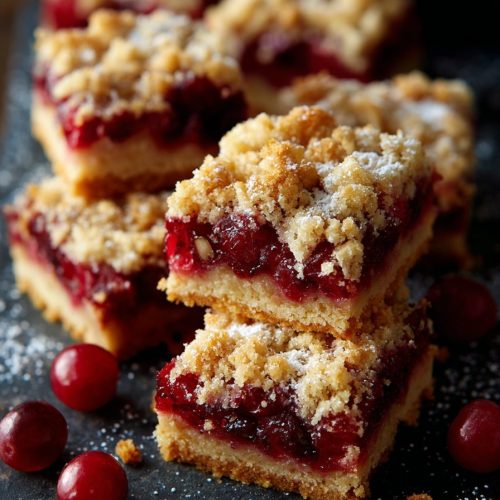
Christmas Cherry Bars Recipe
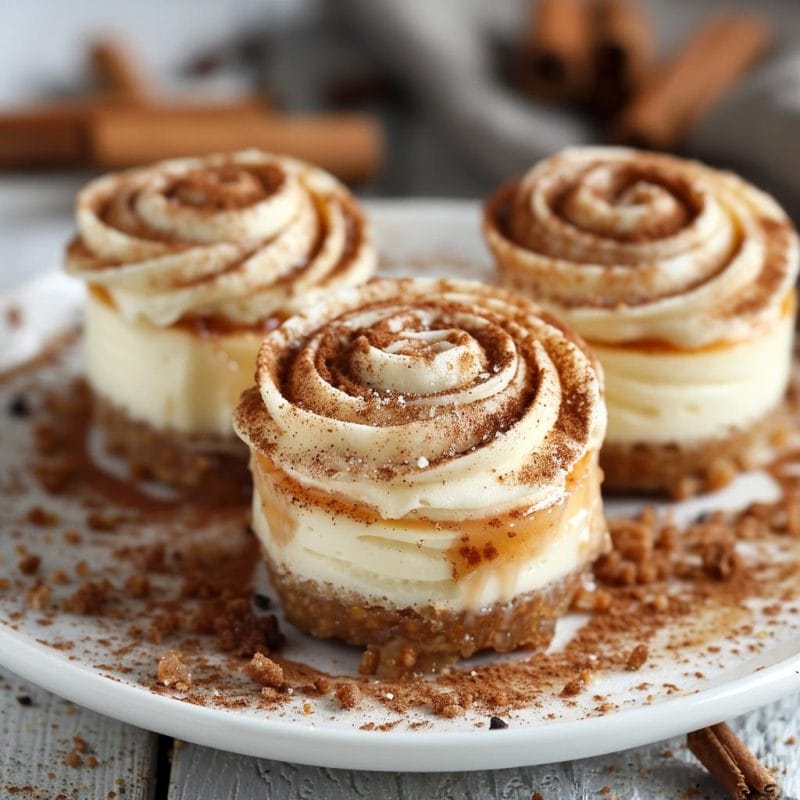
Sweet, buttery, and sparkling with ruby-red cherries, this Christmas Cherry Bars Recipe is the easy, crowd-pleasing holiday dessert bar you’ll want on every cookie tray and potluck table.
What Makes This Christmas Cherry Bars Recipe So Special?
These Christmas cherry bars are soft, rich cherry cookie bars with a tender, buttery base, a bright cherry layer in the middle, and a light almond glaze on top. Think of them as the cozy cousin of a classic cherry pie—only flatter, easier, and much less fussy.
They’re one of those holiday dessert bars that look like you fussed for hours, but honestly, they’re very straightforward. A simple bar cookie recipe baked in a 9×13 pan, sliced, and ready for your Christmas party dessert table or Christmas potluck dessert in under an hour of hands-on time.
I started making these when my kids were in elementary school, back when we were juggling choir concerts, winter sports, and “Mom, I signed you up to bring dessert for the class party tomorrow.” You know that moment. These festive cherry bars saved my sanity more than once.
They’re especially perfect for Christmas baking because:
- The bright red cherry filling looks incredibly festive.
- The bars travel well, freeze well, and hold up on a Christmas cookie tray.
- You can use cherry pie filling or cherry jam, depending on what you have in the pantry.
- A touch of almond extract makes them taste like something from a little European bakery.
And yes, you can absolutely make these ahead and tuck them into freezer containers for a no-stress Christmas dessert recipe when guests drop by.
Why You’ll Love This Recipe
Here’s why this Christmas Cherry Bars Recipe earns a permanent spot in your December rotation:
- Big-batch friendly – Baked in a 9×13 pan, this cherry bar recipe feeds a crowd with very little effort.
- Festive and beautiful – The red cherry filling and snowy white drizzle scream “Christmas baking recipe” without any fancy decorating.
- Easy ingredients – Everything is pantry-friendly: butter, sugar, flour, eggs, and a can or jar of cherries.
- Flexible filling – Use cherry pie filling, cherry preserves, or thick cherry jam bars-style; it all works.
- Perfect for cookie trays – These festive cherry bars hold their shape, stack well, and won’t crumble all over your Christmas cookie tray.
- Make-ahead friendly – They keep well for several days and also freeze, so you can bake before the holiday rush.
- Travel ready – Ideal Christmas potluck dessert: pack them in a container, pop on the lid, and go.
- Kid and grandkid approved – Soft, sweet, and not too tart; they’re usually the first bars to disappear.
- Simple, cozy flavors – Butter, vanilla, almond, and cherry—classic and comforting without being fussy.
Let me explain how to pull them together with ingredients you might already have.
Ingredients for Christmas Cherry Bars
These cherry cookie bars use a simple, soft cookie base that doubles as the topping.
For the Bar Dough
- 1 cup (2 sticks / 226 g) unsalted butter, softened
- Room temperature butter mixes more evenly and gives you a tender, cake-like bar.
- 1 ½ cups (300 g) granulated sugar
- Regular white sugar keeps the bars light in color and nicely sweet.
- 3 large eggs, room temperature
- Room temperature eggs blend better and help the bars bake evenly.
- 1 ½ teaspoons pure vanilla extract
- Use a good-quality vanilla; it’s one of the main flavor notes.
- ½ teaspoon almond extract
- This is what makes them taste like classic cherry almond bars—don’t skip it if you can help it.
- 3 cups (360 g) all-purpose flour
- Measured by spooning into the cup and leveling for accurate results.
- 1 teaspoon baking powder
- Gives a subtle lift so the bars are soft instead of dense.
- ½ teaspoon fine sea salt
- Balances the sweetness and brings out the cherry flavor.
For the Cherry Layer
- 1 (21-ounce / 595 g) can cherry pie filling or 1 ½ to 2 cups thick cherry preserves/jam
- If using cherry pie filling, try to use one with whole cherries. If using jam, choose a thicker style so it doesn’t run.
For the Almond Glaze (Optional but Recommended)
- 1 cup (120 g) powdered sugar, sifted
- 2–3 tablespoons milk or cream
- Start with 2 tablespoons; add more a teaspoon at a time until pourable.
- ¼ teaspoon almond extract
- A little goes a long way and echoes the flavor in the bars.
Substitution ideas:
- Use salted butter and reduce the added salt to a pinch.
- Use gluten-free 1:1 baking flour (a cup-for-cup blend) if you want gluten-free cherry bars; the texture will be slightly more delicate, but still delicious.
- Swap the almond extract for extra vanilla if you’re baking for someone with a nut allergy.

Now, let’s walk through how to turn everything into beautiful baked cherry bars without any stress.
Step-by-Step Directions for Festive Cherry Bars
-
Preheat the oven and prep the pan.
Preheat your oven to 350°F (175°C). Grease a 9×13-inch baking pan with butter or nonstick spray, then line it with parchment paper, leaving an overhang on two sides. This makes it easy to lift out the bars for clean cuts later. -
Cream the butter and sugar.
In a large mixing bowl (a stand mixer with the paddle attachment or a hand mixer both work), beat the softened butter and granulated sugar on medium speed for 2–3 minutes, until light and fluffy. When it’s ready, the mixture will look pale and slightly whipped. -
Add the eggs and flavorings.
Beat in the eggs one at a time, mixing on low-medium speed and scraping down the bowl after each egg. Add the vanilla and almond extracts and mix again until smooth. The batter might look a little thick and glossy at this stage—that’s perfect. -
Combine the dry ingredients.
In a separate bowl, whisk together the flour, baking powder, and salt. This helps the baking powder distribute evenly so you don’t get weird pockets. -
Mix the dough.
With the mixer on low, add the dry ingredients to the butter mixture in two additions, mixing just until they’re incorporated. Don’t overmix. The dough will be thick, almost like a soft sugar cookie dough. -
Press in the base layer.
Scoop about two-thirds of the dough into your prepared 9×13 pan. Use a spatula or your fingertips (very lightly floured or slightly damp) to press it into an even layer across the bottom and into the corners. Take a minute here—an even base means the cherry layer sits nicely. -
Spread the cherry layer.
Spoon the cherry pie filling or cherry jam over the dough, spreading gently with an offset spatula or the back of a spoon. Leave a tiny border (about ¼ inch) around the edges, so the filling doesn’t glue itself to the pan sides. -
Add the top dollops.
Drop small spoonfuls of the remaining dough all over the cherry layer. It won’t cover it completely—that’s okay and actually part of the charm. The cherries will peek through as the bars bake, giving that classic “cherry jam bars” look. -
Bake the bars.
Bake in the preheated oven for 28–35 minutes, or until the top is lightly golden and the edges are set. The center should no longer look wet, though it’ll still be soft. If you gently jiggle the pan, it should move as one solid piece, not like liquid. -
Cool completely.
Place the pan on a wire rack and let the bars cool completely—this can take 1–2 hours. If you try to cut them while warm, they’ll still taste great, but they may be a little messy. For the cleanest slices, you can chill the pan briefly in the fridge after it reaches room temperature. -
Make the almond glaze.
In a small bowl, whisk together the powdered sugar, 2 tablespoons milk or cream, and almond extract. If it’s too thick, add more milk a teaspoon at a time; if it’s too thin, add a tablespoon of powdered sugar. You’re aiming for a consistency that ribbons off the spoon and holds some lines on the surface. -
Drizzle, slice, and serve.
Use the parchment overhang to lift the entire slab of bars out of the pan and onto a cutting board. Drizzle the glaze over the cooled bars in zigzags. Let the glaze set for about 20–30 minutes, then slice into 24–30 small squares or 18 larger bars, depending on how many people you’re feeding (or how much you love dessert).
There you go—your holiday dessert bars are ready for the spotlight.
Servings & Timing
- Yield: About 24 small bars or 18 generously sized bars
- Prep Time: 20–25 minutes
- Bake Time: 28–35 minutes
- Cooling & Glaze Setting Time: 1 ½–2 hours (mostly hands-off)
- Total Time: Around 2–2 ½ hours, with less than 30 minutes of actual work
For Christmas baking days, I like to make these first thing in the morning. They cool while I work on something else—maybe a batch of gingerbread or peppermint bark—and by afternoon I can slice and box them up.
Fun Variations on Christmas Cherry Bars
Once you’ve made the classic version, it’s easy to play a little. Here are some twists that keep the Christmas Cherry Bars Recipe fresh year after year:
- Cherry Almond Crumble Bars: Stir ½ cup sliced almonds into the remaining dough before dolloping on top for a crunchy, nutty finish.
- Chocolate-Cherry Bars: Sprinkle ½–1 cup mini chocolate chips over the cherry layer before adding the top dough; cherry and chocolate are a beautiful pair.
- Citrus Twist Cherry Bars: Add 1 tablespoon finely grated orange zest to the dough and swap the almond glaze for an orange-vanilla glaze.
- Gluten-Free Christmas Cherry Bars: Use a cup-for-cup gluten-free flour blend and chill the dough 10–15 minutes before pressing into the pan to help it firm up.
- Mixed Berry Holiday Bars: Swap half of the cherry filling for raspberry preserves for a mixed red-berry look and flavor.
- “Snowy” Coconut Cherry Bars: After glazing, quickly sprinkle sweetened shredded coconut on top for a snow-like finish.
If you’re baking a lot of different bar cookie recipes for the holidays, you can mix and match these ideas across them too.
How to Store & Freeze Christmas Cherry Bars
These festive cherry bars are very forgiving, which makes them perfect for busy December weeks.
Short-Term Storage
-
Room Temperature:
- Store sliced bars in an airtight container at cool room temperature for 2–3 days.
- If your kitchen runs warm or you’ve used heavy cream in the glaze, I recommend the fridge instead.
-
Refrigerator:
- Keep the bars in a tightly sealed container for up to 5 days.
- Layer with parchment or wax paper so the glaze and cherry layer don’t stick together.
Freezer Storage
-
Freeze sliced bars:
- Arrange the bars in a single layer on a baking sheet and freeze until solid, about 1–2 hours.
- Transfer to a freezer-safe container or zip-top bag, layering with parchment.
- They keep well in the freezer for up to 2 months.
-
Thawing:
- Thaw in the fridge overnight or at room temperature for 30–45 minutes.
- The glaze may look slightly softer after thawing, but the flavor stays lovely.
Make-Ahead Tips
- Bake and cool the bars, then freeze unglazed. Add the almond drizzle the day you plan to serve them.
- If you’re prepping several things at once for Christmas party dessert tables, you can bake these a week ahead, freeze, and not worry about them again until the big day.
Notes from My Kitchen (Little Lessons Learned)
- Chill for clean cuts: If you want magazine-ready squares, chill the fully cooled pan in the fridge for 30–45 minutes before slicing. Use a sharp knife and wipe it between cuts.
- Don’t skimp on the almond extract: That tiny ½ teaspoon in the dough (and in the glaze) gives you that “bakery cherry almond bar” flavor. Without it, the bars are still tasty, just a bit more plain.
- Thicker vs. thinner cherry layer:
- If you love cherries, go closer to 2 cups jam or use an extra half can of pie filling.
- If you like more cookie than fruit, stick to the amounts listed.
- Check early: Ovens vary. Start checking the bars at 25 minutes. The top should be pale golden and just starting to color at the edges. Overbaking will dry them out.
- Jam vs. pie filling:
- Cherry pie filling gives a softer, more “gooey” layer.
- Cherry jam/preserves gives a slightly chewier, more concentrated cherry flavor. Both work; choose what fits your crowd.
- Parchment is your friend: I know it’s tempting to skip lining the pan, but parchment makes lifting and slicing about ten times easier—especially when you’re making several types of holiday dessert bars at once.
You know what? These are also lovely in January when the house feels a little quiet and you still want something cheerful with your coffee. There’s no rule that they’re only for December.
Frequently Asked Questions
1. Can I use homemade cherry pie filling?
Yes, homemade filling works beautifully as long as it’s fairly thick and not too runny; if it’s very juicy, simmer it a bit longer to cook off extra liquid before using.
2. Do I have to use almond extract?
No, but it adds wonderful flavor. If you leave it out (for allergies or preference), replace it with equal extra vanilla so you still get a rich, layered taste.
3. Can I make this Christmas Cherry Bars Recipe in a smaller pan?
You can bake it in a 9×9-inch pan for thicker bars; increase the bake time by 5–10 minutes and check often so the edges don’t over-brown.
4. My bars seemed underbaked in the middle—what went wrong?
Most likely they needed a few more minutes in the oven, or your oven runs a little cool. For next time, use an oven thermometer to check the temperature and bake until the center looks set, not glossy.
5. Can I double the recipe for a big holiday crowd?
Yes, you can double and bake in two 9×13 pans. For even baking, don’t crowd them on one oven rack; stagger them or bake one pan at a time if your oven runs unevenly.
6. How do I keep the bars from sticking to the pan?
Grease the pan well and use parchment paper with overhang. Let the bars cool completely before lifting them out; warm bars are more likely to break or stick.
7. Can I use another fruit besides cherry?
Absolutely—raspberry, strawberry, or mixed berry jam all work, though it won’t technically be a Christmas Cherry Bars Recipe anymore. For Christmas, I love half cherry and half raspberry for a pretty look.
8. Are these bars very sweet?
They’re sweet like most holiday dessert bars, but the cherry adds a little fruity tang. If you prefer a less sweet dessert, you can reduce the sugar in the dough to 1 ¼ cups and use a slightly tart cherry jam.
Bringing It All Together
This Christmas Cherry Bars Recipe gives you everything you want in a holiday dessert: beautiful color, crowd-pleasing flavor, and a big batch without a lot of work. They’re easy enough for a weeknight bake, yet pretty enough for a Christmas party dessert, a cookie exchange, or a potluck table.
If you bake these festive cherry bars, I’d love to hear how they turned out—tell me in the comments how you served them, or what twists you tried. And if you’re planning a whole Christmas cookie tray, pair these with something chocolatey and something spiced for a lovely mix of flavors and colors.
Christmas Cherry Bars
Ingredients
- 1 cup unsalted butter softened; 2 sticks / 226 g
- 1 1/2 cups granulated sugar 300 g
- 3 large eggs room temperature
- 1 1/2 teaspoons pure vanilla extract
- 1/2 teaspoon almond extract
- 3 cups all-purpose flour 360 g; spooned and leveled
- 1 teaspoon baking powder
- 1/2 teaspoon fine sea salt
- 1 can cherry pie filling 21 oz / 595 g; or 1 1/2–2 cups thick cherry preserves/jam
- 1 cup powdered sugar 120 g; sifted, for glaze
- 2-3 tablespoons milk or cream for glaze; start with 2 tbsp
- 1/4 teaspoon almond extract for glaze
Instructions
- Preheat your oven to 350°F (175°C). Grease a 9x13-inch baking pan with butter or nonstick spray, then line it with parchment paper, leaving an overhang on two sides for easy lifting.
- In a large mixing bowl, beat the softened butter and granulated sugar on medium speed for 2–3 minutes, until light, pale, and fluffy.1 cup unsalted butter, 1 1/2 cups granulated sugar
- Beat in the eggs one at a time, mixing well and scraping down the bowl after each addition. Add the vanilla and 1/2 teaspoon almond extract and mix until smooth and glossy.3 large eggs, 1 1/2 teaspoons pure vanilla extract, 1/2 teaspoon almond extract
- In a separate bowl, whisk together the flour, baking powder, and salt until well combined.3 cups all-purpose flour, 1 teaspoon baking powder, 1/2 teaspoon fine sea salt
- With the mixer on low speed, add the dry ingredients to the butter mixture in two additions, mixing just until incorporated. The dough will be thick, like soft sugar cookie dough.3 cups all-purpose flour, 1 teaspoon baking powder, 1/2 teaspoon fine sea salt
- Scoop about two-thirds of the dough into the prepared pan. Use a spatula or lightly floured or damp fingertips to press it evenly across the bottom and into the corners.
- Spoon the cherry pie filling or thick cherry preserves/jam over the dough and gently spread into an even layer, leaving about a 1/4-inch border around the edges.1 can cherry pie filling
- Drop small spoonfuls of the remaining dough evenly over the cherry layer. The cherries should still peek through in spots.
- Bake for 28–35 minutes, or until the top is lightly golden and the edges are set. The center should look set but still soft, not wet or jiggly like liquid.
- Place the pan on a wire rack and let the bars cool completely, 1–2 hours. For extra clean slices, chill briefly in the refrigerator after they reach room temperature.
- In a small bowl, whisk together the powdered sugar, 2 tablespoons milk or cream, and 1/4 teaspoon almond extract until smooth. Adjust with more milk a teaspoon at a time if too thick, or a little extra powdered sugar if too thin, until it ribbons off the spoon.1 cup powdered sugar, 2-3 tablespoons milk or cream, 1/4 teaspoon almond extract
- Use the parchment overhang to lift the cooled bars from the pan onto a cutting board. Drizzle the almond glaze over the top in zigzags. Let the glaze set for 20–30 minutes, then slice into 24 small bars or up to 18 larger bars and serve.