Would you like to save this?
Same Day Sourdough Bread Recipe (No Overnight Wait!)
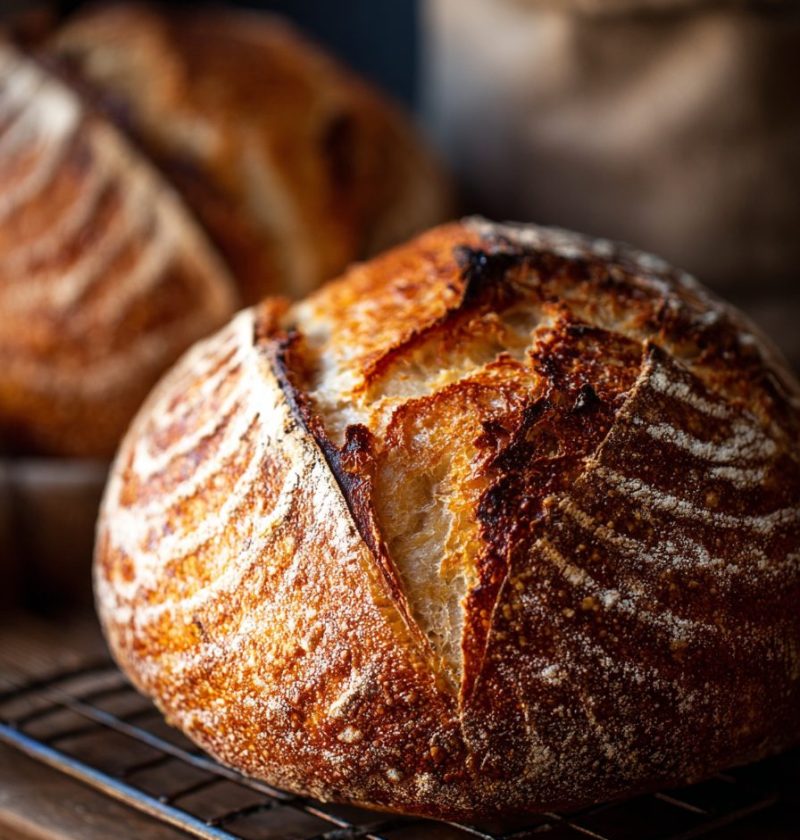
If you’ve been craving real, crusty sourdough but don’t want to wait 24 hours, this Same Day Sourdough Bread Recipe will give you a gorgeous, rustic loaf on your table by dinnertime—no overnight rise, no fuss.
What Makes This Same Day Sourdough Bread Recipe So Special?
This Same Day Sourdough Bread Recipe is my answer to those days when you want artisan sourdough bread today, not tomorrow. We use an active, bubbly starter, a slightly warmer fermentation, and a simple schedule so you can mix in the morning and slice into a golden, crackly farmhouse sourdough loaf by evening.
It’s still a real sourdough bread recipe—no commercial yeast booster, no shortcuts that strip away flavor. You’ll get that tangy aroma, chewy open crumb, and Crisp, blistered crust people pay good money for at a bakery. It just happens with a same day fermentation instead of an overnight one.
I’m a 50‑year‑old home baker who’s baked more loaves than I can count (and burned a few in the process). This same day sourdough bread came out of busy weekends when I’d remember, around 8 a.m., that I said I’d bring “just a simple loaf” to a potluck. So if you’ve ever promised bread and then realized you forgot to start it yesterday—this is for you.
Why You’ll Love This Same Day Sourdough
- Truly same day sourdough – Start in the morning, eat warm homemade sourdough bread with dinner.
- No overnight sourdough fuss – No watching the clock at midnight or waking up at 5 a.m. for shaping.
- Beginner‑friendly method – Clear cues, simple tools, and forgiving dough—ideal as a beginner sourdough recipe.
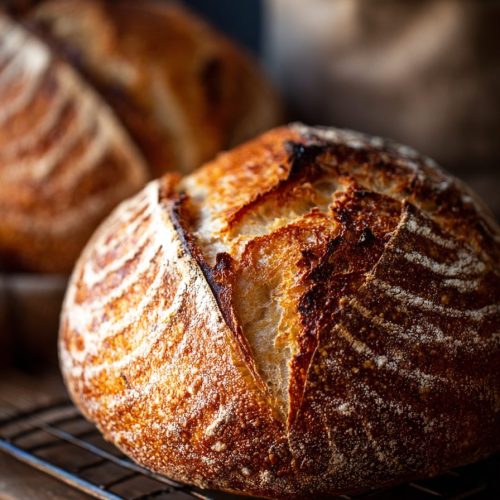
- Artisan look, rustic flavor – You’ll get a crusty sourdough bread with that crackly ear and open crumb.
- Flexible timing – Works with a 6–8 hour same day fermentation, so you can run errands or work from home.
- Just 4 basic ingredients – Flour, water, salt, starter. No oil, sugar, or extras; it’s classic and clean.
- Great for quick sourdough bread cravings – When you don’t want to plan ahead, this one has your back.
- Scales easily – Make one farmhouse sourdough loaf for you, or double for guests and the freezer.
Ingredients For Same Day Sourdough Bread
For one medium rustic sourdough bread (about 750–800 g loaf):
- 400 g bread flour
- (About 3 1/4 cups; use a strong bread flour around 11.5–13% protein for better structure.)
- 50 g whole wheat flour
- (About 1/3 cup; adds flavor and color. You can use all bread flour if you prefer a lighter loaf.)
- 325 g water, lukewarm (80–85°F / 27–29°C)
- (About 1 1/3 cups + 1 Tbsp; slightly warm helps speed same day fermentation.)
- 90 g active sourdough starter (100% hydration)
- (About 1/3 cup; fed 4–8 hours prior, at peak—bubbly, doubled, and passes the float test.)
- 9 g fine sea salt
- (About 1 1/2 teaspoons; avoid iodized table salt if you can, as it can be a bit harsh in flavor.)
Optional (but lovely):
- 5–10 g extra water
- If your flour is very thirsty or you live in a dry climate, you might want to bump hydration slightly.
- Rice flour for dusting
- Keeps your dough from sticking to the banneton or towel and gives a pretty rustic finish.
A quick note on the starter
For a true same day starter sourdough schedule, feed your starter first thing in the morning (or late the night before if it’s very active) using a 1:3:3 or 1:4:4 ratio (starter:water:flour). That gives you a strong, lively culture that can carry a shorter bulk rise. If your kitchen is cold, keep the starter in a slightly warm spot (near but not on your stove, or in the oven with the light on and door cracked).

Step‑By‑Step Directions For Same Day Sourdough Bread
1. Mix the dough (late morning)
In a large bowl, whisk together the bread flour and whole wheat flour. In a separate container, stir your active starter into the lukewarm water until mostly dissolved—you’ll see little cloudy streaks. Pour this mixture into the flour and mix with your hand or a dough whisk until no dry bits remain. The dough will look shaggy and slightly sticky; that’s perfect.
Cover the bowl with a damp towel or plate and rest for 30 minutes (this is your autolyse—don’t skip it; it helps with gluten and flavor).
2. Add salt and finish mixing
After the 30‑minute rest, sprinkle the salt evenly over the dough (and that extra 5–10 g water if using). Wet your fingers and pinch and fold the dough to incorporate the salt. You can use this rhythm: pinch, fold, rotate the bowl, repeat. This takes about 2–3 minutes. The dough should feel smoother and more cohesive.
3. Begin bulk fermentation with stretch & folds (early afternoon)
Cover the bowl and leave the dough at warm room temperature—ideally 75–80°F (24–27°C). For the first 1 1/2–2 hours of bulk, perform 3–4 sets of stretch and folds, spaced about 30 minutes apart:
- With wet hands, grab one side of the dough, stretch it up gently, and fold it over itself.
- Rotate the bowl a quarter turn and repeat, going all the way around.
You’ll notice the dough becoming stronger and less slack with each set. That’s your easy at‑home version of kneading for an artisan sourdough bread.
4. Let the dough rise until puffy (same day fermentation window)
After you finish your last set of folds, let the dough rest, covered, until it’s risen about 50–70%, looks smoother, and has a few bubbles along the edges. In a warm kitchen, this usually takes another 2–3 hours.
Because this is a no overnight sourdough schedule, we’re leaning on warm temperatures and an active starter more than a very long proof. If your kitchen is cooler (below 72°F / 22°C), place the covered bowl in a slightly warm spot, like:
- In the oven with just the light on (check that it’s not too hot)
- Near a sunny window (but not in direct hot sun)
When you jiggle the bowl, the dough should wobble like a soft pillow and feel airy underneath.
5. Pre‑shape the dough
Lightly flour your work surface and gently turn the dough out. Try not to degas it too much—you’ve worked hard for those bubbles. Using a bench scraper and your hand, tuck the edges of the dough underneath itself, turning it in a circle, to create a loose round.
Let it rest, uncovered, for 15–20 minutes. This relaxes the gluten and makes final shaping easier.
6. Shape your farmhouse sourdough loaf
Lightly flour the top of the dough and flip it so the floured side is now down. Shape as a boule (round) or batard (oval), depending on your banneton or Dutch oven:
- For a boule: Gently stretch the bottom third up and over the center, then the sides to the middle, then roll it up toward the top. Flip seam‑side down and tuck with your scraper to build tension.
- For a batard: Gently flatten into a rough rectangle, fold top third down and bottom third up like a letter, then roll into a tight log, sealing the seam.
You’re aiming for good surface tension—tight but not tearing.
7. Final proof (no overnight—still same day)
Dust your banneton or a bowl lined with a clean, floured kitchen towel with rice flour (or a mix of rice and wheat flour). Place the shaped dough seam‑side up in the basket.
Cover and proof at room temperature for 45–75 minutes, depending on kitchen warmth. For a same day sourdough bread, you want it slightly under‑proofed rather than over‑proofed, because it will get strong oven spring.
How to check: Gently press a floured finger into the dough. If the indentation springs back Slowly and doesn’t disappear fully, it’s ready.
8. Preheat your oven and Dutch oven
About 30–40 minutes before baking, place a Dutch oven (or heavy lidded pot) on the center rack and preheat your oven to 475°F (245°C). A blazing hot surface gives you that crusty sourdough bread and good ear.
No Dutch oven? Use a preheated baking stone or inverted sheet pan and add a tray of hot water to create steam.
9. Score and bake
Carefully remove the hot Dutch oven from the oven (use thick oven mitts). Cut a piece of parchment paper and place it over the top of your banneton, then invert the dough onto it so the seam is now down.
With a sharp lame or razor blade, score a long slash about 1/2 inch deep along the top (or create a fun pattern if you’re feeling artsy). This helps control where the bread opens and creates that classic ear.
Transfer the dough (with parchment) into the hot Dutch oven, cover with the lid, and bake for 20 minutes. Then reduce the temperature to 450°F (232°C), remove the lid, and bake another 18–25 minutes until deep golden brown with a crisp crust.
10. Cool (the hardest part!)
Remove the loaf from the Dutch oven and let it cool on a wire rack for at least 1 hour before cutting. I know it’s tempting, but slicing too soon can make the crumb gummy and compress all those lovely pockets you built. When the bread is barely warm and the crust crackles softly as it cools, that’s your cue.
Servings & Timing
- Yield: 1 rustic sourdough bread loaf (about 10–12 slices)
- Prep Time: 30 minutes active mixing/shaping
- Bulk Fermentation: 4–5 hours (with folds)
- Final Proof: 45–75 minutes
- Bake Time: 40–45 minutes
- Total Time: About 7–8 hours, start to finish (same day baking, no overnight rise)
Fun Variations For Your Same Day Sourdough
- Garlic & Herb Same Day Sourdough – Add 1–2 teaspoons dried Italian herbs and 2–3 cloves roasted garlic during the first stretch and fold.
- Seeded Rustic Sourdough Bread – Fold in 1/3 cup mixed seeds (sunflower, sesame, flax) after the first hour of bulk for crunchy texture.
- Olive & Rosemary Artisan Sourdough – Gently incorporate 1/2 cup chopped olives and 1 tablespoon fresh rosemary during the second fold.
- Whole Wheat “Farmhouse” Loaf – Increase whole wheat flour to 150 g and reduce bread flour to 300 g, adding a splash more water if needed.
- Cheesy Crusty Sourdough Bread – Sprinkle 1/2 cup shredded sharp cheddar on the top during the last 10 minutes of baking.
- Cinnamon Raisin Breakfast Sourdough – Add 1 teaspoon cinnamon and 1/2 cup raisins during bulk fermentation, keeping proofing times on the shorter side.
How To Store & Reheat Same Day Sourdough Bread
This part matters almost as much as the bake; it’s how you keep that beautiful crust and chewy crumb.
- Room Temperature:
- Let the loaf cool completely, then store cut‑side down on a wooden cutting board for one day, or wrap loosely in a clean kitchen towel for up to 2–3 days. Avoid sealing in plastic right away; it softens the crust.
- Longer Storage:
- For 3–5 days, store the bread in a paper bag inside a bread box or a linen bag.
- For freezing, slice the bread, lay slices in a single layer on a tray to freeze, then transfer to a freezer bag. Keeps well for up to 2 months.
- Reheating:
- From room temp: Warm slices in a 350°F oven for 5–8 minutes or toast lightly.
- From frozen: Toast slices straight from the freezer or bake at 350°F for about 10–12 minutes.
- Make‑Ahead Tips:
- You can shorten bulk fermentation slightly and add a brief chill: after shaping, chill the dough in the fridge for 45–60 minutes to pause fermentation if your schedule gets away from you. You’ll still keep this in the same‑day sourdough zone.
Notes From My Kitchen (A Few Hard‑Earned Lessons)
- Temperature is your secret weapon. For a quick sourdough bread schedule, warmer dough (around 78°F / 25–26°C) is your best friend. A cheap dough thermometer is worth it if you’re serious about same day fermentation.
- Watch the dough, not the clock. Times are guidelines; your dough will tell you more with how it looks and feels—puffy, airy, slightly domed, jiggly.
- Stronger starter, better same day sourdough. If your starter usually needs 10–12 hours to peak, try feeding it at a higher ratio (1:3:3 or 1:4:4) and keeping it slightly warmer. That alone can speed things up.
- Hydration can vary. Humidity and flour brands matter. If your dough feels very stiff, wet your hands and work in a tiny bit more water during folds. If it’s soupy, add one gentle coil fold and a bit more chill on the final proof.
- Don’t fear a darker bake. A deeper golden‑brown crust adds flavor and makes the bread stay fresh longer. If you think “Hmm, maybe just 3 more minutes,” it probably means yes, 3 more minutes.
- Don’t chase perfect holes. Those big Instagram holes are fun, but a slightly tighter, even crumb is actually better for sandwiches—and much easier for a same day sourdough bread recipe.
Frequently Asked Questions About Same Day Sourdough Bread
1. Can I make this Same Day Sourdough Bread Recipe without a Dutch oven?
Yes. Preheat a baking stone or inverted baking sheet, place the shaped loaf on parchment, and add a tray of hot water on a lower rack to create steam for the first 15–20 minutes.
2. My dough isn’t rising fast—what should I do?
Check the temperature; if it’s cool, move the bowl somewhere warmer (oven with light on, near a warm appliance) and give it more time. A sluggish starter is often the culprit, so make sure it was bubbly and at peak when you started.
3. Can I use all‑purpose flour instead of bread flour?
You can, but the loaf may be a bit softer and less lofty. If using all‑purpose, try to keep hydration slightly lower (reduce water by 10–15 g) and handle the dough gently.
4. How do I know if my starter is strong enough for same day baking?
It should at least double within 4–6 hours after feeding, look bubbly, smell pleasantly tangy (not harsh), and pass the “float test” (a small spoonful floats in water).
5. Can I add commercial yeast to speed things up more?
You can add 1/4 teaspoon instant yeast to the mix for a hybrid same day sourdough, but you’ll lose a bit of that long‑fermented flavor. If you’re in a big rush, though, it’s a practical trick.
6. Why is my crust soft after cooling?
If you store the bread in plastic while it’s still slightly warm, steam gets trapped and softens the crust. Bake a few minutes longer for a darker crust, cool completely, and store in a breathable environment.
7. Can I turn this into two small loaves?
Yes—divide the dough after bulk fermentation, shape into two smaller loaves, and reduce baking time by about 5–8 minutes, watching color as your guide.
8. Is this Same Day Sourdough Bread Recipe good for sandwiches?
Absolutely. It has enough structure for slicing, especially if you let it cool completely. For very neat slices, wait until it’s fully cool and use a sharp serrated knife.
Wrapping It Up (And Passing the Butter)
This Same Day Sourdough Bread Recipe gives you all the charm of rustic sourdough bread—crusty outside, soft and chewy inside—without the overnight wait or complicated schedule. It’s simple enough for a beginner sourdough recipe but flavorful enough that seasoned bakers will still be happy to serve it.
Give it a try on your next quiet Saturday or even a work‑from‑home day. When you bake it, come back and let me know how it went—what flour you used, what your crumb looked like, and who you shared that first warm slice with. And if you’re hooked on same day baking, you might enjoy exploring more easy sourdough recipes, rolls, or focaccia next.
Same Day Sourdough Bread (No Overnight Rise)
Ingredients
- 400 g bread flour about 3 1/4 cups; 11.5–13% protein preferred
- 50 g whole wheat flour about 1/3 cup; or substitute more bread flour for a lighter loaf
- 325 g water lukewarm, 80–85°F / 27–29°C; about 1 1/3 cups + 1 Tbsp
- 90 g active sourdough starter 100% hydration; fed 4–8 hours prior and at peak, bubbly and doubled
- 9 g fine sea salt about 1 1/2 teaspoons; avoid iodized table salt if possible
- 5-10 g extra water optional; only if dough feels stiff or flour is very absorbent
- rice flour for dusting banneton or towel; a mix of rice and wheat flour also works
Instructions
- In a large bowl, whisk together the bread flour and whole wheat flour. In a separate container, stir the active sourdough starter into the lukewarm water until mostly dissolved and cloudy. Pour this mixture into the flour and mix with your hand or a dough whisk until no dry bits remain; the dough will be shaggy and slightly sticky. Cover the bowl with a damp towel or plate and let rest for 30 minutes (autolyse).400 g bread flour, 50 g whole wheat flour, 325 g water, 90 g active sourdough starter
- After the 30-minute rest, sprinkle the salt evenly over the dough. If using, add the extra 5–10 g water. With wet fingers, pinch and fold the dough repeatedly, rotating the bowl as you go, until the salt is fully incorporated and the dough feels smoother and more cohesive, about 2–3 minutes.9 g fine sea salt, 5-10 g extra water
- Cover the bowl and leave the dough at warm room temperature (ideally 75–80°F / 24–27°C). For the first 1 1/2–2 hours of bulk fermentation, perform 3–4 sets of stretch and folds, spaced about 30 minutes apart: with wet hands, grab one side of the dough, gently stretch it up, and fold it over itself. Rotate the bowl a quarter turn and repeat until you’ve gone all the way around. The dough will gradually become stronger and less slack.
- After the last set of folds, let the dough rest, covered, until it has risen about 50–70%, looks smoother, and shows bubbles around the edges. In a warm kitchen, this typically takes another 2–3 hours. If your kitchen is cool (below 72°F / 22°C), keep the bowl in a slightly warm spot such as an oven with the light on (but not hot) or near a warm appliance. When you gently jiggle the bowl, the dough should wobble like a soft, airy pillow.
- Lightly flour your work surface and gently turn the dough out, trying not to deflate it. Using a bench scraper and your hand, tuck the edges of the dough underneath as you rotate it to form a loose round with light surface tension. Let the pre-shaped dough rest, uncovered, for 15–20 minutes to relax the gluten.
- Lightly flour the top of the rested dough and flip it so the floured side is now down. Shape as desired: For a boule, gently stretch the bottom third up over the center, then fold the sides in, and finally roll the dough up toward the top, creating a tight round and flipping it seam-side down. For a batard, gently pat into a rough rectangle, fold the top third down and the bottom third up like a letter, then roll into a tight log, sealing the seam. Aim for good surface tension without tearing the dough.
- Dust a banneton or a bowl lined with a clean kitchen towel generously with rice flour (or a mix of rice and wheat flour). Place the shaped dough seam-side up in the basket. Cover and proof at room temperature for 45–75 minutes, depending on kitchen warmth. The dough is ready when a floured fingertip pressed gently into the surface leaves an indentation that springs back slowly without disappearing completely. For this same-day schedule, err slightly on the under-proofed side to ensure good oven spring.rice flour
- About 30–40 minutes before you plan to bake, place a Dutch oven or heavy lidded pot on the center rack of your oven and preheat to 475°F (245°C). A thoroughly preheated pot and hot oven will help create a crisp, well-risen crust. If you don’t have a Dutch oven, preheat a baking stone or inverted baking sheet and plan to add a tray of hot water for steam when baking.
- Carefully remove the hot Dutch oven from the oven. Cut a piece of parchment paper and place it over the top of the banneton, then invert to release the dough so it is seam-side down on the parchment. Using a sharp lame or razor blade, score a long slash about 1/2 inch deep along the top of the loaf or create a decorative pattern. Lift the dough by the parchment and transfer it into the hot Dutch oven. Cover with the lid and bake for 20 minutes. Then reduce the oven temperature to 450°F (232°C), remove the lid, and continue baking for 18–25 minutes, until the loaf is deep golden brown with a crisp crust.
- Remove the baked loaf from the Dutch oven and place it on a wire rack. Let it cool for at least 1 hour before slicing. Cutting too early can compress the crumb and make it gummy. When the loaf is just barely warm and the crust crackles softly as it cools, it’s ready to slice and serve.