Would you like to save this?
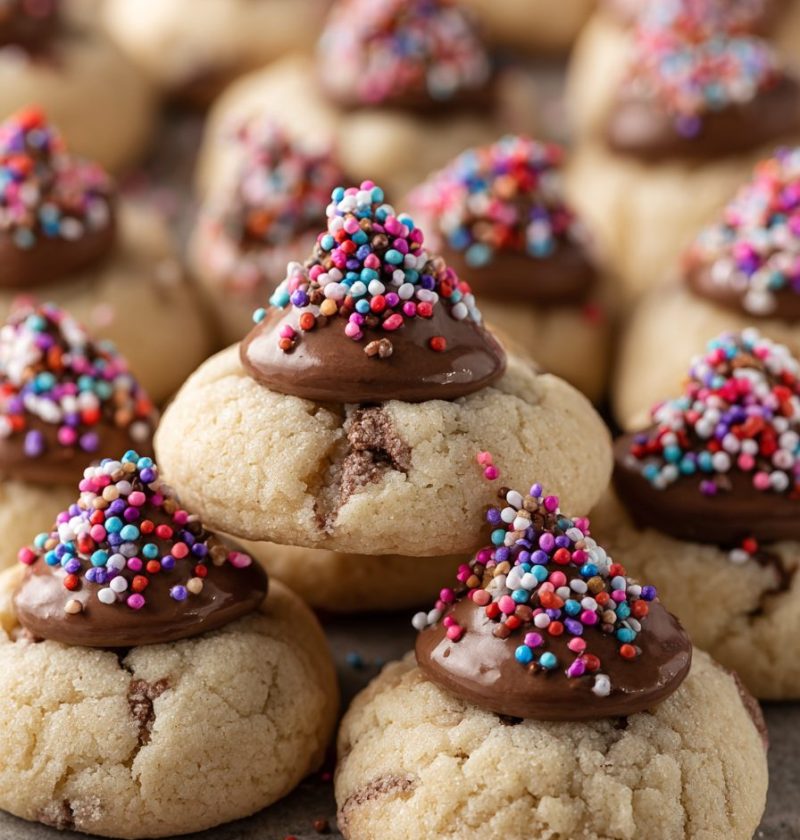
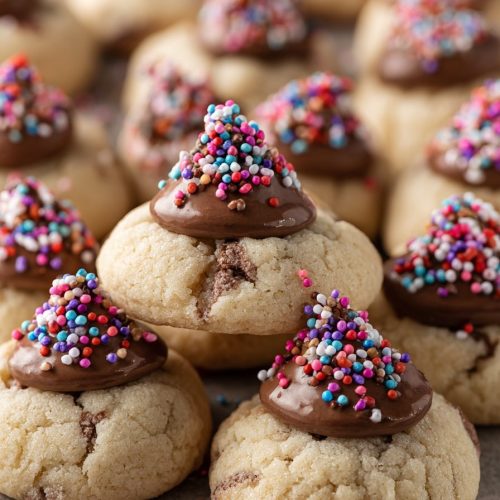
Hershey Kiss Cookies Recipe
Buttery, soft Peanut Butter cookies topped with a melty chocolate kiss—this classic Hershey Kiss Cookies Recipe is the kind of holiday cookie that disappears faster than you can say “Who ate the last one?”
These chocolate kiss cookies (also called peanut butter blossom cookies or thumbprint kiss cookies) are a family Cookie Recipe we make every single Christmas, and honestly, plenty of times the rest of the year too. They’re soft, chewy, full of peanut butter flavor, and finished with that iconic Hershey’s Kiss on top. If you’re looking for an easy cookie recipe that kids adore, travels well in cookie tins, and looks festive on a Christmas cookie platter, you’re in the right place.

What Makes This Hershey Kiss Cookies Recipe So Special?
Let me explain why these little cookies have such a hold on my heart.
Hershey’s Kiss cookies are those classic, criss-cross-free peanut butter cookies that you roll in sugar, bake until just set, and then crown with a chocolate kiss while they’re still warm. The heat from the cookie softens the chocolate so it becomes fudgy in the center but still holds its shape. Chocolate peanut butter cookies really don’t get more nostalgic than this.
I started making this Hershey Kiss dessert back when my kids were little. They’d unwrap the Hershey’s Kisses (and eat about every fifth one), and I’d handle the mixing and baking. Now they’re grown and still request “Mom’s kiss cookies” as soon as the weather turns chilly. To me, that’s the mark of a true classic cookie recipe—when it follows your family through the seasons of life.
A few things that set this version apart:
- The cookies bake up soft and thick, not dry or crumbly.
- The dough is easy to work with and doesn’t spread too much.
- You don’t need any fancy equipment—just a bowl, a mixer, and a baking sheet.
- It uses simple pantry ingredients you probably already have.
This is a perfect holiday cookie recipe for Christmas, cookie exchanges, bake sales, or that Tuesday night when you just want something warm and sweet with a glass of milk.
Why You’ll Love This Hershey Kiss Cookies Recipe
You know what? These cookies are simple, but they check so many boxes:
- Classic holiday favorite – This is the Christmas cookie recipe everyone recognizes and reaches for first.
- Kid-friendly and fun to make – Little hands love rolling the dough balls and pressing in the kisses.
- Soft and chewy texture – These are soft peanut butter cookies with lightly crisp edges and a tender center.
- Simple pantry ingredients – No specialty items; just butter, sugar, peanut butter, and Hershey’s Kisses.
- Easy to scale for parties – Double the batch for cookie trays, holiday parties, or classroom treats.
- Perfect for gifting – They travel well in tins or cookie boxes and stay pretty.
- Ready in under an hour – About 15 minutes of prep, a quick chill, and they’re on your table.
- Flexible with flavors – You can swap in different Hershey’s Kiss flavors, from dark chocolate to caramel.
- Make-ahead friendly – Freeze the dough balls or baked cookies for stress-free entertaining.
Ingredients For This Hershey Kiss Cookies Recipe
Let’s walk through what you’ll need for these homemade peanut butter cookies topped with chocolate kisses. I’ll include a few tips and substitution ideas, too.
Dry Ingredients
-
1 ¾ cups (220 g) all-purpose flour
Use regular all-purpose flour. Spoon it into the measuring cup and level it off so you don’t pack in too much. -
1 teaspoon baking soda
This helps the cookies rise slightly and stay soft. -
½ teaspoon baking powder
Gives a gentle lift so the cookies don’t bake up too dense. -
½ teaspoon fine sea salt
Balances the sweetness and brings out the peanut butter and chocolate flavor.
Wet Ingredients
-
½ cup (1 stick / 113 g) unsalted butter, softened
Room temperature butter should press easily with your finger but not look greasy. If you only have salted butter, you can use it and reduce the added salt to a pinch. -
½ cup (100 g) granulated sugar
For sweetness and that light crunchy sugar coating outside. -
½ cup (100 g) packed light brown sugar
Brown sugar adds moisture and a slight caramel note, which keeps the cookies soft. -
½ cup (130 g) creamy peanut butter
Use a standard shelf-stable brand like Jif or Skippy for the best texture. Natural peanut butter tends to be runnier and can make the cookies spread more, but if you use it, stir it very well before measuring. -
1 large egg, at room temperature
Room temperature eggs incorporate more easily and give more even cookies. -
2 teaspoons vanilla extract
Adds warmth and rounds out the flavor.
For Rolling & Topping
-
½ cup (100 g) granulated sugar, for rolling
This gives the cookies that pretty, sparkly outside and a gentle crunch. -
About 36 Hershey’s Kisses (milk chocolate), unwrapped
This is for a standard batch. Have a few extra on hand in case you get a couple more cookies out of the dough—or someone snacks on one or two during baking. You can also use dark chocolate Kisses, almond, or seasonal flavors.
Step-by-Step Directions
These chocolate kiss cookies come together in a few simple steps. If you can cream butter and sugar, you can absolutely handle this recipe.
1. Mix Your Dry Ingredients
- Whisk the dry ingredients.
In a medium bowl, whisk together the flour, baking soda, baking powder, and salt. Set aside.
Tip: This step makes sure the leavening is evenly spread, so you don’t get lopsided cookies.
2. Cream Butter, Sugars, and Peanut Butter
-
Beat the butter and sugars.
In a large mixing bowl, using a hand mixer or stand mixer fitted with the paddle attachment, beat the softened butter, ½ cup granulated sugar, and ½ cup brown sugar on medium speed for about 2–3 minutes, until light and fluffy.
The mixture should look a bit lighter in color and feel airy. -
Add the peanut butter.
Beat in the creamy peanut butter on medium speed until combined and smooth, about 30–45 seconds. Scrape down the sides of the bowl as needed.
3. Add Egg and Vanilla
- Mix in the egg and vanilla.
Add the egg and vanilla extract. Beat on medium-low speed just until the egg disappears into the batter and everything looks smooth.
Tip: Try not to overbeat once the egg goes in; that can make cookies tougher.
4. Combine Wet and Dry Mixtures
- Add the dry ingredients.
With the mixer on low speed, gradually add the flour mixture. Mix just until the flour is incorporated and no dry streaks remain.
The dough should be soft but not sticky. If it seems very sticky, you can refrigerate it for about 10 minutes before rolling.
5. Chill the Dough (Quick Chill, Big Payoff)
- Chill the dough.
Cover the bowl and refrigerate the dough for about 20–30 minutes.
This helps the cookies hold their shape and keeps them thick and chewy instead of thin and flat. If your kitchen is cool, you can sometimes get away without chilling, but I’ll be honest—I almost always chill for better results.
6. Prep the Oven and Pan
-
Preheat and prep.
Preheat your oven to 375°F (190°C). Line baking sheets with parchment paper or silicone baking mats.
Tip: Parchment helps cookies bake more evenly and makes cleanup easier. I keep a stack in my pantry like it’s gold. -
Prep the rolling sugar.
Place the ½ cup of granulated sugar for rolling into a small, shallow bowl.
7. Shape and Roll the Cookies
-
Shape the dough balls.
Scoop about 1 tablespoon of dough (a small cookie scoop works great) and roll into smooth balls between your palms. Aim for 1–1 ¼-inch balls. -
Roll in sugar.
Roll each dough ball in the bowl of sugar to coat completely. Place on the prepared baking sheet, spacing them about 2 inches apart.
Tip: If the dough feels too soft and sticky while rolling, pop the tray of dough balls into the fridge for 10 minutes before baking.
8. Bake
- Bake the cookies.
Bake in the preheated oven for 8–10 minutes, or until the cookies are puffed, set on the edges, and just slightly cracked on top.
They should still look a little soft in the centers—that’s good. They’ll finish setting as they cool.
9. Press in the Hershey’s Kisses
-
Add the chocolate kisses.
As soon as the cookies come out of the oven, gently press one Hershey’s Kiss into the center of each warm cookie. The edges of the cookie will crack a bit more—that’s exactly what you want. -
Cool completely.
Let the cookies cool on the baking sheet for about 5 minutes, then carefully transfer to a wire rack to cool completely. The chocolate Kisses will soften from the heat, then firm back up as the cookies cool.
Tip: If you like the look of Kisses that keep a perfect peak, try not to move the cookies too early. Give them time to set.
Servings & Timing
- Yield: About 30–36 cookies (depending on the size of your dough balls)
- Prep Time: 15–20 minutes
- Chill Time: 20–30 minutes
- Bake Time: 8–10 minutes per tray
- Total Time: About 1 hour (active time is under 30 minutes)
This makes a nice-sized batch for a family or small gathering. If you’re baking for a big holiday party or cookie swap, you can easily double the recipe and bake over several trays.
Fun Variations on Classic Hershey’s Kiss Cookies
Once you’ve made the classic version, it’s fun to play. Here are some easy twists on this Hershey Kiss Cookies Recipe:
- Chocolate Peanut Butter Blossoms – Add 2 tablespoons unsweetened cocoa powder to the flour mixture for a chocolate peanut butter cookie base.
- Sugar Cookie Kiss Cookies – Swap the peanut butter for ½ cup softened cream cheese and use vanilla Kisses for a milder, non-peanut butter version.
- Holiday Sprinkle Kiss Cookies – Skip the rolling sugar and instead roll dough balls in red and green sprinkles for a festive Christmas cookie recipe.
- Dark Chocolate Kiss Cookies – Use dark chocolate or special dark Hershey’s Kisses for a more grown-up chocolate flavor.
- Gluten-Free Thumbprint Kiss Cookies – Use a 1:1 gluten-free baking flour blend in place of the all-purpose flour and chill the dough well.
- Nutty Crunch Version – Stir in ¼–½ cup finely chopped peanuts or pecans for extra crunch.
How To Store, Freeze, and Make Ahead
One of the reasons this is a go-to family cookie recipe in my house is how well it stores and freezes. You can absolutely get ahead of your holiday baking.
Storing Baked Cookies
-
Room Temperature:
Store cooled cookies in an airtight container at room temperature for 4–5 days. If your kitchen is very warm, they may get a bit softer, but they’ll still be tasty. -
Stacking Tip:
Layer cookies between sheets of parchment paper so the chocolate Kisses don’t smudge onto other cookies.
Freezing Baked Cookies
- Freeze baked cookies:
Place fully cooled cookies on a baking sheet and freeze until solid (about 1–2 hours). Then transfer to a freezer-safe bag or container.
They keep well for up to 2 months. Thaw at room temperature for 30–45 minutes.
Freezing the Dough
-
Freeze dough balls:
Roll the dough into sugared balls as directed, but don’t bake. Freeze them on a sheet until firm, then store in a freezer bag with the date labeled.
When ready to bake, place frozen dough balls on a baking sheet and bake straight from frozen, adding 1–2 extra minutes to the bake time. -
Make-ahead for parties:
You can prepare dough balls and keep them in the fridge (covered) for up to 24 hours. Bake just before guests arrive so your house smells like a bakery—works every time.
No need to “reheat” these, but if you love that melty chocolate experience, you can warm a cookie in the microwave for 5–8 seconds. Don’t go longer or the Kiss can collapse.
Notes From My Kitchen
A few things I’ve learned over many, many batches of Hershey Kiss cookies:
-
Don’t skip the chill if your kitchen is warm.
Chilling the dough helps the cookies hold that nice rounded shape and keeps them soft inside instead of spreading flat. -
Measure flour gently.
Too much flour is the quickest way to dry, crumbly cookies. If you don’t have a kitchen scale, fluff the flour, spoon it into your cup, and level it off with a knife. -
Use a small cookie scoop.
A 1-tablespoon scoop helps keep all your cookies the same size, which means even baking. It also speeds things up when you’re baking for a crowd. -
Unwrap the Kisses before you bake.
Ask any parent—if you wait until the cookies are in the oven, chaos follows. Have a little bowl of unwrapped kisses ready to go, and maybe an extra bowl for the “sampling.” -
Watch your oven.
Every oven runs a bit differently. The first time you try this recipe, check the cookies at 8 minutes. If they’re set on the edges and puffed in the middle, pull them. Slightly underbaked usually means softer cookies. -
Play with peanut butter brands.
I find standard creamy peanut butter gives the most classic flavor, but if you love a stronger peanut taste, Skippy “Super Chunk” or Jif Extra Crunchy is fun—just know you’ll see bits of peanuts in your cookies.
Frequently Asked Questions
1. Can I use natural peanut butter in this Hershey Kiss Cookies Recipe?
Yes, but the texture will be a bit different. Make sure your natural peanut butter is well-stirred and thick, not oily, and chill the dough longer so the cookies don’t spread too much.
2. Why did my Hershey’s Kiss cookies go flat?
Usually it’s from warm dough, too little flour, or an oven that’s not hot enough. Chill the dough, measure your flour carefully, and make sure the oven is fully preheated to 375°F.
3. How do I keep the chocolate Kisses from melting completely?
They’ll soften—that’s normal—but they should still hold their shape. Don’t place the cookies on a hot stove or near the oven vent, and let them set on a wire rack in a cooler spot in the kitchen.
4. Can I make these peanut-free?
You can try substituting sunflower seed butter or another nut/seed spread you like. The flavor will change, but the basic method is the same. Watch for slight green coloring with sunflower butter (it’s a harmless reaction to baking soda).
5. Can I use different flavors of Hershey’s Kisses?
Absolutely. Candy cane, caramel, almond, or dark chocolate Kisses all work and are fun for seasonal variations.
6. Do I need to chill the dough every time?
Technically, you can bake right away, especially in a cool kitchen, but chilling helps keep them thick and soft. For the best results, I do at least a 20-minute chill.
7. How do I know when the cookies are done?
Look for lightly browned edges, a soft center, and small cracks on top. They’ll look a bit underdone in the middle, but they firm up as they cool.
8. Can I make larger or smaller cookies?
Yes. Smaller cookies will bake faster (start checking at 7 minutes). Larger ones will need a minute or two more. Just keep an eye on the edges and cracks as your main visual cue.
Wrapping It Up (And Sharing A Few Cookies)
These Hershey Kiss cookies are one of those simple pleasures I come back to year after year. A soft peanut butter base, a sparkly sugar coating, and that little chocolate kiss in the center—this Hershey Kiss Cookies Recipe has “holiday tradition” written all over it, but it’s just as lovely on a random Sunday afternoon.
If you bake a batch, I’d love to hear how they turn out—tell me what kind of Hershey’s Kisses you used, or if your kids helped with the rolling and pressing. And if you’re in full baking mode, try pairing these with a few other classics like Sugar Cookies or chocolate chip bars for a complete cookie tray.
Now go preheat that oven, unwrap a few Kisses (snack on one, you’ve earned it), and fill your kitchen with the smell of warm, homemade peanut butter cookies.
Hershey Kiss Cookies
Ingredients
- 1 3/4 cups all-purpose flour (220 g), spooned and leveled
- 1 teaspoon baking soda
- 1/2 teaspoon baking powder
- 1/2 teaspoon fine sea salt
- 1/2 cup unsalted butter (1 stick / 113 g), softened to room temperature
- 1/2 cup granulated sugar (100 g), for the dough
- 1/2 cup light brown sugar (100 g), packed
- 1/2 cup creamy peanut butter (130 g), shelf-stable (like Jif or Skippy)
- 1 large egg at room temperature
- 2 teaspoons vanilla extract
- 1/2 cup granulated sugar (100 g), for rolling the cookie dough balls
- 36 Hershey’s Kisses milk chocolate, unwrapped (have a few extra on hand)
Instructions
- In a medium bowl, whisk together the flour, baking soda, baking powder, and fine sea salt until well combined. Set aside.1 3/4 cups all-purpose flour, 1 teaspoon baking soda, 1/2 teaspoon baking powder, 1/2 teaspoon fine sea salt
- In a large mixing bowl, using a hand mixer or a stand mixer fitted with the paddle attachment, beat the softened butter, 1/2 cup granulated sugar, and 1/2 cup packed light brown sugar on medium speed for 2–3 minutes, until light and fluffy.1/2 cup unsalted butter, 1/2 cup granulated sugar, 1/2 cup light brown sugar
- Add the creamy peanut butter to the butter-sugar mixture and beat on medium speed until smooth and fully combined, about 30–45 seconds. Scrape down the bowl as needed.1/2 cup creamy peanut butter
- Beat in the egg and vanilla extract on medium-low speed just until the egg is incorporated and the mixture looks smooth. Avoid overbeating at this stage.1 large egg, 2 teaspoons vanilla extract
- With the mixer on low speed, gradually add the dry ingredient mixture to the wet ingredients. Mix just until no dry streaks of flour remain. The dough should be soft but not sticky.1 3/4 cups all-purpose flour, 1 teaspoon baking soda, 1/2 teaspoon baking powder, 1/2 teaspoon fine sea salt
- Cover the bowl and refrigerate the dough for 20–30 minutes. Chilling helps the cookies bake up soft, thick, and prevent excessive spreading.
- Preheat the oven to 375°F (190°C). Line baking sheets with parchment paper or silicone baking mats. Place the remaining 1/2 cup granulated sugar for rolling in a shallow bowl.1/2 cup granulated sugar
- Scoop about 1 tablespoon of dough and roll it between your palms into a smooth ball (about 1–1 1/4 inches in diameter). Roll each ball in the bowl of sugar to coat completely, then place on the prepared baking sheet about 2 inches apart.1/2 cup granulated sugar
- Bake in the preheated oven for 8–10 minutes, or until the cookies are puffed, set around the edges, and just starting to crack on top. The centers should still look slightly soft.
- Immediately after removing the cookies from the oven, gently press one unwrapped Hershey’s Kiss into the center of each warm cookie. The edges will crack slightly as the Kiss sinks in—this is normal and desired.36 Hershey’s Kisses
- Let the cookies cool on the baking sheet for about 5 minutes, then carefully transfer them to a wire rack to cool completely. The Kisses will soften from the heat and then firm up again as the cookies cool.
- Once fully cooled, serve immediately or store in an airtight container at room temperature for 4–5 days. Layer cookies between sheets of parchment so the chocolate Kisses don’t smudge.
Notes
Storage: Store cooled cookies in an airtight container at room temperature for 4–5 days, layering with parchment paper. To freeze, freeze cooled cookies on a tray until solid, then transfer to a freezer-safe container for up to 2 months. Thaw at room temperature.
Make-ahead: Roll dough into sugared balls and freeze on a tray, then store frozen in a bag. Bake from frozen, adding 1–2 minutes to the baking time.
Tips: Chill the dough if your kitchen is warm to prevent spreading. Measure flour gently to avoid dry cookies. Unwrap Hershey’s Kisses before baking so they’re ready to press into the warm cookies.
Variations: Use different Hershey’s Kiss flavors (dark, caramel, candy cane). Add 2 tablespoons cocoa powder to the flour for a chocolate-peanut butter base, or use a 1:1 gluten-free baking flour blend for a gluten-free version.