Would you like to save this?
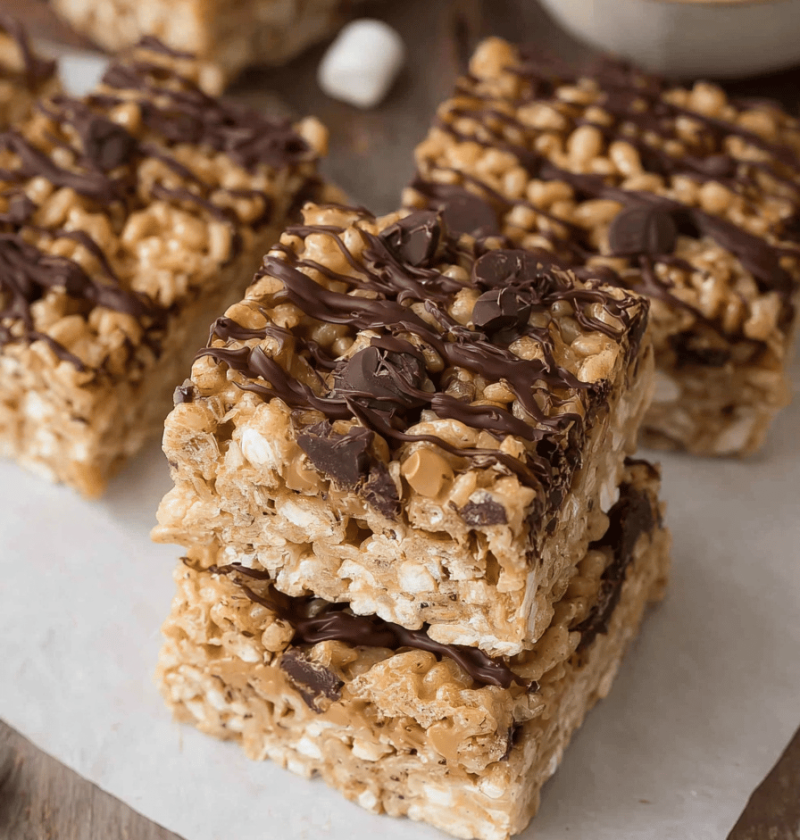
These Chocolate Peanut Butter Rice Krispie Treats are a no-bake, sweet snack that marries creamy peanut butter, melty marshmallow, and rich chocolate into one easy dessert.
I’ve always had a soft spot for classic Rice Krispie treats—my grandmother used to whip them up for every church potluck. But when I started craving something a bit more decadent, I went ahead and swirled in peanut butter and dipped each bar in chocolate. The result? A homemade, crowd-pleasing dessert that feels nostalgic but new. Perfect for after-school nibblers, last-minute bake sales, or a cozy movie night, these bars are fuss-free, generously sweet, and surprisingly light. Plus, by using natural peanut butter and dark chocolate chips, they’re a slightly healthier twist on the usual kid-friendly snack.
Why You’ll Love This Recipe
• No oven needed – just a saucepan and a spatula.
• Ready in under an hour, even with chill time.
• Perfect for gift boxes and bake sales—everyone adores these.
• Hands-on time is under 20 minutes—ideal for busy weeknights.
• Customizable: swap in almond butter, add nuts, go vegan.
• Combines creamy peanut butter, gooey marshmallow, and chocolate in every bite.
• Great sweet pick-me-up for road trips, picnics, or school lunches.
• Uses pantry staples you likely already have on hand.
Ingredients
• 5 cups Rice Krispies cereal (Kellogg’s or gluten-free brand)
• 1/4 cup unsalted butter (use Kerry Gold for a richer taste)
• 1 1/2 cups mini marshmallows (or 10 large marshmallows, cut in half)
• 1 cup creamy peanut butter (natural, no-stir variety)
• 1 tsp pure vanilla extract
• 1/4 tsp fine sea salt (if your peanut butter is unsalted)
• 8 oz dark chocolate chips (60–70% cacao)
• 1 tbsp coconut oil or vegetable shortening (for smoother melting)
Tip: If you’d like a lighter texture, use half crispy rice and half puffed brown rice cereal. For a nuttier note, swap crunchy peanut butter for creamy.
Directions
1. Line a 9×9-inch square pan with parchment paper, leaving an overhang for easy removal—here’s the thing, it makes slicing a breeze.
2. In a medium saucepan over low heat, melt the butter. Stir often—no one likes scorched butter.
3. Add marshmallows and peanut butter. Stir until completely melted and smooth, about 2–3 minutes. The mixture should gleam and pull away from the pan’s sides.
4. Remove from heat, then stir in vanilla extract and salt. Taste a tiny dollop—if it needs more salt, now’s the time.
5. Quickly fold in Rice Krispies cereal, using a silicone spatula to coat every flake. Work fast; the mixture sets up quickly.
6. Transfer to the prepared pan. Press evenly with a piece of parchment or a lightly buttered spatula—don’t pack too tight, or bars get too dense.
7. Chill in the fridge for at least 30 minutes. You’ll know they’re ready when edges pull away slightly from the pan.
8. Meanwhile, melt chocolate chips and coconut oil in a double boiler or microwave in 20-second bursts, stirring in between. Smooth and glossy is our goal.
9. Lift the chilled rice bars using the parchment overhang. Place on a cutting board and slice into 16 bars with a sharp knife (wiping it clean between cuts helps).
10. Dip each bar halfway into melted chocolate or drizzle it on top—your call. Let excess chocolate drip off before setting bars back on parchment.
11. Return to the fridge for 10–15 minutes until the chocolate firms up. Then…dig in!
Servings & Timing
• Makes: 16 bars
• Prep Time: 15 minutes
• Chill Time: 30–45 minutes
• Total Time: about 1 hour
Variations
• Swirl caramel sauce on top instead of dipping in chocolate.
• Use almond butter or sunflower seed butter for nut-allergy-friendly bars.
• Stir in chopped Reese’s peanut butter cups for extra indulgence.
• Add a teaspoon of instant espresso powder to the marshmallow mix for a mocha twist.
• Sprinkle flaky sea salt over the chocolate before it sets.
• Fold in 1/4 cup rainbow nonpareils for a festive, colorful treat.
Storage & Reheating
• Store bars in an airtight container at room temperature for up to 3 days—if you can resist that long.
• For longer storage, keep them in the fridge (up to 1 week) or freeze in layers separated by parchment (up to 1 month).
• To thaw frozen bars, let sit at room temperature for 20 minutes.
• No reheating needed—these snack bars are best served cool so the chocolate stays crisp.
• Make-ahead tip: prep the Rice Krispie base a day ahead, cover, then melt chocolate and dip on the day you need them.
Notes
• I learned that warming peanut butter just slightly in the microwave before adding helps it integrate more smoothly.
• If your mixture seems too stiff, add a teaspoon of milk or cream when melting marshmallows.
• Press gently but firmly: too much force squeezes out marshmallow pockets, and bars become brick-like.
• Use silicone-lined or nonstick pans—traditional metal pans can stick and pull apart bars.
• For extra chew and flavor, fold in 1/3 cup toasted chopped peanuts along with the cereal.
FAQs
Q: Can I use natural crunchy peanut butter?
A: Absolutely—crunchy adds a nice texture. Just be sure to mix non-stir brands well before measuring.
Q: My bars turned out too soft—what went wrong?
A: You may need more chilling time or a bit less marshmallow; gently warm your mixture only until melted.
Q: How do I make these vegan?
A: Swap marshmallows for vegan marshmallows (like Dandies) and use dairy-free chocolate chips.
Q: Can I skip the chocolate coating?
A: Of course—these treats are delightful plain, and you’ll save a step.
Q: What’s the best way to cut clean bars?
A: Chill fully, then use a hot, sharp knife—dip the blade in warm water and wipe clean between cuts.
Q: Any gluten-free considerations?
A: Choose certified gluten-free puffed rice cereal (Kellogg’s has a GF version) to keep bars safe for celiac diets.
Q: Can I add protein powder?
A: You can—stir in one scoop of unflavored whey or vegan protein after removing from heat, but texture may change.
Q: Why is my chocolate dull after setting?
A: If your kitchen is humid, chocolate can bloom; set bars in a cool, dry place or briefly chill.
Conclusion
These Chocolate Peanut Butter Rice Krispie Treats hit all the right notes—no-bake ease, creamy sweetness, and that satisfying cereal crunch. Whether you’re packing them for lunchboxes or nibbling late at night, they’ll vanish fast. Give them a whirl, leave a comment below with your favorite tweak, and don’t forget to explore more homemade snack recipes on the blog!
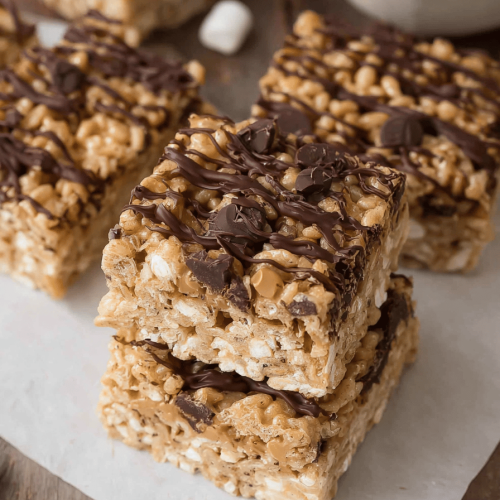
Chocolate Peanut Butter Rice Krispie Treats
Ingredients
- 5 cups Rice Krispies cereal (Kellogg’s or gluten-free brand)
- 1/4 cup Unsalted butter (use Kerry Gold for a richer taste)
- 1 1/2 cups Mini marshmallows (or 10 large marshmallows, cut in half)
- 1 cup Creamy peanut butter (natural, no-stir variety)
- 1 tsp Pure vanilla extract
- 1/4 tsp Fine sea salt (if your peanut butter is unsalted)
- 8 oz Dark chocolate chips (60–70% cacao)
- 1 tbsp Coconut oil or vegetable shortening (for smoother melting)
Instructions
- Line a 9x9-inch square pan with parchment paper.
- Melt butter in a medium saucepan over low heat.
- Add marshmallows and peanut butter, stir until melted and smooth.
- Stir in vanilla extract and salt, then fold in Rice Krispies cereal.
- Transfer mixture to the prepared pan, press evenly, and chill for 30 minutes.
- Melt chocolate chips and coconut oil, dip each bar in melted chocolate.
- Chill bars until chocolate firms up, then serve.

