Would you like to save this?
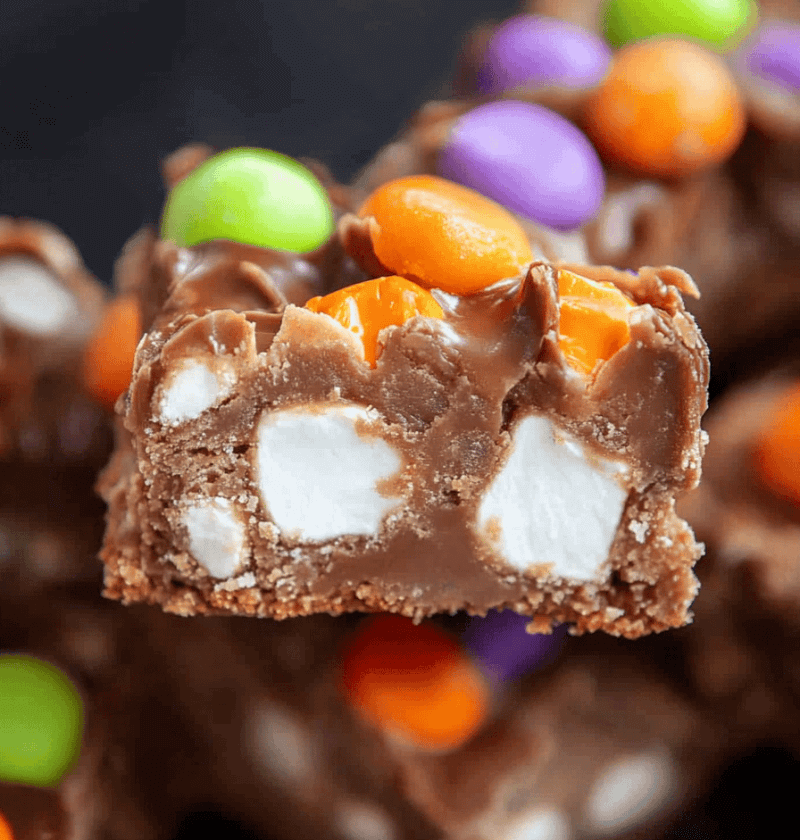
These Halloween Marshmallow Bars are a spooky, no-bake festive snack that’s lightened up with whole-grain cereal and sugar-free marshmallows—perfect for guilt-free Halloween treats!
Ever since my neighbor handed me a tray of these gooey squares at last year’s fall potluck, I’ve been hooked. Think classic rice-cereal marshmallow bars dressed up for Halloween with candy corn pops of color, a dark-chocolate swirl, and an optional Greek-yogurt drizzle. They’re unique because they come together in minutes—no oven needed—and you can tweak them for vegan, gluten-free, or nut-free diets. I love serving them after trick-or-treating: the kids get their sugar rush, and I don’t have to worry about turning on the oven when the night’s already chilly.
Why You’ll Love This Recipe
- No oven needed—just a stovetop or microwave
- Ready in under 30 minutes from start to finish
- Perfectly portioned bars for lunchboxes or gift boxes
- Gluten-free and vegetarian (swap ingredients for vegan)
- Packed with colorful candy corn for a festive snack
- Flexible: swap in sprinkles, nuts, or flavored marshmallows
- Kid-friendly “spooky dessert” that even picky eaters adore
- Pantry-friendly—odds are you already have most ingredients
Ingredients
– 4 cups brown rice cereal (I like Nature’s Path Organic; certified gluten-free)
– 3 tbsp unsalted butter or coconut oil (for dairy-free/vegan)
– 10 oz sugar-free or light marshmallows (about 8 cups; see Note below)
– 1 tsp pure vanilla extract
– ¼ tsp fine sea salt
– ½ cup mini candy corn (substitute with Halloween M&M’s or colored sprinkles)
– 2 tbsp dark chocolate chips (70% cacao or dairy-free chips)
– ¼ cup plain whole-milk Greek yogurt (optional drizzle)
– 1 tsp coconut oil (to thin the yogurt drizzle)
Tips for success:
• Use whole-grain or gluten-free cereal for better nutrition and crunch.
• Room-temperature butter prevents scorching.
• If you go vegan, pick marshmallows labeled vegan and use coconut oil.
Directions
- Line a 9×9-inch pan with parchment paper, letting some overhang for easy removal—then lightly grease the paper.
- In a large pot over low heat, melt butter (or coconut oil) until it’s just bubbly. Add marshmallows and stir constantly with a silicone spatula until smooth. Keep the flame low so they don’t burn.
- Remove from heat, stir in vanilla and sea salt, and watch the mixture shine—this is where the flavor really pops.
- Quickly fold in the brown rice cereal and mini candy corn, coating everything evenly. Work fast: marshmallows set up quickly.
- Transfer the sticky blend to your lined pan. Use a well-greased spatula or piece of wax paper to press it firmly and evenly—aim for uniform thickness so bars cut neatly.
- Sprinkle chocolate chips over the top. As they soften from the residual heat, swirl them into the surface with a butter knife for a pretty marble effect.
- Chill in the fridge for at least 30 minutes (45 if your house is warm) until bars are firm. Lift out via parchment overhang and slice into 16 squares with a sharp knife (warmed under hot water and wiped dry).
Servings & Timing
Yields: 16 Halloween Marshmallow Bars
Prep Time: 15 minutes (chopping candy corn optional)
Chill Time: 30–45 minutes
Total Time: About 1 hour
Variations
– Swap candy corn for neon sprinkles or gummy worms for extra color.
– Stir in ¼ cup peanut butter for a nutty twist (and richer flavor).
– Add 2 tbsp chopped roasted almonds or pecans for crunch.
– Drizzle with white chocolate tinted orange using a drop of beet juice.
– Make vegan by using plant-based butter, vegan marshmallows, and dairy-free chips.
Storage & Reheating
Store cooled bars in an airtight container at room temperature for up to 3 days or refrigerate for up to 5 days. To freeze, wrap individual bars in plastic wrap and layer with parchment in a freezer-safe bag—keep for up to 1 month. No real reheating needed; if you want them gooey, zap a bar for 5–7 seconds in the microwave.
Make-ahead tip: Press the mixture into the pan and wrap well—chill overnight so you’re party-ready at a moment’s notice.
Notes
• If your marshmallows are a bit stale, toss in an extra tablespoon of butter to help them melt smoothly.
• Pressing firmly is critical—too soft, and bars crumble when sliced. I learned that the hard way when my first batch looked more like rocky road!
• The vanilla goes in at the end for that bright aroma; if added too early, the flavor can fade.
• Warm your knife or spatula under hot water and dry it before cutting for cleaner edges.
FAQs
Q: Can I use regular marshmallows instead of sugar-free?
A: Absolutely. They’ll sweeten the bars more, so watch melting closely to avoid scorching.
Q: How do I keep bars from sticking to the pan?
A: The parchment overhang helps—just lift them out gently. A quick spray of nonstick on the parchment never hurts either.
Q: Are these bars gluten-free?
A: Yes, if you choose certified gluten-free rice cereal.
Q: Can I leave out the candy corn?
A: Of course—swap it for sprinkles, chopped chocolate, or M&M’s to suit dietary needs.
Q: My bars are too dry and crumbly—what happened?
A: Probably not enough marshmallows or butter; add a splash more butter next time.
Q: Can I make these nut-free for school events?
A: Definitely—just skip nuts or peanut butter variations and double up on chocolate chips.
Q: How do I get the Halloween swirl effect?
A: As soon as you sprinkle warm chocolate chips, swirl them gently with a knife before chilling.
Q: Will these melt in warm weather?
A: They’ll soften above 75°F; keep them in the fridge or serve chilled.
Conclusion
These Halloween Marshmallow Bars hit every note—spooky dessert fun, simple no-bake prep, and that festive snack vibe we all crave this time of year. Give them a whirl for your next Halloween party, then drop me a comment to share your favorite candy-corn swap or variation. Don’t forget to check out my Witch Hat Cookies and Pumpkin Spice S’mores for more Halloween treats!

Halloween Marshmallow Bars
Ingredients
- 4 cups brown rice cereal I like Nature’s Path Organic; certified gluten-free
- 3 tbsp unsalted butter or coconut oil for dairy-free/vegan
- 10 oz sugar-free or light marshmallows about 8 cups; see Note below
- 1 tsp pure vanilla extract
- 1/4 tsp fine sea salt
- 1/2 cup mini candy corn (substitute with Halloween M&M’s or colored sprinkles)
- 2 tbsp dark chocolate chips (70% cacao or dairy-free chips)
- 1/4 cup plain whole-milk Greek yogurt (optional drizzle)
- 1 tsp coconut oil to thin the yogurt drizzle
Instructions
- Line a 9x9-inch pan with parchment paper, letting some overhang for easy removal—then lightly grease the paper.
- In a large pot over low heat, melt butter (or coconut oil) until it’s just bubbly. Add marshmallows and stir constantly with a silicone spatula until smooth. Keep the flame low so they don’t burn.
- Remove from heat, stir in vanilla and sea salt, and watch the mixture shine—this is where the flavor really pops.
- Quickly fold in the brown rice cereal and mini candy corn, coating everything evenly. Work fast: marshmallows set up quickly.
- Transfer the sticky blend to your lined pan. Sprinkle chocolate chips over the top and swirl them into the surface with a butter knife for a pretty marble effect.
- Chill in the fridge for at least 30 minutes until bars are firm. Lift out via parchment overhang and slice into 16 squares with a sharp knife.
Notes
• Room-temperature butter prevents scorching.
• If you go vegan, pick marshmallows labeled vegan and use coconut oil.

