Would you like to save this?
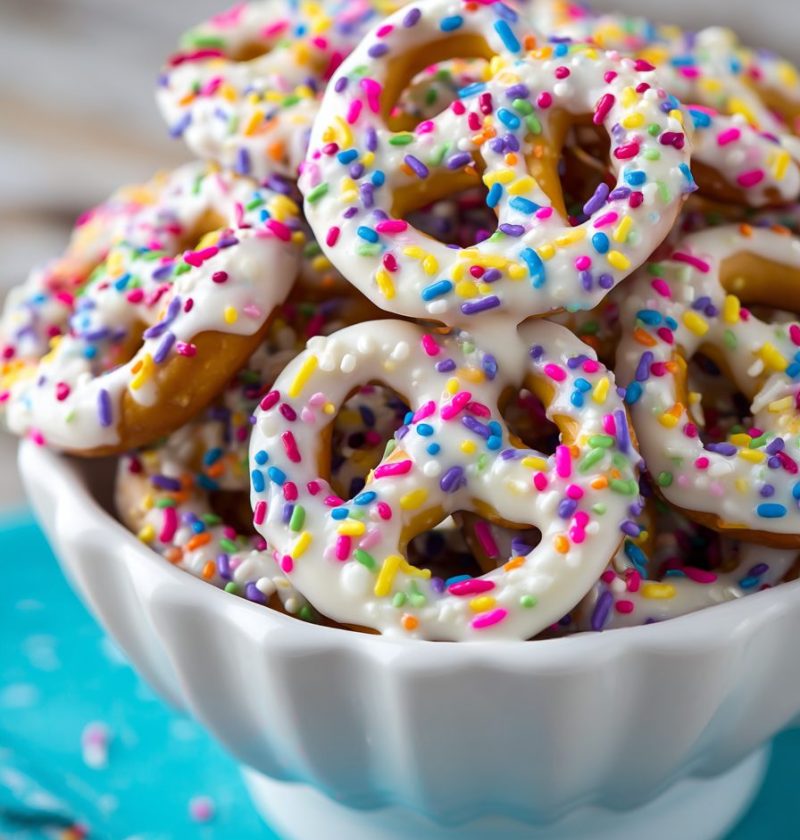
Yogurt Covered Pretzels Recipe
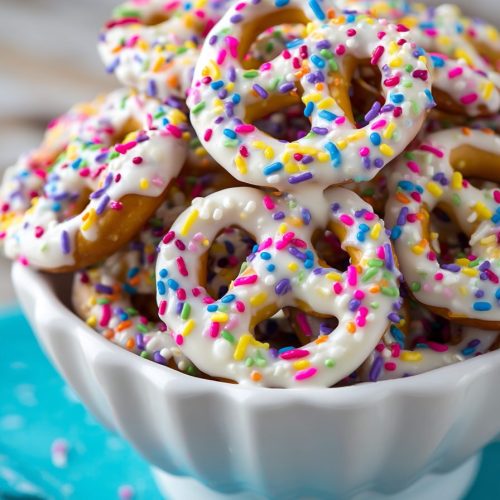
This Yogurt Covered Pretzels Recipe gives you the perfect sweet-salty crunch, with a creamy vanilla yogurt coating and zero oven time—an easy, no-bake treat that looks store-bought but tastes even better homemade.
What Makes These Yogurt Covered Pretzels So Special?
If you’ve ever grabbed a bag of yogurt covered pretzels at Target or Trader Joe’s and thought, “I could eat this whole thing,” you’re in good company. This homemade yogurt pretzels recipe was my answer to that exact problem—and to a growing snack budget.
These crunchy yogurt pretzels are:
- a sweet and salty snack,
- an easy dessert snack for last-minute company,
- and one of my go-to kids’ party snacks.
They’re essentially mini pretzels coated in a smooth vanilla yogurt candy coating. Think of them as cousins to White Chocolate pretzels—just a little tangier, a touch lighter, and very easy to dress up with sprinkles for holidays, baby showers, movie nights, or game-day parties.
I started making them when my kids were in middle school and needed snack food for school clubs almost every week. Now, as a 50-year-old with grown kids and a couple of very opinionated grand-nibblings, this coated pretzel snack still shows up on my table for:
- Christmas cookie trays,
- teacher gifts,
- Super Bowl spreads,
- and “just because it’s Tuesday” treats.
The best part? This no bake pretzel recipe gives you full control—less sugar if you like, gluten-free pretzels if you need them, and lots of flexibility with flavors and toppings.
And yes, it absolutely scratches that “store-bought yogurt coated pretzels” itch.
Why You’ll Love This Yogurt Covered Pretzels Recipe
Let me explain why this one stays in my regular rotation:
- No oven needed – A true no-bake pretzel recipe; perfect when it’s too hot to turn the oven on.
- Quick to make – About 20 minutes of hands-on time; the rest is just chilling.
- Perfect sweet-salty balance – Crunchy, salty mini pretzels with a creamy vanilla yogurt candy coating.
- Looks store-bought, tastes homemade – Polished enough for gift boxes, but simple enough for a Tuesday.
- Easy to customize – Add sprinkles, crushed freeze-dried fruit, or a drizzle of dark chocolate.
- Kid-friendly project – Little hands love dipping and decorating these yogurt coated pretzels.
- Great party snack recipe – Ideal for bowls at parties, snack boards, and dessert tables.
- Budget-friendly – Cheaper than constantly buying bags of yogurt covered pretzels from the store.
- Make-ahead friendly – Stays fresh for days if stored properly, and freezes very well.
If you like recipes that feel special but don’t demand a full afternoon in the kitchen, this one fits right in.
Ingredients for the Best Yogurt Covered Pretzels
Here’s what you’ll need for this Yogurt Covered Pretzels Recipe. I’ll give you a “shortcut version” and a “from-scratch style” yogurt coating so you can choose what works for your schedule.
Basic Yogurt Candy Coating (Quick & Reliable)
- 4 cups mini pretzels
(Traditional mini twists or mini pretzel knots; use gluten-free pretzels if needed.) - 2 cups yogurt chips
(These are like white chocolate chips but flavored with yogurt; look near chocolate chips or in the health-food baking section.) - 1 tablespoon refined coconut oil or vegetable shortening
(Helps the coating melt smooth and set with a nice snap.) - 1 teaspoon pure vanilla extract
(For that classic vanilla yogurt coating flavor.)
Optional Creamy Yogurt Boost (Adds Real Yogurt Flavor)
If you want more “real yogurt” character in your yogurt candy coating:
- 3 tablespoons plain Greek yogurt, room temperature
(Use whole milk Greek yogurt for extra creaminess and a hint of tang. Avoid nonfat if you can—it can be a bit chalky.) - 2–3 tablespoons powdered sugar
(Sweetens the yogurt and thickens it so the coating sets up nicely.)
You’ll stir this yogurt mixture into the melted yogurt chips for that extra tang. It’s not strictly necessary, but it really does deepen the flavor.
Toppings & Decorations (Optional but Fun)
Use any mix of the following to turn these into party-ready coated pretzel snacks:
- Colored sprinkles (holidays, birthdays, team colors)
- Crushed freeze-dried strawberries or raspberries
(Adds color and a little fruity pop.) - Finely chopped nuts (pistachios, pecans, or almonds)
- Drizzle of melted dark or milk chocolate
(For that white chocolate pretzels look with contrast.) - Sea salt flakes (if you love an extra salty edge)
A quick tip: If you’re adding sprinkles or toppings, have them ready before you melt the coating. Once you start dipping pretzels, things move fairly fast.

Step-by-Step Directions (Easy Enough for a Weeknight Treat)
1. Prep your workspace
Line 2 baking sheets with parchment paper or silicone baking mats.
This keeps the yogurt coated pretzels from sticking and makes clean-up easy.
Pour your mini pretzels into a wide bowl so you can grab them easily. Set your toppings in small bowls nearby.
2. Melt the yogurt chips
Place the yogurt chips and coconut oil (or shortening) in a Microwave-safe bowl. A medium glass bowl works well so you can see what’s going on.
Microwave in 20–30 second bursts, stirring well after each round, until the mixture is mostly melted. When only a few small pieces remain, stop microwaving and stir until fully smooth.
Stovetop option: Use a double boiler or a heat-safe bowl set over (not in) a pot of gently simmering water. Stir until melted and smooth.
You’re aiming for a thick but pourable consistency—kind of like warm pudding.
3. (Optional) Stir in the yogurt boost
If you’re using the Greek yogurt for extra flavor:
- In a small bowl, stir together the Greek yogurt and powdered sugar until very smooth—no lumps.
- Whisk this mixture into the warm melted yogurt coating off the heat.
- Add the vanilla extract and stir again until completely combined.
If the mixture thickens a bit from the yogurt, you can gently warm it for another 10 seconds in the microwave and stir again. You don’t want it hot, just nicely fluid.
4. Test the consistency
Drop one pretzel into the coating. Use a fork to lift it out, letting the extra drip back into the bowl.
If the coating looks:
- too thin (you can see the pretzel clearly through it):
Let it cool for a couple of minutes or stir in a tablespoon or two more melted yogurt chips. - too thick (it clumps and doesn’t drip at all):
Stir in 1 teaspoon extra coconut oil at a time, or warm the bowl for 10 seconds.
You want a smooth, even layer that clings to the pretzel without forming big drips.
5. Coat the pretzels
Now the fun part.
- Working with a few at a time, drop mini pretzels into the bowl of coating.
- Push them down gently with a fork so they’re fully coated.
- Use the fork to lift each pretzel out, tapping the fork on the edge of the bowl to let any excess drip back.
- Slide the pretzel off the fork onto your prepared baking sheet.
Try not to crowd them too much—they’ll look prettier if they’re not touching.
Kid helper tip: If you’ve got kids helping, let them handle the sprinkling instead of the dipping. Less mess, more fun.
6. Add toppings right away
While the coating is still wet, sprinkle on:
- colored sprinkles,
- crushed freeze-dried fruit,
- or nuts.
If you’re planning to drizzle with melted chocolate, wait until the yogurt coating has set first.
7. Let them set
Place the baking sheets in the refrigerator for 20–30 minutes or until the yogurt candy coating is firm and dry to the touch.
If your kitchen is cool, you can let them set at room temperature, but refrigeration helps them firm up faster and gives a nice snap.
8. Add chocolate drizzle (optional)
For a fun “bakery case” look:
- Melt ¼–½ cup white, dark, or milk chocolate chips in a small bowl.
- Use a spoon or a small piping bag (or a zip-top bag with a tiny corner snipped) to drizzle thin lines over the set yogurt covered pretzels.
- Chill again for another 10–15 minutes.
Now you have the prettiest homemade yogurt pretzels on the block.
Servings & Timing
- Yield: About 4 cups of yogurt covered pretzels
(Roughly 8–10 servings, depending on snack appetite.) - Prep Time: 20 minutes
- Chill Time: 20–30 minutes
- Total Time: 40–50 minutes
You could stretch this snack food recipe to serve more people if you’re mixing it into snack mixes or dessert boards.
Fun Variations to Try
Once you’ve made this Yogurt Covered Pretzels Recipe once, it’s hard not to start playing with flavors. Here are some ideas:
- Strawberry Yogurt Pretzels – Stir crushed freeze-dried strawberries into the yogurt coating and sprinkle more on top.
- Cinnamon Vanilla Yogurt Coating – Add ½ teaspoon ground cinnamon and a pinch of nutmeg to the melted chips for a cozy, holiday-style coating.
- Chocolate-Dipped Half & Half – Dip only half of each pretzel in the yogurt coating, then the other half in melted dark chocolate for a black-and-white effect.
- Protein-Boosted Snack – Use high-protein Greek yogurt chips (if you can find them) and Greek yogurt in the coating, and pair the pretzels with nuts in a snack mix.
- Birthday Party Pretzels – Use bright rainbow sprinkles, and maybe add a few white chocolate pretzels to the tray for color contrast.
- Red, White & Blue Party Snack – Use red and blue sprinkles or freeze-dried berries on top for Memorial Day or the 4th of July.
Honestly, once you realize how simple the base yogurt pretzel recipe is, you can match it to just about any holiday or party theme.
How to Store & Make Ahead
Good news: these crunchy yogurt pretzels store very well when kept dry and cool.
Room Temperature
- Store in an airtight container at room temperature for up to 5 days, if your kitchen stays cool and not super humid.
- Keep them away from direct sunlight or warm spots, which can soften the coating.
Refrigerator
- For longer storage, keep them in a container in the fridge for up to 2 weeks.
- Let them sit at room temperature for 10–15 minutes before serving so the yogurt coating softens slightly.
Freezer
Yes, you can freeze them—and this is really helpful for holiday prep.
- Place the set pretzels on a baking sheet in a single layer.
- Freeze until solid, then transfer to a freezer-safe bag or container.
- Store for up to 2 months.
To serve, thaw at room temperature for about 20–30 minutes. They’ll taste just as crisp as the day you made them.
Make-Ahead Tips
- Make these yogurt coated pretzels 1–3 days before a party and store at room temp in a sealed tin.
- For gift giving, I like to tuck them into cellophane bags or pretty jars the day I plan to hand them out so they stay fresh and crisp.
Notes From My Kitchen (Little Things That Help)
- Use good pretzels. Not all pretzels are equal. Thicker mini twists hold the coating better and stay crunchy longer. Thin pretzel sticks can get a little soft inside after a day or two.
- Don’t rush the melting. High heat in the microwave can scorch yogurt chips and give you a grainy coating. Short bursts and lots of stirring are the way to go.
- Yogurt plus moisture is tricky. This is why we mix the Greek yogurt with powdered sugar first—it stabilizes it. If you add cold, wet yogurt straight into hot coating, it can seize up.
- Humidity matters. On sticky summer days, I keep these in the fridge so the yogurt candy coating stays firm. If they look a little “sweaty” coming out, just let them sit uncovered for a few minutes.
- Double the batch. This is one of those snack food recipes that disappears. I rarely make a single batch anymore if there’s any kind of gathering.
- Great for gifting. Add these alongside cookies and white chocolate pretzels on Christmas trays—they break up all the darker sweets and add a pretty pale color.
You know what? Over the years, I’ve learned that people remember the simple treats just as much as the fancy ones. These homemade yogurt pretzels are proof.
Frequently Asked Questions (FAQs)
1. Can I make this recipe without yogurt chips?
You can. Use white chocolate chips instead, melt them with a bit of coconut oil, then whisk in 2–3 tablespoons Greek yogurt and powdered sugar. The flavor will be closer to white chocolate pretzels with a light yogurt tang.
2. Why did my yogurt coating turn grainy or thick?
It likely overheated or came into contact with cold moisture. Heat slowly, stir often, and make sure the yogurt is room temperature and mixed with powdered sugar before adding.
3. Do these yogurt covered pretzels need to be refrigerated?
They don’t have to be if your kitchen is cool and dry; room temperature is fine for a few days. For longer storage or warm climates, I recommend the fridge.
4. Can I use flavored yogurt instead of plain Greek yogurt?
Yes, but choose thick, not runny yogurt, and reduce the powdered sugar since flavored yogurt is usually sweeter. Vanilla or strawberry works especially well.
5. How can I make this snack more “healthy”?
Use whole grain or gluten-free pretzels, choose Greek yogurt chips with less sugar (if you can find them), and skip extra drizzles or heavy toppings. Portion in small cups for kids.
6. My coating isn’t sticking well—what did I do wrong?
If the coating is too thin or too warm, it can slide off. Let it cool slightly so it thickens, then try dipping again. Also make sure your pretzels are dry and not oily.
7. Can I turn this into a party snack mix?
Absolutely. Combine the yogurt covered pretzels with nuts, plain pretzels, popcorn, and a few chocolate candies for a sweet-salty mix that disappears fast at parties.
8. Are these good for kids’ lunchboxes?
Yes—with one caution. If the lunchbox will sit in a warm place, the coating may soften. Pack them in an insulated bag with an ice pack for the best texture.
Wrapping It Up (And Inviting You to Snack)
This Yogurt Covered Pretzels Recipe gives you everything we love in a sweet salty snack: crunch, creaminess, a little tang from the yogurt, and a beautiful finish that feels special without a lot of fuss. It’s an easy dessert snack, a fun coated pretzel snack for parties, and one of those recipes that quietly becomes a family favorite.
If you try these homemade yogurt pretzels, I’d love to hear how you flavored and decorated yours—tell me in the comments or share a photo. And if this hits the spot, you might also enjoy some of the other no-bake and party snack recipes on the blog for your next movie night, game day, or school party.
Yogurt Covered Pretzels
Ingredients
- 4 cups mini pretzels traditional mini twists or mini pretzel knots; use gluten-free pretzels if needed
- 2 cups yogurt chips look near chocolate chips or in the health-food baking section
- 1 tablespoon refined coconut oil or vegetable shortening helps the coating melt smooth and set with a nice snap
- 1 teaspoon pure vanilla extract
- 3 tablespoons plain Greek yogurt room temperature; whole milk preferred for extra creaminess and tang; optional
- 2-3 tablespoons powdered sugar to sweeten and thicken the yogurt; optional
- colored sprinkles optional, for decorating
- crushed freeze-dried strawberries or raspberries optional, for color and fruity flavor
- finely chopped nuts such as pistachios, pecans, or almonds; optional
- 1/4-1/2 cup white, dark, or milk chocolate chips optional, for drizzling after coating is set
- sea salt flakes optional, for extra salty finish
Instructions
- Line 2 baking sheets with parchment paper or silicone baking mats to prevent sticking and make cleanup easy. Pour the mini pretzels into a wide bowl so they are easy to grab, and set any toppings (sprinkles, crushed freeze-dried fruit, nuts, sea salt) in small bowls nearby.
- Place the yogurt chips and coconut oil (or shortening) in a microwave-safe bowl. Microwave in 20–30 second bursts, stirring well after each round, until the mixture is mostly melted. When only a few small pieces remain, stop microwaving and stir until fully smooth. The consistency should be thick but pourable, like warm pudding. Alternatively, melt gently over a double boiler, stirring until smooth.
- If using Greek yogurt for extra flavor, stir the Greek yogurt and powdered sugar together in a small bowl until completely smooth with no lumps. Off the heat, whisk this mixture into the warm melted yogurt coating, then stir in the vanilla extract until fully combined. If the mixture thickens too much, gently warm it for about 10 seconds in the microwave and stir again until fluid but not hot.
- Drop one pretzel into the yogurt coating and lift it out with a fork, letting excess drip back into the bowl. If the coating is too thin and you can see the pretzel clearly through it, let the coating cool for a couple of minutes or stir in a tablespoon or two of additional melted yogurt chips. If it is too thick and clumpy, stir in 1 teaspoon extra coconut oil at a time or warm the bowl for about 10 seconds until the coating flows smoothly.
- Working with a few pretzels at a time, drop mini pretzels into the bowl of yogurt coating. Gently press them down with a fork so they are fully coated. Lift each pretzel out with the fork, tapping the fork on the side of the bowl to let any excess drip off, then slide the pretzel off the fork onto the prepared baking sheet. Arrange so the pretzels do not touch for a neater appearance.
- While the yogurt coating is still wet, immediately sprinkle coated pretzels with colored sprinkles, crushed freeze-dried fruit, chopped nuts, or a pinch of sea salt flakes if using. Have toppings ready before you begin dipping, as the coating will start to set as it cools.
- Place the baking sheets in the refrigerator for 20–30 minutes, or until the yogurt candy coating is firm and dry to the touch. In a cool kitchen you can let them set at room temperature, but chilling helps them firm up faster and gives a nice snap.
- For a bakery-style finish, melt 1/4–1/2 cup white, dark, or milk chocolate chips in a small microwave-safe bowl using short bursts and stirring until smooth. Transfer to a piping bag or a zip-top bag with a tiny corner snipped off, or use a spoon to drizzle thin lines of chocolate over the set yogurt covered pretzels. Refrigerate again for 10–15 minutes until the chocolate is firm.
- Once fully set, transfer the yogurt covered pretzels to an airtight container. Store at room temperature for up to 5 days if your kitchen is cool and dry, in the refrigerator for up to 2 weeks, or freeze for up to 2 months. Let chilled or frozen pretzels sit at room temperature briefly before serving for the best texture.