Would you like to save this?
Jewelry, whether it’s a treasured family heirloom, a cherished gift, or a special purchase, holds both sentimental and monetary value. Unfortunately, over time, your favorite pieces can lose their shine, becoming tarnished, dirty, or just plain dull. Regular cleaning can be a hassle, especially when dealing with intricate designs or delicate stones, and often involves scrubbing or using harsh chemicals.
But what if I told you there’s a way to clean your jewelry with almost zero effort? My mom shared this simple yet effective trick with me—passed down from her own mother—that works wonders on most types of jewelry. The best part? You only need a few common household items to restore your pieces to their original sparkle. Here’s how you can easily bring your jewelry back to life.
The Magic of Mom’s Jewelry Cleaning Trick
The secret behind this low-effort jewelry cleaning method lies in a combination of common household items and a bit of chemistry. This method is incredibly easy, requires minimal ingredients, and works like a charm on most types of jewelry, from gold and silver to diamonds and gemstones.
What You’ll Need:
- A glass or ceramic bowl (avoid metal bowls as they may interfere with the chemical reaction)
- Aluminum foil
- Hot water (not boiling—just hot enough to be effective)
- Baking soda (a natural, gentle cleaning agent)
- Salt (enhances the cleaning process)
- Mild dish soap (optional for extra grease removal)
- A soft cloth or a toothbrush (for gentle scrubbing, if necessary)
Step-by-Step Guide to Effortlessly Clean Jewelry
Follow these simple steps to restore your jewelry’s sparkle without any harsh chemicals or strenuous scrubbing:
Step 1: Prepare the Cleaning Solution
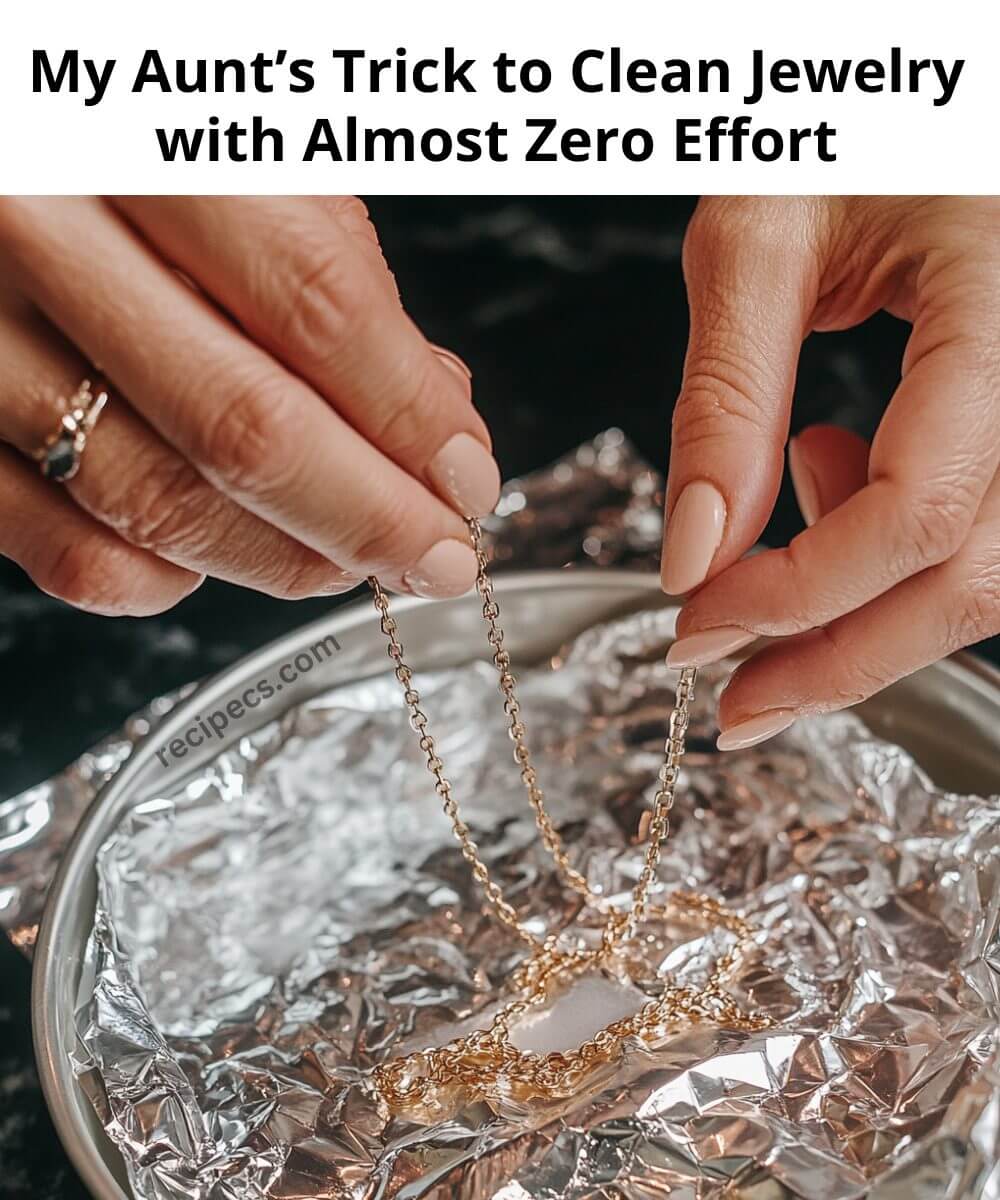
- Line the Bowl with Aluminum Foil:
Start by lining the bottom of your bowl with a piece of aluminum foil, shiny side up. The foil plays a key role in this cleaning method by initiating a chemical reaction that helps remove tarnish from the jewelry. - Add Hot Water to the Bowl:
Next, fill the bowl with hot water. The water should be hot, but not boiling, as excessively high temperatures could damage delicate stones or metalwork. For particularly delicate pieces, lukewarm water might be a safer option.
Step 2: Add the Cleaning Agents
- Add One Tablespoon of Baking Soda and One Tablespoon of Salt:
The baking soda works to neutralize acids and break down dirt, while the salt enhances the electrolytic reaction that will pull tarnish away from your jewelry. - Optional – Add a Drop of Dish Soap:
For extra grease removal, add a drop or two of mild dish soap. The dish soap will help to dissolve any oils or residues that might be on the jewelry, making the cleaning process even more effective.
Step 3: Immerse the Jewelry
- Place Your Jewelry in the Solution:
Place your jewelry pieces into the bowl, ensuring they make contact with the aluminum foil. The aluminum creates a slight electrical current that helps to loosen the tarnish on the metal. You may notice some bubbling or fizzing—this is a good sign that the chemical reaction is taking place and lifting away the grime.
Step 4: Wait and Watch
- Let the Jewelry Soak for 10-15 Minutes:
Allow the jewelry to sit in the solution for about 10-15 minutes. During this time, the baking soda and salt will work together to lift away dirt and tarnish, while the aluminum foil attracts the tarnish through a process called ion exchange. - For Extra Stubborn Tarnish, Extend the Soaking Time:
If your jewelry is heavily tarnished, you may need to leave it in the solution a bit longer. If you’re in a hurry, you can gently rub the jewelry with a soft cloth or toothbrush to speed up the process.
Step 5: Rinse and Dry
- Rinse Under Cool Water:
After soaking, remove the jewelry from the bowl and rinse it thoroughly under cool, running water. This will remove any remaining residue from the cleaning agents. - Dry with a Soft Cloth:
Pat the jewelry dry with a soft cloth. Avoid using tissues or paper towels, as these can leave fibers on the jewelry or cause scratches. For pieces with intricate designs, use a soft toothbrush to reach into crevices and ensure all dirt is removed.
Why This Trick Works So Well
This cleaning method leverages a bit of chemistry to make jewelry cleaning effortless. The aluminum foil, baking soda, and salt create a chemical reaction that lifts tarnish from the metal. Tarnish is a layer of corrosion that forms when metals like silver react with sulfur in the air. The aluminum foil attracts the tarnish through ion exchange, effectively transferring it from your jewelry onto the foil.
Meanwhile, the hot water and baking soda help to loosen dirt and grime, and the optional dish soap cuts through any oils or residues that have accumulated on your jewelry. This combination not only cleans your jewelry but also restores its original shine without the need for harsh chemicals or intensive scrubbing.
A Few Extra Tips for Jewelry Care
- Avoid Using This Method on Porous Gemstones:
Steer clear of using this solution on porous stones like pearls, opals, and turquoise, as these can be damaged by the ingredients. For these delicate pieces, stick to gently wiping with a soft, damp cloth or consult a professional jeweler. - Test Before You Clean:
If you’re unsure about how your jewelry will react, test the solution on a small, inconspicuous area first. This ensures that your piece won’t be damaged by the cleaning process. - Regular Maintenance:
To keep your jewelry looking its best, try to clean it regularly using this method. It’s also a good idea to store your jewelry in a cool, dry place, away from direct sunlight and chemicals.
Why This Trick is a Game-Changer
This jewelry cleaning trick, passed down from my mom and grandma, is a true game-changer. It’s incredibly effective, requires almost no effort, and uses ingredients you likely already have at home. Plus, it’s a gentle method that’s safe for most metals and stones, making it a go-to solution for keeping your jewelry looking its best.
The next time your rings, necklaces, or bracelets start to look a little dull, skip the harsh chemicals and give this simple solution a try. You’ll be amazed at how easy it is to restore your jewelry’s brilliance and shine. With minimal work and no need for specialized cleaners, this trick will become your new favorite way to keep your jewelry sparkling!