Would you like to save this?
Royal Icing Recipe With Meringue Powder
If you’re looking for a glossy, sturdy, egg-free icing that makes sugar cookies look bakery-level fancy, this Royal Icing Recipe With Meringue Powder is about to become your new holiday (and birthday, and bake sale) best friend.
What Makes This Royal Icing So Special?
Royal icing can sound a little fussy, but this version is surprisingly friendly and forgiving. This is a classic royal icing recipe with meringue powder—no raw egg whites—so it’s safer for kids, easier to store, and much more reliable for cookie decorating.
I’ve been baking and decorating cookies for well over 25 years now. I’ve tried the old-school egg-white royal icing, quick powdered sugar glazes, and every “easy royal icing recipe” that’s gone viral. I always come back to meringue powder royal icing, especially when I want:
- Clean, sharp details for piping
- Smooth, shiny flood consistency royal icing that dries beautifully
- Icing sturdy enough for shipping cookie gifts to my grown kids
This royal icing with meringue powder has that classic sweet vanilla flavor, dries firm enough for stacking, and can be tweaked for piping or flooding in just a minute or two. Whether you’re frosting sugar cookies, decorating gingerbread houses with the grandkids, or adding lace details to a cake, this is the one icing that truly does it all.
Why You’ll Love This Royal Icing Recipe With Meringue Powder
- No raw eggs – This egg free royal icing is made with meringue powder, so it’s safer and more convenient than traditional egg-white versions.
- Perfect for cookie decorating – Ideal royal icing for cookies: outlines, flooding, polka dots, lettering—you name it.
- Consistent results – Meringue powder gives you predictable stiffness and drying, even on humid days.
- Customizable consistency – Make a stiff royal icing recipe for piping details, or thin it into flood consistency royal icing for smooth, shiny cookie tops.
- Great for beginners – If you’re nervous about royal icing, this version is forgiving and easy to fix with a teaspoon of water or powdered sugar.
- Longer shelf life – Thanks to meringue powder, the icing keeps well, so you can decorate over a few days without making a new batch.
- Works for gingerbread and cakes – Use it as royal icing for gingerbread houses, as glue for candy decorations, or for simple cake decorating.
- Takes color beautifully – Gel food colors blend in smoothly and give vivid, stable shades without thinning the icing.
- No mixer drama – You do need a mixer, but nothing fancy—your basic hand mixer will get the job done.
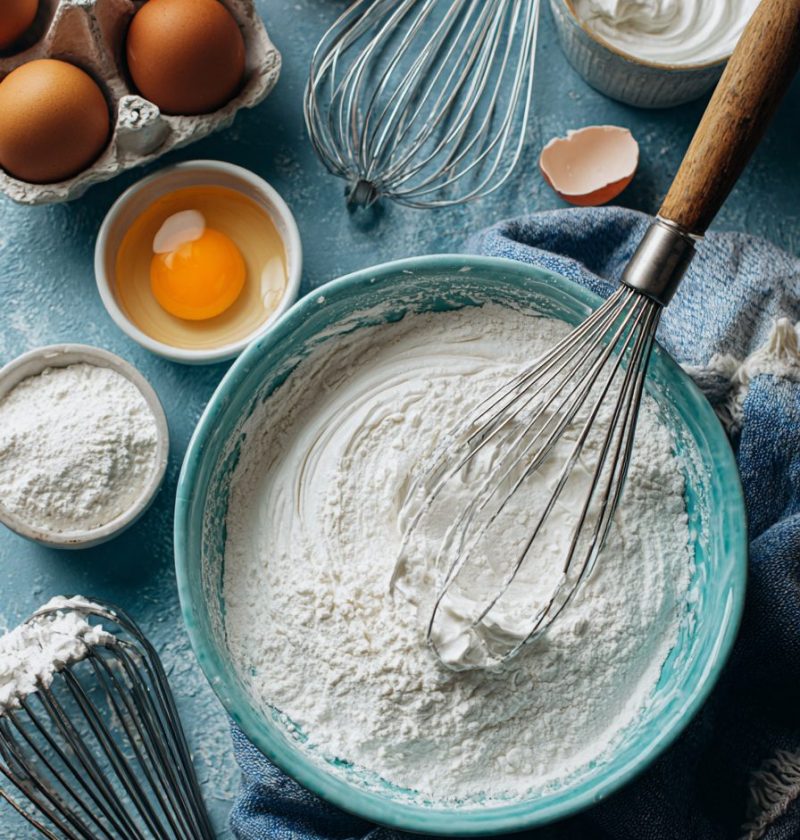
Ingredients For Classic Meringue Powder Royal Icing
Here’s what you’ll need to make a reliable, easy royal icing recipe that you can tweak for any decorating project.
Royal Icing Ingredients
- 4 cups (about 1 lb / 450 g) powdered sugar, sifted
- Sifting removes lumps so your icing is smooth and clump-free—especially important if you’ll be using tiny piping tips.
- 3 tablespoons meringue powder
- I usually use Wilton or CK brand; both are easy to find in craft stores and online. Meringue powder replaces raw egg whites and stabilizes the icing.
- 6–8 tablespoons warm water, divided
- Start with 6 tablespoons, then add more a teaspoon at a time to reach the consistency you want.
- 1 teaspoon pure vanilla extract (or clear vanilla for bright white icing)
- Clear vanilla keeps your icing very white—great for wedding cookies or holiday snowflakes.
- 1/4 teaspoon almond extract (optional but lovely)
- Just a touch adds that classic bakery sugar cookie icing flavor. Skip it if there are nut allergies.
- 1/8 teaspoon fine salt (optional)
- Helps cut the sweetness slightly and round out the flavor.
Optional Add-ins
- Gel food coloring – AmeriColor, Chefmaster, and Wilton gels work well and won’t water down the icing.
- 1–2 teaspoons light corn syrup (optional) – Adds a bit of shine and a slightly softer bite without stopping the icing from drying.
- Flavor variations – Try lemon, orange, or almond extract in place of or along with the vanilla for a twist.
Tip: Measure your powdered sugar by weight if you can. A kitchen scale really does make a difference for consistent results, especially when you’re fussing with icing consistency.
Directions: How To Make Royal Icing With Meringue Powder
You’ll need an electric mixer (hand or stand), a medium mixing bowl, and a rubber spatula. You can absolutely do this with a hand mixer—I did it that way for years at my kitchen table.
1. Prep Your Ingredients
- Sift the powdered sugar into a large bowl to remove lumps.
- Have your meringue powder, warm water, and extracts measured and ready.
- Warm water helps the meringue powder dissolve more smoothly.
2. Combine Dry Ingredients
- In the bowl of a stand mixer (or a large mixing bowl if using a hand mixer), whisk together the powdered sugar and meringue powder on low speed for a few seconds.
- This helps distribute the meringue powder evenly so you don’t get clumps.
3. Add Water and Flavor
- With the mixer on low, slowly add 6 tablespoons of warm water, plus the vanilla and any other extracts you’re using.
- Keep mixing on low until the mixture starts looking thick and clumpy, then slowly increases in smoothness.
- Scrape down the sides of the bowl once or twice so everything’s incorporated.
4. Beat To Stiff Peaks
- Turn the mixer up to medium-high and beat for 5–7 minutes (closer to 7 minutes with a hand mixer).
- The icing is ready when it’s:
- Thick
- Glossy
- Holding stiff peaks that stand upright when you lift the beater
- If it’s still droopy after 7 minutes, beat a bit longer or add 2–3 tablespoons more powdered sugar.
This is your base stiff royal icing—perfect for details, outlining cookies, piping leaves or borders, or using as “glue” for gingerbread.
5. Adjust Consistency For Piping and Flooding
Here’s where the magic happens. One batch of this royal icing recipe with meringue powder can become multiple consistencies.
- Divide the icing into separate bowls depending on how many colors and consistencies you need. Keep any icing you’re not working with covered with plastic wrap touching the surface so it doesn’t crust.
Piping Consistency Royal Icing (For Outlines & Details)
- For piping outlines, lettering, and small details, add 1/2 teaspoon of warm water at a time to a bowl of stiff icing, stirring gently with a spatula.
- You’re aiming for an icing that holds its shape, but flows smoothly from the piping bag.
- A good test: Draw a line through the icing with a spoon; it should very slowly melt back together in about 15–20 seconds.
Flood Consistency Royal Icing (For Filling Cookies)
- For flooding, add water a tiny bit at a time (start with 1/2 teaspoon) and stir gently.
- Test the consistency by letting a ribbon of icing fall back into the bowl from your spoon.
- For basic flooding, you want about a 10–12 second icing—meaning the surface smooths out in 10–12 seconds.
- If it’s too thin and runs off the cookie, work in a tablespoon of powdered sugar at a time to thicken.
Little reality check: You’ll almost always overshoot on water at least once. It’s fine. Just add more powdered sugar and stir slowly to fix it.
6. Color and Decorate
- Add gel food coloring to each bowl of icing a few drops at a time, mixing until you reach the shade you want.
- Remember that colors deepen as they sit, so stop just a shade lighter than your target color.
- Transfer your icing to piping bags fitted with small round tips (#1–#3 for detail, #2–#4 for flooding) or use tipless piping bags.
Let your decorated cookies dry at room temperature for 6–12 hours (or overnight) until the surface is fully dry and no longer tacky.
Servings & Timing
- Yield: Enough icing for about 30–40 medium sugar cookies, depending on how heavily you decorate
- Prep Time: 15 minutes
- Mixing/Adjusting Time: 10–20 minutes
- Total Time: 25–35 minutes (plus drying time on the cookies)
For big holiday trays or decorated cookie sets, I often double this recipe and work with several colors and consistencies at once.
Fun Variations & Flavor Twists
You know what? Once you’re comfortable with this base meringue powder royal icing, it’s a bit like a blank canvas.
- Citrus Royal Icing – Use lemon or orange extract instead of vanilla for bright, fresh icing that’s lovely on spring and summer cookies.
- Peppermint Holiday Icing – Add 1/4 teaspoon peppermint extract for candy-cane vibes on Christmas cookies and gingerbread.
- Spiced Gingerbread Icing – Mix in a pinch of cinnamon and nutmeg and use this as royal icing for gingerbread houses or men.
- Cocoa Royal Icing – Replace 2–3 tablespoons of powdered sugar with unsweetened cocoa powder for a light chocolate flavor.
- Soft-Bite Finish – Stir in 1–2 teaspoons of light corn syrup for icing that’s still firm but not rock-hard when you bite into it.
- Dairy-Free, Nut-Free Version – Skip almond extract and use only vanilla or citrus; this icing is naturally dairy-free.
How To Store, Freeze, and Make Ahead
Royal icing with meringue powder is very make-ahead friendly, which is a lifesaver during busy baking seasons.
Short-Term Storage
- Countertop:
- Keep icing covered in a bowl with plastic wrap touching the surface to prevent a crust from forming.
- Good for up to 8 hours while you’re actively decorating.
- Refrigerator:
- Store in an airtight container, again with plastic wrap on the surface.
- Keeps for up to 1 week. Stir well before using.
Freezing Royal Icing
- Place icing in small airtight containers or zip-top bags.
- Squeeze out extra air; label with date and consistency (stiff/piping/flood).
- Freeze for up to 1 month.
- Thaw overnight in the fridge, then let come to room temperature and stir gently.
- You may need a teaspoon or two of water or powdered sugar to adjust the consistency again.
Make-Ahead Tips
- You can make the base stiff royal icing 2–3 days before decorating, store it in the fridge, then thin and color on decorating day.
- If you’re decorating multiple days in a row, keep each color in a piping bag with the tip covered (I pop mine in a glass with a damp paper towel over the nozzles).
Notes From My Kitchen (What I’ve Learned Over The Years)
- Humidity is the boss. On rainy or very humid days, royal icing takes longer to dry and sometimes dries with a matte finish. Give it extra drying time and avoid stacking cookies until you’re sure they’re fully set.
- Don’t over-thin. It’s always easier to add another drop of water than to fix icing that’s turned into a puddle. Go slowly; stir thoroughly between each addition.
- Use the right tools. Tipless piping bags are wonderful for beginners—fewer parts to clean, and you can snip exactly the opening size you need.
- Color in advance when you can. Letting colored icing sit for 30–60 minutes deepens the color and lets air bubbles rise. Just stir gently before using.
- Pop the bubbles. For ultra-smooth flood icing on sugar cookies, use a toothpick or scribe tool to pop any air bubbles right after you flood the cookie.
- Test on a “sacrificial” cookie. I always decorate one cookie first and let it sit 10–15 minutes. If the icing is cratering (sinking in the middle) or running over the edges, I know I need to thicken it a bit.
FAQs About Royal Icing With Meringue Powder
1. Can I make this royal icing recipe without meringue powder?
You can, but it becomes a different recipe that uses raw egg whites or pasteurized carton egg whites. For food safety and consistency, I highly recommend meringue powder.
2. How long does royal icing take to dry on cookies?
Typically 6–12 hours at room temperature; thin layers can set in 2–3 hours, but don’t stack decorated cookies until they’re completely dry and hard to the touch.
3. Why is my royal icing dull instead of shiny?
Over-mixing, high humidity, or icing that’s too thick can lead to a matte finish. A teaspoon of corn syrup and careful drying in a cool, dry spot can help.
4. My icing is full of air bubbles—what did I do wrong?
Royal icing naturally traps some air when whipped. Stir gently with a spatula after mixing, let it sit 10–15 minutes, then pop surface bubbles with a toothpick as you work.
5. Is this royal icing safe for kids and pregnant people?
Yes—this is an egg free royal icing made with meringue powder, so there are no raw eggs involved.
6. Can I use this royal icing for cake decorating?
Yes, this royal icing for cake decorating is great for details like lace, writing, or small flowers, but it does dry firm, so it’s not meant for frosting the entire cake like buttercream.
7. How do I stop royal icing from bleeding colors?
Use gel colors, avoid over-thinning, let one color dry before adding another when possible, and dry the cookies in a cool, non-humid place away from direct sunlight.
8. My icing is too stiff to pipe—how do I fix it?
Stir in a few drops of warm water at a time, mixing well after each addition, until it flows smoothly from the piping bag but still holds its shape.
Wrapping It Up (And Maybe Grabbing a Cookie)
This Royal Icing Recipe With Meringue Powder has seen my kids through school bake sales, gingerbread house competitions, and more holidays than I can count. It’s reliable, flexible, and once you’ve made it once or twice, it feels easy and almost meditative—just you, a bowl of icing, and a tray of blank cookies.
If you try this royal icing for sugar cookies or gingerbread, I’d love to hear how it goes—what you decorated, what worked, and what you’d tweak next time. Leave a comment with your questions or your cookie decorating victories, and if you’re ready for your next project, pair this icing with your favorite sugar cookie recipe or a cozy gingerbread cookie base for the full festive experience.
Royal Icing Recipe With Meringue Powder
Ingredients
- 4 cups powdered sugar about 1 lb / 450 g, sifted
- 3 tablespoons meringue powder
- 6-8 tablespoons warm water start with 6 tablespoons, then add more a teaspoon at a time as needed
- 1 teaspoon pure vanilla extract use clear vanilla for bright white icing
- 1/4 teaspoon almond extract optional; omit for nut-free
- 1/8 teaspoon fine salt optional, to slightly cut sweetness
- 1-2 teaspoons light corn syrup optional, for extra shine and slightly softer bite
- gel food coloring as needed, any desired colors
Instructions
- Sift the powdered sugar into a large bowl to remove any lumps. Measure out the meringue powder, warm water, vanilla, almond extract (if using), and salt (if using).4 cups powdered sugar, 3 tablespoons meringue powder, 6-8 tablespoons warm water, 1 teaspoon pure vanilla extract, 1/4 teaspoon almond extract, 1/8 teaspoon fine salt
- In the bowl of a stand mixer (or a large mixing bowl for a hand mixer), whisk together the sifted powdered sugar and meringue powder on low speed for a few seconds to distribute the meringue powder evenly.4 cups powdered sugar, 3 tablespoons meringue powder
- With the mixer on low, slowly add 6 tablespoons of warm water along with the vanilla and any other extracts you are using. Mix on low until the mixture looks thick and clumpy, then begins to smooth out, scraping down the sides of the bowl as needed.6-8 tablespoons warm water, 1 teaspoon pure vanilla extract, 1/4 teaspoon almond extract
- Increase the mixer speed to medium-high and beat for 5–7 minutes (closer to 7 minutes with a hand mixer), until the icing is thick, glossy, and holds stiff peaks that stand upright when the beater is lifted. If the icing is still droopy, beat longer or add 2–3 tablespoons more powdered sugar.4 cups powdered sugar
- For outlines and details, transfer some of the stiff icing to a bowl. Add warm water 1/2 teaspoon at a time, stirring gently with a spatula, until the icing flows smoothly but still holds its shape. A line drawn through the icing should very slowly melt back together in about 15–20 seconds.6-8 tablespoons warm water
- For flooding cookies, place some icing in another bowl. Add warm water a tiny bit at a time (start with 1/2 teaspoon), stirring gently, until a ribbon of icing dropped from a spoon smooths out in about 10–12 seconds. If the icing becomes too thin and runny, thicken it by stirring in powdered sugar a tablespoon at a time.4 cups powdered sugar, 6-8 tablespoons warm water
- If you’d like extra shine and a slightly softer bite, stir 1–2 teaspoons of light corn syrup into the prepared icing until fully combined.1-2 teaspoons light corn syrup
- Divide the icing into separate bowls for each color and consistency you need. Keep any icing you’re not working with covered with plastic wrap touching the surface to prevent crusting. Add gel food coloring a few drops at a time, stirring until you reach the desired shade, stopping just shy of the final color since it will deepen as it sits.gel food coloring
- Transfer the icing to piping bags fitted with small round tips (or use tipless bags). Decorate cookies or gingerbread as desired. Let the decorated cookies dry at room temperature for 6–12 hours, or overnight, until the surface is fully dry and no longer tacky before stacking or packaging.
- For short-term use, keep icing covered at room temperature with plastic wrap touching the surface for up to 8 hours, or refrigerate in an airtight container (with plastic wrap on the surface) for up to 1 week. For longer storage, freeze in airtight containers or zip-top bags (labeling color and consistency) for up to 1 month. Thaw overnight in the refrigerator, bring to room temperature, then stir gently and adjust with a little water or powdered sugar if needed.