Would you like to save this?
Red White & Blue Dump Cake Recipe
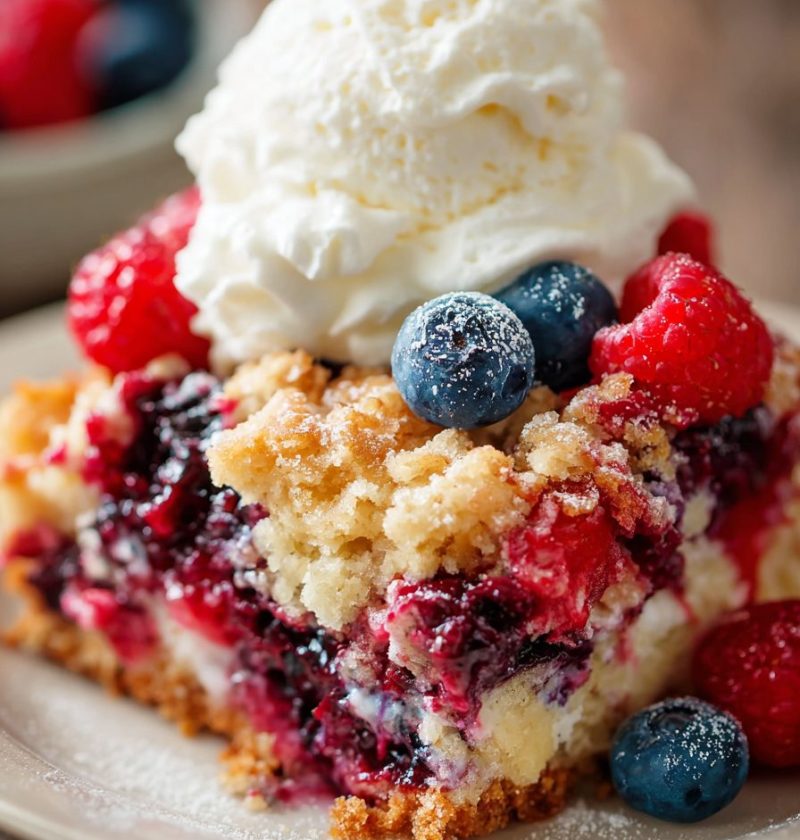
If you’re hunting for a no-fuss, crowd-pleasing Fourth of July dessert, this Red White & Blue Dump Cake Recipe is your new party trick—layered fruit, buttery cake mix, and a sweet “flag-colored” finish with almost zero effort.
Full Recipe Introduction
A dump cake is one of those old-school American desserts that makes you shake your head and smile—because it really is as easy as “dump, bake, and enjoy.”
This Red White & Blue Dump Cake Recipe takes that classic idea and turns it into the perfect patriotic dump Cake Recipe. Think cherry and blueberry pie fillings for the red and blue, a tender white cake mix on top, and a rich buttery crust that forms all by itself as it bakes. It’s a red white blue dump cake that tastes like a cobbler and a cake had a very festive baby.
I make this every year for summer holiday dessert tables—Memorial Day, Fourth of July, Labor Day, and honestly, any backyard cookout where someone brings a flag tablecloth and a cooler of sweet tea. My kids grew up knowing that when the fireworks came out, the cherry blueberry dump cake wasn’t far behind.
Is it healthy? Let’s be honest: this is a treat. But you can lighten it up a bit with lower-sugar pie filling, a lighter cake mix, and less butter. I’ll share those tweaks below. Even with a few smart swaps, you still get a cozy, buttery, festive party dessert that feels special without feeling fussy.
And the best part? You don’t need any cake decorating skills or fancy tools. If you can open a can and melt butter, you can make this easy dump cake recipe.

Why You’ll Love This Red White & Blue Dump Cake Recipe
- Ridiculously easy. No mixer, no frosting, no layering—just dump, spread, and bake.
- Perfect patriotic colors. The cherries and blueberries give you that red white blue dessert look without food coloring.
- Feeds a crowd. Bakes in a 9×13 pan, so it’s party-ready for cookouts, potlucks, and fireworks nights.
- Flexible and forgiving. Use different pie fillings, cake flavors, or even gluten-free mix, and it still works.
- Budget-friendly ingredients. Canned pie filling and cake mix are easy to find and often on sale around summer holidays.
- Kid-helper friendly. Kids can help layer the fruit and sprinkle the cake mix; it’s almost impossible to mess up.
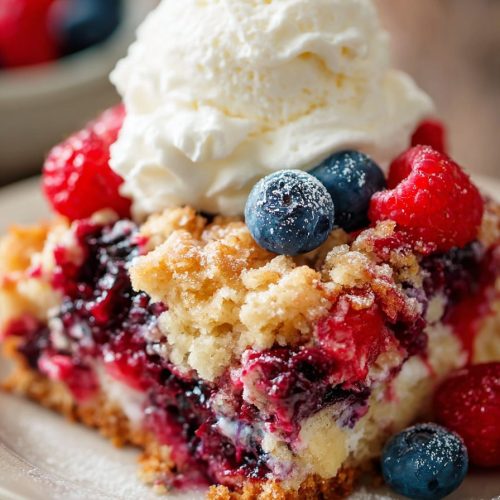
- Tastes amazing warm. Serve it fresh from the oven with vanilla ice cream for that classic summer holiday dessert moment.
- Great make-ahead dessert. Bake earlier in the day and gently rewarm before serving—no last-minute stress.
- Looks festive with no decorating. The fruit peeking through and the golden topping look farm-stand rustic and party-ready.
Ingredients
This layered fruit dump cake is built on pantry staples, but I’ll give you a few notes so you can tweak it to your taste.
For a 9×13 pan (about 12 servings):
- 2 cans (21 oz each) cherry pie filling
- Look for “extra fruit” or “less sugar” versions if you prefer.
- 1 can (21 oz) blueberry pie filling
- You can also use mixed berry pie filling for a twist.
- 1 box (15.25 oz) white cake mix
- Any brand works—Betty Crocker, Duncan Hines, or store brand. Yellow cake mix also works if that’s what you have.
- 1 cup (2 sticks minus 2 tablespoons) unsalted butter, melted
- Salted butter is fine too; just skip any added salt.
- ½ cup white chocolate chips (for the “white” and a creamy bite; can use mini marshmallows instead)
- 1 teaspoon vanilla extract (adds a little bakery-style flavor)
- ¼ teaspoon almond extract (optional, but lovely with cherry)
- Pinch of salt (helps balance the sweetness)
- Nonstick spray or butter for the baking dish
Optional for serving:
- Vanilla ice cream
- Whipped cream
- Fresh berries (strawberries, raspberries, blueberries) for extra color
Ingredient Tips:
- Pie filling: Canned pie filling keeps this truly “dump and go,” but you can mix 2 cups fresh berries with ½ cup sugar and 2 tablespoons cornstarch for each “can” if you like a more homemade touch.
- Cake mix: If you need gluten-free, grab a gluten-free white or yellow cake mix and use it exactly the same way.
- Butter: Melt it gently so it doesn’t separate. I like to melt about ¾ of it, then stir in the remaining butter so it cools slightly and stays rich.
Directions
Follow these simple steps and you’ll have a quick patriotic cake that smells like a small-town bakery and tastes like a warm hug.
-
Preheat your oven.
Set your oven to 350°F (175°C). Give it a good 10 minutes to preheat so the topping bakes evenly. -
Prepare your pan.
Lightly grease a 9×13-inch baking dish with nonstick spray or a thin coat of butter. This helps the corners release easily and keeps cleanup simple. -
Layer the cherry filling.
Spoon the cherry pie filling into the bottom of the baking dish. Spread it into an even layer with a spatula, all the way to the edges. This is your “red” stripe. -
Add the blueberry layer.
Spoon the blueberry pie filling on top of the cherries, focusing mostly down the center or in scattered patches—this gives you pretty pockets of “blue” when you scoop. You can spread it fully or leave it a bit rustic; both work. -
Flavor the fruit (optional but tasty).
Drizzle the vanilla and almond extract over the fruit and sprinkle on the pinch of salt. It doesn’t have to be perfect; it all bakes together. -
Sprinkle on the cake mix.
Open the white cake mix and sprinkle it evenly over the fruit in a loose, fluffy layer. Don’t stir. You want a dry, even blanket of mix over the entire surface—use your hands to break up any big clumps. -
Add the butter.
Slowly pour the melted butter over the cake mix, trying to cover as much of the surface as you can. It’s okay if there are a few dry spots, but more coverage means a more even golden crust. -
Top with “white” accents.
Sprinkle the white chocolate chips evenly over the top (or mini marshmallows if you prefer). They’ll melt a bit and give you that creamy “white” contrast. -
Bake.
Place the pan in the preheated oven and bake for 40–50 minutes. You’re looking for a deep golden-brown top with bubbly fruit peeking up around the edges. If the top is getting too brown before the center looks set, tent it loosely with foil for the last 10 minutes. -
Cool slightly and serve.
Let the red white blue dump cake rest for about 10–15 minutes. It will thicken as it cools but is best served warm. Scoop into bowls and top with ice cream or whipped cream if you like.
Servings & Timing
- Yield: About 12 servings
- Prep Time: 10 minutes
- Bake Time: 40–50 minutes
- Rest Time: 10–15 minutes
- Total Time: About 1 hour
For a busy summer gathering, I like to bake it right before guests arrive so it’s still warm when dessert time rolls around.
Variations
Once you’ve made this version, you’ll see how easy it is to play with flavors.
- Strawberry-Blueberry Version: Swap one can of cherry pie filling for strawberry pie filling for a softer, berry-sweet red layer.
- Triple Berry Patriotic Dump Cake: Use one can cherry, one can blueberry, and one can mixed berry pie filling for extra color and tartness.
- Gluten-Free Red White Blue Dessert: Use a gluten-free vanilla or white cake mix and check that your pie fillings are labeled gluten-free.
- Dairy-Free Twist: Use a dairy-free margarine or coconut oil instead of butter and skip the white chocolate chips (use marshmallows labeled dairy-free if needed).
- Slow Cooker Version: Layer everything in a greased slow cooker and cook on HIGH for 2½–3 hours, until the top is set and the edges are bubbly.
- Individual Party Servings: Assemble in small mason jars or ramekins and bake on a sheet pan—perfect for portion-controlled festive party dessert cups.
Storage & Reheating
This Red White & Blue Dump Cake Recipe is wonderful fresh, but it stores nicely too.
- Room Temperature: If your kitchen is cool, you can keep it loosely covered at room temperature for up to 8 hours the day you bake it.
- Refrigerator: For longer storage, cover the pan tightly with foil or transfer leftovers to airtight containers and refrigerate for up to 4 days.
- Freezer: Freeze individual portions in freezer-safe containers for up to 2 months. Label with the date so you remember what it is—frozen desserts love to hide behind the peas.
Reheating:
- Single servings: Microwave on medium power for 30–45 seconds until warm but not boiling hot.
- Larger amounts: Cover the pan with foil and warm in a 325°F oven for 15–20 minutes, or until heated through.
Make-Ahead Tip:
You can assemble the fruit and cake mix layers a few hours ahead, keep the pan covered in the fridge, then add melted butter and bake closer to serving time. This keeps the topping from getting soggy.
Notes
After testing this recipe a few different ways, here are the little lessons that made the biggest difference:
- Don’t stir the layers. It’s tempting, but stirring muddies the texture. Keeping the fruit on the bottom and the dry cake mix on top is what gives you that cobbler-meets-cake crust.
- More butter = more crust. If you like a thicker, crunchier topping, use the full 1 cup of butter. If you prefer it lighter and more cakey, you can use ¾ cup.
- Watch the corners. The corners brown faster, which some folks (like my husband) absolutely love. If you don’t, just scoop more from the center.
- Let it rest a bit. Giving the cake 10–15 minutes to settle makes the scoops neater and the texture more spoonable instead of soupy.
- Make it extra “white.” For a really bold red white blue dessert look, top with whipped cream and a few white chocolate curls right before serving.
- Ice cream is your friend. A simple vanilla ice cream or frozen yogurt balances all that sweet fruit and buttery cake so nicely.
FAQs
Can I use fresh fruit instead of canned pie filling?
Yes, but you’ll need to sweeten and thicken it. For each “can,” mix about 2 cups berries with ½ cup sugar and 2 tablespoons cornstarch, then use as directed.
Can I use yellow cake mix instead of white?
Absolutely. Yellow cake mix gives a richer, more buttery flavor. You’ll lose a bit of the “white” theme, but it still makes a wonderful patriotic dump cake recipe.
Why is some of my cake mix still powdery on top?
That usually means there wasn’t quite enough butter in that spot. You can gently press those dry areas into the fruit with a spoon right out of the oven, or drizzle a tablespoon or two of melted butter over them during baking.
Do I need to refrigerate leftovers?
Yes, after the first few hours, store leftovers covered in the fridge. The fruit layer is perishable, and chilling also helps the texture.
Can I halve the recipe?
Yes—use an 8×8 or 9×9 pan, 1 can cherry filling, 1 can blueberry filling, about half a box of cake mix, and ½ cup (1 stick) butter. Watch the bake time; it may be closer to 35–40 minutes.
Can I make this Red White & Blue Dump Cake Recipe ahead for a party?
You can bake it earlier in the day, cool it, and reheat gently before serving. Or assemble without the butter, chill, and add the melted butter just before baking.
Is this good without ice cream?
It is! The cake and fruit are sweet and rich on their own, but a spoonful of whipped cream or a dollop of Greek yogurt adds a nice creamy contrast.
Can I make this in a slow cooker for a potluck?
Yes—layer the ingredients in a greased slow cooker and cook on HIGH for 2½–3 hours. Serve straight from the pot on “warm” to keep it cozy through the party.
Conclusion
This Red White & Blue Dump Cake Recipe is everything I love about summer desserts—simple ingredients, big flavor, and a festive look that doesn’t require a pastry degree. With its layers of cherry and blueberry fruit, buttery cake topping, and easy assembly, it’s the kind of fourth of july dessert you’ll make once and then keep in your back pocket for every cookout.
Give it a try for your next summer gathering, then come back and tell me how it went—what fruit you used, how your family liked it, and whether there were any leftovers at all. And if you enjoy easy dump cake recipes like this, you might also enjoy exploring more cherry blueberry desserts, cobblers, and other quick patriotic cakes on my site.
Red White & Blue Dump Cake
Ingredients
- 2 cans (21 oz each) cherry pie filling use “extra fruit” or “less sugar” if preferred
- 1 can (21 oz) blueberry pie filling or mixed berry pie filling
- 1 box (15.25 oz) white cake mix any brand; yellow cake mix also works
- 1 cup unsalted butter melted; about 2 sticks minus 2 tablespoons; salted butter is fine
- 1/2 cup white chocolate chips or mini marshmallows
- 1 teaspoon vanilla extract
- 1/4 teaspoon almond extract optional, but lovely with cherry
- pinch salt to balance sweetness
- Nonstick spray or butter for greasing the baking dish
- Vanilla ice cream optional, for serving
- Whipped cream optional, for serving
- Fresh berries such as strawberries, raspberries, and blueberries, optional for serving
Instructions
- Preheat your oven to 350°F (175°C). Allow it to heat for about 10 minutes so the topping bakes evenly.
- Lightly grease a 9x13-inch baking dish with nonstick spray or a thin coat of butter to help with easy release and cleanup.Nonstick spray or butter
- Spoon the cherry pie filling into the bottom of the prepared baking dish. Spread it into an even layer all the way to the edges to form the red base.2 cans (21 oz each) cherry pie filling
- Spoon the blueberry pie filling over the cherries, focusing mostly down the center or in scattered patches to create pockets of blue. You can spread it fully or leave it rustic.1 can (21 oz) blueberry pie filling
- Drizzle the vanilla extract and almond extract (if using) over the fruit layers and sprinkle on a pinch of salt. Do not stir; it will all bake together.1 teaspoon vanilla extract, 1/4 teaspoon almond extract, pinch salt
- Sprinkle the dry white cake mix evenly over the fruit in a loose, fluffy layer. Do not stir. Use your hands to break up any large clumps so the surface is evenly covered.1 box (15.25 oz) white cake mix
- Slowly pour the melted butter over the cake mix, trying to cover as much of the surface as possible. A few dry spots are fine, but more coverage gives a more even golden crust.1 cup unsalted butter
- Sprinkle the white chocolate chips (or mini marshmallows) evenly over the top. They will melt slightly and create creamy white accents.1/2 cup white chocolate chips
- Bake in the preheated oven for 40–50 minutes, until the top is deep golden brown and the fruit is bubbly around the edges. If the top browns too quickly, tent loosely with foil for the last 10 minutes.
- Let the cake rest for 10–15 minutes to thicken and set. Serve warm in bowls, topped with vanilla ice cream, whipped cream, and fresh berries if desired.Vanilla ice cream, Whipped cream, Fresh berries