Would you like to save this?
Recipe With Lemon Curd
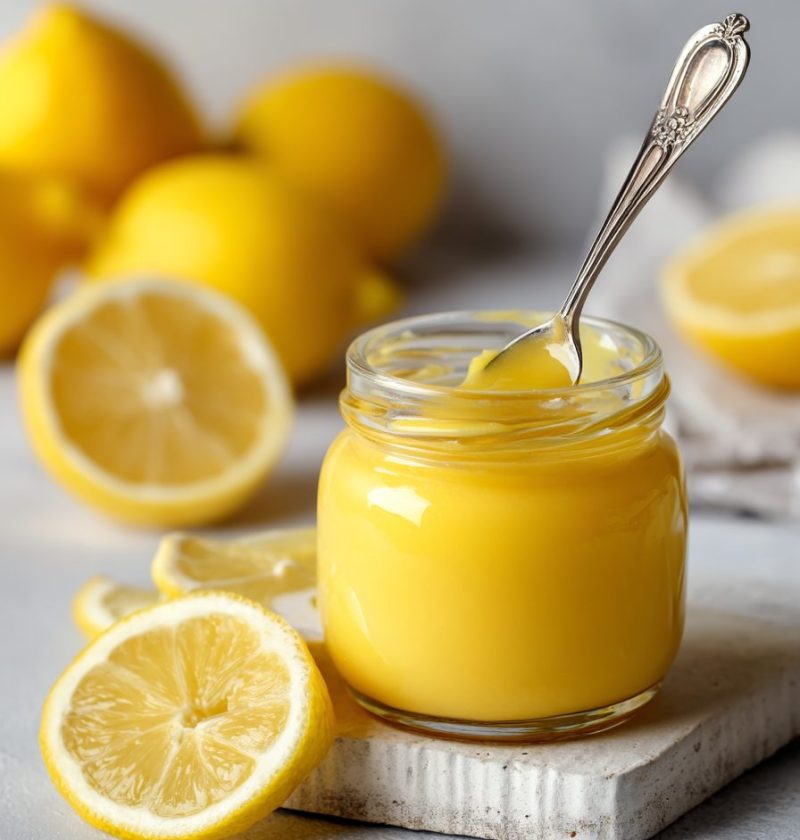
If you love bright, sunshine-on-a-spoon flavors, this recipe with lemon curd is about to be your new favorite way to sweeten breakfast, dessert, and everything in between.
A Cozy Introduction to My Favorite Recipe With Lemon Curd
Lemon curd is one of those things that sounds fancy, like something only a pastry chef in a white jacket should tackle—but I promise you, this homemade lemon curd is easy, reliable, and absolutely gorgeous. It’s creamy, tangy, and silky, with that perfect balance of sweet and tart that wakes up your taste buds.
I’ve been baking for a long time (50 years and counting on this planet, plenty of them spent in the kitchen), and I can tell you: a good lemon curd recipe is a secret weapon. This simple recipe with lemon curd can become a dessert, a filling, a topping, or even a brunch star. I spoon it over Greek yogurt, layer it in parfaits, swirl it into lemon curd cheesecake, spread it on scones, and yes—eat it by the spoonful when nobody’s looking.
What makes this one special? We’re using fresh lemons, real butter, and whole eggs for a luscious texture—no shortcuts, no neon-yellow jar flavor. It’s a classic lemon curd that also happens to be flexible enough for lemon curd bars, lemon curd tartlets, lemon curd cake, and just about any lemon curd dessert you can dream up.
And here’s a bonus: this recipe is naturally gluten-free, and you can easily adjust the sweetness, the tang, and even the richness depending on how you like your creamy lemon curd.
Why You’ll Love This Recipe With Lemon Curd
- Bright, tangy flavor that tastes like real lemons—not artificial lemon candy.
- Smooth, creamy texture that works as a lemon curd filling, topping, or spread.
- Ready in about 20 minutes, plus a little chilling time.
- Uses simple pantry and fridge staples—eggs, sugar, lemons, butter.
- Perfect for make-ahead desserts like lemon curd tart, trifle, and parfait.
- Versatile enough for brunch (hello, lemon curd pancakes and waffles) or dessert.
- Scales up easily if you want to gift jars during the holidays or spring events.
- Much better (and usually cheaper) than store-bought lemon curd.
- Reliable, no-fuss method with clear sensory cues, so you know when it’s done.
Ingredients for the Best Homemade Lemon Curd
For this recipe with lemon curd, we’re keeping the ingredient list short but paying attention to quality. Fresh lemons are non‑negotiable here.
-
4 large eggs
- (Use fresh, cold eggs; they help the curd thicken properly. You can use 3 whole eggs + 2 yolks for extra richness if you like.)
-
1 cup (200 g) granulated sugar
- (Regular white sugar works best; superfine sugar dissolves a bit faster if you have it.)
-
2/3 cup (160 ml) freshly squeezed lemon juice
- About 3–4 medium lemons. Use real lemons, not bottled juice—the flavor difference is huge.
-
2 tablespoons finely grated lemon zest
- Zest the lemons before you juice them. A microplane makes this easy and gives you fine zest that disappears into the curd.
-
1/2 cup (113 g) unsalted butter, cut into small cubes
- Room temperature or slightly cool is fine. Unsalted gives you more control over the flavor.
-
Pinch of fine sea salt
- Just a pinch balances the sweetness and brings out that tangy lemon flavor.
Optional Add‑Ins (Choose 0–2):
- 1 teaspoon pure vanilla extract – for a softer, more dessert‑like flavor.
- 1–2 tablespoons heavy cream – stirred in at the end, for extra silky, rich lemon curd.
Substitution Tips
- Meyer lemons: Use Meyer lemons for a milder, slightly floral flavor; reduce sugar by about 2 tablespoons since Meyer lemons are sweeter.
- Dairy-free: Replace butter with vegan butter sticks (not spread) for a dairy-free lemon curd; texture will be slightly softer but still lovely.
- Less sweet / more tangy: Reduce sugar to 3/4 cup (150 g) if you prefer a sharper, more tangy lemon curd.

Step‑by‑Step Directions (So Your Lemon Curd Never Scrambles)
-
Set up your tools first
Grab a medium, heavy‑bottomed saucepan, a whisk, a heatproof spatula, and a fine‑mesh strainer. Place a clean glass or ceramic bowl near the stove, and set the strainer over it. This makes it easy to pour and strain the lemon curd as soon as it’s done. -
Whisk together eggs and sugar
In the saucepan (off the heat), whisk the eggs and sugar together until the mixture is smooth, pale, and slightly thickened—about 1–2 minutes. This helps dissolve the sugar and prevents clumping. -
Add lemon juice, zest, and salt
Pour in the lemon juice, add the lemon zest and a pinch of sea salt, and whisk until everything is fully combined. The mixture will look thin at this point—totally normal. -
Cook gently over medium‑low heat
Place the pan over medium‑low heat. Stir constantly with your whisk or a heatproof spatula, making sure to scrape the bottom and corners of the pan. You want gentle, steady heat; if it starts to bubble more than a few tiny bubbles around the edges, turn the heat down.- Visual cue: As it cooks, the mixture will gradually thicken and turn glossy.
-
Check for doneness (the spoon test)
After 8–12 minutes, the lemon curd should be thick enough to coat the back of a spoon. If you run your finger across the spoon, it should leave a clean line. It should read about 170–175°F (77–80°C) on an instant‑read thermometer, but don’t stress if you don’t have one—just use that spoon test. -
Remove from heat and add butter
Take the pan off the heat and immediately add the cubed butter (and vanilla, if using). Stir until the butter has completely melted and the curd looks silky and smooth. This step also cools the mixture slightly and gives it that creamy lemon curd texture. -
Strain for extra-smooth lemon curd
Pour the hot lemon curd through the fine‑mesh strainer into your prepared bowl. Use a spatula to press it through. This catches any tiny bits of cooked egg and zest, leaving you with a perfectly smooth lemon curd spread. -
Optional: Stir in heavy cream
If you want a richer, dessert‑style lemon curd for things like lemon curd tart, lemon curd cheesecake, or lemon curd frosting, stir in 1–2 tablespoons of heavy cream while the curd is still warm. -
Cool and chill
Press a piece of plastic wrap or parchment directly onto the surface of the curd to prevent a skin from forming. Let it cool at room temperature for about 30 minutes, then refrigerate for at least 2 hours, or until fully chilled and thickened. -
Serve, swirl, or spoon on everything
Once chilled, your lemon curd is ready to be used as a lemon curd filling for cakes, tarts, cookies, pastries, or as a lemon curd topping on pancakes, waffles, yogurt, and ice cream. Give it a quick stir before using.
Servings & Timing
- Yield: About 2 cups of lemon curd (enough to fill one 9‑inch tart, layer a cake, or serve 6–8 as a dessert topping)
- Prep Time: 10 minutes (zesting, juicing, and whisking)
- Cook Time: 10–12 minutes on the stove
- Chill Time: 2 hours
- Total Time: About 2 hours 30 minutes, most of it hands‑off while it chills
Fun Ways to Use This Recipe With Lemon Curd (Variations)
You know what? This is where it gets really fun. Once you’ve got a batch of this creamy lemon curd, you can turn it into a dozen different desserts without much extra work.
- Lemon Curd Parfait: Layer lemon curd with Greek yogurt and granola in glasses for a quick lemon curd parfait breakfast or light dessert.
- Lemon Curd Trifle: Cube pound cake or angel food cake, then layer it with lemon curd and whipped cream in a trifle dish.
- Lemon Curd Bars: Spread the lemon curd over a baked shortbread crust, then bake briefly until just set and chill for lemon curd bars.
- Lemon Curd Cake Filling: Use it as a lemon curd filling between layers of vanilla, coconut, or lemon cake, then frost with whipped cream or cream cheese frosting.
- Lemon Curd Cookies and Tartlets: Spoon into thumbprint cookies or baked mini tart shells for easy lemon curd cookies or lemon curd tartlets.
- Brunch Boosters: Serve warm or room‑temperature lemon curd over lemon curd pancakes, waffles, scones, muffins, or yogurt for a bright lemon curd brunch spread.
Storage & Make‑Ahead Tips
One of the things I love about this recipe with lemon curd is that it keeps so well, which makes it a smart make‑ahead option for busy weeks or special occasions.
- Fridge: Store lemon curd in an airtight glass jar or container for 1–2 weeks. Press plastic wrap on the surface before sealing if you’re worried about a skin forming.
- Freezer: Lemon curd freezes beautifully. Freeze in small jars or containers (leave a little space at the top) for up to 3 months. Thaw overnight in the fridge and stir well before using.
- Make‑Ahead for Events: Make the curd up to 3–4 days before you need it for lemon curd cake, pie, or tart. Keep it chilled; give it a good stir on the day you assemble your dessert.
- Reheating / Softening: If your lemon curd is very thick from the fridge, let it sit at room temperature for 10–15 minutes, or warm it gently in a heatproof bowl set over a pot of warm water, stirring until loosened.
Notes from My Kitchen (What I’ve Learned Over the Years)
- Low and slow heat is everything. The number one reason lemon curd scrambles is heat that’s too high. If you’re nervous, err on the side of lower heat; it may just take a couple extra minutes.
- Trust the spoon test more than the clock. Stoves vary a lot. I’ve had gas stoves that cook this in 7 minutes and electric ones that need 12. As soon as it coats the back of a spoon and holds that line, you’re set.
- Strain even if you think you don’t need it. I know it feels like an extra step, but that quick strain is the difference between “good lemon curd” and “wow, did you buy this from a French bakery?”
- Adjust sugar for how you plan to use it. If I’m making lemon curd pie or tart, I sometimes like it slightly tangier. For lemon curd yogurt or ice cream, I keep the full amount of sugar.
- Use fresh lemons, always. Bottled lemon juice has preservatives and a dull flavor. Fresh juice is brighter, cleaner, and really makes this the best lemon curd you can make at home.
- Zest before juicing. I know it seems obvious, but it’s easy to forget—zesting already‑juiced lemon halves is basically a workout.
FAQs About This Recipe With Lemon Curd
1. Why did my lemon curd turn out runny?
It probably didn’t cook quite long enough. Next time, cook until it fully coats the back of a spoon and leaves a clean line, or use a thermometer and reach about 170–175°F (77–80°C).
2. Can I fix lemon curd that’s too thin?
Yes—return it to the saucepan and cook over low heat, stirring constantly, for a few more minutes until it thickens. Don’t boil it hard, or it may curdle.
3. Why does my lemon curd taste eggy?
This usually happens if it overheats or boils too hard. Straining helps, and adding a bit of vanilla at the end softens any eggy notes.
4. Can I make lemon curd without butter?
You can, but it’ll be less rich and creamy. For a lighter, more tangy lemon curd, you can reduce or skip the butter, though I recommend keeping at least a few tablespoons.
5. Is lemon curd safe to can?
Home canning lemon curd is tricky and not recommended without tested recipes and proper procedures, because of the eggs and butter. I prefer to refrigerate or freeze it instead.
6. Can I use this lemon curd as a pie or tart filling?
Absolutely. For a lemon curd tart or pie, fill a fully baked crust with chilled lemon curd, then refrigerate until set; you can top it with whipped cream or berries.
7. How do I make lemon curd frosting?
Beat softened butter with powdered sugar, then gradually mix in cooled lemon curd until you reach a spreadable consistency—perfect for lemon curd cake or cupcakes.
8. Is this recipe gluten-free?
Yes, this classic lemon curd is naturally gluten-free, as it’s made with eggs, sugar, lemon, and butter. Just pair it with gluten-free crusts or bases if needed.
Bringing It All Together
This simple, homemade recipe with lemon curd gives you a bright, creamy, tangy spread that can turn everyday breakfasts into something special and make quick work of elegant desserts. Whether you’re spooning it over lemon curd scones for a slow Sunday brunch, layering it in a lemon curd trifle for a party, or swirling it into yogurt for a weekday treat, it’s one of those recipes that always feels like a little burst of sunshine.
If you make this lemon curd recipe, I’d love to hear how you used it—did it end up in lemon curd muffins, cookies, pie, or just on a spoon straight from the jar? Leave a comment, share a photo, and if you’re in a lemon mood, explore more citrus recipes next.
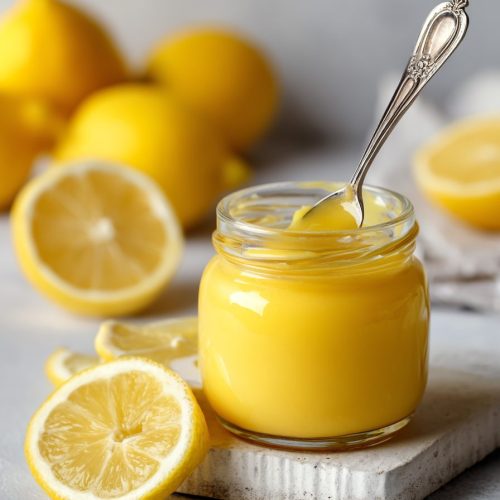
Homemade Lemon Curd
Ingredients
- 4 large eggs fresh, cold; or use 3 whole eggs + 2 yolks for extra richness
- 1 cup granulated sugar about 200 g; regular white sugar or superfine
- 2/3 cup freshly squeezed lemon juice about 3–4 medium lemons; use fresh, not bottled
- 2 tablespoons finely grated lemon zest zest lemons before juicing; use a microplane for fine zest
- 1/2 cup unsalted butter about 113 g; cut into small cubes, room temperature or slightly cool
- fine sea salt pinch, to taste
- 1 teaspoon pure vanilla extract optional, for a softer dessert-like flavor
- 1-2 tablespoons heavy cream optional, stirred in at the end for extra silkiness
Instructions
- Set out a medium heavy‑bottomed saucepan, a whisk, a heatproof spatula, and a fine‑mesh strainer. Place a clean glass or ceramic bowl near the stove and set the strainer over it so it’s ready for straining the curd as soon as it’s done.
- In the saucepan off the heat, whisk the eggs and granulated sugar together until the mixture is smooth, pale, and slightly thickened, about 1–2 minutes. This helps dissolve the sugar and prevents clumping.4 large eggs, 1 cup granulated sugar
- Whisk in the freshly squeezed lemon juice, finely grated lemon zest, and a pinch of fine sea salt until fully combined. The mixture will be thin at this stage.2/3 cup freshly squeezed lemon juice, 2 tablespoons finely grated lemon zest, fine sea salt
- Place the saucepan over medium‑low heat. Cook, stirring constantly with a whisk or heatproof spatula and scraping the bottom and corners of the pan. Maintain gentle heat; if it starts bubbling more than a few tiny bubbles around the edges, lower the heat. The mixture will gradually thicken and become glossy.
- After about 8–12 minutes, the lemon curd should be thick enough to coat the back of a spoon. Run a finger across the coated spoon; it should leave a clean line. If using a thermometer, the curd should read about 170–175°F (77–80°C).
- Remove the saucepan from the heat and immediately add the cubed unsalted butter and vanilla extract, if using. Stir until the butter is completely melted and the curd is silky and smooth.1/2 cup unsalted butter, 1 teaspoon pure vanilla extract
- Pour the hot lemon curd through the prepared fine‑mesh strainer into the clean bowl. Use a spatula to press it through, leaving behind any bits of cooked egg or zest for an extra‑smooth texture.
- For a richer, dessert‑style lemon curd, stir in 1–2 tablespoons of heavy cream while the curd is still warm and smooth.1-2 tablespoons heavy cream
- Press a piece of plastic wrap or parchment directly onto the surface of the curd to prevent a skin from forming. Let cool at room temperature for about 30 minutes, then refrigerate for at least 2 hours, or until fully chilled and thickened.
- Once chilled, stir the lemon curd to loosen it slightly. Use as a filling for cakes, tarts, cookies, and pastries, or as a topping for pancakes, waffles, scones, yogurt, or ice cream.
Notes
- Meyer lemons: Use Meyer lemons for a milder, floral flavor; reduce sugar by about 2 tablespoons since they’re sweeter.
- Dairy‑free: Substitute vegan butter sticks for the butter for a dairy‑free version (texture will be slightly softer).
- Less sweet / more tangy: Reduce sugar to 3/4 cup (150 g) for a sharper, more tangy curd. Storage:
- Fridge: Store in an airtight glass jar for 1–2 weeks. Press plastic wrap onto the surface before sealing if you’re concerned about a skin forming.
- Freezer: Freeze in small jars or containers for up to 3 months, leaving headspace. Thaw overnight in the fridge and stir well before using.
- Make‑ahead: Prepare 3–4 days in advance for pies, tarts, or cakes; keep chilled and stir before using. Tips:
- Keep the heat low and steady to avoid scrambling the eggs.
- Trust the spoon test more than the clock; stoves vary.
- Straining is highly recommended for the smoothest texture.
- Always zest lemons before juicing, and use fresh juice rather than bottled for the best flavor. FAQs (summary):
- Runny curd usually means undercooking; return to low heat and cook longer until it passes the spoon test.
- Eggy flavor usually comes from overheating; straining and a bit of vanilla help.
- This recipe is naturally gluten‑free.
- Not recommended for home canning; refrigerate or freeze instead.