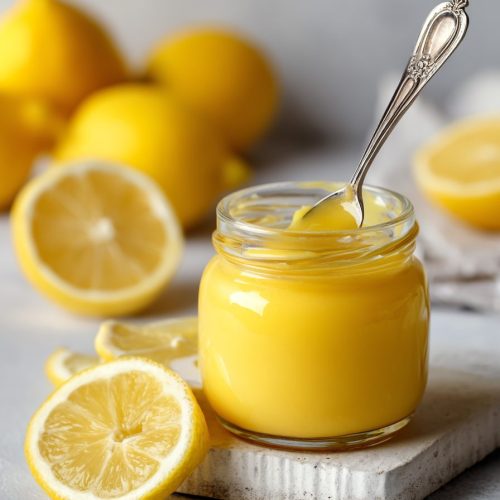
Homemade Lemon Curd
This homemade lemon curd is bright, tangy, and silky-smooth—perfect as a filling, topping, or spread for breakfasts and desserts alike. Made with fresh lemons, eggs, sugar, and butter, it comes together in about 20 minutes on the stove plus chilling time.
Ingredients
- 4 large eggs fresh, cold; or use 3 whole eggs + 2 yolks for extra richness
- 1 cup granulated sugar about 200 g; regular white sugar or superfine
- 2/3 cup freshly squeezed lemon juice about 3–4 medium lemons; use fresh, not bottled
- 2 tablespoons finely grated lemon zest zest lemons before juicing; use a microplane for fine zest
- 1/2 cup unsalted butter about 113 g; cut into small cubes, room temperature or slightly cool
- fine sea salt pinch, to taste
- 1 teaspoon pure vanilla extract optional, for a softer dessert-like flavor
- 1-2 tablespoons heavy cream optional, stirred in at the end for extra silkiness
Instructions
- Set out a medium heavy‑bottomed saucepan, a whisk, a heatproof spatula, and a fine‑mesh strainer. Place a clean glass or ceramic bowl near the stove and set the strainer over it so it’s ready for straining the curd as soon as it’s done.
- In the saucepan off the heat, whisk the eggs and granulated sugar together until the mixture is smooth, pale, and slightly thickened, about 1–2 minutes. This helps dissolve the sugar and prevents clumping.4 large eggs, 1 cup granulated sugar
- Whisk in the freshly squeezed lemon juice, finely grated lemon zest, and a pinch of fine sea salt until fully combined. The mixture will be thin at this stage.2/3 cup freshly squeezed lemon juice, 2 tablespoons finely grated lemon zest, fine sea salt
- Place the saucepan over medium‑low heat. Cook, stirring constantly with a whisk or heatproof spatula and scraping the bottom and corners of the pan. Maintain gentle heat; if it starts bubbling more than a few tiny bubbles around the edges, lower the heat. The mixture will gradually thicken and become glossy.
- After about 8–12 minutes, the lemon curd should be thick enough to coat the back of a spoon. Run a finger across the coated spoon; it should leave a clean line. If using a thermometer, the curd should read about 170–175°F (77–80°C).
- Remove the saucepan from the heat and immediately add the cubed unsalted butter and vanilla extract, if using. Stir until the butter is completely melted and the curd is silky and smooth.1/2 cup unsalted butter, 1 teaspoon pure vanilla extract
- Pour the hot lemon curd through the prepared fine‑mesh strainer into the clean bowl. Use a spatula to press it through, leaving behind any bits of cooked egg or zest for an extra‑smooth texture.
- For a richer, dessert‑style lemon curd, stir in 1–2 tablespoons of heavy cream while the curd is still warm and smooth.1-2 tablespoons heavy cream
- Press a piece of plastic wrap or parchment directly onto the surface of the curd to prevent a skin from forming. Let cool at room temperature for about 30 minutes, then refrigerate for at least 2 hours, or until fully chilled and thickened.
- Once chilled, stir the lemon curd to loosen it slightly. Use as a filling for cakes, tarts, cookies, and pastries, or as a topping for pancakes, waffles, scones, yogurt, or ice cream.
Notes
Yield: about 2 cups of lemon curd, enough to fill one 9‑inch tart, layer a cake, or serve 6–8 as a dessert topping.
Substitution tips:
- Meyer lemons: Use Meyer lemons for a milder, floral flavor; reduce sugar by about 2 tablespoons since they’re sweeter.
- Dairy‑free: Substitute vegan butter sticks for the butter for a dairy‑free version (texture will be slightly softer).
- Less sweet / more tangy: Reduce sugar to 3/4 cup (150 g) for a sharper, more tangy curd. Storage:
- Fridge: Store in an airtight glass jar for 1–2 weeks. Press plastic wrap onto the surface before sealing if you’re concerned about a skin forming.
- Freezer: Freeze in small jars or containers for up to 3 months, leaving headspace. Thaw overnight in the fridge and stir well before using.
- Make‑ahead: Prepare 3–4 days in advance for pies, tarts, or cakes; keep chilled and stir before using. Tips:
- Keep the heat low and steady to avoid scrambling the eggs.
- Trust the spoon test more than the clock; stoves vary.
- Straining is highly recommended for the smoothest texture.
- Always zest lemons before juicing, and use fresh juice rather than bottled for the best flavor. FAQs (summary):
- Runny curd usually means undercooking; return to low heat and cook longer until it passes the spoon test.
- Eggy flavor usually comes from overheating; straining and a bit of vanilla help.
- This recipe is naturally gluten‑free.
- Not recommended for home canning; refrigerate or freeze instead.
Nutrition
Calories: 140kcal
Love this recipe?Follow us at @Recipecs for more