Would you like to save this?
Peanut Butter Snowballs Recipe
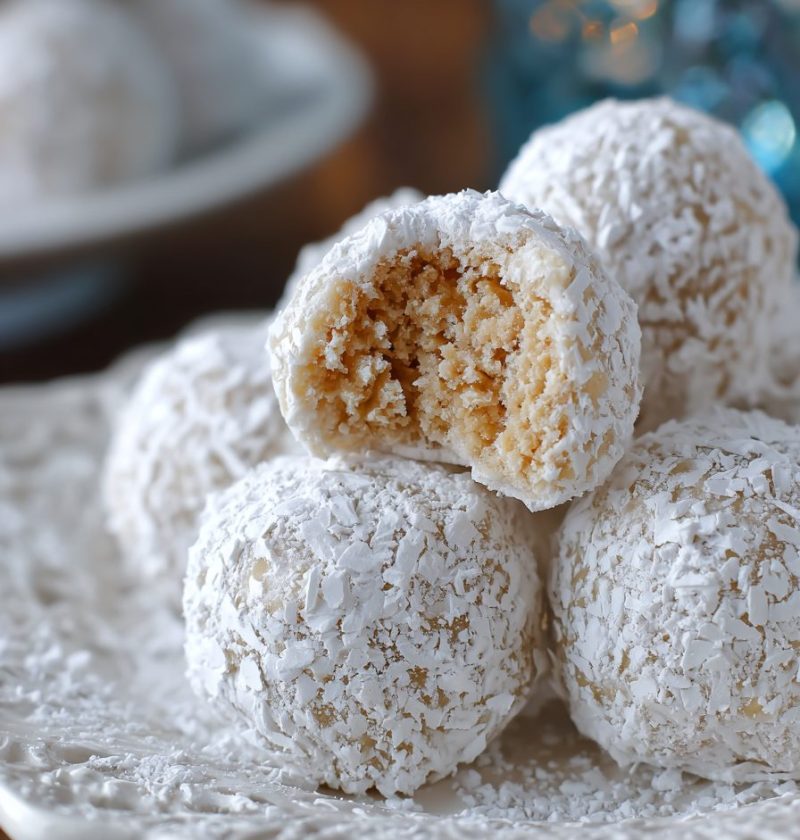
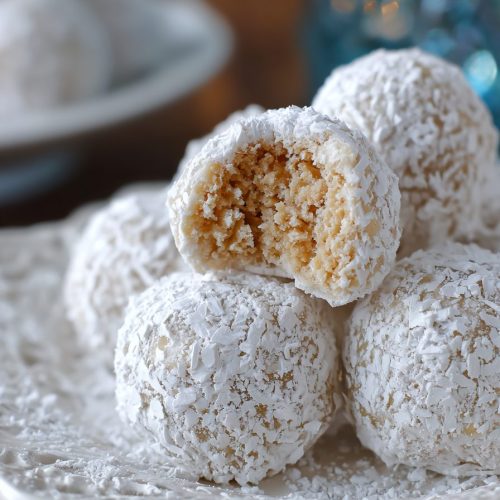
This Peanut Butter Snowballs Recipe gives you soft, creamy, no-bake peanut butter balls rolled in “snow” and ready for holiday cookie trays, potlucks, or a quiet movie night on the couch.
What Are Peanut Butter Snowballs?
Peanut butter snowballs are little bite-size peanut butter dessert balls that are chilled, rolled, and either dipped in melted chocolate or coated in powdered sugar so they look like tiny snow-covered truffles. Think of them as homemade peanut butter truffles with a cozy winter sweater on.
This Peanut Butter Snowballs Recipe is my go-to when I want something that feels like a Christmas peanut butter candy, but I don’t want to mess with the oven or fuss with candy thermometers. You get all the flavor of chocolate covered peanut butter balls, but with a super simple, no-bake method that’s friendly even if you’re not a confident baker yet.
I started making these in my early 30s when my kids were little and attention spans were short. I needed holiday peanut butter Treats that could come together fast, hold well in the fridge, and survive little hands “helping.” These checked every single box. Now that I’m 50, I still make them every December, tuck them in gift boxes, and stash a secret container in the back of the fridge just for me.
A fun little data note for my fellow food nerds: searches for “no bake peanut butter balls” and “peanut butter snowballs” jump every year from mid-November through New Year’s. That tells me you all are busy, tired, and craving easy peanut butter candy recipes that feel festive without taking your whole weekend. This recipe was written with exactly that season of life in mind.
Why You’ll Love This Recipe
- No oven needed – the kitchen stays cool and calm.
- Simple pantry ingredients – peanut butter, sugar, and a few basics.
- Ready in about an hour, most of it chilling time.
- Easy to make ahead for parties, cookie swaps, and gifting.
- Freezer-friendly, so you can stock up before the holiday rush.
- Customizable – turn them into chocolate covered peanut butter balls or keep them snowy white.
- Naturally gluten-free if you choose the right mix-ins.
- Kid-friendly to make and to eat (great for little helpers who love to roll things).
- Pretty enough for party platters and Christmas peanut butter candies gift boxes.
- They taste like a cross between a peanut butter cup and a soft truffle.
Ingredients for the Best Peanut Butter Snowballs
Let’s walk through what you’ll need for this Peanut Butter Snowballs Recipe. I’ll include a few notes and simple swaps that I’ve tested over the years.
Peanut Butter Snowball Base
- 1 cup creamy peanut butter (regular, not “natural” is easiest – I often use Jif or Skippy)
- 4 tablespoons unsalted butter, softened (half a stick; salted works too, just reduce the added salt)
- 2 cups powdered sugar, sifted (also called confectioners’ sugar)
- 1 teaspoon pure vanilla extract
- ¼ teaspoon fine sea salt (skip only if your peanut butter is very salty)
- ¾ cup finely crushed graham cracker crumbs
- For gluten-free: use gluten-free graham crackers or crushed gluten-free cookies.
Snowy Coating & Optional Chocolate Shell
You can choose one or mix and match:
- 1½ cups powdered sugar (for rolling snowballs)
- OR 12 ounces White Chocolate chips or vanilla candy coating (for dipping)
- 1–2 teaspoons neutral oil or coconut oil (helps thin the chocolate for smoother dipping)
Optional Mix-Ins (Choose 1–2)
These are totally extra, but fun if you want to personalize your peanut butter dessert balls:
- ¼ cup finely chopped peanuts (for a bit of crunch)
- ¼ cup mini chocolate chips
- 2–3 tablespoons shredded coconut (adds texture and a little more “snow” look)
A quick tip: if you’re adding a lot of mix-ins, add an extra tablespoon or two of powdered sugar so the balls hold their shape.

Step-by-Step Directions
Here’s the thing: peanut butter snowballs are very forgiving. The most important part is chilling the peanut butter cookie balls long enough so they keep their shape when you roll and coat them.
1. Cream the Peanut Butter and Butter
Add peanut butter and softened butter to a medium mixing bowl.
Beat with a hand mixer on medium speed (or stir very well by hand) until the mixture is smooth and creamy, about 1–2 minutes.
- You’re looking for a silky, spreadable texture with no visible chunks of butter.
- If you’re mixing by hand, use a sturdy spatula and a little elbow grease—it will come together.
2. Add Vanilla, Salt, and Powdered Sugar
Beat in the vanilla extract and salt.
Then add the powdered sugar about ½ cup at a time, mixing on low speed to avoid a sugar cloud.
- The dough will look crumbly at first. Keep mixing; it will begin to clump together.
- If it gets too thick for the mixer, switch to a wooden spoon or spatula and press it together.
3. Stir in Graham Cracker Crumbs and Mix-Ins
Sprinkle in the graham cracker crumbs and fold them into the dough.
If you’re using chopped peanuts, mini chocolate chips, or coconut, stir them in now.
- The mixture should feel like a soft Cookie Dough that holds together when you press it.
- If it feels sticky, add 1–2 tablespoons more powdered sugar.
- If it feels too dry or sandy, add 1 tablespoon peanut butter at a time.
4. Chill the Dough Briefly
Cover the bowl and place it in the fridge for 20–30 minutes.
- Chilling makes the dough easier to roll and helps your snowballs keep their round shape.
- If your kitchen is very warm, chill up to 45 minutes.
5. Roll Into Peanut Butter Balls
Line a baking sheet or large plate with parchment paper.
Use a small cookie scoop or teaspoon to scoop about 1 tablespoon of dough. Roll it gently between your palms to form a smooth ball.
- Place each ball on the prepared sheet, leaving a little space between them.
- You should get about 24–30 balls, depending on how generous you are with the scoops.
6. Chill Again While You Prep the Coating
Once all the peanut butter snowballs are rolled, place the tray in the fridge for at least 20 minutes or the freezer for 10–15 minutes.
While they chill, prepare your “snow”:
- For powdered sugar coating: place the powdered sugar in a shallow bowl.
- For chocolate covered peanut butter balls:
- Put the white chocolate chips or candy coating and 1 teaspoon oil in a microwave-safe bowl.
- Microwave in 20-second bursts, stirring between each, until smooth.
- If the chocolate still feels thick, stir in another ½–1 teaspoon oil.
7. Coat the Snowballs
Now the fun part—time to make them look snowy.
For powdered sugar snowballs:
Roll each chilled ball in the powdered sugar until fully coated. Gently press the sugar on so it sticks. Place back on the parchment.
For chocolate covered peanut butter snowballs:
Use a fork or a toothpick to dip each ball into the melted chocolate. Tap off excess chocolate on the side of the bowl and place the coated ball back on the parchment.
- If you want an extra snowy look, let the chocolate set slightly, then drizzle with more chocolate or dust very lightly with powdered sugar at the end.
- If your chocolate starts to thicken, warm it in the microwave for 10–15 seconds and stir again.
8. Chill Until Firm
Return the tray to the fridge for 20–30 minutes or until the chocolate is set and the peanut butter snowballs are firm to the touch.
That’s it—you’ve got a full batch of no bake peanut butter balls that look like they rolled right off a winter postcard.
Servings, Prep Time & Total Time
- Yield: About 24–30 snowballs (1-inch balls)
- Prep Time: 20–25 minutes active time
- Chill Time: 45–60 minutes total (split between dough and finished balls)
- Total Time: About 1 hour 15 minutes, with most of that just waiting while they chill
If you’re making multiple batches for gifting or parties, you can double the recipe with no problem. I do this every Christmas and rotate trays in and out of the fridge while I’m cleaning up or wrapping presents.
Flavor Variations & Fun Twists
You know what? Once you master this basic Peanut Butter Snowballs Recipe, it’s very easy to change it up a bit from year to year.
- Dark Chocolate Drizzle: Use dark or semi-sweet chocolate instead of white for a richer, peanut butter cup style flavor.
- Crunchy Snowballs: Stir in finely chopped salted peanuts and a spoonful of crispy rice cereal for extra texture.
- Salted Caramel Swirl: Add a tablespoon of thick caramel sauce to the dough and finish each ball with a tiny pinch of flaky sea salt.
- Peppermint Holiday Peanut Butter Treats: Use white chocolate coating and sprinkle crushed candy canes on top before it sets.
- Nut-Free Version: Use sunflower seed butter instead of peanut butter; the texture is similar and works well for school-safe snacks.
- Mocha Truffles: Stir 1 teaspoon instant espresso powder into the dough and coat with dark chocolate for a coffee shop style homemade peanut butter truffle.
How to Store, Freeze & Make Ahead
These peanut butter cookie balls are very storage-friendly, which is why they’re always on my December baking plan.
Storing in the Fridge
- Place snowballs in an airtight container in a single layer.
- If stacking, separate layers with parchment or wax paper so they don’t stick.
- Store in the refrigerator up to 7 days.
They’re safe a bit longer, but the texture and flavor are best within the first week.
Freezing for Later
- Arrange finished snowballs on a baking sheet and freeze until solid, about 1–2 hours.
- Transfer to a freezer bag or sealed container, again with parchment between layers.
- Freeze for up to 2 months.
To serve from frozen, place the snowballs in the fridge for a few hours or on the counter for about 20–30 minutes. No reheating needed—just thaw and enjoy.
Make-Ahead Tips
- You can prepare the dough up to 2 days ahead, cover tightly, and keep it in the fridge. Roll and coat when you’re ready.
- Or, roll the balls and freeze them uncoated. Later, thaw slightly and coat in powdered sugar or dip in chocolate before serving.
I’ll often make the dough the night before a cookie exchange, then roll and coat them with my coffee the next morning while something else bakes.
Recipe Notes from My Kitchen
- Peanut Butter Type Matters: Shelf-stable, creamy peanut butter works best here. Natural peanut butters that separate can make the dough oily or too soft. If you really want to use natural, stir very well and add a bit more powdered sugar.
- Size Consistency: Using a small cookie scoop keeps all your snowballs the same size, which helps them chill and set evenly and makes your tray look polished.
- Powdered Sugar Coating Tip: If your kitchen is humid, roll the balls in powdered sugar twice—once right after chilling, then again just before serving to refresh the snowy look.
- Working With Chocolate: White chocolate can be a little temperamental. Adding that small amount of oil and using short microwave bursts keeps it smooth and prevents burning.
- Flavor Balance: The dough will taste a bit sweeter before chilling. As it chills and the flavors blend, the peanut butter comes forward and the sweetness calms down.
- Kids in the Kitchen: Let kids help with rolling and sugar-coating; keep the chocolate dipping for older kids or adults to avoid too many “whoops” moments and hot bowls.
Every year I think about changing up the holiday dessert menu completely, and yet these little snowballs keep coming back because they’re the one thing everyone requests. That tells me they’re doing their job.
Peanut Butter Snowballs Recipe FAQs
1. Can I use crunchy peanut butter instead of creamy?
Yes. Crunchy peanut butter works; you’ll just have extra texture from the peanut pieces. If your crunchy peanut butter is thick, you may need an extra tablespoon of butter or a splash of milk.
2. Why is my dough too sticky to roll?
Sticky dough usually means your peanut butter is softer or oilier. Add more powdered sugar, 1–2 tablespoons at a time, and chill a bit longer until you can roll it into balls.
3. Why are my snowballs cracking when I coat them?
This can happen if the balls are very cold and the coating is warm. Let the balls sit at room temperature for 3–5 minutes before dipping, and be sure your chocolate isn’t too hot.
4. Can I make these as plain no bake peanut butter balls without any coating?
Absolutely. Just roll the balls, chill them, and store in the fridge. They’ll taste like soft, sweet peanut butter bites—still delicious, just less snowy.
5. Are these gluten-free?
They can be. Use gluten-free graham crackers or gluten-free cookies for the crumbs, and make sure your chocolate coating and mix-ins are certified gluten-free.
6. Can I reduce the sugar?
You can cut the powdered sugar by about ¼ cup, but the dough may be softer. If it doesn’t hold its shape, add a bit more graham cracker crumbs to balance it.
7. My powdered sugar coating is melting—what happened?
If the snowballs are too warm when you roll them, or your kitchen is very warm or humid, the sugar can soak in. Chill the balls longer, then roll again just before serving.
8. How can I make these look nice for gifting?
Place 2–3 snowballs in mini cupcake liners and tuck them into a tin or box. Mix powdered sugar snowballs with chocolate covered peanut butter balls for contrast—it looks like a little candy shop display.
Final Thoughts & How to Share These Sweet Little Snowballs
This Peanut Butter Snowballs Recipe gives you everything I love about holiday baking—comforting flavor, pretty presentation, and a whole lot of joy—without standing over a hot oven or stressing about whether something will rise. You get easy peanut butter candy that works as party treats, simple desserts, and Christmas peanut butter candies for gifting.
If you make these peanut butter snowballs, I’d love to hear how they turn out—tell me your favorite variation, or who you shared them with. And when you’re ready for more cozy treats, try pairing them with a batch of hot cocoa or your favorite simple cookie recipe for a full holiday dessert spread.
Peanut Butter Snowballs
Ingredients
- 1 cup creamy peanut butter shelf-stable, not natural; e.g., Jif or Skippy
- 4 tablespoons unsalted butter softened; salted is okay, reduce added salt
- 2 cups powdered sugar sifted; also called confectioners’ sugar
- 1 teaspoon pure vanilla extract
- 1/4 teaspoon fine sea salt skip only if peanut butter is very salty
- 3/4 cup graham cracker crumbs finely crushed; use gluten-free graham crackers or cookies for GF version
- 1 1/2 cups powdered sugar for rolling snowballs (coating option)
- 12 ounces white chocolate chips or vanilla candy coating for dipping (coating option)
- 1-2 teaspoons neutral oil or coconut oil to thin chocolate for dipping as needed
- 1/4 cup peanuts finely chopped; optional mix-in
- 1/4 cup mini chocolate chips optional mix-in
- 2-3 tablespoons shredded coconut optional mix-in, adds texture and snowy look
Instructions
- Add the creamy peanut butter and softened butter to a medium mixing bowl. Beat with a hand mixer on medium speed (or stir very well by hand) until smooth and creamy, about 1–2 minutes, with no visible chunks of butter.1 cup creamy peanut butter, 4 tablespoons unsalted butter
- Beat in the vanilla extract and fine sea salt. Add 2 cups powdered sugar about 1/2 cup at a time, mixing on low speed to avoid a sugar cloud. The mixture will look crumbly at first; keep mixing until it begins to clump together. If it becomes too thick for the mixer, switch to a sturdy spoon or spatula and press it together.2 cups powdered sugar, 1 teaspoon pure vanilla extract, 1/4 teaspoon fine sea salt
- Sprinkle in the graham cracker crumbs and fold them into the dough. If using chopped peanuts, mini chocolate chips, or shredded coconut, stir them in now. The mixture should feel like a soft cookie dough that holds together when pressed. If it feels sticky, add 1–2 tablespoons more powdered sugar; if too dry or sandy, add peanut butter 1 tablespoon at a time until it holds.3/4 cup graham cracker crumbs, 1/4 cup peanuts, 1/4 cup mini chocolate chips, 2-3 tablespoons shredded coconut
- Cover the bowl and place it in the refrigerator for 20–30 minutes (up to 45 minutes if your kitchen is very warm). Chilling makes the dough easier to roll and helps the snowballs keep their round shape.
- Line a baking sheet or large plate with parchment paper. Use a small cookie scoop or teaspoon to portion about 1 tablespoon of dough per snowball. Roll each portion gently between your palms to form a smooth 1-inch ball and place on the prepared sheet, leaving a little space between them. You should get about 24–30 balls depending on scoop size.
- Place the tray of rolled peanut butter balls in the fridge for at least 20 minutes, or in the freezer for 10–15 minutes, until firm. While they chill, prepare your coating. For a powdered sugar coating, place 1 1/2 cups powdered sugar in a shallow bowl. For a chocolate coating, add white chocolate chips or vanilla candy coating and 1 teaspoon neutral oil or coconut oil to a microwave-safe bowl. Microwave in 20-second bursts, stirring between each, until melted and smooth. If the chocolate is still thick, stir in up to another 1 teaspoon oil until fluid.1 1/2 cups powdered sugar, 12 ounces white chocolate chips or vanilla candy coating, 1-2 teaspoons neutral oil or coconut oil
- For powdered sugar snowballs: roll each chilled ball in powdered sugar until fully coated, gently pressing so the sugar adheres. Return to the parchment-lined tray. For chocolate-covered snowballs: using a fork or toothpick, dip each chilled ball into the melted chocolate, tap off excess on the side of the bowl, and place back on the parchment. For an extra snowy look, let the chocolate set slightly, then drizzle with more chocolate or dust very lightly with powdered sugar. If the chocolate thickens as you work, briefly rewarm it in the microwave for 10–15 seconds and stir until smooth.1 1/2 cups powdered sugar, 12 ounces white chocolate chips or vanilla candy coating
- Return the coated snowballs to the refrigerator for 20–30 minutes, or until the chocolate is set and the balls are firm to the touch. Serve chilled or slightly cool. Store any leftovers in an airtight container in the fridge.