Would you like to save this?
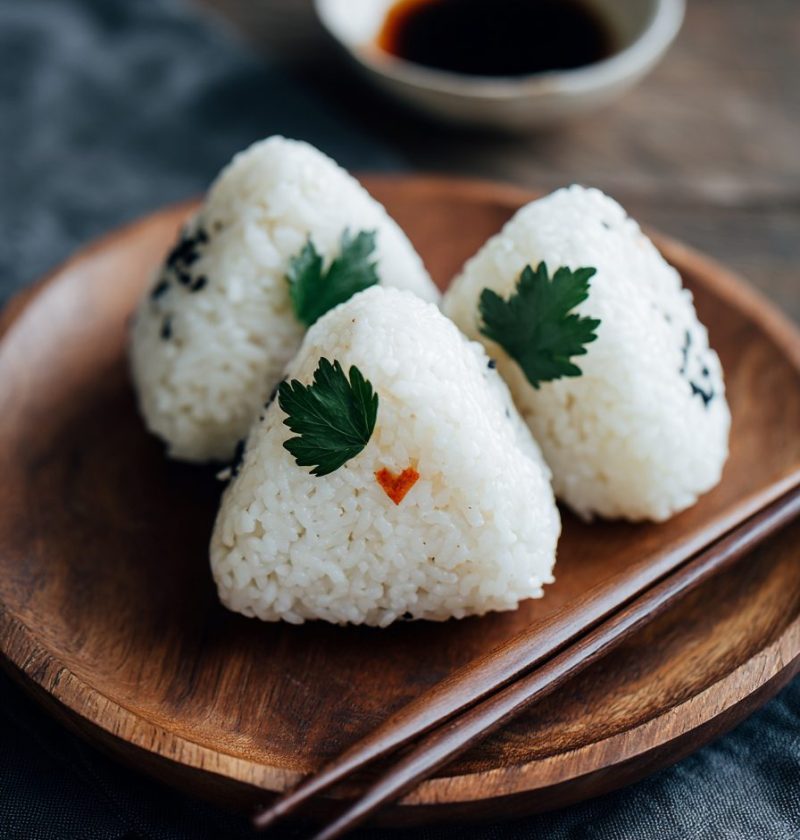
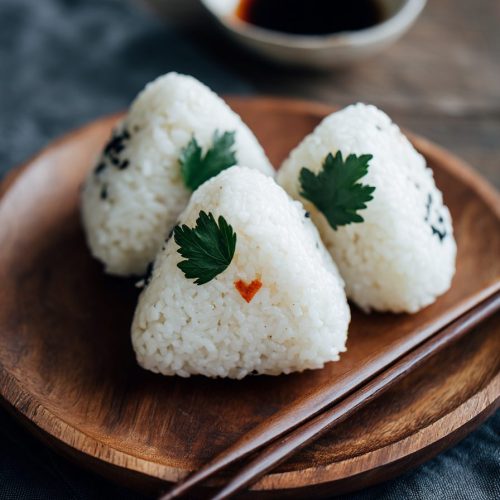
Onigiri Recipe (Japanese Rice Balls You Can Actually Make on a Weeknight)
If you’ve ever wanted a cozy, portable Japanese comfort food you can pack for lunch or grab as a snack, this Onigiri Recipe is going to be your new favorite kitchen friend—simple, customizable, and so satisfying.

What Is Onigiri and Why Is It So Special?
Onigiri, sometimes called Japanese rice balls, are compact triangles or rounds of seasoned sticky rice, often wrapped in nori (seaweed) and filled with something savory—think tuna mayo, salmon, or pickled plum. In Japan, they’re the definition of everyday comfort food: tucked into bento boxes, sold at convenience stores, or grabbed before a train ride.
This particular onigiri recipe leans into that “everyday magic” vibe. It’s:
- No-bake
- Pantry-friendly
- Easy to customize with what you already have
As a 50-year-old mom who’s packed more lunches than I can count, onigiri have become one of my favorite bento box ideas for busy weeks. They keep well, they’re fun to eat, and they feel a little special without being fussy.
Nutritionally, they’re a nice balance of carbs and protein (depending on your fillings), and you can keep them lighter or more indulgent with your choice of onigiri filling ideas—from lean grilled salmon to creamy tuna mayo. Plus, there’s something incredibly grounding about shaping warm rice with your hands. It slows you down for a minute, which I honestly appreciate on chaotic days.
Why You’ll Love This Onigiri Recipe
- Beginner-friendly: Perfect if you’ve never made Japanese rice balls before—no special skills, just sticky rice and your hands.
- Kid-approved & lunchbox-ready: Great for bento boxes, school lunches, and snacks; they’re easy to hold and not too messy.
- Customizable fillings: Use canned tuna, leftover rotisserie chicken, grilled salmon, or vegetarian fillings you love.
- Budget-conscious: Made with basic staples like rice, seaweed, and canned protein—cheaper than store-bought Japanese snack food.
- No oven, no problem: Everything is done on the stovetop; ideal for hot days or tiny kitchens.
- Meal-prep friendly: Make a batch ahead and refrigerate or freeze for quick Japanese meals all week.
- Naturally portable: Perfect for picnics, road trips, or a quick desk lunch that feels more exciting than a plain sandwich.
- Authentic but flexible: Follows traditional onigiri methods, but allows easy American pantry shortcuts.
Ingredients for Authentic but Easy Onigiri
This onigiri recipe makes classic rice and seaweed snacks with a few filling options. You can mix and match.
For the Rice
- 2 cups uncooked Japanese short-grain rice (sushi rice or “Calrose” style; must be short-grain so it’s sticky)
- 2 ¼ cups water, plus extra for rinsing
- 1 teaspoon fine sea salt (divided; some for the rice, some for your hands)
For Seasoning & Wrapping
- 3–4 sheets nori (seaweed), cut into strips or rectangles (roasted nori for sushi works best)
- 1–2 teaspoons furikake (optional, but lovely; a Japanese rice seasoning with seaweed, sesame, sometimes dried fish)
- 1 tablespoon toasted sesame seeds (white, black, or a mix; for extra nuttiness and texture)
For Tuna Mayo Filling (Classic Convenience Store Style)
- 1 (5-ounce) can tuna, drained well (water- or oil-packed both work)
- 2–3 tablespoons Japanese mayonnaise (like Kewpie; or regular mayo with a pinch of sugar)
- 1 teaspoon soy sauce (low-sodium works fine)
- ½ teaspoon rice vinegar (optional, for a tiny tang)
- Pinch of black pepper
For Simple Salmon Filling
- ½ cup cooked salmon, flaked (leftover grilled, baked, or canned salmon)
- ½ teaspoon soy sauce
- ¼ teaspoon sesame oil
- Pinch of salt
Optional Extra Fillings (Pick 1–2 to try):
- Pickled plum (umeboshi), pitted – very traditional, salty-tart, and keeps well.
- Cooked seasoned chicken (shredded with a little soy sauce and mayo).
- Avocado slices with a pinch of salt and sesame seeds.
- Cooked, seasoned mushrooms (for a savory vegetarian rice ball recipe).
A quick note on rice:
Use Japanese short-grain rice, not long-grain or jasmine. You need that slightly sticky texture so the rice holds its shape. If your bag says “sushi rice” or “short-grain Japanese-style rice,” you’re good to go.
Step-by-Step Directions: How to Make Onigiri at Home
1. Rinse the Rice Until the Water Runs Almost Clear
Measure the 2 cups of rice into a bowl. Cover with cold water, swirl gently with your hand, and drain. Repeat 3–4 times until the water is mostly clear. This rinsing step removes extra starch and helps your rice cook up fluffy but still sticky—perfect for homemade onigiri.
2. Cook the Rice
Add the rinsed rice and 2 ¼ cups water to a rice cooker or medium saucepan.
- Rice cooker: Cook on the white rice setting.
- Stovetop: Bring to a gentle boil, cover with a tight lid, turn heat to low, and simmer for 15 minutes. Turn off the heat and let sit, covered, for another 10 minutes.
The resting time is important; it finishes cooking the rice and lets moisture distribute evenly.
3. Season the Rice Lightly
Transfer the hot rice to a wide bowl. Sprinkle with ½ teaspoon sea salt and gently fluff with a rice paddle or silicone spatula, folding from the bottom up—don’t mash it. If you’re using furikake, you can mix 1–2 teaspoons into the rice now for extra flavor and color.
Let the rice cool until warm but not hot; about 10–15 minutes. Warm rice shapes better than hot or cold rice.
4. Prepare the Fillings
While the rice cools, make your fillings.
- Tuna Mayo: In a small bowl, stir together drained tuna, mayonnaise, soy sauce, rice vinegar (if using), and pepper until creamy. Taste and adjust salt or soy.
- Salmon: Mix flaked salmon with soy sauce, sesame oil, and a pinch of salt.
Keep fillings fairly dry; very saucy fillings can make the rice fall apart. Think “moist but not runny.”
5. Set Up a Simple Shaping Station
This is where things get fun. On a clean counter or table, set out:
- A small bowl of clean water
- A small dish with ½ teaspoon sea salt
- Your bowl of warm rice
- Your fillings
- Cut nori pieces
Dip your hands in water (so the rice doesn’t stick), then tap your fingertips lightly into the salt. This seasons the outside of the rice balls and helps with stickiness.
6. Shape the Onigiri (Triangle or Round)
Work with about ⅓–½ cup of rice at a time:
- Place the rice in one damp, salted hand and gently press to flatten it into a rough disk.
- Add 1–2 teaspoons of filling in the center—don’t overfill or it’ll burst out.
- Fold the rice around the filling, cupping your hands to close it up.
- Now shape:
- For triangles: Use both hands to gently press the rice into a three-sided shape, rotating and pressing lightly—think “firm but kind.”
- For rounds: Roll between your hands like a slightly loose meatball.
If the rice sticks, wet your hands again lightly. Don’t be shy, this part takes a little practice. My first few looked like lopsided snowballs, and they still tasted wonderful.
7. Wrap with Nori
Once the rice balls are formed, wrap each onigiri with a strip or rectangle of nori:
- For classic convenience-store style, press a wide strip along the bottom and up the sides.
- For a simpler seaweed-wrapped rice snack, just press a small strip on one side so there’s a “handle” to hold.
Make sure the rice has cooled slightly before wrapping. If it’s too hot, the nori can go soggy very quickly. If you want crisp nori for later, keep the seaweed separate and wrap just before eating.
8. Garnish (Optional but Fun)
Sprinkle the tops with extra toasted sesame seeds or a little more furikake. If you’re packing a Japanese lunch recipe for a friend or kid, a tiny sprinkle of black sesame or a cute pick can make it feel special.
Servings & Timing
- Yield: About 8–10 onigiri (depending on size)
- Prep Time: 20 minutes (including rinsing and mixing fillings)
- Cook Time: 20–25 minutes for the rice
- Rest/Cool Time: 10–15 minutes
- Total Time: About 50–60 minutes
If you’re faster at shaping or using leftover rice, you can absolutely get this down to a quick Japanese meal in closer to 30–40 minutes.
Onigiri Variations: Make It Your Own
Here’s where you can play—this is my favorite part.
- Spicy Tuna Onigiri: Add a teaspoon of sriracha or chili crisp to the tuna mayo filling for a little kick.
- Vegetarian Miso Mushroom Onigiri: Sauté chopped mushrooms with a teaspoon of miso paste and a splash of soy until browned and savory, then use as your filling.
- Cheesy Rice Balls: Tuck a small cube of mozzarella or mild cheese into the center; it’ll get slightly melty and comforting.
- Brown Rice “Healthier” Onigiri: Use short-grain brown rice (cooked softer with a little extra water) for more fiber; the texture will be a bit chewier but still tasty.
- Furikake-Only Onigiri: Skip fillings altogether and mix rice with furikake; shape into small snack-sized balls—great for picky eaters or simple bento box ideas.
- Ume & Shiso Traditional Onigiri: Use umeboshi (pickled plum) and a bit of shiso leaf for a truly traditional onigiri flavor that’s bright and tangy.
How to Store & Reheat Onigiri
Onigiri are best the day they’re made, but real life doesn’t always work that way—so here’s how I handle leftovers.
Room Temperature (Short Term)
- Keep onigiri at cool room temperature for up to 4–6 hours, wrapped in plastic wrap or a reusable wrap.
- This is perfect for packing a Japanese rice recipe into lunch boxes in the morning.
Refrigerator
- Wrap each onigiri tightly in plastic wrap or put in an airtight container.
- Store for up to 2 days.
- The rice will firm up in the fridge, so:
- Gently reheat in the microwave for 20–30 seconds, just until slightly warm and soft again.
- If using nori, it’s better to add fresh nori after reheating to avoid sogginess.
Freezer
- Wrap each rice ball in plastic, then place in a freezer bag.
- Freeze up to 1 month.
- Thaw overnight in the fridge, then warm briefly in the microwave before eating. Again, add nori after reheating if you want a crisp texture.
Make-Ahead Tip:
If you’re prepping for the week, make the rice balls and fillings ahead, freeze some, and keep a little stash of nori in your pantry. You can assemble fresh rice and seaweed snacks whenever you need a quick meal.
Notes from My Kitchen (and a Few Lessons Learned)
- Warm, not hot rice: Too hot, and it’s tough to handle; too cold, and it doesn’t stick as well. Aim for comfortably warm—like a cozy bath.
- Salted hands are key: Lightly salting your hands seasons the rice delicately and gives that classic Japanese home cooking taste.
- Don’t overfill: I know it’s tempting, but a smaller amount of filling gives you a better seal and a prettier shape.
- Triangle anxiety is normal: Your first traditional onigiri might look a little funny. Start with round shapes if that feels easier, then move on to triangles when you’re more comfortable.
- Rice leftovers rule: Leftover warm rice from dinner works great; just avoid rice that’s been sitting in the fridge for more than a day without reheating—texture matters.
- Nori timing: If you’re packing these for later, wrap the nori just before eating, especially if you like it crisp instead of soft.
You know what? The “imperfect” ones always disappear first at my house—nobody cares about the shape once they take that first bite.
FAQs About Making Onigiri at Home
1. Can I use regular long-grain or jasmine rice for this onigiri recipe?
Not really. Long-grain and jasmine rice don’t have the stickiness you need; the rice balls will fall apart. Short-grain Japanese-style rice is the way to go.
2. How do I keep the rice from sticking to my hands?
Wet your hands lightly and use a pinch of salt on your palms. Re-wet whenever the rice starts to cling again.
3. Do I have to use nori?
No. You can serve onigiri plain as sticky rice balls, especially for kids who don’t like seaweed, or just sprinkle sesame seeds on the outside.
4. Can I make onigiri the night before?
Yes. Wrap tightly and refrigerate, then let them come to room temp or warm them very briefly before eating. Add the nori later if you want it crisp.
5. Are onigiri eaten warm or cold?
Both are common. They’re often eaten at room temperature, but slightly warm rice balls feel extra comforting.
6. What fillings are safest for lunch boxes?
Saltier fillings like tuna with soy sauce, umeboshi, or salted salmon hold up well. If your lunch will sit out several hours, keep it in an insulated lunch bag with an ice pack.
7. Can I make vegan onigiri?
Absolutely—use fillings like miso mushrooms, seasoned tofu, avocado with sesame seeds, or pickled vegetables.
8. Why is my rice too dry and crumbly?
You may not have used enough water or you used the wrong rice type. Short-grain and correct water ratio give you that proper sticky texture for Japanese rice balls.
Wrapping It Up (and Packing It Up)
This simple Onigiri Recipe brings a little bit of Japanese home cooking right to your kitchen—no fancy tools, no special training, just warm rice, savory fillings, and a strip of nori. It’s portable, budget-friendly, and endlessly adaptable, whether you’re making bento box ideas for the kids or a quiet solo lunch.
If you try these homemade onigiri, let me know how they turned out—or what fillings you came up with. Leave a comment, share a photo, or explore more quick Japanese recipes and snack ideas next; your lunch routine might never be the same.
Onigiri Recipe (Japanese Rice Balls You Can Actually Make on a Weeknight)
Ingredients
- 2 cups Japanese short-grain rice sushi rice or Calrose style; must be short-grain so it’s sticky
- 2 1/4 cups water plus extra for rinsing the rice
- 1 teaspoon fine sea salt divided; some for seasoning rice, some for your hands
- 3 to 4 sheets nori roasted seaweed for sushi; cut into strips or rectangles
- 1 to 2 teaspoons furikake optional Japanese rice seasoning with seaweed, sesame, and sometimes dried fish
- 1 tablespoon toasted sesame seeds white, black, or mixed; for garnish and extra nuttiness
- 1 can (5 ounces) tuna drained well; water- or oil-packed
- 2 to 3 tablespoons Japanese mayonnaise such as Kewpie; or regular mayo with a pinch of sugar
- 1 teaspoon soy sauce for tuna mayo; low-sodium is fine
- 1/2 teaspoon rice vinegar optional, for a little tang in tuna mayo
- black pepper pinch, for tuna mayo
- 1/2 cup cooked salmon flaked; leftover grilled, baked, or canned salmon
- 1/2 teaspoon soy sauce for salmon filling
- 1/4 teaspoon sesame oil for salmon filling
- salt pinch, for salmon filling plus extra to taste
- umeboshi (pickled plum) optional filling; pitted, very traditional and salty-tart
- cooked seasoned chicken optional filling; shredded with a little soy sauce and mayo
- avocado optional filling; sliced with a pinch of salt and sesame seeds
- cooked, seasoned mushrooms optional vegetarian filling; sautéed and savory
Instructions
- Measure 2 cups of Japanese short-grain rice into a bowl. Cover with cold water, swirl gently with your hand, and drain. Repeat 3–4 times until the water runs mostly clear to remove excess starch and help the rice cook fluffy yet sticky.2 cups Japanese short-grain rice, 2 1/4 cups water
- Combine the rinsed rice and 2 1/4 cups water in a rice cooker or medium saucepan. For a rice cooker, cook on the white rice setting. For stovetop, bring to a gentle boil, cover with a tight lid, reduce heat to low, and simmer for 15 minutes. Turn off the heat and let the rice rest, covered, for another 10 minutes.2 cups Japanese short-grain rice, 2 1/4 cups water
- Transfer the hot cooked rice to a wide bowl. Sprinkle with about 1/2 teaspoon fine sea salt and gently fluff and fold with a rice paddle or silicone spatula without mashing. If using furikake, mix in 1–2 teaspoons now. Let the rice cool until warm but not hot, about 10–15 minutes.2 cups Japanese short-grain rice, 1 teaspoon fine sea salt, 1 to 2 teaspoons furikake
- In a small bowl, combine the drained tuna, 2–3 tablespoons Japanese mayonnaise, 1 teaspoon soy sauce, 1/2 teaspoon rice vinegar (if using), and a pinch of black pepper. Stir until creamy and adjust seasoning to taste. Keep the mixture moist but not runny.1 can (5 ounces) tuna, 2 to 3 tablespoons Japanese mayonnaise, 1 teaspoon soy sauce, 1/2 teaspoon rice vinegar, black pepper
- In another small bowl, mix 1/2 cup flaked cooked salmon with 1/2 teaspoon soy sauce, 1/4 teaspoon sesame oil, and a pinch of salt. Stir to combine and taste, adjusting seasoning as desired.1/2 cup cooked salmon, 1/2 teaspoon soy sauce, 1/4 teaspoon sesame oil, salt
- Prepare a small bowl of clean water, a small dish with the remaining 1/2 teaspoon sea salt, your bowl of warm rice, your fillings, and cut pieces of nori. Dip your hands in water, then lightly touch the salt to season your palms and help prevent sticking.1 teaspoon fine sea salt, 3 to 4 sheets nori
- Working with about 1/3–1/2 cup of rice at a time, place the rice in one damp, salted hand and gently flatten into a rough disk. Add 1–2 teaspoons of your chosen filling in the center. Fold the rice around the filling to enclose it. Shape into a triangle by gently pressing with both hands and rotating, or roll into a round ball. Re-wet your hands lightly if the rice sticks.2 cups Japanese short-grain rice
- When the rice balls have cooled slightly but are still warm, wrap each onigiri with a strip or rectangle of nori. For a classic look, press a wide strip along the bottom and up the sides, or simply press a smaller strip onto one side as a handle. For the crispiest texture, add nori just before eating if packing for later.3 to 4 sheets nori
- Sprinkle the tops of the onigiri with toasted sesame seeds and more furikake if desired. Serve warm or at room temperature, or wrap and pack for lunches, picnics, or snacks.1 to 2 teaspoons furikake, 1 tablespoon toasted sesame seeds
- For short-term storage, keep onigiri wrapped at cool room temperature for up to 4–6 hours. For longer storage, wrap tightly and refrigerate up to 2 days, then soften by microwaving 20–30 seconds before eating and add fresh nori. To freeze, wrap each onigiri, place in a freezer bag, and freeze up to 1 month. Thaw in the refrigerator and warm briefly before serving.