Onigiri Recipe (Japanese Rice Balls You Can Actually Make on a Weeknight)
Cozy, portable Japanese rice balls made with seasoned short-grain rice, savory fillings like tuna mayo or salmon, and wrapped in nori. Beginner-friendly, customizable, and perfect for lunches, snacks, or meal prep.
Ingredients
- 2 cups Japanese short-grain rice sushi rice or Calrose style; must be short-grain so it’s sticky
- 2 1/4 cups water plus extra for rinsing the rice
- 1 teaspoon fine sea salt divided; some for seasoning rice, some for your hands
- 3 to 4 sheets nori roasted seaweed for sushi; cut into strips or rectangles
- 1 to 2 teaspoons furikake optional Japanese rice seasoning with seaweed, sesame, and sometimes dried fish
- 1 tablespoon toasted sesame seeds white, black, or mixed; for garnish and extra nuttiness
- 1 can (5 ounces) tuna drained well; water- or oil-packed
- 2 to 3 tablespoons Japanese mayonnaise such as Kewpie; or regular mayo with a pinch of sugar
- 1 teaspoon soy sauce for tuna mayo; low-sodium is fine
- 1/2 teaspoon rice vinegar optional, for a little tang in tuna mayo
- black pepper pinch, for tuna mayo
- 1/2 cup cooked salmon flaked; leftover grilled, baked, or canned salmon
- 1/2 teaspoon soy sauce for salmon filling
- 1/4 teaspoon sesame oil for salmon filling
- salt pinch, for salmon filling plus extra to taste
- umeboshi (pickled plum) optional filling; pitted, very traditional and salty-tart
- cooked seasoned chicken optional filling; shredded with a little soy sauce and mayo
- avocado optional filling; sliced with a pinch of salt and sesame seeds
- cooked, seasoned mushrooms optional vegetarian filling; sautéed and savory
Instructions
- Measure 2 cups of Japanese short-grain rice into a bowl. Cover with cold water, swirl gently with your hand, and drain. Repeat 3–4 times until the water runs mostly clear to remove excess starch and help the rice cook fluffy yet sticky.2 cups Japanese short-grain rice, 2 1/4 cups water
- Combine the rinsed rice and 2 1/4 cups water in a rice cooker or medium saucepan. For a rice cooker, cook on the white rice setting. For stovetop, bring to a gentle boil, cover with a tight lid, reduce heat to low, and simmer for 15 minutes. Turn off the heat and let the rice rest, covered, for another 10 minutes.2 cups Japanese short-grain rice, 2 1/4 cups water
- Transfer the hot cooked rice to a wide bowl. Sprinkle with about 1/2 teaspoon fine sea salt and gently fluff and fold with a rice paddle or silicone spatula without mashing. If using furikake, mix in 1–2 teaspoons now. Let the rice cool until warm but not hot, about 10–15 minutes.2 cups Japanese short-grain rice, 1 teaspoon fine sea salt, 1 to 2 teaspoons furikake
- In a small bowl, combine the drained tuna, 2–3 tablespoons Japanese mayonnaise, 1 teaspoon soy sauce, 1/2 teaspoon rice vinegar (if using), and a pinch of black pepper. Stir until creamy and adjust seasoning to taste. Keep the mixture moist but not runny.1 can (5 ounces) tuna, 2 to 3 tablespoons Japanese mayonnaise, 1 teaspoon soy sauce, 1/2 teaspoon rice vinegar, black pepper
- In another small bowl, mix 1/2 cup flaked cooked salmon with 1/2 teaspoon soy sauce, 1/4 teaspoon sesame oil, and a pinch of salt. Stir to combine and taste, adjusting seasoning as desired.1/2 cup cooked salmon, 1/2 teaspoon soy sauce, 1/4 teaspoon sesame oil, salt
- Prepare a small bowl of clean water, a small dish with the remaining 1/2 teaspoon sea salt, your bowl of warm rice, your fillings, and cut pieces of nori. Dip your hands in water, then lightly touch the salt to season your palms and help prevent sticking.1 teaspoon fine sea salt, 3 to 4 sheets nori
- Working with about 1/3–1/2 cup of rice at a time, place the rice in one damp, salted hand and gently flatten into a rough disk. Add 1–2 teaspoons of your chosen filling in the center. Fold the rice around the filling to enclose it. Shape into a triangle by gently pressing with both hands and rotating, or roll into a round ball. Re-wet your hands lightly if the rice sticks.2 cups Japanese short-grain rice
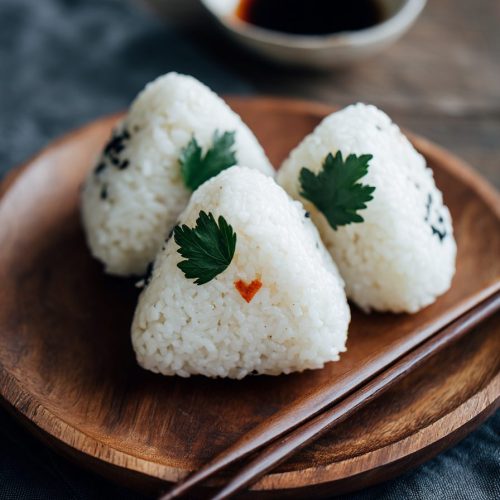
- When the rice balls have cooled slightly but are still warm, wrap each onigiri with a strip or rectangle of nori. For a classic look, press a wide strip along the bottom and up the sides, or simply press a smaller strip onto one side as a handle. For the crispiest texture, add nori just before eating if packing for later.3 to 4 sheets nori
- Sprinkle the tops of the onigiri with toasted sesame seeds and more furikake if desired. Serve warm or at room temperature, or wrap and pack for lunches, picnics, or snacks.1 to 2 teaspoons furikake, 1 tablespoon toasted sesame seeds
- For short-term storage, keep onigiri wrapped at cool room temperature for up to 4–6 hours. For longer storage, wrap tightly and refrigerate up to 2 days, then soften by microwaving 20–30 seconds before eating and add fresh nori. To freeze, wrap each onigiri, place in a freezer bag, and freeze up to 1 month. Thaw in the refrigerator and warm briefly before serving.
Notes
Use Japanese short-grain rice (often labeled sushi rice or Calrose style); long-grain or jasmine rice will not be sticky enough and the onigiri may fall apart. Shape onigiri with warm, not hot or cold rice, and lightly salt your hands for flavor and easier handling. Avoid overfilling so the rice can fully encase the filling. For crisp nori, keep seaweed separate and wrap just before eating. Fillings can be varied: try umeboshi (pickled plum), seasoned chicken, avocado with sesame, or sautéed mushrooms for a vegetarian option. Onigiri can be eaten warm, room temperature, or slightly chilled and are ideal for bento boxes and make-ahead snacks.
Love this recipe?Follow us at @Recipecs for more