Would you like to save this?
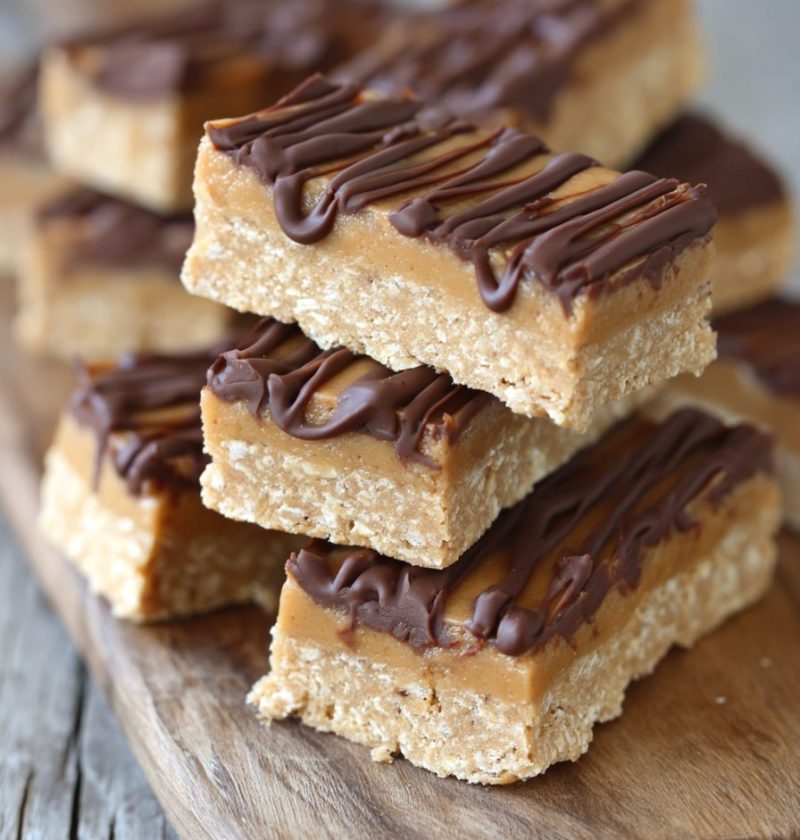
No Bake Peanut Butter Bars Recipe
If you’re craving something sweet, chocolatey, and rich—but don’t feel like turning on the oven—this No Bake Peanut Butter Bars Recipe is about to become your new weeknight (and weekend) hero.
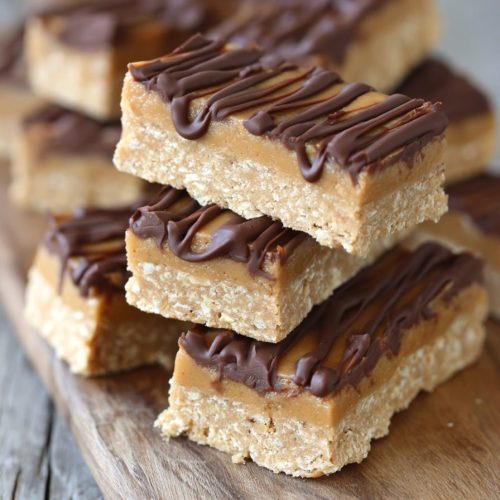
These no bake peanut butter bars taste like a homemade peanut butter cup in dessert bar form, with a buttery graham cracker base and a silky chocolate topping. They’re perfect for busy days, summer nights when the kitchen is already too warm, or those last-minute “Mom, I need a treat for school tomorrow!” moments that still happen even when your kids are technically adults.
What Makes These Peanut Butter Bars So Special?
This No Bake Peanut Butter Bars Recipe is my version of those classic chocolate peanut butter bars many of us grew up on—just a touch less sugary, a bit more peanut-forward, and easier to customize.
They’re:
- No-bake
- Freezer-friendly
- Easy enough for beginners
- Rich enough to feel like a special occasion
I like to think of them as the love child of a peanut butter cookie and a Reese’s cup, but in bar form. The bottom layer is a mix of peanut butter, crushed graham crackers, butter, and powdered sugar. It sets up into a soft but sliceable peanut butter “Fudge.” Then we pour a glossy layer of melted chocolate (with a touch of peanut butter for smoothness) on top.
I usually make these peanut butter dessert bars for:
- Summer BBQs when I don’t want to heat up the house
- Holiday treat trays (they travel beautifully and stack well)
- Meal prep “treat boxes” in the freezer for my husband and me
- College care packages for my kids
From a “healthy-ish” standpoint, they’ve got real peanut butter, and you can easily tweak the sweetness, use dark chocolate, and even reduce the sugar if you like. Are they a salad? No. Are they a satisfying, homemade peanut butter dessert bar you can control the ingredients in? Absolutely.
From an SEO point of view (yes, the food blogger in me is also a data nerd), no bake dessert bars like these trend up every summer and around the holidays. People search for “easy no bake recipe,” “no bake chocolate bars,” and “homemade peanut butter bars” when they’re busy, hot, or both. So if that’s you? You’re in the right place.
Why You’ll Love This Recipe
- No oven needed – Keep your kitchen cool; everything sets in the fridge.
- Simple pantry ingredients – Peanut butter, chocolate, graham crackers, butter, sugar—nothing fancy.
- Foolproof for beginners – No tempering chocolate or tricky baking times.
- Ready to chill in 15 minutes – The hands-on time is very short.
- Perfect for parties and potlucks – Easy to slice, stack, and transport.
- Freezer-friendly – Make a batch now and stash some for later.
- Customizable – Works with crunchy or creamy peanut butter, dark or milk chocolate, even gluten-free crumbs.
- Tastes like a giant peanut butter cup – But with that nostalgic dessert-bar texture.
- Scales beautifully – Double the recipe for a 9×13-inch pan without any extra fuss.
Ingredients for No Bake Peanut Butter Bars
Let’s walk through what you’ll need for this peanut butter bars recipe. I’ll add a few tips and flexible options as we go.
Peanut Butter Base Layer
-
1 cup (225 g) creamy peanut butter
- Use a regular shelf-stable peanut butter like Jif, Skippy, or Peter Pan for the most consistent texture.
- Natural peanut butter can work, but you may need a bit more powdered sugar to help it set.
-
1/2 cup (113 g) unsalted butter, melted
- If you only have salted butter, that’s fine—just reduce or skip any added salt.
- Melt it gently on the stovetop or in the microwave in 15–20 second bursts.
-
2 cups (200 g) graham cracker crumbs
- About 14–16 full sheets of graham crackers, finely crushed.
- You can also use digestive biscuits, vanilla wafers, or gluten-free graham crackers.
-
1 3/4 cups (210 g) powdered sugar (confectioners’ sugar)
- This gives the bars structure and sweetness without grit.
- Sift if it looks clumpy, especially if your kitchen is humid.
-
1 teaspoon pure vanilla extract
- Adds warmth and depth to the peanut butter flavor.
-
1/4 teaspoon fine sea salt
- Helps balance the sweetness and makes the peanut flavor pop.
Chocolate Peanut Butter Topping
-
1 1/2 cups (270 g) semi-sweet chocolate chips
- You can also use chopped chocolate bars. Semi-sweet is a nice middle ground for sweetness.
-
1/4 cup (60 g) creamy peanut butter
- This keeps the chocolate layer from becoming too hard and helps it slice cleanly.
-
1 tablespoon butter or coconut oil (optional)
- Adds a little shine and softness to the topping—handy if your fridge runs very cold.
Optional Garnishes
These are all optional, but they make your no bake chocolate peanut butter bars look extra polished:
- Flaky sea salt
- Crushed peanuts or chopped roasted peanuts
- Mini chocolate chips
- Crushed pretzels
- A drizzle of melted white chocolate for contrast
And because we eat with our eyes first:

Step-by-Step Directions
You don’t need special equipment here—just a mixing bowl, spatula, and a small saucepan or microwave-safe bowl.
1. Prepare the pan
- Line an 8×8-inch (20×20 cm) square baking pan with parchment paper, leaving some overhang on the sides for easy lifting.
- Lightly spritz with nonstick spray if you want extra insurance against sticking (optional but helpful).
Tip: If you’re doubling this easy no bake recipe, use a 9×13-inch pan.
2. Make the peanut butter base
- In a large bowl, combine melted butter, 1 cup peanut butter, vanilla, and salt. Stir until smooth and creamy.
- Add the graham cracker crumbs and powdered sugar. Mix until everything is evenly combined and you have a soft, thick dough-like mixture.
You’re looking for a mixture that holds together when pressed. If it seems too crumbly, add 1–2 tablespoons of extra peanut butter. If it’s too soft or greasy, sprinkle in another tablespoon or two of graham cracker crumbs.
3. Press the base into the pan
- Transfer the peanut butter mixture to your prepared pan.
- Use a spatula or the bottom of a measuring cup to press it into an even, compact layer.
Take a moment here—pressing firmly helps the bars slice neatly later. I usually run a spatula over the top to smooth it out like frosting.
4. Make the chocolate peanut butter topping
- Place the chocolate chips, 1/4 cup peanut butter, and butter or coconut oil (if using) in a microwave-safe bowl.
- Microwave in 20–30 second intervals, stirring well after each, until the mixture is fully melted and smooth. This usually takes about 60–90 seconds total.
Alternatively, you can melt everything gently in a heatproof bowl set over a pot of simmering water (a simple double boiler).
If the chocolate looks a little thick, you can stir in an extra teaspoon of coconut oil or neutral oil to loosen it.
5. Pour and smooth
- Pour the melted chocolate peanut butter mixture over the peanut butter base.
- Tilt the pan and use a spatula to spread it into an even layer, reaching all the corners.
Give the pan a few gentle taps on the counter to help any air bubbles rise and pop.
6. Add toppings
- While the chocolate is still soft, sprinkle on any garnishes you like: flaky sea salt, crushed peanuts, mini chips, or pretzel crumbs.
A light sprinkling of flaky sea salt really makes the chocolate and peanut butter flavors shine—highly recommended.
7. Chill the bars
- Cover the pan loosely with plastic wrap or foil.
- Chill in the refrigerator for at least 2 hours, or until the chocolate is set and the base feels firm when pressed.
If you’re in more of a hurry, you can place the pan in the freezer for about 45 minutes to 1 hour, just be aware the chocolate might be a little firmer to cut.
8. Slice and serve
- Use the parchment overhang to lift the whole slab out of the pan and onto a cutting board.
- With a sharp knife, cut into 16 large bars or 25 smaller squares, depending on how rich you want the servings.
For the cleanest cuts, warm the knife under hot water, dry it, and wipe the blade between cuts.
Servings & Timing
- Yield: 16–25 bars (depending on cut size)
- Prep Time: 15–20 minutes
- Chill Time: 2 hours (or about 1 hour in the freezer)
- Total Time: About 2 hours 15 minutes, mostly hands-off
These peanut butter bars recipe portions are rich, so I often cut them smaller for a dessert tray and a little larger when they’re the “main” treat.
Tasty Variations to Try
Once you’ve made the classic version, it’s fun to play around. Here are a few no bake dessert bars twists that work beautifully:
- Extra Nutty Crunch: Use crunchy peanut butter in the base and sprinkle chopped peanuts on top.
- Dark Chocolate Dream: Use 70% dark chocolate for the topping and reduce the powdered sugar in the base by 1/4 cup for a less-sweet bar.
- Gluten-Free Version: Swap the graham cracker crumbs for gluten-free graham crackers or finely crushed gluten-free cookies.
- Peanut-Free Swap: Use almond butter or sunflower seed butter instead of peanut butter (texture will be similar, flavor will change slightly).
- Sweet & Salty Pretzel Base: Replace half the graham cracker crumbs with crushed pretzels for a salty crunch.
- Holiday Peppermint Twist: Add 1/2 teaspoon peppermint extract to the chocolate layer and sprinkle with crushed Candy canes in December.
Honestly, once you have this basic no bake chocolate bars formula down, you can tailor it to almost any flavor profile you love.
How to Store and Freeze Your Bars
These homemade peanut butter bars store really well, which makes them great for prepping ahead.
Fridge Storage
- Place sliced bars in an airtight container, layering parchment paper between layers to keep them from sticking.
- Store in the refrigerator for up to 1 week.
- Let them sit at room temperature for 5–10 minutes before serving if you want a slightly softer bite.
Freezer Storage
- Arrange the bars in a single layer on a baking sheet and freeze until firm, about 1 hour.
- Transfer the frozen bars to a freezer-safe container or zip-top bag, with parchment between layers.
- Freeze for up to 2–3 months.
To serve from frozen, let the bars thaw in the fridge for a few hours or on the counter for about 20–30 minutes. They’re actually pretty delicious half-frozen too—like a peanut butter icebox treat.
Make-Ahead Tips
If you’re making these no bake peanut butter bars for a party or holiday:
- Make them 1–2 days in advance and store in the fridge.
- Slice the bars the day you plan to serve for the neatest edges.
- If transporting, keep them chilled in a cooler pack; the chocolate topping softens if left in a warm car or sunny spot.
Notes from My Kitchen
A few things I’ve learned after testing this recipe more times than I should probably admit:
- Graham crackers matter: Finer crumbs give you a smoother base. I like to pulse them in a food processor, but a sturdy zip bag and a rolling pin work too.
- Peanut butter consistency: Shelf-stable peanut butter gives you that classic peanut butter bars recipe texture. If using natural peanut butter, stir it very well and be ready to adjust the powdered sugar slightly.
- Sweetness level: If you prefer desserts less sweet, you can cut the powdered sugar down to 1 1/2 cups and use dark chocolate. The bars will still set, just be a bit softer.
- Cutting cleanly: Chilling is key. If the chocolate topping cracks when you slice, let the bars sit at room temperature for 5–10 minutes before cutting.
- Small pan vs. big pan: An 8×8-inch pan gives thicker, bakery-style bars. A 9×9 will give slightly thinner bars. For a crowd, double the recipe in a 9×13-inch pan.
- Texture balance: If your base feels oily, it probably needs a bit more powdered sugar or crumbs. If it feels dry, one more spoonful of peanut butter usually fixes it.
You know what? This is one of those recipes where “good enough” is still really, really good. Don’t overthink it.
Frequently Asked Questions
Can I use natural peanut butter in this No Bake Peanut Butter Bars Recipe?
Yes, but make sure it’s well-stirred and not too runny; you may need to add extra powdered sugar or graham cracker crumbs so the base sets firmly.
Do these peanut butter dessert bars need to stay refrigerated?
Yes, they hold their shape best when chilled; you can leave them out at room temperature for an hour or two for serving, but store leftovers in the fridge.
Can I make these peanut butter bars recipe dairy-free?
You can—use dairy-free butter and dairy-free chocolate chips, and keep an eye on the texture of the base so it’s firm but spreadable.
What’s the best way to crush graham crackers for no bake peanut butter bars?
A food processor is quickest, but a heavy-duty zip-top bag and rolling pin work well; just crush them very fine for the best texture.
Why is my chocolate topping cracking when I cut the bars?
It’s likely too cold or too firm; let the bars sit at room temperature for 5–10 minutes, run a sharp knife under hot water, dry it, and slice gently.
Can I reduce the sugar in this easy no bake recipe?
Yes—try cutting the powdered sugar by 1/4 to 1/2 cup and using darker chocolate; the bars will be slightly softer but still delicious.
How long do these no bake chocolate bars last in the freezer?
They’ll keep well for about 2–3 months in an airtight, well-sealed container.
Can I use a different nut butter?
Absolutely—almond butter, cashew butter, or sunflower seed butter all work, as long as they’re thick and not too runny.
Conclusion: Your New Go-To No Bake Treat
These No Bake Peanut Butter Bars hit that sweet spot (literally and figuratively) between nostalgic and practical—no oven, simple ingredients, and big chocolate-peanut butter flavor. Whether you’re packing a dessert tray, sneaking a square with your afternoon coffee, or stocking the freezer for “just in case,” they’re the kind of treat that quietly becomes a family favorite.
If you try this No Bake Peanut Butter Bars Recipe, I’d love to hear how it turns out—tell me your favorite variation, or what kind of chocolate you used. And if you enjoy easy no bake dessert bars, you might also like my other no-bake treats like cookie truffles or simple cheesecake cups, which follow the same low-stress, high-reward approach.
No Bake Peanut Butter Bars
Ingredients
- 1 cup creamy peanut butter for the base; shelf-stable like Jif, Skippy, or Peter Pan preferred
- 1/2 cup unsalted butter melted
- 2 cups graham cracker crumbs about 14–16 full sheets, finely crushed
- 1 3/4 cups powdered sugar confectioners’ sugar; sift if clumpy
- 1 teaspoon pure vanilla extract
- 1/4 teaspoon fine sea salt
- 1 1/2 cups semi-sweet chocolate chips
- 1/4 cup creamy peanut butter for the chocolate topping
- 1 tablespoon butter or coconut oil optional, for a softer, shinier topping
- flaky sea salt optional, for garnish
- crushed or chopped roasted peanuts optional, for garnish
- mini chocolate chips optional, for garnish
- crushed pretzels optional, for garnish
- melted white chocolate optional, for drizzling on top
Instructions
- Line an 8x8-inch (20x20 cm) square baking pan with parchment paper, leaving some overhang on the sides for easy lifting. Lightly spritz with nonstick spray if desired.
- In a large bowl, combine the melted butter, 1 cup creamy peanut butter, vanilla extract, and fine sea salt. Stir until smooth and creamy. Add the graham cracker crumbs and powdered sugar, then mix until evenly combined and a soft, thick dough-like mixture forms.1/2 cup unsalted butter, 1 cup creamy peanut butter, 1 teaspoon pure vanilla extract, 1/4 teaspoon fine sea salt, 2 cups graham cracker crumbs, 1 3/4 cups powdered sugar
- Check the consistency of the base. It should hold together when pressed. If it seems too crumbly, add 1–2 tablespoons of extra peanut butter. If it feels too soft or greasy, sprinkle in another tablespoon or two of graham cracker crumbs.1 cup creamy peanut butter, 2 cups graham cracker crumbs
- Transfer the peanut butter mixture to the prepared pan. Use a spatula or the bottom of a measuring cup to press it firmly into an even, compact layer, smoothing the top.
- Place the semi-sweet chocolate chips, 1/4 cup creamy peanut butter, and butter or coconut oil (if using) in a microwave-safe bowl. Microwave in 20–30 second intervals, stirring well after each, until fully melted and smooth (about 60–90 seconds total). Alternatively, melt gently in a heatproof bowl over a pot of simmering water.1 1/2 cups semi-sweet chocolate chips, 1/4 cup creamy peanut butter, 1 tablespoon butter or coconut oil
- Pour the melted chocolate-peanut butter mixture over the peanut butter base. Tilt the pan and use a spatula to spread it into an even layer that reaches all the corners. Gently tap the pan on the counter to release any air bubbles.
- While the chocolate is still soft, sprinkle on any garnishes you like, such as flaky sea salt, crushed peanuts, mini chocolate chips, or crushed pretzels. You can also drizzle melted white chocolate on top for contrast.flaky sea salt, crushed or chopped roasted peanuts, mini chocolate chips, crushed pretzels, melted white chocolate
- Cover the pan loosely with plastic wrap or foil and chill in the refrigerator for at least 2 hours, or until the chocolate is set and the base feels firm when pressed. For a faster set, chill in the freezer for about 45–60 minutes, noting that the chocolate will be firmer to cut.
- Use the parchment overhang to lift the slab out of the pan and onto a cutting board. With a sharp knife, cut into 16 large bars or up to 25 smaller squares. For the cleanest cuts, warm the knife under hot water, dry it, and wipe the blade between cuts.
- Store sliced bars in an airtight container in the refrigerator for up to 1 week, layering parchment between them. For longer storage, freeze the bars in a single layer until firm, then transfer to a freezer-safe container with parchment between layers and freeze for up to 2–3 months.