Would you like to save this?
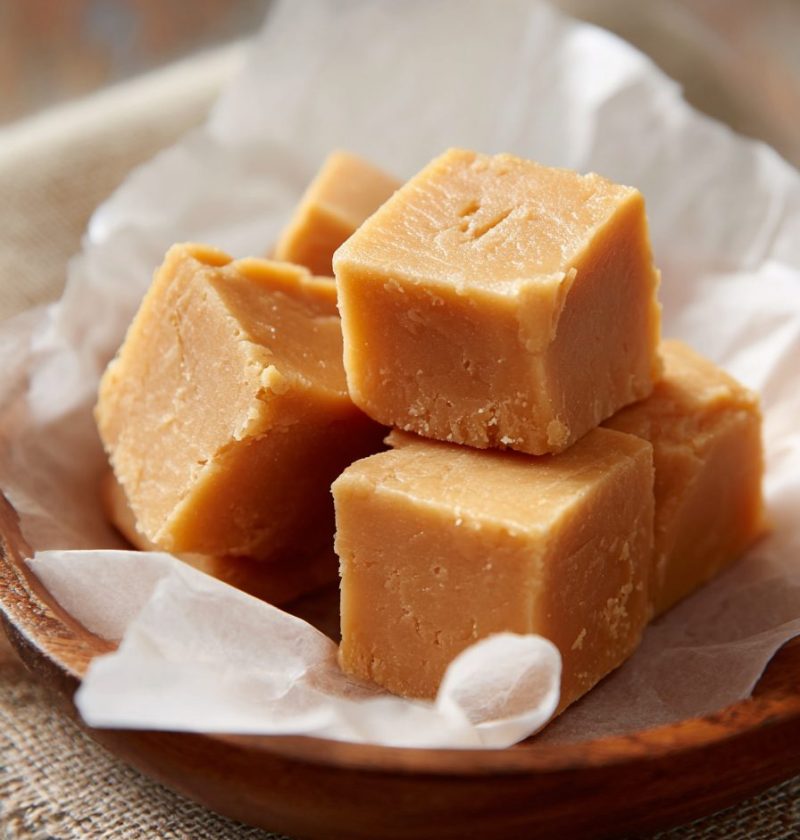
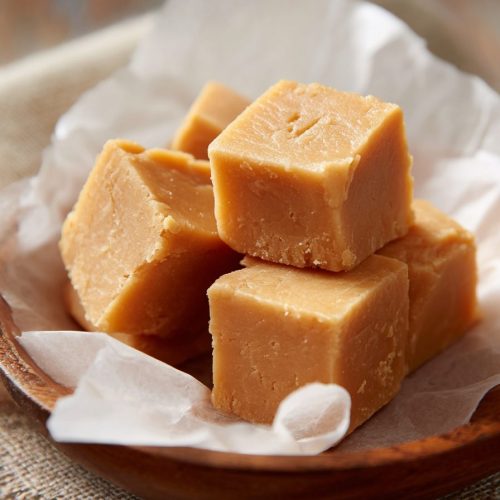
Needhams (Potato Fudge) Recipe
Needhams, classic Maine potato fudge candies wrapped in dark chocolate, are the kind of old-fashioned treat that makes a room go quiet with the first bite.
If you’ve never heard of them, this Needhams (Potato Fudge) Recipe might sound a little wild—yes, we’re using real mashed potatoes in candy—but stay with me. This traditional Maine candy recipe has been around for more than a century, especially in New England church kitchens and holiday bake sales. The potato keeps the coconut cream centers tender, smooth, and not-too-sweet, and the chocolate shell gives you that perfect snap.
I’m 50 now, and I’ve been making these since my kids were little. We set up an assembly line, someone in charge of rolling the coconut centers, someone on dipping duty, and someone “taste-testing” the rejects. They’ve become a Christmas staple at my house, but honestly, they’re just as welcome on a rainy weekend or tucked into a gift box any time of year.
What Are Needhams, Anyway?
Let me explain, because “mashed potato fudge” sounds like a prank if you didn’t grow up with it.
Needhams are a classic New England candy: a creamy coconut-and-potato center, flavored with Vanilla and a little butter, then dipped in melted chocolate. Think of them as chocolate coconut potato candy—sort of like a homemade Mounds bar with a softer, silkier middle and a fun backstory.
They’re especially famous as a Maine potato candy, because potatoes are a huge part of Maine’s farming history. Old-fashioned Needhams started as a thrifty way to stretch expensive ingredients like sugar and coconut. You’d use leftover mashed potatoes to bulk up the candy filling without changing the flavor much.
Why are they special?
- The texture is dreamy—like coconut cream centers from an old candy shop.
- The flavor is rich but not cloying.
- They’re no-bake, which is wonderful on busy days.
- And despite the name, you really don’t taste “potato” in the classic Needhams candy; you taste coconut, vanilla, and chocolate.
You know what? This is one of those recipes that feels vintage and nostalgic, but also kind of clever and modern at the same time. Turning humble mashed potatoes into a fancy dessert candy? That’s kitchen magic.
Why You’ll Love This Needhams (Potato Fudge) Recipe
- No oven needed – The whole traditional Needhams recipe comes together on the stovetop and countertop.
- Budget-friendly – A little potato stretches the sugar and coconut, just like the old New England cooks intended.
- Beautiful for gifting – These chocolate dipped Needhams look like you picked them up at a fancy candy shop.
- Naturally egg-free – Great for friends who can’t have eggs but still want a special dessert.
- Surprisingly simple – The ingredients are basic pantry items, and the steps are easy to follow.
- Perfect holiday candy – This vintage Maine confection fits right into Christmas tins, Easter baskets, or Valentine’s treat boxes.
- Make-ahead friendly – They actually set up better after a night in the fridge.
- Customizable flavors – Turn them into peppermint, almond, or even mocha potato fudge with a few tweaks.
- Not too sweet – The potato and coconut balance the sugar, so you don’t get that cloying sugar rush.
Ingredients for Classic Needhams (Potato Fudge) Recipe
Here’s everything you’ll need for this homemade potato fudge with coconut and chocolate. I’ll add a few notes, like I would if you were standing at my kitchen counter with me.
For the coconut-potato filling:
- 1/2 cup mashed potato, very smooth and cooled
- (From about 1 medium russet or Yukon Gold potato; plain—no butter, milk, or salt)
- 1/2 cup (1 stick / 113 g) unsalted butter, softened
- (Salted butter works; just skip added salt.)
- 1 teaspoon pure vanilla extract
- 1/4 teaspoon fine sea salt
- 5–5 1/2 cups powdered sugar (confectioners’ sugar), sifted
- (Start with 5 cups; add more if the mixture is too loose.)
- 3 cups sweetened shredded coconut
- (Use finely shredded for the best “coconut cream” texture.)
For the chocolate coating:
- 16 ounces semisweet or dark chocolate, chopped
- (Chocolate chips work, but a bar melts smoother—brands like Ghirardelli or Guittard are great.)
- 2 tablespoons coconut oil or shortening
- (Helps make the coating shiny and easier to dip.)
A quick note on potatoes:
Use a starchy potato like russet or a medium-starch like Yukon Gold. Waxy potatoes, like red potatoes, can turn a bit gummy when mashed and change the texture of your mashed potato fudge. You want them mashed very smooth, with no lumps at all—lumps show up as little bumps in your coconut cream centers.
And one more note on sugar:
Humidity affects powdered sugar. On a damp day, you might need all 5 1/2 cups; on a dry day, 5 cups may be perfect. We’ll talk about what the mixture should feel like in the directions.

Step-by-Step Directions for Homemade Needhams
1. Cook and mash the potato
- Peel and cube your potato. Place in a small pot, cover with cold water by about an inch, and bring to a gentle boil.
- Cook until the pieces are very tender when pierced with a fork—about 10–12 minutes.
- Drain well and return the potato to the warm pot. Mash until completely smooth, with no lumps.
- Tip: Use a ricer or press through a fine mesh sieve if you want that ultra-smooth texture.
Let the mashed potato cool to room temperature before you use it. Warm potatoes will melt the butter and make the filling too loose.
2. Mix the potato fudge coconut filling
- In a large mixing bowl, beat the softened butter with a hand mixer until creamy.
- Add 1/2 cup cooled mashed potato, vanilla, and salt. Beat until combined and smooth.
- Gradually add 4 cups of the powdered sugar, about 1 cup at a time, mixing on low speed so it doesn’t go everywhere.
- Stir in the coconut with a spatula. At this point, check the texture.
You’re aiming for a thick, scoopable dough that you can press into a pan or shape into squares. It should be firm, not runny, but not so dry that it crumbles.
- Add more powdered sugar, 1/4 cup at a time, until the mixture holds its shape when pressed.
- If it’s too soft and sticky: more sugar.
- If it’s too stiff or dry: you can sprinkle in another teaspoon or two of mashed potato or a teaspoon of milk, but go very slowly.
3. Chill the centers
- Line a 9×13-inch baking pan with parchment paper, letting it hang over the edges for easy lifting.
- Press the coconut-potato mixture evenly into the pan, smoothing the top with an offset spatula or the back of a spoon.
You can also shape this needhams potato fudge mixture into small balls or rectangles by hand if you prefer, but the pan method is easier for beginners.
- Chill in the refrigerator for at least 2 hours, or in the freezer for 45–60 minutes, until very firm.
The centers need to be cold and solid before dipping. If they’re soft, they’ll fall apart in the chocolate and you’ll say unkind words about me under your breath.
4. Cut the coconut cream centers
- Lift the chilled slab out of the pan using the parchment edges and place it on a cutting board.
- Using a sharp knife, cut into small squares or rectangles, about 1 to 1 1/2 inches.
You should get roughly 40–50 pieces, depending on how big you cut them. Return the cut pieces to the fridge or freezer while you prepare the chocolate.
5. Melt the chocolate coating
- Place the chopped chocolate and coconut oil (or shortening) in a microwave-safe bowl.
- Microwave on 50% power in 20–30 second bursts, stirring well after each.
- Stop heating when most of the chocolate is melted and a few small pieces remain—keep stirring until it’s completely smooth and glossy.
If you prefer the stovetop, use a double boiler: set a heatproof bowl over a pot of gently simmering water, without letting the bottom touch the water, and stir until melted.
If the melted chocolate seems very thick, stir in another teaspoon or two of coconut oil to thin it slightly for dipping.
6. Dip the Needhams
- Working with a few centers at a time (keep the rest chilled), place one piece on a fork. Dip into the melted chocolate, spooning chocolate over the top if needed.
- Lift it out, gently tap the fork on the side of the bowl to remove excess chocolate, and slide the candy onto a parchment-lined baking sheet.
- Repeat with the remaining pieces.
If the chocolate starts to thicken as you work, warm it gently again in the microwave for 10–15 seconds. Cold centers plus room-temp chocolate can set fast.
You can drizzle a little extra chocolate over the top for a fancy look, or sprinkle a few coconut flakes on a couple of pieces so people know what’s inside.
7. Let them set
- Let the chocolate dipped Needhams sit at room temperature until the coating is firm, about 30–45 minutes, or pop the tray in the fridge for 15–20 minutes for faster setting.
Once the chocolate is firm, transfer the candies to an airtight container.
Servings & Timing
- Yield: About 40–50 classic Needhams candy pieces
- Prep Time: 30–40 minutes (including mixing and shaping)
- Chill Time: 2 hours in the fridge (or about 1 hour in the freezer total, split between steps)
- Total Time: About 2 1/2–3 hours, most of it hands-off chilling time
It’s a perfect afternoon project: mix in the morning, chill while you do other things, and then dip in the afternoon with a cup of coffee nearby.
Fun Variations on Traditional Needhams
Once you master the classic Maine potato candy, you can play a bit:
- Peppermint Needhams: Add 1/2 teaspoon peppermint extract to the filling and sprinkle crushed candy cane on top of the wet chocolate—amazing for Christmas.
- Almond Joy–style: Swap half the vanilla for almond extract and press a toasted almond on top of each center before dipping.
- Extra dark chocolate version: Use 70–72% dark chocolate for a more grown-up, less sweet Needhams dessert recipe.
- Orange twist: Add 1 teaspoon fresh orange zest to the filling and use a dark chocolate coating—bright and lovely.
- Dairy-free Needhams: Use vegan butter, dairy-free chocolate, and coconut oil; the mashed potato and coconut still give you that creamy center.
- Bar-style Needhams: Skip cutting into small pieces and press the filling into an 8×8 pan, chill, then pour chocolate over the top and slice into bars after it sets.
Storage, Freezing & Make-Ahead Tips
One of my favorite things about this Needhams (Potato Fudge) Recipe is how well it keeps. These candies are sturdy little treasures.
- Room temperature: Keep in a cool room, in an airtight container, for up to 3 days. (Not great for warm kitchens; the chocolate can bloom or soften.)
- Refrigerator: Store in a covered container for up to 2 weeks. Separate layers with parchment paper so they don’t stick together.
- Freezer: Freeze in a well-sealed container for up to 3 months. Again, use parchment between layers.
To serve from frozen, let the candies thaw in the fridge overnight, then bring to room temperature for about 15–20 minutes before eating. No reheating needed—just a little patience.
For holidays or parties, you can make the coconut cream centers up to 2 days ahead, keep them chilled, and then dip them in chocolate the day before serving. The chocolate looks its best within the first several days.
Notes From My Kitchen to Yours
- Don’t overdo the potato. More potato doesn’t make the filling “healthier”; it just makes it wetter. Measure that 1/2 cup and resist the urge to toss in more.
- Texture is everything. If the filling feels too sticky to shape, it needs more powdered sugar or more chilling time. If it’s cracking when you cut it, it’s a little too dry—next time, hold back some sugar.
- Warm chocolate, cold centers. That’s your best combo for a nice, even chocolate coat. If both are cold, the chocolate can seize up fast; if both are warm, the centers fall apart.
- Use good chocolate. This is a simple new england candy recipe, so the quality of chocolate really shows. It doesn’t have to be expensive, but avoid waxy bargain chocolate.
- Decorating tip: If you’re making a big tray for a party, drizzle some with White chocolate or sprinkle toasted coconut so you get a pretty mix of textures.
- Flavor balance: If you prefer less sweet desserts, go with a darker chocolate (60–70%) and you’ll get a lovely contrast to the sweet coconut cream centers.
I learned the hard way, years ago, that if you rush the chilling steps, you’ll end up fishing broken candy out of chocolate like a raccoon at midnight. Take the time to chill; it really pays off.
FAQs About Needhams (Potato Fudge) Recipe
1. Can you taste the potato in Needhams?
No, you really can’t. The potato is there for texture and moisture; the flavor is mostly coconut, vanilla, and chocolate.
2. My filling is too soft and sticky. What did I do wrong?
Most likely, it needs more powdered sugar or more chilling time. Mix in extra sugar a little at a time until the mixture holds its shape, then chill well.
3. Why is my chocolate cracking when I bite the candy?
That can happen if the centers are very cold and the room is warm, or if the chocolate coating is very thick. Let the candies sit at room temperature briefly before serving, and try a thinner coat next time.
4. Can I make Needhams without coconut?
Traditional Needhams are a coconut potato candy, so you’d be veering away from the classic. You can reduce the coconut a bit and add more powdered sugar, but the texture will change.
5. Are Needhams gluten-free?
Yes, generally. The ingredients here are naturally gluten-free, but always check your powdered sugar and chocolate labels if you’re serving someone with celiac disease.
6. Can I use leftover mashed potatoes from dinner?
Ideally, no. Needhams work best with plain mashed potato—no butter, milk, cream, salt, or pepper. Seasoned mashed potatoes can affect both flavor and texture.
7. How long do Needhams last?
Stored in the fridge, they keep well for up to 2 weeks; in the freezer, up to 3 months, as long as they’re in an airtight container.
8. Can I make this recipe without an electric mixer?
Yes, though it’s a little more work. Use a sturdy wooden spoon or spatula to mix, and make sure your butter is very soft so it blends well with the potato and sugar.
Wrapping It Up (and Wrapping Them for Gifts!)
This Needhams (Potato Fudge) Recipe is one of those old fashioned Needhams traditions that feels like a little love letter from Maine—simple ingredients, clever technique, and a whole lot of heart. You get creamy coconut potato fudge centers, a snap of chocolate, and a story to tell when someone says, “Wait, there’s potato in this?”
If you make these classic Needhams candy at home, I’d love to hear how they turned out—tell me if you went peppermint, almond, or straight-up traditional. And if you’re in the mood for more vintage sweets, put on a pot of coffee and explore other old-fashioned New England candy ideas next; there’s a whole world of cozy recipes waiting.
Needhams (Potato Fudge) Recipe
Ingredients
- 1/2 cup mashed potato very smooth and cooled; from about 1 medium russet or Yukon Gold; plain—no butter, milk, or salt
- 1/2 cup unsalted butter softened (1 stick / 113 g). Salted butter works; just skip added salt.
- 1 teaspoon pure vanilla extract
- 1/4 teaspoon fine sea salt
- 5–5 1/2 cups powdered sugar confectioners’ sugar, sifted; start with 5 cups and add more if mixture is too loose
- 3 cups sweetened shredded coconut finely shredded for best coconut cream texture
- 16 ounces semisweet or dark chocolate chopped; chocolate chips or bars (bars melt smoother—Ghirardelli or Guittard recommended)
- 2 tablespoons coconut oil or shortening helps make the coating shiny and easier to dip
Instructions
- Peel and cube a medium russet or Yukon Gold potato. Place in a small pot, cover with cold water by about 1 inch, and bring to a gentle boil. Cook until the pieces are very tender when pierced with a fork, about 10–12 minutes. Drain well and return the potato to the warm pot. Mash until completely smooth with no lumps (a ricer or pressing through a fine mesh sieve gives the smoothest texture). Let the mashed potato cool to room temperature before using so it doesn’t melt the butter.
- In a large mixing bowl, beat the softened butter with a hand mixer until creamy. Add 1/2 cup cooled mashed potato, vanilla, and salt; beat until smooth and well combined. Gradually add 4 cups of the powdered sugar, about 1 cup at a time, mixing on low speed. Stir in the shredded coconut with a spatula. Check the texture—you want a thick, scoopable dough that holds its shape when pressed, firm but not crumbly.
- Add additional powdered sugar, 1/4 cup at a time, until the mixture is firm enough to press into a pan or shape into squares. If the mixture is too soft and sticky, add more powdered sugar. If it becomes too stiff or dry, sprinkle in a teaspoon or two of mashed potato or a teaspoon of milk, mixing gently and adding very slowly.
- Line a 9×13-inch baking pan with parchment paper, letting it overhang the edges. Press the coconut-potato mixture evenly into the pan, smoothing the top with an offset spatula or the back of a spoon. Chill in the refrigerator for at least 2 hours, or in the freezer for 45–60 minutes, until very firm. The centers must be cold and solid before dipping so they don’t fall apart in the chocolate.
- Lift the chilled slab out of the pan using the parchment overhang and place it on a cutting board. Using a sharp knife, cut into small squares or rectangles about 1 to 1 1/2 inches in size. You should get roughly 40–50 pieces, depending on how large you cut them. Return the cut centers to the fridge or freezer while you prepare the chocolate.
- Place the chopped chocolate and coconut oil (or shortening) in a microwave-safe bowl. Microwave on 50% power in 20–30 second bursts, stirring well after each. Stop heating when most of the chocolate is melted with a few small pieces remaining; continue stirring until the mixture is completely smooth and glossy. If using a stovetop, melt gently in a double boiler over barely simmering water, stirring until smooth. If the chocolate seems very thick, stir in another teaspoon or two of coconut oil to thin it slightly for dipping.
- Working with a few chilled centers at a time, place one piece on a fork and dip it into the melted chocolate, spooning chocolate over the top if needed. Lift it out and gently tap the fork on the side of the bowl to let excess chocolate drip off. Slide the coated candy onto a parchment-lined baking sheet. Repeat with the remaining centers, reheating the chocolate briefly if it begins to thicken. Optionally, drizzle extra chocolate over the tops or sprinkle a few coconut flakes on some pieces for decoration.
- Let the dipped Needhams sit at room temperature until the chocolate coating is firm, about 30–45 minutes, or refrigerate for 15–20 minutes to speed setting. Once the chocolate is fully set, transfer the candies to an airtight container. Store at room temperature (in a cool room) for up to 3 days, in the refrigerator for up to 2 weeks, or freeze for up to 3 months with parchment between layers.