Would you like to save this?
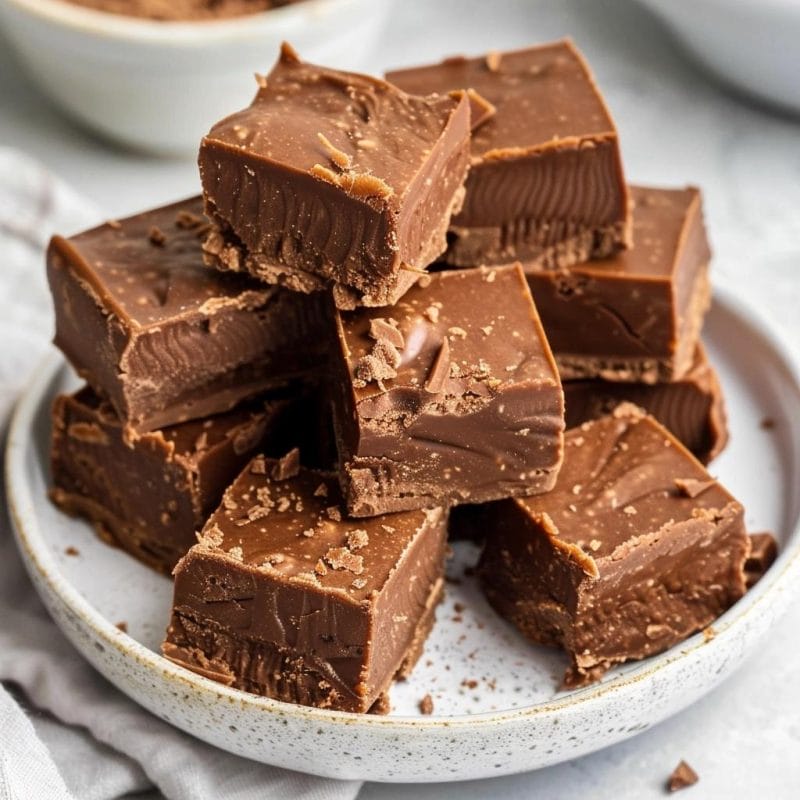
There are recipes that transcend time and place, weaving themselves into the fabric of our memories, and for me, my mom’s fudge is one such treasure. It’s not just a dessert; it’s a portal to childhood holidays, cozy family gatherings, and the kind of homemade sweetness that warms the heart. Every bite of this rich, velvety fudge is a reminder of my mother’s kitchen, where the air was filled with the comforting aroma of melting chocolate and buttery caramelized sugar.
My mom’s fudge is renowned in our family not just for its exceptional taste but also for the joy it brings to those who indulge in it. I remember standing by her side as a child, eagerly awaiting the moment she’d stir in the marshmallow fluff and watch in awe as the mixture transformed into a glossy, luscious treat. The ritual of preparing this fudge—stirring the pot, waiting patiently for it to set, and finally slicing it into squares—is a cherished tradition that I now pass on to my own family.
This recipe is incredibly straightforward, making it accessible even to novice cooks, yet it delivers a decadent treat that feels indulgent and special. Perfect for holiday gatherings, gift-giving, or simply a sweet pick-me-up, my mom’s fudge is bound to become a favorite in your own kitchen.
Ingredients
¾ cup unsalted butter
2 ½ cups granulated sugar
â…†cup evaporated milk
12 oz. bag semi-sweet chocolate chips
7 oz. jar marshmallow fluff
1 teaspoon vanilla extract
Directions
1. Prepare Your Baking Dish
Line the Dish
: Start by lining a 9×9-inch baking dish with aluminum foil. This will help you lift the fudge out of the dish easily once it’s set. Be sure to leave some overhang on the sides for easy removal.
Grease the Foil: Lightly spray the foil-lined dish with cooking spray. This step ensures that your fudge will come out cleanly and prevents it from sticking to the foil.
2. Cook the Fudge Mixture
Combine Ingredients
: In a large saucepan, place ¾ cup of unsalted butter, 2 ½ cups of granulated sugar, and â…†cup of evaporated milk.
Heat and Whisk: Set the saucepan over high heat on the stove. Continuously whisk the mixture to combine the ingredients thoroughly. Bring the mixture to a rolling boil. This is crucial, as boiling helps to dissolve the sugar and ensures a smooth texture in the final fudge.
Boil and Stir: Once the mixture reaches a boil, reduce the heat to medium. Continue to boil the mixture for exactly five minutes. It’s important to keep whisking during this time to prevent burning and to ensure that the sugar is fully dissolved.
3. Incorporate the Chocolate and Marshmallow
Remove from Heat
: After five minutes of boiling, remove the saucepan from the heat.
Add Chocolate Chips: Immediately whisk in the 12 oz. bag of semi-sweet chocolate chips. The heat from the mixture will melt the chocolate, creating a smooth, glossy texture. Keep whisking until the chocolate chips are fully melted and the mixture is uniformly smooth.
Mix in Marshmallow Fluff: Add the 7 oz. jar of marshmallow fluff to the mixture. Whisk until the fluff is completely incorporated and the mixture is smooth and creamy. The fluff adds a delightful texture and a touch of sweetness that is characteristic of classic fudge.
Add Vanilla Extract: Finally, stir in 1 teaspoon of vanilla extract. This step enhances the overall flavor of the fudge, adding a hint of warmth and depth.
4. Transfer and Set
Pour into Dish
: Carefully pour the fudge mixture into the prepared 9×9-inch baking dish. Spread it evenly with a spatula to ensure a uniform thickness.
Cool and Chill: Allow the fudge to cool at room temperature for a few hours. Once it has started to set, transfer it to the refrigerator and let it chill for at least several hours, or until fully set. Chilling in the fridge solidifies the fudge and makes it easier to cut into neat squares.
5. Slice and Serve
Lift and Slice
: Once the fudge is fully set, lift it out of the baking dish using the overhanging foil. Place it on a cutting board and use a sharp knife to cut it into squares.
Enjoy: Serve the fudge as a delightful treat on its own or alongside a cup of coffee or tea. It also makes a wonderful gift when wrapped in festive paper or placed in a decorative tin.
Variations & Tips
Nutty Fudge
: For a bit of crunch, consider adding ½ cup of chopped nuts, such as walnuts or pecans, to the fudge mixture along with the chocolate chips.
Flavor Twists: Experiment with different extracts to change the flavor profile of the fudge. Almond or peppermint extract can add unique notes to the classic recipe.
Swirl Additions: For a marbled effect, swirl in some caramel sauce or peanut butter into the fudge before it sets. Use a knife or skewer to create the swirls.
Salted Fudge: Sprinkle a pinch of sea salt on top of the fudge before chilling for a sweet and salty contrast that enhances the flavor.
Dairy-Free Version: Substitute the butter with a dairy-free alternative and use dairy-free chocolate chips to create a version suitable for those with dairy sensitivities.
Conclusion
My mom’s fudge is more than just a recipe; it’s a family tradition and a sweet slice of nostalgia. Each piece is rich, creamy, and indulgent, with a smooth texture that melts in your mouth. The combination of butter, chocolate, and marshmallow fluff creates a perfect harmony of flavors that is both comforting and satisfying.
Making this fudge is not only about preparing a delicious treat but also about continuing a cherished tradition. Whether you’re sharing it with loved ones during the holidays, bringing it to a potluck, or enjoying it as a personal indulgence, this fudge brings joy and satisfaction in every bite. Its simplicity and deliciousness make it a recipe worth holding onto and sharing with future generations. Enjoy the process and, most importantly, the sweet results!


