Would you like to save this?
Ingredients
2 8oz packages of cream cheese, softened to room temperature
3/4 cup of sugar
3 large eggs
1 tsp vanilla extract
1 tbsp freshly squeezed lemon juice
A dash or two of lemon zest (optional)
Mini Nilla Wafers
1 can of pie filling of your choice (strawberry is always a winner)
Instructions
Step 1: Preparation
Preheat Your Oven
Preheat your oven to 350°F (175°C). This ensures that your cheesecakes will bake evenly and to perfection.
Prepare the Mini Cupcake Pan
Line a mini cupcake pan with mini liners. This recipe should make about 24 mini cheesecakes, so make sure you have enough liners.
Add the Nilla Wafers
Place a mini Nilla Wafer in each liner, with the mounded side facing up. This will form the base of your mini cheesecakes, adding a delightful crunch.
Step 2: Mixing the Cheesecake Batter
Gather Your Ingredients
Ensure all your ingredients are at room temperature, especially the cream cheese, which will make mixing easier and smoother.
Combine the Ingredients
In a large mixing bowl, combine the softened cream cheese, sugar, vanilla extract, eggs, lemon juice, and lemon zest (if using).
Mix Until Smooth
Using an electric mixer, beat the ingredients together on medium speed until the mixture is silky smooth and free of lumps. This should take about 3-5 minutes. Make sure to scrape down the sides of the bowl occasionally to ensure everything is well combined.
Step 3: Filling the Liners
Fill the Liners
Carefully spoon the cheesecake batter into the prepared cupcake liners, filling each one about three-quarters full. The cheesecakes will puff up during baking and then settle down with a slight dip in the middle, perfect for holding the pie filling later.
Avoid Overfilling
Don’t worry if you slightly overfill some; they will still turn out fine. It’s better to err on the side of a little too much rather than too little.
Step 4: Baking
Bake
Place the mini cupcake pan in the preheated oven and bake for 18-20 minutes. The cheesecakes should be set with a slight jiggle in the center when done.
Cool the Cheesecakes
Allow the cheesecakes to cool in the pan for about 10 minutes, then transfer them to a wire rack to cool completely. For best results, chill them in the refrigerator for at least an hour to set fully.
Step 5: Adding the Topping
Prepare the Pie Filling
Open your can of pie filling. Strawberry is a classic choice, but feel free to use your favorite – blueberry, cherry, or even apple would be delicious.
Top the Cheesecakes
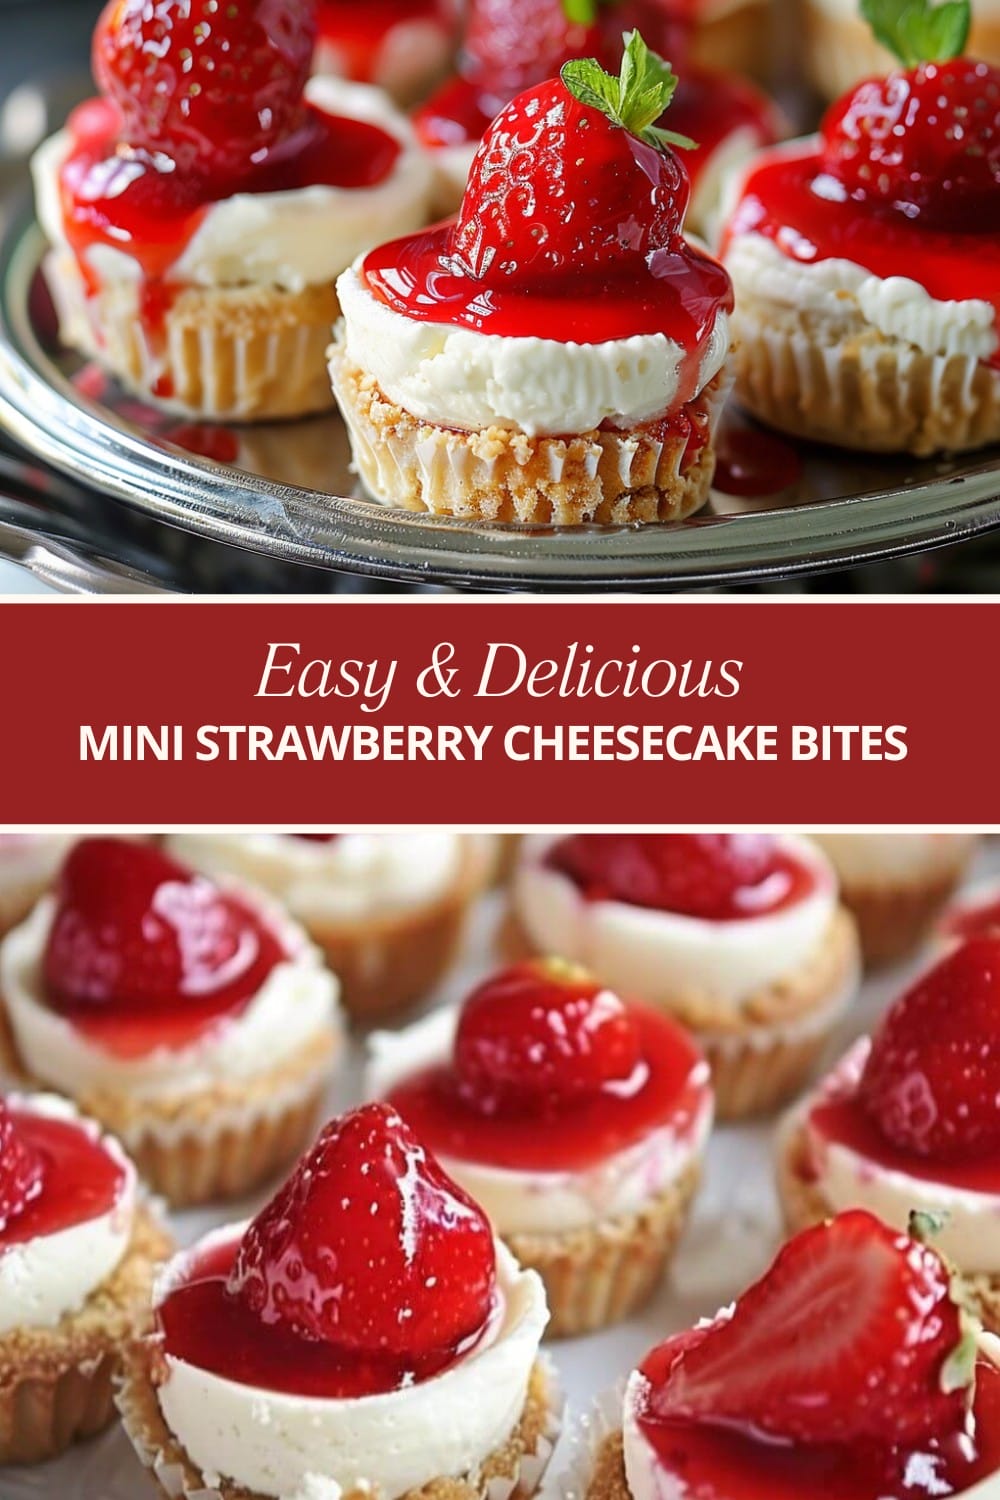
Once the mini cheesecakes are fully cooled and set, spoon a small amount of pie filling onto each one, filling the dip in the center. Be generous but careful not to overflow.
Variations and Substitutions
One of the best things about this recipe is its versatility. Here are a few variations and substitutions to suit different tastes and dietary preferences:
Gluten-Free: Use gluten-free vanilla wafers to make this recipe suitable for those with gluten sensitivities.
Different Extracts: Substitute the vanilla extract with almond, lemon, or coconut extract for a different flavor profile.
Fruit Toppings: Experiment with different pie fillings or even fresh fruit for a lighter option. Mango puree or passion fruit curd would add an exotic twist.
Lower Sugar: Substitute the sugar with a sugar alternative like Stevia or erythritol for a lower-calorie version.
No-Bake Option: For a no-bake version, use a pre-made no-bake cheesecake mix and follow the instructions on the package, skipping the baking step.
Conclusion
These mini cheesecake bites are a delightful treat that combines the classic flavors of traditional cheesecake with the convenience and fun of individual servings. They are easy to make, and their small size makes them perfect for parties and gatherings. The creamy, smooth cheesecake, paired with the crunch of the Nilla Wafer base and the sweet, fruity topping, creates a delicious balance of textures and flavors.
Not only are these mini cheesecake bites enjoyable to eat, but they are also a joy to make. The process is straightforward, and the results are consistently impressive. Whether you’re a seasoned baker or a novice in the kitchen, this recipe is sure to become a favorite.
So next time you’re looking for a dessert that’s sure to impress, give these mini cheesecake bites a try. They are a wonderful way to indulge in the rich, creamy goodness of cheesecake without the need for a special occasion. Happy baking!

