Would you like to save this?
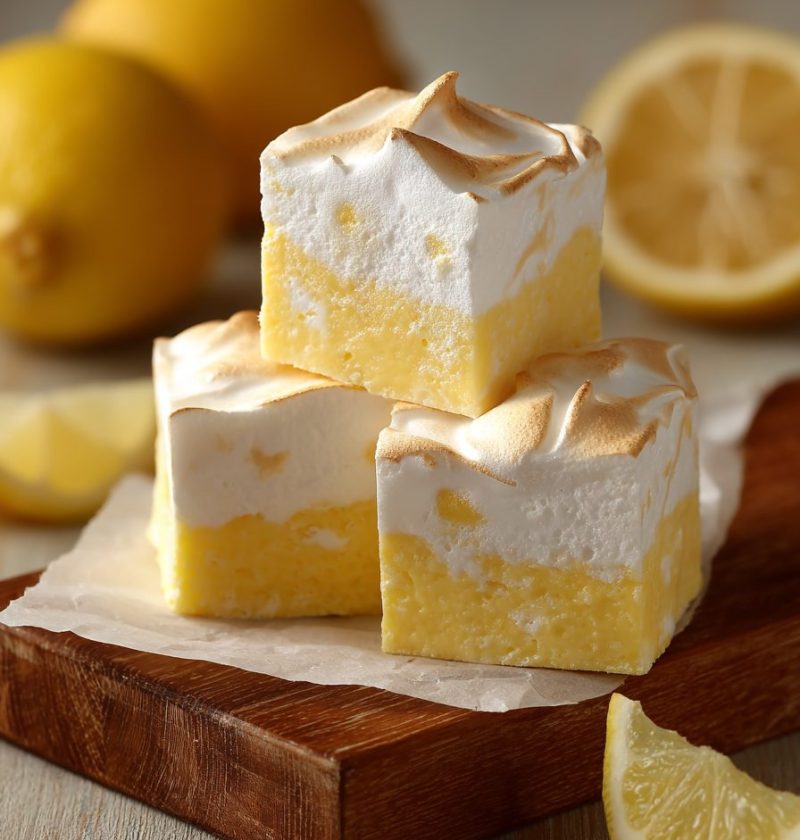
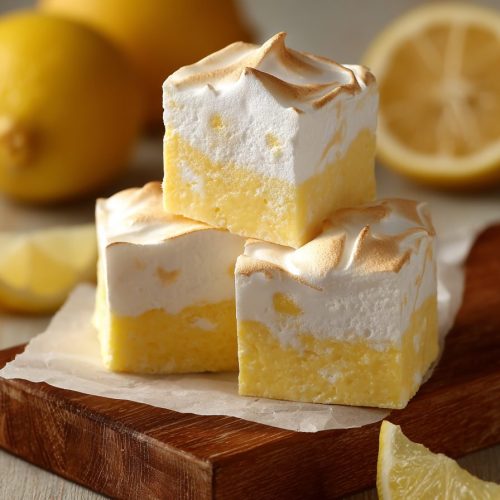
Lemon Meringue Fudge Recipe
If you love classic lemon meringue pie but want something easier, this Lemon Meringue Fudge Recipe gives you all that bright citrus flavor in a creamy, no-bake candy form—perfect for gifts, bake sales, or a little “just because” lemon dessert on a weeknight.
A Sunny Little Intro
This lemon meringue fudge is soft, creamy, and full of tangy lemon with ribbons of marshmallow “meringue” on top. It’s a stovetop fudge, so there’s no oven, no candy thermometer, and no fuss.
Think of it as lemon meringue pie and old-fashioned homemade fudge having a very delicious baby.
When my kids were little, they always requested lemon sweets for spring holidays—Easter, Mother’s Day, first warm weekend, you name it. Traditional lemon meringue pie is a joy, but it’s also a project. This meringue fudge gives you that same nostalgic flavor in a pan you can chill, slice, and share. It also travels better than pie, which is handy if you’re the “dessert person” in your family like I am.
And one more thing: this is rich. A small square goes a long way, which makes it perfect for sharing.
What Makes This Lemon Meringue Fudge So Special?
This Lemon Meringue Fudge Recipe starts with a simple white chocolate and sweetened condensed milk base. That’s what gives you that smooth, melt-in-your-mouth texture people love about old-school fudge.
Then we add:
- Fresh lemon zest and lemon curd for a real citrus punch
- A hint of vanilla for warmth
- A fluffy marshmallow meringue-style swirl on top
It’s like a layered lemon dessert—fudge base, creamy lemon, and marshmallow meringue—without actually layering a thing. The swirl does all the pretty work for you.
Why is it special for the season? Lemon desserts tend to spike in popularity in spring and summer, when everyone’s craving something lighter and brighter. But honestly, I make this lemon fudge at Christmas too. It looks beautiful on cookie trays next to all the chocolate and peppermint. The yellow adds a cheerful pop of color.
Is it healthy? Well, it’s still candy—but you can control the ingredients. No mystery flavorings, and you’re using real lemon and real butter. You can also cut it small, since citrus fudge is so flavorful that a little square satisfies the sweet tooth.
And it’s surprisingly beginner-friendly. If you can stir, you can make this lemon candy.
Why You’ll Love This Recipe
Here’s why this Lemon Meringue Fudge Recipe tends to become a “keeper” for people:
- No oven needed – It’s a simple stovetop fudge; your kitchen stays cool.
- Beginner-friendly – No candy thermometer, no fancy sugar stages—just melt, stir, swirl, and chill.
- Fast prep – About 15–20 minutes of hands-on time, then the fridge does the rest.
- Make-ahead friendly – It keeps well in the fridge and freezer, so you can prep days (or weeks) ahead.
- Perfect for gifting – Pack it in pretty tins or boxes; it holds up better than pie or cake.
- Bright, tangy flavor – Fresh lemon zest and lemon curd give you that real lemon meringue flavor, not fake lemon.
- Crowd-pleasing texture – Soft, creamy lemon fudge base with little hints of chewy marshmallow meringue on top.
- Adaptable – Easy to tweak for extra tang, different citrus, or even gluten-free needs.
- Looks fancy, but isn’t – The swirl pattern makes people think you fussed more than you did.
Ingredients You’ll Need
Let me walk you through the ingredients for this lemon dessert. I’ll share what I use and a few easy swaps.
For the Lemon Fudge Base
- 3 cups (about 18 oz) white chocolate chips
- Use a brand that melts smoothly—Ghirardelli, Guittard, or Nestlé work well. Cheaper chips sometimes stay lumpy.
- 1 can (14 oz) sweetened condensed milk
- This is what makes the fudge creamy and sweet. Don’t use evaporated milk—they’re not the same.
- 4 tablespoons (1/2 stick) unsalted butter
- Adds richness and keeps the texture silky. If you only have salted, just reduce the added salt a bit.
- 1/4 cup lemon curd
- Store-bought is fine (Trader Joe’s, Bonne Maman, or your favorite brand). This gives deep, creamy lemon flavor without too much extra liquid.
- 2–3 tablespoons fresh lemon zest (from about 2 large lemons)
- Zest gives that bright, aromatic lemon note that makes this taste like real lemon meringue.
- 1–2 tablespoons fresh lemon juice
- Start with 1 tablespoon. Add up to 2 if you want a tangier fudge, keeping in mind that extra liquid can soften the final set a bit.
- 1 teaspoon pure vanilla extract
- Balances the tartness and adds warmth.
- 1/4 teaspoon fine sea salt
- Just enough to keep the lemon from tasting flat.
- Optional: 2–4 drops yellow food coloring
- If you want a sunny lemon color. Without it, the fudge is more ivory with a hint of yellow.
For the Marshmallow “Meringue” Swirl
- 1 cup marshmallow creme (fluff)
- This mimics the soft meringue on a lemon meringue pie, without whipping egg whites.
- 1 teaspoon lemon zest
- For a little extra citrus in the swirl.
- 1 teaspoon vanilla extract
- Gives the marshmallow that toasted-meringue flavor note.
Optional Toppings
- Crushed Shortbread cookies or graham crackers (about 1/2 cup)
- Sprinkle on top for a “crust” feel and a little crunch. Use gluten-free cookies if needed.
- Mini meringue cookies, lightly crushed
- For more meringue fudge vibes and a pretty finish.
You know what? This is one of those desserts where quality really shows. Fresh lemons make a huge difference for tangy fudge. Bottled lemon juice just doesn’t have that same bright aroma.

Step-by-Step Directions
This is a simple stovetop fudge method. A heavy-bottomed saucepan is your best friend here—it helps keep things from scorching.
1. Prepare your pan.
Line an 8×8-inch square baking pan with parchment paper, letting it overhang on two sides to make a sling. Lightly grease the parchment with butter or a neutral spray.
- This makes it easy to lift the lemon fudge out for clean slicing.
2. Get the lemon pieces ready.
Zest your lemons first, then juice them.
- Remember, zest only the yellow part; the white pith is bitter. I like a microplane for very fine zest that disappears into the fudge.
3. Start the fudge base.
In a medium heavy saucepan over low heat, add:
- White chocolate chips
- Sweetened condensed milk
- Butter
Stir constantly with a silicone spatula, scraping the bottom and sides of the pan.
- Keep the heat low. If the chocolate overheats, it can seize and turn grainy.
4. Melt until smooth and glossy.
Continue stirring until the mixture is fully melted, smooth, and thick—no visible chunks of chocolate.
- This usually takes 5–8 minutes over low heat. If it starts to bubble, your heat is too high; turn it down.
5. Flavor with lemon and vanilla.
Remove the pan from the heat. Quickly stir in:
- Lemon curd
- Lemon zest
- 1 tablespoon lemon juice (start here)
- Vanilla extract
- Salt
Stir well until everything is fully combined and the fudge base is smooth. Taste a small spoonful (careful, it’s warm):
- If you want a stronger tang, add up to 1 more tablespoon lemon juice.
- If the mixture seems too loose after extra juice, you can stir in a small handful of extra white chocolate chips to help it firm up.
6. Add a touch of color (optional).
If you’d like a bright lemon color, add 2–4 drops of yellow food coloring and stir until even.
- Start with less; you can always add more, but you can’t take it out.
7. Pour the fudge into the pan.
Scrape the lemon fudge mixture into your prepared pan. Use your spatula to spread it into an even layer, smoothing the surface.
- Tap the pan gently on the counter a few times to pop any air bubbles.
8. Make the marshmallow “meringue” swirl.
In a small bowl, stir together:
- Marshmallow creme
- 1 teaspoon lemon zest
- 1 teaspoon vanilla extract
Drop spoonfuls of this marshmallow mixture all over the surface of the warm fudge.
9. Swirl and top.
Use a butter knife or skewer to gently swirl the marshmallow into the fudge base, making figure-eight motions.
- Don’t over-swirl—3–4 passes are enough. You want distinct ribbons of marshmallow meringue, not a fully mixed layer.
If you’re using toppings, sprinkle crushed shortbread, graham crackers, or mini meringues over the top and gently press them in.
10. Chill until set.
Cover the pan lightly with foil or plastic wrap (without touching the surface, if you can) and chill in the refrigerator for at least 2–3 hours, or until firm enough to cut.
- For very clean slices, chill 4 hours or even overnight.
11. Slice and serve.
Use the parchment sling to lift the fudge out of the pan. Place it on a cutting board.
- Use a sharp knife, wiping the blade between cuts with a warm, damp cloth for neat, bakery-style squares.
- Cut into 25 small squares (5×5) for rich bites, or 36 mini squares if you’re adding this to a dessert tray with other treats.
Now you’ve got a pan of gorgeous lemon meringue fudge ready to share—or stash in the back of the fridge and pretend you forgot about it. I won’t judge.
Servings & Timing
Yield:
- About 25–36 squares of fudge, depending on how you slice it
Timing:
- Prep Time: 15–20 minutes
- Chill Time: 2–4 hours
- Total Time: About 2.5–4.5 hours (most of that is hands-off chilling)
If you’re making this dessert recipe for a party or holiday, I recommend making it the day before. It slices better when fully chilled.
Fun Variations to Try
Once you’ve made this Lemon Meringue Fudge Recipe once, it’s easy to play around with flavors and textures.
- Meyer Lemon Fudge: Use Meyer lemons for a sweeter, more floral citrus fudge that’s lovely for spring brunches.
- Extra Tangy Fudge: Add an extra tablespoon of lemon zest and a teaspoon of citric acid (found in the canning section) for a bold, tangy fudge with serious pucker.
- Gluten-Free Lemon Treat: Skip the graham crackers and use gluten-free shortbread or no crunchy topping at all for naturally gluten-free lemon sweets.
- Lemon Blueberry Swirl: Press a few dried blueberries into the top before chilling—lemon and blueberry together make a beautiful, fruity fudge.
- Toasted Meringue Look: After chilling, top each square with a tiny swirl of store-bought meringue or marshmallow creme and lightly “toast” with a kitchen torch for a showy dessert tray.
Feel free to treat this as your lemon candy playground. Once you understand the base, it’s very forgiving.
Storage, Freezing & Make-Ahead Tips
One of my favorite things about this fudge recipe is how well it keeps. That makes it perfect for busy weeks, holidays, or those times when you just want dessert ready to go.
Fridge Storage
- Store cut squares of lemon meringue fudge in an airtight container.
- Place parchment or wax paper between layers to keep them from sticking.
- Keeps well for 1–2 weeks in the refrigerator.
Freezer Storage
- For longer storage, freeze the fudge in a single layer first, then transfer to a freezer-safe container or bag.
- Again, use parchment between layers.
- Freeze for up to 2 months.
Thawing
- Let frozen fudge thaw in the refrigerator for several hours or overnight.
- For the best texture, let the thawed fudge sit at room temperature for 10–15 minutes before serving.
Make-Ahead Advice
- For holidays or events, you can make this lemon fudge up to 5 days ahead and store it in the fridge.
- If you’re shipping it or putting it in gift boxes, chill the cut pieces well first so they stay firm.
This is one of those desserts I like to tuck into the freezer “just in case.” It’s a handy little surprise when friends swing by for coffee.
Recipe Notes From My Kitchen
After testing this Lemon Meringue Fudge Recipe a few times (and sending batches with my husband to his office—very scientific feedback system), here are some personal notes:
- Balance the tang: People have different “lemon tolerance.” If your crowd likes milder lemon, stick with 1 tablespoon lemon juice. For big lemon fans, go with 2 tablespoons juice and a very full 3 tablespoons zest.
- Watch the heat: Low and slow is key for smooth fudge. If the white chocolate scorches, there’s no fixing it. A heavy-bottomed pot helps a lot.
- Texture check: Your mixture should be thick but pourable when you spread it into the pan. If it’s runny like sauce, stir in more white chocolate chips off the heat until it thickens.
- Marshmallow swirl tip: If your marshmallow creme is stiff, microwave it in a bowl for about 10 seconds to loosen it before swirling.
- Clean cuts: A warm knife makes all the difference. Run the blade under hot water, dry it, cut a few squares, then repeat. It’s a little fussy but worth it.
- Serving size: This lemon dessert is rich. Smaller squares are plenty, especially if you’re serving it after a big meal.
Honestly, the biggest “problem” with this fudge is how fast it disappears. My grown kids now ask if I’m bringing “the lemon candy” for Easter instead of traditional pie. Times change.
Frequently Asked Questions
1. Can I make this fudge without white chocolate chips?
Not really—the white chocolate is what gives the fudge its structure and creamy texture. Using only lemon curd and condensed milk will be too soft and won’t set properly.
2. My fudge didn’t set. What went wrong?
Usually, this happens when there’s too much liquid (extra lemon juice) or the chocolate didn’t fully melt and emulsify. Next time, reduce the juice a bit or add a handful of extra white chocolate chips and stir until very thick before pouring into the pan.
3. Can I use bottled lemon juice instead of fresh?
You can, but fresh lemon juice and zest give the best bright flavor. Bottled juice tends to taste flat, so if you use it, don’t skip the zest.
4. Is this Lemon Meringue Fudge Recipe safe at room temperature?
Yes, it’s fine at cool room temperature for several hours, especially for parties. For longer storage, keep it in the fridge, since the butter and dairy base stay fresher when chilled.
5. Can I microwave the mixture instead of cooking it on the stove?
Yes, you can make a microwave version: melt the white chocolate, condensed milk, and butter together in 20–30 second bursts, stirring well each time until smooth. Just be careful not to overheat, as microwaves can scorch chocolate quickly.
6. How do I make the flavor less sweet and more tart?
Use a very tangy lemon curd, increase the zest, and add an extra teaspoon or two of lemon juice. You can also sprinkle a tiny pinch of flaky sea salt on top before chilling to balance the sweetness.
7. Can I use dark or milk chocolate instead of white?
You can, but it won’t really be a lemon meringue fudge anymore. The lemon flavor gets lost with darker chocolate. For a true citrus fudge, white chocolate is the best base.
8. What pan size can I use if I want thicker or thinner fudge?
An 8×8-inch pan gives medium-thick squares. For thicker fudge, use a 9×5-inch loaf pan. For thinner pieces (great for candy platters), use a 9×9-inch pan and check firmness a little sooner.
Final Thoughts
This Lemon Meringue Fudge Recipe brings all the charm of a classic lemon meringue pie into a creamy, sliceable lemon dessert that fits in a candy tin or a lunchbox. It’s bright, buttery, tangy, and just fancy enough to impress, without making you spend all day in the kitchen.
If you try this meringue fudge, let me know how it went—did you go extra tangy, or keep it sweet and mellow? Leave a comment with your tweaks, or share a photo of your pan. And if you’re as obsessed with citrus as I am, you might like to explore more lemon fudge and lemon dessert recipes next—you’ll have a whole citrus candy tray in no time.
Lemon Meringue Fudge
Ingredients
- 3 cups white chocolate chips about 18 oz; use a good melting brand like Ghirardelli, Guittard, or Nestlé
- 14 oz sweetened condensed milk 1 can; do not substitute evaporated milk
- 4 tablespoons unsalted butter about 1/2 stick
- 1/4 cup lemon curd store-bought or homemade
- 2 tablespoons lemon zest from about 2 large lemons; up to 3 tablespoons for extra lemon flavor
- 1 tablespoon fresh lemon juice up to 2 tablespoons for tangier fudge
- 1 teaspoon pure vanilla extract
- 1/4 teaspoon fine sea salt
- 2 drop yellow food coloring optional; 2–4 drops for a brighter lemon color
- 1 cup marshmallow creme for the meringue-style swirl
- 2 teaspoons lemon zest divided; 1 teaspoon for the marshmallow swirl and extra if desired
- 1 teaspoon pure vanilla extract for the marshmallow swirl
- 1/2 cup crushed shortbread cookies or graham crackers optional topping; use gluten-free cookies if needed
- mini meringue cookies optional; lightly crushed for topping
Instructions
- Line an 8×8-inch square baking pan with parchment paper, leaving an overhang on two sides to form a sling. Lightly grease the parchment with butter or nonstick spray for easy removal and clean slicing.
- Zest the lemons first, then juice them. Measure out 2–3 tablespoons lemon zest and 1–2 tablespoons fresh lemon juice. Avoid the bitter white pith when zesting.2 tablespoons lemon zest, 1 tablespoon fresh lemon juice, 2 teaspoons lemon zest
- In a medium heavy-bottomed saucepan over low heat, combine the white chocolate chips, sweetened condensed milk, and unsalted butter. Stir constantly with a silicone spatula, scraping the bottom and sides to prevent scorching.3 cups white chocolate chips, 14 oz sweetened condensed milk, 4 tablespoons unsalted butter
- Continue cooking over low heat, stirring constantly, until the mixture is fully melted, thick, smooth, and glossy, with no visible chunks of chocolate. This usually takes 5–8 minutes. If it begins to bubble, reduce the heat.
- Remove the saucepan from the heat. Stir in the lemon curd, 2 tablespoons lemon zest, 1 tablespoon lemon juice, 1 teaspoon vanilla extract, and fine sea salt until fully combined and smooth. Taste a small amount carefully; if you want a stronger tang, add up to 1 more tablespoon lemon juice. If the mixture becomes too loose, stir in a small handful of extra white chocolate chips off the heat until thickened.1/4 cup lemon curd, 2 tablespoons lemon zest, 1 tablespoon fresh lemon juice, 1 teaspoon pure vanilla extract, 1/4 teaspoon fine sea salt
- If desired, add 2–4 drops of yellow food coloring to the warm fudge base and stir until the color is evenly distributed, adjusting to your preferred shade.2 drop yellow food coloring
- Scrape the lemon fudge mixture into the prepared pan and spread it into an even layer, smoothing the surface with a spatula. Tap the pan gently on the counter a few times to release any air bubbles.
- In a small bowl, stir together the marshmallow creme, 1 teaspoon lemon zest, and 1 teaspoon vanilla extract until smooth and combined. If the marshmallow creme is very stiff, microwave it for about 10 seconds to loosen before mixing.1 cup marshmallow creme, 2 teaspoons lemon zest, 1 teaspoon pure vanilla extract
- Drop spoonfuls of the marshmallow mixture all over the warm fudge. Use a butter knife or skewer to gently swirl it into the fudge in figure-eight motions, making 3–4 passes so you have distinct ribbons rather than fully mixing it in. If using, sprinkle crushed shortbread or graham crackers and/or lightly crushed mini meringue cookies over the top and gently press them in.1 cup marshmallow creme, 1/2 cup crushed shortbread cookies or graham crackers, mini meringue cookies
- Cover the pan loosely with foil or plastic wrap (avoid touching the surface if possible) and refrigerate for at least 2–3 hours, or until the fudge is firm enough to cut. For very clean slices, chill 4 hours or overnight.
- Use the parchment sling to lift the fudge out of the pan and place it on a cutting board. With a sharp knife, cut into 25 small squares (5×5 grid) or up to 36 mini squares. Wipe the knife with a warm, damp cloth between cuts for neat edges. Serve chilled or allow to soften slightly at room temperature before serving.
Notes
Freezer: Freeze in a single layer, then transfer to a freezer-safe container with parchment between layers for up to 2 months. Thaw in the refrigerator, then let sit at room temperature 10–15 minutes before serving.
Flavor tips: Adjust lemon intensity by varying the zest and juice. For extra tang, add more zest or a pinch of citric acid. Use fresh lemons for the brightest flavor.
Microwave option: Melt white chocolate chips, sweetened condensed milk, and butter together in 20–30 second bursts, stirring well between each, then proceed with the flavoring and swirling steps, being careful not to overheat the chocolate.
Pan size variations: An 8×8-inch pan gives medium-thick fudge. Use a 9×5-inch loaf pan for thicker pieces or a 9×9-inch pan for slightly thinner squares.