Would you like to save this?
Graduation Cheesecake Recipe
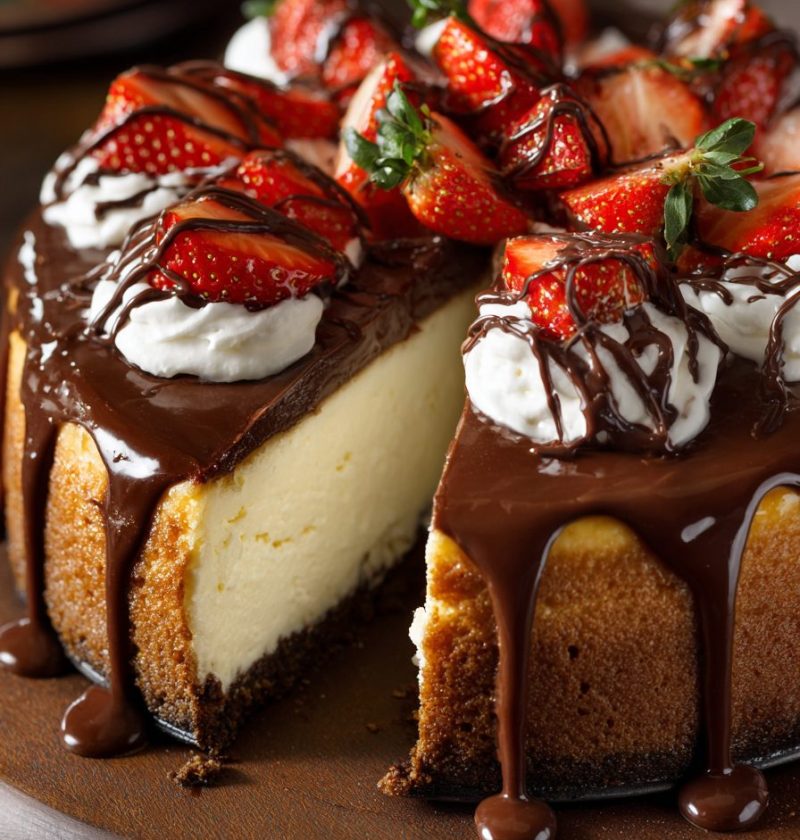
If you need a show-stopping Graduation Cheesecake Recipe that feels festive, creamy, and worthy of a once-in-a-lifetime celebration, this one is it. It’s a rich baked cheesecake with a buttery graham cracker crust, a silky vanilla filling, and easy graduation-themed decorations that make it perfect for a graduation party dessert.
A Celebration Cheesecake That Feels Extra Special
There’s something about cheesecake that says, “This is a real celebration.” Maybe it’s the creamy texture, maybe it’s that gorgeous tall slice, or maybe it’s because a good graduation cheesecake always looks like you spent all day fussing over it, even when the steps are very manageable.
I started making a version of this recipe for family milestones years ago—birthdays, anniversaries, even one retirement party where the dessert table nearly stole the whole event. But for graduation season, this cheesecake really shines. It’s elegant enough for a formal gathering, simple enough for a backyard party, and easy to decorate in school colors. That makes it a wonderful cheesecake for graduation, whether you’re celebrating a high school senior, a college grad, or even a proud kindergarten graduate in a paper cap.
And let me tell you, this isn’t one of those fussy cheesecakes that leaves you second-guessing every little crack. We use a few practical tricks—room-temperature ingredients, gentle mixing, and a water bath—to help create that classic smooth texture. The result is a creamy cheesecake with a balanced sweetness, a sturdy crust, and a bakery-style finish that tastes every bit as joyful as the occasion feels.
From a food blog and search trend point of view, celebratory desserts tend to perform especially well in spring and early summer, and cheesecake remains one of the most searched party desserts in the U.S. for milestone events. That makes sense, honestly. A special occasion cheesecake is familiar, crowd-pleasing, and easy to personalize. It checks all the boxes.
Why You’ll Love This Recipe
- Perfect for graduation parties, open houses, and family dinners
- Rich, smooth, and beautifully sliceable
- Easy to decorate in school colors
- Made with simple grocery-store ingredients
- Classic vanilla flavor that pleases nearly everyone
- Can be made a day or two ahead
- Looks impressive without requiring advanced baking skills
- Great base for chocolate, berry, or caramel toppings
- A dependable party cheesecake recipe for big moments
- Holds up well on dessert tables when chilled properly
Ingredients You’ll Need
For the crust:
- 2 cups graham cracker crumbs (about 15 full graham cracker sheets)
- 1/4 cup granulated sugar
- 1/2 cup unsalted butter, melted
(Use real butter for the best flavor; I like Land O’Lakes or Kerrygold if I have it on hand.)
For the cheesecake filling:
- 4 packages (8 ounces each) full-fat cream cheese, softened
(Philadelphia cream cheese gives a very reliable texture.) - 1 cup granulated sugar
- 1 cup sour cream, room temperature
(Full-fat sour cream creates the creamiest finish; Greek yogurt can work in a pinch, though it’s a touch tangier.) - 1 tablespoon pure vanilla extract
- 4 large eggs, room temperature
- 2 tablespoons all-purpose flour
(Helps stabilize the filling and can reduce cracking.) - 1/4 teaspoon salt
For topping and decoration:
- 1 cup whipped cream or stabilized whipped topping
- Fresh berries, chocolate drizzle, or caramel sauce, optional
- Graduation sprinkles or candy pearls in school colors
- Small fondant graduation caps or chocolate squares, optional

A few ingredient notes, because they really do matter: room-temperature cream cheese blends much more smoothly than cold cream cheese, and that means fewer lumps. Eggs at room temperature also mix in more evenly, which helps avoid overbeating. It’s one of those small kitchen habits that pays off.
Directions
-
Preheat the oven and prep the pan.
Set your oven to 325°F. Wrap the outside of a 9-inch springform pan tightly with two layers of heavy-duty foil if you plan to use a water bath—and I recommend that you do. Lightly grease the inside of the pan. -
Make the graham cracker crust.
In a medium bowl, stir together the graham cracker crumbs, sugar, and melted butter until the mixture looks like wet sand. Press it firmly into the bottom and slightly up the sides of the springform pan. Use the bottom of a measuring cup to pack it down evenly. -
Bake the crust briefly.
Bake the crust for 8 to 10 minutes, then remove it from the oven and let it cool while you prepare the filling. This quick bake helps keep the crust crisp under the creamy filling. -
Beat the cream cheese and sugar.
In a large mixing bowl, beat the softened cream cheese on medium speed until smooth. Add the sugar and beat again until fully combined. Scrape down the bowl well. Here’s the thing—don’t rush this step. A smooth base is the backbone of a great classic cheesecake. -
Add the sour cream, vanilla, flour, and salt.
Mix in the sour cream, vanilla extract, flour, and salt until smooth and creamy. Keep the mixer on low to medium speed. You want the batter silky, not whipped full of air. -
Add the eggs one at a time.
Add the eggs one by one, mixing on low just until each egg disappears into the batter. Don’t overmix here. Too much air can lead to puffing and cracking, and nobody wants that on a festive cheesecake meant for photos. -
Pour the filling over the crust.
Pour the cheesecake batter into the cooled crust and smooth the top with a spatula. Tap the pan gently on the counter a couple of times to release any large air bubbles. -
Set up the water bath.
Place the foil-wrapped springform pan inside a large roasting pan. Carefully pour hot water into the roasting pan until it reaches about halfway up the sides of the springform pan. This extra step sounds a little old-school, but it creates gentle, even heat, which helps make a beautiful baked cheesecake. -
Bake until almost set.
Bake for 60 to 75 minutes. The edges should look set, while the center should still have a slight jiggle—like Jell-O, not soup. Every oven has its own personality, so start checking around the 60-minute mark. -
Cool slowly.
Turn off the oven, crack the oven door, and let the cheesecake sit inside for 1 hour. This gentle cooling helps prevent sudden temperature changes, which can cause cracks. -
Chill completely.
Remove the cheesecake from the water bath, discard the foil, and let it cool at room temperature. Then refrigerate for at least 6 hours, preferably overnight. Honestly, overnight is better. The flavor deepens, and the slices come out cleaner. -
Decorate for graduation.
Before serving, top with whipped cream around the edges or across the center. Add berries, sprinkles, chocolate drizzle, or decorations in the graduate’s school colors. If you’re hosting a buffet-style graduation party, I like to keep the decorations simple and bold so the cheesecake looks polished from across the table.
Servings & Timing
- Yield: 12 to 14 slices
- Prep Time: 25 minutes
- Bake Time: 60 to 75 minutes
- Cooling Time: 1 hour in the oven
- Chill Time: 6 hours or overnight
- Total Time: About 8.5 hours, mostly hands-off
This timing is ideal for make-ahead planning. Bake it the day before the party, decorate the next morning, and you’re in great shape.
Variations to Make It Your Own
- Chocolate Graduation Cheesecake: Add 6 ounces melted and cooled semi-sweet chocolate to the filling for a richer dessert.
- Berry Celebration Cheesecake: Top with strawberries, blueberries, and a glossy berry sauce for a brighter finish.
- Lemon Vanilla Version: Add 1 tablespoon lemon zest for a fresh, springy flavor that feels perfect for May and June.
- Cookies-and-Cream Twist: Use crushed chocolate sandwich cookies for the crust and fold chopped cookies into the filling.
- Gluten-Free Option: Use gluten-free graham crackers and replace the flour with 1 tablespoon cornstarch.
- Mini Graduation Cheesecakes: Divide the batter among lined muffin tins for individual servings that are easy to hand out at a party.
Storage & Reheating
Store the cheesecake covered in the refrigerator for up to 5 days. A cake carrier works beautifully, but loosely tented plastic wrap is fine too.
For longer storage, freeze the cheesecake—whole or in slices—for up to 2 months. Wrap it tightly in plastic wrap and then foil. Thaw overnight in the refrigerator before serving.
There’s no reheating needed, of course, but do let the cheesecake sit at room temperature for about 15 to 20 minutes before slicing if it’s very cold. That little wait improves the texture and flavor.
If you want to make it ahead, this recipe is a gem. Bake it 1 to 2 days in advance, then decorate closer to serving time so everything still looks fresh and party-ready.
Notes From My Kitchen
Use full-fat cream cheese. I know the reduced-fat versions can be tempting, especially when you’ve already bought decorations and paper goods and all the rest, but the texture just isn’t quite the same. For a truly creamy cheesecake, full-fat is the way to go.
Don’t overbeat the batter after adding the eggs. I’ve tested this both ways, and the lower-mixing method gives a denser, smoother texture with fewer cracks.
If a crack does happen, don’t fret. Really. A little whipped cream and a festive topping can cover just about anything, and your graduation dessert will still look lovely.
For the cleanest slices, dip a sharp knife in hot water, wipe it dry, and slice. Repeat between cuts. It sounds fussy, but it’s quick, and the presentation is worth it.
And one more thing: if your springform pan tends to leak, place the foil-wrapped pan inside an oven-safe cheesecake pan protector or use a slow cooker liner around the outside before the water bath. It’s a handy little insurance policy.
FAQs
Can I make this Graduation Cheesecake Recipe ahead of time?
Yes, and it’s actually better that way. Make it 1 or 2 days ahead so the texture firms up and the flavor settles nicely.
What if my cheesecake cracks?
Small cracks are usually caused by overmixing or sudden cooling, but they’re easy to hide with whipped cream, berries, or graduation-themed decorations.
Do I have to use a water bath?
Technically no, but it helps a lot with even baking and a creamy texture. If you skip it, place a pan of hot water on the oven rack below the cheesecake.
Can I use a different crust?
Absolutely. Vanilla wafers, digestive biscuits, or chocolate cookie crumbs all work well for this celebration cheesecake.
How do I know when the cheesecake is done baking?
The edges should be set, and the center should still wobble slightly when you gently shake the pan. It will continue to firm up as it cools.
Can I freeze leftover slices?
Yes. Wrap slices individually and freeze for up to 2 months. They thaw beautifully in the fridge overnight.
What toppings work best for a graduation party dessert?
Whipped cream, berries, caramel, chocolate drizzle, and sprinkles in school colors are all easy, attractive choices that fit the occasion.
Can I make this cheesecake in mini form?
You sure can. Mini cheesecakes are great for large gatherings and bake much faster, usually in about 18 to 22 minutes depending on your pan.
Conclusion
This Graduation Cheesecake Recipe is rich, classic, and party-ready, with a smooth vanilla filling and plenty of room for fun, festive decorating. It’s the kind of special occasion cheesecake that feels polished without being hard to make. If you give it a try, leave a comment and let me know how you decorated yours—and if you’re planning a full dessert table, be sure to check out more graduation party dessert ideas too.