Would you like to save this?
The genesis of these bars in my kitchen was an impromptu baking session on a rainy afternoon. I had a craving for something sweet but didn’t want to spend hours in the kitchen. With a quick rummage through my pantry, I unearthed some graham crackers, coconut flakes, and chocolate chips. The idea of creating a layered bar with these ingredients seemed perfect. As the aroma of baking graham crackers and melting chocolate filled the house, the rain tapping softly on the window, I knew I had stumbled upon a recipe worth repeating.
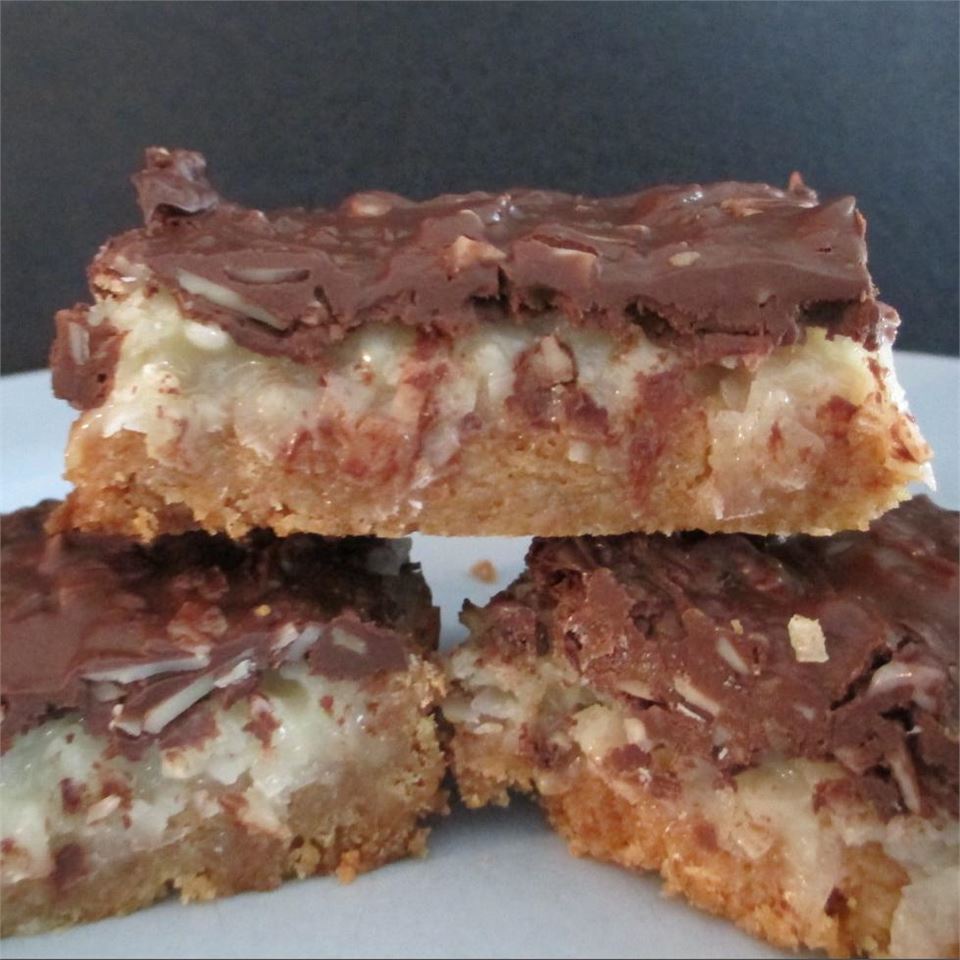
Fantasio Bars are not just a treat for the taste buds but also a feast for the eyes with their enticing layers of textures and flavors. The graham cracker crust offers a sturdy, buttery foundation, while the coconut and sweetened condensed milk layer adds a chewy, rich contrast. The crowning touch of semisweet chocolate and crunchy almonds brings everything together in a symphony of taste and texture.
Ingredients
1/2 cup butter
1/4 cup white sugar
1 1/2 cups graham cracker crumbs
1 1/2 cups flaked coconut
1 (14-ounce) can sweetened condensed milk
1 cup semisweet chocolate chips
1/2 cup almonds, chopped
Directions
1. Preheat the Oven
Begin by preheating your oven to 350 degrees Fahrenheit (175 degrees Celsius). This is a crucial step, as a properly preheated oven ensures even cooking and helps achieve that perfect texture in your bars.
2. Prepare the Graham Cracker Crust
Melt the Butter:
In a medium saucepan, melt 1/2 cup of butter over low to medium heat. This should be done gently to avoid burning the butter.
Combine Ingredients: Once the butter is melted, remove the saucepan from the heat. Stir in 1/4 cup of white sugar until it is fully dissolved. Then add 1 1/2 cups of graham cracker crumbs. Mix until the crumbs are fully coated and the mixture resembles wet sand.
Press into Pan: Transfer the graham cracker mixture into a 9×13-inch baking dish. Use the back of a spoon or the bottom of a measuring cup to press the mixture evenly into the bottom of the dish. This will create a solid base for the layers to come.
Bake the Crust: Place the dish in the preheated oven and bake for about 10 minutes, or until the crust is slightly firm and golden brown. This initial baking sets the crust and gives it a nice texture.
3. Add the Coconut Layer
Prepare Coconut Mixture:
While the crust is baking, prepare the coconut layer. In a mixing bowl, combine 1 1/2 cups of flaked coconut with 1 can (14 ounces) of sweetened condensed milk. Stir until well mixed. The sweetened condensed milk binds the coconut flakes together, creating a chewy layer.
Spread Over Crust: Once the crust has baked, remove it from the oven and spread the coconut mixture evenly over the hot crust. Smooth the surface with a spatula.
Bake Again: Return the dish to the oven and bake for an additional 12 minutes. The coconut layer should be golden and bubbly. Remove from the oven and allow the bars to cool at room temperature for at least 10 minutes before adding the final layer.
4. Prepare the Chocolate Almond Topping
Melt the Chocolate:
Using a double boiler (or a heatproof bowl set over a pot of simmering water), melt 1 cup of semisweet chocolate chips. Stir frequently with a rubber spatula to ensure even melting and prevent the chocolate from scorching. Be patient and avoid rushing this step to achieve a smooth, glossy finish.
Add Almonds: Once the chocolate is melted, stir in 1/2 cup of chopped almonds. This adds a delightful crunch and nutty flavor to the bars.
Spread Over Coconut Layer: Pour the melted chocolate mixture over the cooled coconut layer. Use a spatula to spread it evenly, covering the entire surface. The chocolate will harden as it cools, creating a decadent topping.
5. Cool and Set
Let It Cool:
Allow the bars to cool completely at room temperature. This cooling period is crucial for the chocolate to set properly. You can also speed up this process by placing the dish in the refrigerator for about 30 minutes.
Cut into Bars: Once the chocolate is set, use a sharp knife to cut the bars into squares or rectangles. The graham cracker crust and layers should hold together nicely, making for easy serving.
Variations and Substitutions
Nut Alternatives:
If you prefer or need to avoid almonds, you can substitute with other nuts like walnuts or pecans. For a nut-free version, you can omit the nuts entirely or use seeds like sunflower or pumpkin seeds.
Flavor Additions: To enhance the flavor, consider adding a pinch of sea salt on top of the chocolate before it sets. This will provide a sweet-salty contrast that elevates the overall taste.
Fruit Twist: For a fruity twist, you can mix in or top the bars with dried fruit like cranberries or chopped apricots. These additions can add a chewy texture and a burst of flavor.
Dietary Adjustments: For a dairy-free version, use coconut oil instead of butter, and opt for dairy-free chocolate chips. Ensure that the graham crackers and other ingredients are also dairy-free.
Conclusion
Fantasio Bars with Graham Cracker Crust are a delightful treat that combines the comforting flavors of chocolate, coconut, and graham crackers into a single, irresistible dessert. The combination of a buttery crust, a chewy coconut layer, and a rich chocolate topping makes these bars a perfect choice for any occasion, from casual get-togethers to festive celebrations.
The recipe’s simplicity and the delicious outcome make it a go-to for both experienced bakers and novices alike. The bars are not only visually appealing but also incredibly satisfying to eat, with each bite offering a wonderful mix of textures and flavors.
Whether you’re baking for a family gathering or just craving a sweet indulgence, these bars are sure to become a favorite. Enjoy the process of creating them as much as the pleasure they bring when you share them with others.


