Would you like to save this?
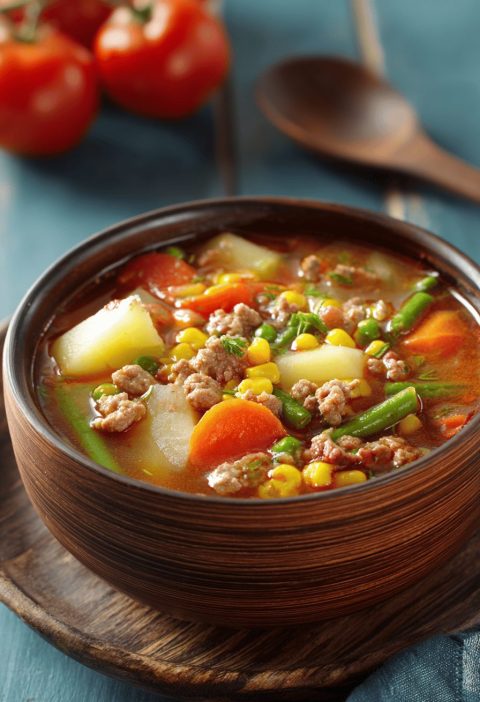
Chili Con Carne, often simply known as chili, is a dish that embodies warmth, comfort, and robust flavors. Its origins can be traced back to the American Southwest, particularly Texas, where it became a beloved staple. This dish combines ground beef, tomatoes, beans, and a medley of spices to create a hearty meal that’s perfect for any occasion, whether it’s a casual family dinner or a gathering with friends. The name “Chili Con Carne” literally means “chili with meat,” and this recipe stays true to its roots while offering room for personalization.
I remember my first experience with chili con carne at a community cook-off. The air was thick with the smoky aroma of spices, and the variety of chili recipes showcased the versatility of this dish. From fiery hot to mild and comforting, each pot of chili told a story. Inspired by this experience, I developed my own version of Chili Con Carne, which has since become a favorite at family gatherings and potlucks. The rich, savory flavors, coupled with the ease of preparation, make it a go-to recipe for many occasions.
Let’s dive into the detailed steps to create this flavorful Chili Con Carne, ensuring each step is clear and easy to follow.
Ingredients
2 tablespoons olive oil
2 large onions, diced
5 cloves garlic, minced
3 pounds ground beef (preferably chuck)
2 tablespoons tomato paste
1 12-ounce can crushed tomatoes
3 cups beef broth
3 tablespoons chili powder
1 tablespoon ground cumin
1 teaspoon smoked paprika
1/2 teaspoon dried oregano
1/2 teaspoon cayenne pepper (adjust to taste)
2 15-ounce cans kidney beans, drained and rinsed
1 15-ounce can pinto beans, drained and rinsed
Salt and pepper, to taste
Optional garnishes: shredded cheese, sour cream, chopped green onions, fresh cilantro
Directions
Step 1: Sauté the Aromatics
Heat the Oil: In a large pot, heat 2 tablespoons of olive oil over medium-high heat. The oil will help to sauté the onions and garlic, creating a flavorful base for the chili.
Sauté the Onions: Add the diced onions to the pot. Cook, stirring occasionally, until they turn translucent, about 5 minutes. This process releases the natural sweetness of the onions and adds depth to the chili.
Add the Garlic: Stir in the minced garlic and cook until fragrant, about 1 minute. Be careful not to burn the garlic, as it can turn bitter.
Step 2: Brown the Beef
Cook the Ground Beef: Crumble the ground beef into the pot. Cook, stirring and breaking it apart with a wooden spoon, until it’s nicely browned and fully cooked. This should take about 8-10 minutes. Browning the meat enhances its flavor and adds richness to the chili.
Drain Excess Fat: If necessary, drain any excess fat from the pot. This step helps to prevent the chili from becoming too greasy.
Step 3: Add Tomatoes and Broth
Incorporate Tomato Paste: Mix in 2 tablespoons of tomato paste. Stir well to ensure it’s fully integrated with the meat and onions. The tomato paste adds a concentrated tomato flavor and helps to thicken the chili.
Add Crushed Tomatoes and Broth: Pour in the 12-ounce can of crushed tomatoes and 3 cups of beef broth. Stir everything together to combine. The liquid components are essential for creating a rich, hearty chili.
Step 4: Season the Chili
Add Spices: Season the mixture with 3 tablespoons of chili powder, 1 tablespoon of ground cumin, 1 teaspoon of smoked paprika, 1/2 teaspoon of dried oregano, and 1/2 teaspoon of cayenne pepper. Add salt and pepper to taste. These spices give the chili its signature flavor and heat.
Stir to Combine: Stir the mixture thoroughly to ensure the spices are evenly distributed. This step is crucial for developing a well-rounded flavor profile.
Step 5: Simmer the Chili
Bring to a Simmer: Let the mixture come to a simmer. Reduce the heat to low and let the chili bubble gently, uncovered, for about an hour. Stir occasionally to prevent sticking and to allow the flavors to meld together.
Adjust Consistency: If the chili thickens too much for your liking, you can add more beef broth to achieve your desired consistency.
Step 6: Add the Beans
Introduce Beans: After the chili has simmered for an hour, add the 2 cans of drained and rinsed kidney beans and the 1 can of drained and rinsed pinto beans. Stir well to combine.
Simmer Again: Continue simmering the chili for another 30 minutes. This additional simmering time allows the beans to absorb the flavors of the chili and become tender.
Step 7: Final Adjustments and Serving
Taste and Adjust Seasoning: Taste the chili and adjust the seasoning if needed. You can add more salt, pepper, or spices to suit your preference.
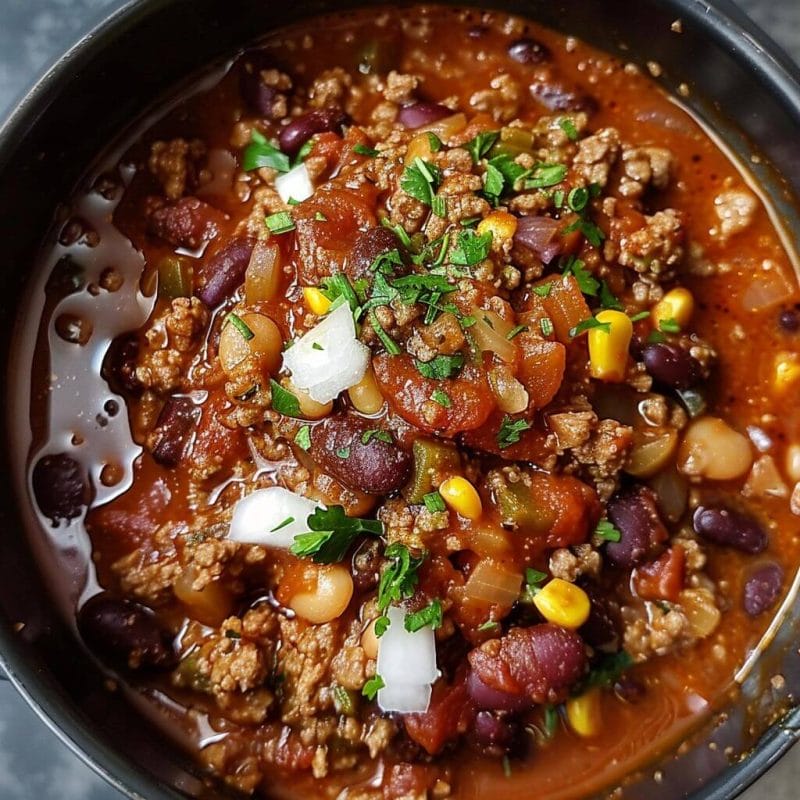
Serve: Ladle the hot chili into bowls. Top each serving with your chosen garnishes, such as shredded cheese, sour cream, chopped green onions, or fresh cilantro. These garnishes add extra layers of flavor and texture to the dish.
Variations & Tips
Heartier Texture: For a heartier texture, swap the ground beef for cubed beef chuck. The larger pieces of meat add a substantial, satisfying bite.
Increase Heat: If you crave more heat, toss in some diced jalapeños or switch to chipotle chili powder. Adjust the amount of cayenne pepper to suit your heat tolerance.
Bean Variety: Mix in different beans like black beans or navy beans for variety. This adds different textures and flavors to the chili.
Vegetarian Option: For a vegetarian version, use textured vegetable protein (TVP) and vegetable broth instead of beef. This provides a similar texture and flavor profile while keeping it meat-free.
Make Ahead and Freeze: Chili’s flavors deepen overnight, making it even more delicious the next day. It also freezes well, so make a big batch to save for later. Store in airtight containers, and thaw in the fridge overnight before reheating.
Summary
Chili Con Carne is a dish that brings people together over a meal that’s as rich in history as it is in flavor. The combination of tender ground beef, savory tomatoes, hearty beans, and a blend of spices creates a comforting and satisfying dish that’s perfect for any occasion. Whether you’re looking to warm up on a chilly day or feed a crowd at your next gathering, this recipe delivers. The versatility of chili allows for endless variations, making it easy to tailor to your tastes and dietary needs. Enjoy crafting this hearty, flavorful dish and sharing it with those you love.