Would you like to save this?
This Cannoli Bars Recipe gives you all the classic, homemade cannoli flavor—creamy ricotta, mini chocolate chips, and a crisp cookie crust—baked into easy Italian dessert bars that are perfect for parties, holidays, or “just because” Tuesdays.
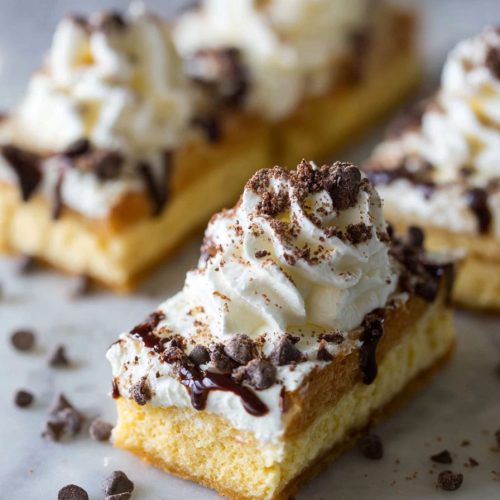
Cannoli Bars Recipe: A Cozy Spin on an Italian Classic
If you love cannoli but don’t love standing over hot oil or fussing with pastry tubes, this Cannoli Bars Recipe is for you. Think of it as Sicilian dessert bars with all the charm of a pastry-shop treat, layered into a pan, baked once, and sliced into neat little squares.
These baked cannoli bars start with a buttery cannoli cookie crust—more like a shortbread meets a sugar cookie—then get topped with a creamy ricotta filling dessert that tastes like the inside of a traditional cannoli. The filling is lightly sweet, studded with mini chocolate chips, and brightened with orange zest and Vanilla.
I’m a 50-year-old home cook who’s hosted more holidays than I can count, and I’ll tell you this: people go nuts for Italian dessert bars. They feel special but don’t require last-minute fuss. I like to serve these creamy ricotta bars at Thanksgiving, Christmas Eve (with strong coffee, of course), or spring brunches when I want a dessert that’s rich but not heavy.
These bars also travel well, cut cleanly, and look adorable in cookie tins, dessert buffets, or school bake sales. They’re my “I need something impressive but I’m tired” dessert—and they’ve never failed me.

Why You’ll Love This Cannoli Bars Recipe
- All the cannoli flavor, none of the frying – No shells, no deep fryer, just one pan of baked cannoli bars.
- Perfect for make-ahead entertaining – The flavor gets even better after chilling, so you can bake them the day before.
- A crowd-pleasing Italian dessert bar – Feels fancy enough for holidays, simple enough for a Sunday potluck.
- Simple pantry ingredients – Butter, sugar, ricotta, chocolate chips—nothing fussy or hard to find.
- Easy to slice and serve – These Italian dessert bars hold their shape, so they’re perfect for platters or gift boxes.
- Customizable flavors – Add pistachios, swap in mascarpone, or use Lemon instead of orange for your own twist.
- Kid- and adult-approved – Sweet but not cloying, with just enough chocolate and that classic ricotta filling texture.
- Great way to use ricotta – If you’ve ever bought a tub for lasagna and had some left over, this is your new favorite dessert plan.
Let me explain: once you make these chocolate chip ricotta bars, you’ll start looking for excuses to “just pick up some ricotta” at the store.
Ingredients for the Best Cannoli Bars
You don’t need anything fancy to make these creamy Sicilian dessert bars, but a few choices—like using whole milk ricotta and good vanilla—really do make a difference.
For the Cannoli Cookie Crust
- 1 ½ cups (180 g) all-purpose flour
Use a standard unbleached flour; no need for cake or bread flour here. - ½ cup (100 g) granulated sugar
- ½ cup (1 stick / 113 g) unsalted butter, melted and slightly cooled
Salted butter works too—just reduce the added salt slightly. - ¼ teaspoon kosher salt
- 1 teaspoon vanilla extract
- ½ teaspoon ground cinnamon
This gives a hint of that cannoli shell flavor. Don’t skip it if you can help it.
This crust bakes up like a tender shortbread. It’s the base that turns this easy cannoli dessert into cut-and-go bars.
For the Ricotta Filling
- 2 cups (about 16 oz / 450 g) whole milk ricotta cheese
Look for whole milk ricotta for a creamy texture—low-fat can be grainier and watery. If your ricotta is very wet, you may want to drain it (see note below). - 4 oz (115 g) cream cheese, softened
This adds extra richness and helps the bars set cleanly. - ½ cup (100 g) granulated sugar
- ¼ cup (30 g) powdered sugar
The combo of sugars keeps the filling smooth and not gritty. - 2 large eggs, at room temperature
- 1 teaspoon vanilla extract
- ½ teaspoon almond extract (optional but lovely)
Just a touch gives you that bakery-style cannoli flavor without tasting like almond candy. - 1 tablespoon orange zest
Classic Sicilian dessert bars often use citrus. Orange zest brightens the whole pan. Lemon zest works too, but orange is more traditional. - ¼ teaspoon kosher salt
- ¾ cup (130 g) mini chocolate chips
Mini chips disperse better than full-size chips and give that classic cannoli filling dessert look. - ¼ cup (30 g) finely chopped pistachios (optional, for topping)
A quick note on ricotta texture
If your ricotta looks very wet or loose, spoon it into a fine-mesh sieve lined with a paper towel or cheesecloth. Let it sit over a bowl in the fridge for 30–60 minutes. This helps prevent a soggy or weepy filling and gives you those sturdy, creamy ricotta bars.
Directions: How to Make Baked Cannoli Bars
These baked cannoli bars come together in two layers: a simple press-in crust and a whipped ricotta filling. Take your time with the mixing, and the oven does the rest.
1. Prep the pan and oven
- Preheat your oven to 350°F (175°C).
- Line a 9×9-inch baking pan with parchment paper, leaving some overhang on two sides to create “handles.”
- This parchment sling makes it much easier to lift the cannoli bars out cleanly for slicing.
2. Make the cannoli cookie crust
-
In a medium mixing bowl, whisk together the flour, sugar, cinnamon, and salt.
-
Pour in the melted butter and vanilla extract.
-
Stir with a fork or spatula until the mixture looks like damp sand and starts to clump.
- It won’t form a dough ball; it should be crumbly but hold together when pressed.
-
Transfer the crust mixture to the prepared pan and press it firmly and evenly into the bottom.
- Use the bottom of a measuring cup or your fingertips—press well so the crust doesn’t crumble when you cut the bars.
-
Bake the crust for 10–12 minutes, just until it looks set and slightly puffed, not browned.
- This partial bake helps keep the crust crisp once you pour on the ricotta filling.
While the crust bakes, you’ll mix the filling.
3. Prepare the ricotta filling
- In a large bowl, beat the cream cheese with a hand mixer on medium speed until smooth and fluffy, about 1–2 minutes.
- Starting with cream cheese alone helps prevent lumps later.
- Add the ricotta and beat again until well combined and smooth. Scrape down the sides of the bowl as needed.
- Add the granulated sugar, powdered sugar, salt, vanilla, almond extract (if using), and orange zest.
- Beat on medium speed until the mixture is creamy and slightly thickened, about 1–2 minutes.
- Add the eggs, one at a time, mixing on low just until incorporated. Don’t overmix here; you don’t want too much air in the batter.
- Gently fold in the mini chocolate chips with a spatula.
You should have a smooth, pourable, but creamy batter that looks like a slightly thicker cheesecake filling.
4. Assemble and bake
-
When the crust comes out of the oven, let it cool for about 5 minutes.
-
Pour the ricotta filling evenly over the warm crust and spread it into the corners with an offset spatula or the back of a spoon.
-
If you’re using pistachios, sprinkle them over the top now for a pretty finish and nutty crunch.
-
Bake the pan at 350°F (175°C) for 30–35 minutes, or until:
- The edges are set,
- The center looks mostly set but still has a slight wobble, and
- A toothpick inserted near the center comes out mostly clean (a few moist crumbs are okay).
If the top starts to brown too quickly, tent it loosely with foil for the last 5–10 minutes.
5. Cool and chill for clean slices
- Remove the pan from the oven and cool on a wire rack until it reaches room temperature.
- Once cool, cover and chill in the refrigerator for at least 3 hours, or preferably overnight.
- This step is key. Chilling helps the ricotta filling firm up into neat, creamy slices.
- When ready to serve, use the parchment overhang to lift the slab from the pan.
- Place on a cutting board and slice into 16–20 bars, depending on your preferred size.
You know what? Don’t stress about perfect squares. Even the “edge pieces” of these Italian dessert bars disappear first in my house.
Servings & Timing
- Yield: About 16–20 cannoli bars
- Prep Time: 20 minutes
- Bake Time: 40–45 minutes total (10–12 for crust, 30–35 for filling)
- Chill Time: Minimum 3 hours (overnight recommended)
- Total Time: About 4 hours, most of it hands-off
These numbers might look long at first glance, but remember—this is mostly oven and fridge time. The hands-on part is simple and relaxing, which I appreciate on a busy holiday week.
Variations: Make These Cannoli Bars Your Own
One of my favorite things about this cannoli bars recipe is how flexible it is. Once you have the base, you can play.
- Lemon Ricotta Bars: Swap the orange zest for lemon zest and add a teaspoon of fresh lemon juice for a brighter, tangier finish.
- Mascarpone Cannoli Bars: Replace half of the ricotta (1 cup) with mascarpone for an even richer, silkier filling.
- Gluten-Free Cannoli Bars: Use a 1:1 gluten-free all-purpose flour blend in the crust; check that your chocolate chips are certified gluten-free.
- Pistachio-Lover’s Version: Stir ¼ cup finely chopped pistachios into the filling plus more on top for a true Sicilian dessert bar moment.
- Chocolate Cannoli Bars: Add 2–3 tablespoons of unsweetened cocoa powder to the filling and increase sugar by 1–2 tablespoons for fudgy, chocolatey ricotta bars.
- Holiday Cannoli Bars: Add a pinch of nutmeg and cinnamon to the filling and top with festive sprinkles instead of nuts.
If you’re baking for a crowd with different tastes, half the pan can be classic, and half can be decorated with nuts or extra chips. Just “draw a line” with a row of pistachios down the middle.
Storage, Freezing & Make-Ahead Tips
Let’s talk logistics—because if you’re anything like me, you’re always planning around schedules, carpools, and last-minute guests.
Storing in the fridge
- Store leftover cannoli bars in an airtight container in the refrigerator for 4–5 days.
- Separate layers with parchment or wax paper to keep the tops from sticking.
They actually taste even better on day two as the flavors mingle, so they’re a fantastic make-ahead dessert for holidays and dinner parties.
Freezing cannoli bars
- To freeze, chill the bars completely first, then cut them into squares.
- Arrange on a baking sheet and freeze until solid, about 1–2 hours.
- Transfer the frozen bars to a freezer-safe container or zip-top bag with parchment between layers.
- Freeze for up to 2 months.
To serve, thaw the bars in the refrigerator overnight. The texture holds up well, especially thanks to the cream cheese in the filling.
Make-ahead advice
- For parties: Bake the cannoli bars one day ahead and chill overnight. Slice the next day, right before serving.
- For busy weeks: Make a full pan on Sunday, cut into bars, and store in the fridge. They’re wonderful with afternoon coffee or as a “just one bite” dessert after dinner.
These creamy ricotta bars are also great for those times you need something “fancier than brownies” but still family-friendly.
Recipe Notes From My Kitchen
A few hard-earned tips from plenty of trial (and a few slightly-wobbly) batches:
- Ricotta quality matters. A good whole milk ricotta makes a huge difference in texture. If it looks very watery, give it that brief drain in a sieve.
- Don’t skip the chill. I know it’s tempting to cut into them warm, but they’ll be soft and messy. Chilling turns them into clean-cut Italian dessert bars.
- Use mini chocolate chips. Full-size chips tend to sink and make the bars harder to slice; mini chips stay suspended in the filling.
- Room temperature ingredients mix better. Let your cream cheese and eggs sit out for 20–30 minutes before you start. It’s a small step that helps avoid lumps and streaks.
- Flavor balance is key. If you love a stronger citrus note, add extra zest; if you prefer the homemade cannoli flavor leaning toward vanilla and chocolate, keep the citrus light.
- Cut with a warm knife. For the cleanest edges, run a sharp knife under hot water, dry it, and slice. Wipe between cuts.
Honestly, the “worst” batch I ever made was still eaten in 24 hours. These are very forgiving.
Cannoli Bars Recipe FAQs
1. Can I use part-skim ricotta instead of whole milk?
Yes, but the texture will be a bit less creamy and might feel slightly grainier. Whole milk ricotta is best for that lush cannoli filling dessert feel.
2. My filling looks grainy—what went wrong?
Usually, this happens if the ricotta was very wet or if the cream cheese wasn’t beaten smooth first. Next time, drain the ricotta briefly and cream the cheese before adding other ingredients.
3. Do I have to use cream cheese?
Cream cheese helps the bars set nicely and adds richness. You can skip it and use all ricotta, but the bars may be softer and a little more custard-like.
4. Can I make this in a 9×13-inch pan?
Yes, but you’ll want to increase the recipe by about 50% for a 9×13 pan, and start checking for doneness a few minutes earlier, since thinner bars can bake faster.
5. How do I know when the bars are done baking?
The edges should be set, the center mostly set with a slight jiggle, and a toothpick near the center should come out with moist crumbs but no wet batter.
6. Can I skip the chocolate chips or replace them?
Absolutely. You can leave them out, use chopped dark chocolate, or swap in chopped candied orange peel or nuts for a different twist on these Italian dessert bars.
7. Are these cannoli bars very sweet?
They’re gently sweet—more like a cheesecake or classic cannoli, not as sugary as frosted cake. If you prefer very sweet desserts, you can add an extra tablespoon or two of sugar to the filling.
8. Can I serve these at room temperature?
They’re best served chilled or just slightly cool. If they sit out at room temperature for an hour or so, they’re fine, but for the best texture, keep them refrigerated until close to serving time.
Final Thoughts: Bring a Little Italian Bakery Home
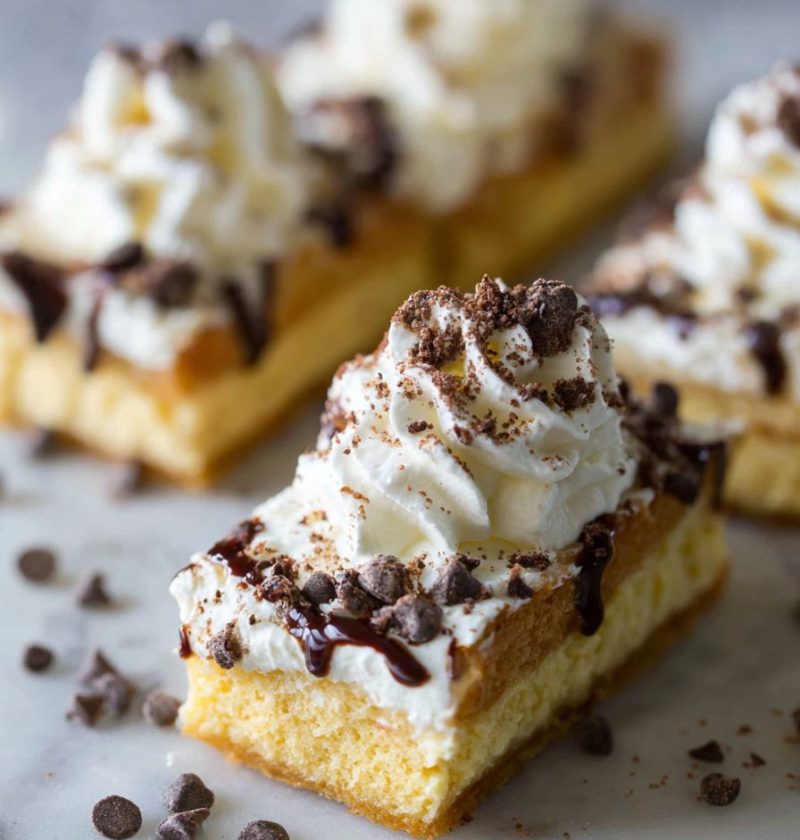
These Cannoli Bars bring together the best parts of a classic Italian pastry—creamy ricotta filling, sweet chocolate chips, a hint of citrus, and a cookie-like crust—into one easy, shareable pan. They’re everything I want in an easy cannoli dessert: simple to make, pretty on a platter, and always the first thing to disappear.
I’d love for you to try this cannoli bars recipe and tell me how it goes—Did you add pistachios? Did your family fight over the last piece? Leave a comment with your tweaks, or explore more Italian-inspired desserts next, like Tiramisu, ricotta cheesecake, or almond biscotti to round out your dessert table.
Cannoli Bars
Ingredients
- 1 1/2 cups all-purpose flour for the cookie crust
- 1/2 cup granulated sugar for the cookie crust
- 1/2 cup unsalted butter melted and slightly cooled; for the cookie crust
- 1/4 teaspoon kosher salt for the cookie crust
- 1 teaspoon vanilla extract for the cookie crust
- 1/2 teaspoon ground cinnamon for the cookie crust
- 2 cups whole milk ricotta cheese about 16 oz / 450 g; drain if very wet
- 4 oz cream cheese softened
- 1/2 cup granulated sugar for the filling
- 1/4 cup powdered sugar for the filling
- 2 large eggs at room temperature
- 1 teaspoon vanilla extract for the filling
- 1/2 teaspoon almond extract optional but recommended; for the filling
- 1 tablespoon orange zest or lemon zest for variation
- 1/4 teaspoon kosher salt for the filling
- 3/4 cup mini chocolate chips about 130 g
- 1/4 cup pistachios finely chopped, optional, for topping
- parchment paper for lining the baking pan
- nonstick spray or butter optional, for lightly greasing the pan under parchment
Instructions
- Preheat your oven to 350°F (175°C). Line a 9×9-inch baking pan with parchment paper, leaving overhang on two opposite sides to create handles. Lightly grease the pan under the parchment if desired to help it stay in place.parchment paper, nonstick spray or butter
- In a medium mixing bowl, whisk together the flour, granulated sugar, cinnamon, and salt for the crust. Pour in the melted, slightly cooled butter and vanilla extract. Stir until the mixture resembles damp sand and starts to clump; it should be crumbly but hold together when pressed.1 1/2 cups all-purpose flour, 1/2 cup granulated sugar, 1/2 cup unsalted butter, 1/4 teaspoon kosher salt, 1 teaspoon vanilla extract, 1/2 teaspoon ground cinnamon
- Transfer the crust mixture to the prepared pan and press it firmly and evenly into the bottom using your fingertips or the bottom of a measuring cup. Bake for 10–12 minutes, just until the crust looks set and slightly puffed but not browned. While the crust bakes, prepare the filling.
- In a large bowl, beat the softened cream cheese with a hand mixer on medium speed until smooth and fluffy, 1–2 minutes. Add the ricotta and beat again until very smooth and well combined, scraping down the sides of the bowl as needed.2 cups whole milk ricotta cheese, 4 oz cream cheese
- Add the granulated sugar, powdered sugar, salt, vanilla extract, almond extract (if using), and orange zest to the ricotta mixture. Beat on medium speed until creamy and slightly thickened, about 1–2 minutes.1/2 cup granulated sugar, 1/4 cup powdered sugar, 1/4 teaspoon kosher salt, 1 teaspoon vanilla extract, 1/2 teaspoon almond extract, 1 tablespoon orange zest
- Add the eggs one at a time, mixing on low speed just until each egg is incorporated. Do not overmix. Gently fold in the mini chocolate chips with a spatula until evenly distributed.2 large eggs, 3/4 cup mini chocolate chips
- When the crust comes out of the oven, let it cool for about 5 minutes. Pour the ricotta filling evenly over the warm crust and spread it into the corners. If using pistachios, sprinkle them evenly over the top.1/4 cup pistachios
- Return the pan to the oven and bake at 350°F (175°C) for 30–35 minutes, until the edges are set, the center is mostly set with a slight wobble, and a toothpick inserted near the center comes out mostly clean with a few moist crumbs. If the top begins to brown too quickly, tent loosely with foil for the last 5–10 minutes.
- Remove the pan from the oven and place it on a wire rack. Cool completely to room temperature, then cover and chill in the refrigerator for at least 3 hours, preferably overnight, until the filling is fully set.
- Use the parchment overhang to lift the chilled slab out of the pan onto a cutting board. For the cleanest cuts, run a sharp knife under hot water, wipe dry, and slice into 16–20 bars, wiping the knife between cuts. Serve chilled or slightly cool.