Would you like to save this?
Bubblegum Fudge Recipe
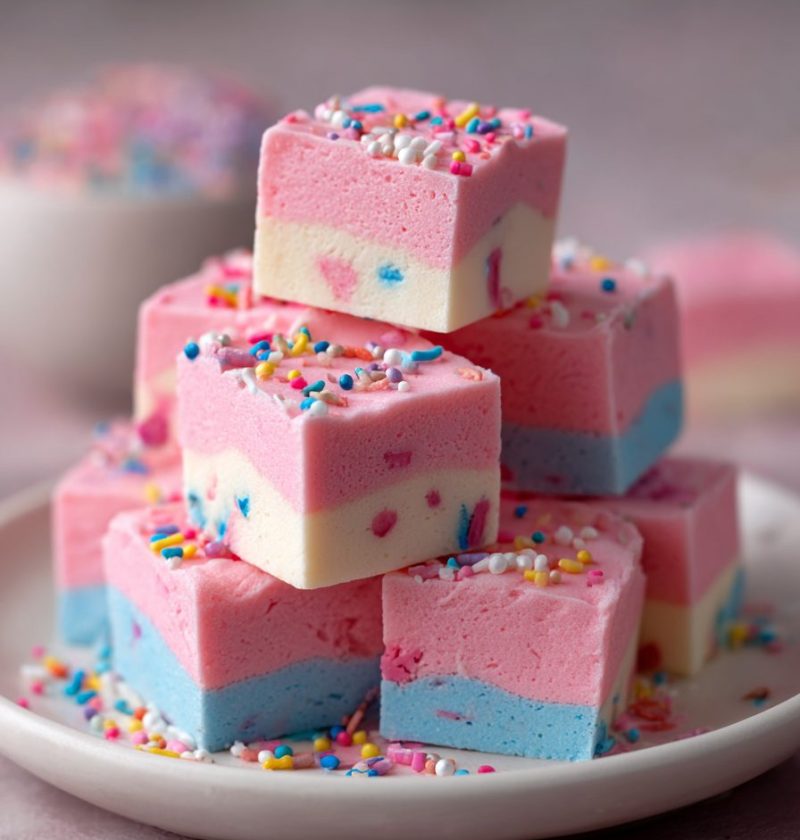
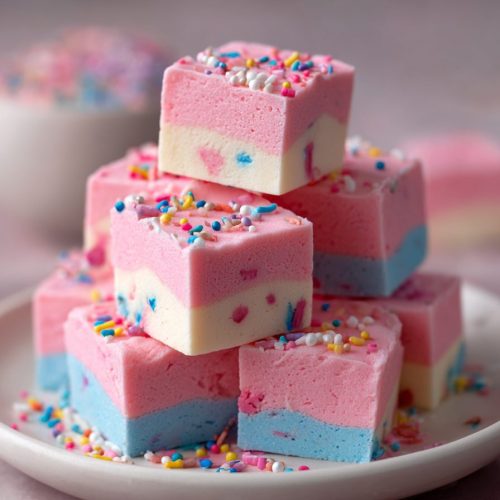
If you’re craving something bright, playful, and ridiculously easy, this Bubblegum Fudge Recipe gives you creamy pink squares of fun that come together in minutes—no oven, no fuss, just sweet bubblegum-flavored magic.
A Nostalgic Treat With A Modern Shortcut
You know what? This bubblegum Fudge Recipe hits that sweet spot between childhood nostalgia and grown-up convenience. It’s a smooth, creamy bubblegum flavored fudge made with white chocolate, sweetened condensed milk, and a splash of bubblegum extract, then tinted the prettiest shade of pink. Think old-fashioned candy shop vibes, but made in your own kitchen with a microwave and one bowl.
I first started making homemade bubblegum fudge for my kids’ birthday parties about 15 years ago. The cupcakes were always cute, but the colorful fudge squares disappeared first—every single time. These pink bubblegum fudge pieces became the “fun dessert recipe” all the kids talked about, and parents started requesting the recipe for their own parties.
This recipe is:
- A no bake bubblegum fudge that doesn’t require a candy thermometer
- A quick fudge recipe that’s ready to slice in a couple of hours
- A kid friendly fudge recipe with a flavor kids instantly recognize and love
- An easy bubblegum fudge you can make in the microwave after dinner and chill overnight
Is it a health food? Of course not; it’s candy flavored fudge. But it’s special-occasion sweet—a little goes a long way, and you control what goes into it. No mystery ingredients, no long list of additives, just familiar pantry staples with a whimsical twist.
I love making this for birthday party fudge platters, school bake sales, baby showers, and even Valentine’s Day treat boxes. And if you grew up in the ‘70s or ‘80s like I did, that first bite of creamy bubblegum fudge might take you straight back to Saturday trips to the corner store.
Why You’ll Love This Bubblegum Fudge Recipe
- No stove drama – This is a true microwave bubblegum fudge; no candy thermometer, no sugar stages, no stress.
- Fast and simple – About 10 minutes of hands-on prep, then the fridge does the rest.
- Creamy, not chalky – The combo of white chocolate and sweetened condensed milk makes an ultra creamy bubblegum fudge that melts in your mouth.
- Perfect for parties – Cut into colorful fudge squares, it looks adorable on dessert tables and fits right into birthday themes.
- Customizable color – Go soft baby pink, bright neon, or swirl in a second color for a fun bubblegum effect.
- Kid helper friendly – Older kids can help stir, add sprinkles, and press the fudge into the pan.
- No-bake dessert – Great for hot summer months when you don’t want to turn on the oven but still want a sweet bubblegum dessert.
- Easy to transport – Sturdy enough for lunchboxes, bake sales, and goodie bags, yet still soft and fudgy.
- Freezer-friendly – Make ahead, freeze, and you’ve got homemade bubblegum fudge ready for last-minute celebrations.
Let me explain how to set yourself up for success with the ingredients. That’s really where the magic starts.
Ingredients For Bubblegum Fudge
For this homemade bubblegum fudge, you’ll need:
- 3 cups (about 18 oz / 510 g) white chocolate chips
- Use a good-quality brand that melts smoothly (Guittard, Ghirardelli, or Nestlé work well). Cheap chips sometimes turn grainy.
- 1 can (14 oz / 396 g) sweetened condensed milk
- Make sure it’s sweetened condensed milk, not evaporated milk. That’s what gives the fudge its creamy, rich texture.
- 2 tablespoons unsalted butter, cut into pieces
- Butter adds flavor and a slightly softer, luxurious texture.
- 1½–2 teaspoons bubblegum flavoring or bubblegum extract
- Start with 1½ teaspoons, taste, then add a little more if you like a stronger bubblegum punch. LorAnn Oils or similar candy flavorings work beautifully here.
- ¼ teaspoon fine sea salt
- Just enough salt keeps your pink bubblegum fudge from tasting flat and overly sweet.
- 2–3 drops pink gel food coloring
- Gel color works better than liquid because it keeps the fudge from getting too thin. Add drop by drop until you reach your perfect bubblegum pink.
- 2–3 tablespoons rainbow sprinkles, jimmies, or nonpareils (optional, for topping)
- Jimmies bleed less than nonpareils; they’re my go-to for a clean look.
- Optional add-ins (choose one or two)
- ½ cup mini marshmallows (folded in at the end for texture)
- ⅓ cup finely chopped bubblegum candies (choose a brand that stays semi-chewy when cold)
- ¼ cup white chocolate chips or colorful candy pieces for a “birthday party fudge” feel
Pan & tools:
- 8×8-inch (20×20 cm) square baking pan
- Parchment paper
- Microwave-safe mixing bowl (glass works best)
- Rubber spatula
- Small offset spatula (handy for spreading, but not required)

A quick note: if you’re cooking in a very warm kitchen (hello, summer), chill your white chocolate chips in the fridge for 10–15 minutes before you start. It can help them melt more evenly in the microwave.
Step-By-Step Directions (Microwave Method)
1. Prepare your pan.
Line your 8×8-inch pan with parchment paper, leaving a little overhang on two sides to act as “handles.” Lightly mist with nonstick spray or brush with a tiny bit of melted butter. This makes removal and slicing your bubblegum fudge recipe so much easier.
2. Combine the base ingredients.
In a large microwave-safe bowl, add the white chocolate chips, sweetened condensed milk, and butter pieces. Don’t stir yet; just pile them in. The more evenly spread they are, the better they’ll melt.
3. Melt carefully in the microwave.
Microwave on 50% power for 60 seconds. Remove the bowl and stir slowly, scraping the bottom and sides. Return to the microwave and continue heating in 20–30 second bursts at 50% power, stirring well after each burst, until everything is mostly melted and smooth.
- The residual heat will finish melting the small pieces, so stop while a few tiny lumps remain and keep stirring. This helps prevent scorching.
4. Stir until silky.
Once the chips are fully melted, keep stirring for another 20–30 seconds. The mixture should be thick, glossy, and smooth—like a very rich frosting. If it seems grainy, pop it back into the microwave for 10 seconds and stir again.
5. Add bubblegum flavoring, salt, and color.
Stir in the bubblegum extract and salt. Taste a tiny bit (careful, it’s warm). If you want a stronger bubblegum flavor, add another ¼–½ teaspoon and stir again.
Now add your pink gel food coloring, one drop at a time, stirring well after each drop. For classic pink bubblegum fudge, 2–3 small drops should do it.
6. Fold in any mix-ins.
If you’re adding mini marshmallows, chopped bubblegum, or extra white chocolate chips, let the mixture cool for 2–3 minutes so they don’t completely melt. Then gently fold them in with your spatula. You want pretty bits and pockets throughout your easy bubblegum fudge.
7. Pour and smooth.
Quickly scrape the fudge mixture into your prepared pan. Use your spatula or an offset spatula to spread it evenly into the corners and smooth the top. Work fairly fast—the fudge will start to firm up as it cools.
8. Decorate the top (optional but very fun).
While the fudge is still soft, sprinkle the top with rainbow sprinkles, extra chopped bubblegum pieces, or even tiny heart sprinkles if you’re making Valentine’s Day treats. Press them down very lightly so they adhere.
9. Chill until firm.
Transfer the pan to the refrigerator and chill for at least 2 hours, or until the fudge is firm enough to slice cleanly. For the neatest squares, chill 3–4 hours or overnight.
10. Slice into colorful fudge squares.
Use the parchment overhang to lift the fudge block out of the pan. Place it on a cutting board. With a sharp knife, cut into 1-inch squares (or larger if you like generous pieces). Wipe the knife with a warm, damp cloth between cuts to keep edges clean.
Now you’ve got a full pan of creamy bubblegum fudge, ready for party platters, lunchboxes, or straight-from-the-fridge snacking.
Servings & Timing
- Yield: About 36 small squares (1-inch) or 16–25 larger pieces, depending on how you slice.
- Prep Time: 10–15 minutes
- Chill Time: 2–4 hours (hands-off)
- Total Time: About 2½–4¼ hours, with only a few minutes of actual work
For parties, I like to cut smaller squares. Kids love coming back for “just one more,” and small pieces stretch the batch further on a dessert table.
Fun Variations To Try
You know what? Once you make this once, you’ll probably start dreaming up your own twists. Here are some favorites that have worked well for my family and readers:
- Cotton Candy Twist: Use half bubblegum flavoring and half cotton candy flavoring, then swirl in a bit of blue food coloring for a pink-and-blue candy-shop effect.
- Confetti Birthday Bubblegum Fudge: Stir in ¼–⅓ cup rainbow jimmies and top with more sprinkles for a full-on birthday party fudge.
- Bubblegum & Marshmallow Swirl: Fold in ½ cup mini marshmallows and a handful of extra chopped white chocolate for soft, pillowy bites.
- Two-Tone Bubblegum Fudge: Make one batch pink and a second batch white (no coloring); layer them in the pan for a fun striped look.
- Gluten-Free Bubblegum Fudge: This recipe is naturally gluten-free as long as your sprinkles and candy add-ins are certified gluten-free.
- Bubblegum Bark Fudge: Spread the fudge a bit thinner, let it chill, then break it into pieces instead of cutting squares for a more rustic candy bark style.
If you’re making this for a holiday, match your topping colors—red and green for Christmas, pastels for Easter, school colors for graduation, and so on.
How To Store, Freeze, and Serve Later
Homemade bubblegum fudge behaves nicely if you store it correctly. Here’s how I handle it when I’m planning ahead for parties or gift boxes.
Room temperature (short term):
- Store pieces in an airtight container, layered with parchment or wax paper.
- Keeps 3–4 days at cool room temperature (around 68–70°F), away from direct sunlight or heat sources.
Refrigerator (longer freshness):
- For the best texture, I like to keep this creamy bubblegum fudge in the fridge.
- Store in an airtight container for up to 2 weeks.
- Let pieces sit at room temperature for about 10–15 minutes before serving if you want a softer bite.
Freezer (make-ahead magic):
- Place cut squares on a parchment-lined tray and freeze until solid, about 1–2 hours.
- Transfer to a freezer-safe bag or container, with parchment between layers.
- Freeze for up to 2 months for best flavor.
- To serve, thaw in the fridge overnight or at room temperature for 20–30 minutes.
No real reheating is needed—this isn’t that kind of dessert. The main thing is avoiding big temperature swings, which can cause a little surface condensation. If you see a tiny bit of sugar bloom (a light, frosty look), it’s still safe to eat; it just means some sugar crystals migrated to the surface.
Notes From My Kitchen (And What I Learned Testing This)
- Flavor strength matters. Bubblegum flavoring can be very strong or quite mild depending on the brand. Always start lower, then add more to taste. Once it’s in there, you can’t take it out.
- White chocolate can be fussy. Overheating white chocolate chips in the microwave can cause them to seize. That’s why I stress 50% power and short bursts. Go slowly; patience pays off.
- Color choice changes the vibe. A very pale blush feels nostalgic and soft, while a bright hot pink bubblegum fudge reads more “party!” and shows up better on dessert tables.
- Pan size tweaks thickness. An 8×8 pan gives you nice, thick fudge squares. If you use a 9×9 pan, the pieces will be slightly thinner, but still delicious.
- Line your pan—trust me. I once skipped the parchment because I was “in a hurry,” and I ended up scooping fudge out with a spatula. It still tasted great but looked like a candy avalanche.
- Chill fully before slicing. If you’re impatient and cut too soon, the texture will seem too soft and the squares may slump. Give it time, then enjoy those neat little cubes.
This recipe has been tweaked over many batches for birthday parties, church bake sales, and grandbaby celebrations. Each time, I learn something small—usually that kids can somehow eat more bubblegum flavored fudge than I think is humanly possible.
Frequently Asked Questions
1. Can I make this bubblegum fudge recipe without a microwave?
Yes. Combine the white chocolate, sweetened condensed milk, and butter in a heavy saucepan, and warm over very low heat, stirring constantly, until smooth. Remove from heat before adding flavoring and color.
2. What if I can’t find bubblegum extract?
Use a candy flavoring labeled “bubblegum” from brands like LorAnn, or look for bubblegum flavoring online. You can’t really mimic true bubblegum flavor with pantry ingredients, so the flavoring is important.
3. My fudge turned grainy—what went wrong?
Most likely the white chocolate overheated. Next time, use 50% power in the microwave, stir often, and stop heating while a few small lumps remain so they melt gently from residual heat.
4. Can I use candy melts instead of white chocolate chips?
You can, but the texture will be a bit firmer and slightly less creamy. If you use candy melts, reduce the amount to about 2¾ cups so the fudge doesn’t get too stiff.
5. Is this recipe safe for people with nut allergies?
The recipe itself doesn’t contain nuts, but always check your chocolate chips, sprinkles, and flavorings—many are made in facilities that also process nuts. For very sensitive allergies, choose clearly labeled nut-free brands.
6. Can I double this recipe for a big party?
Absolutely. Double all the ingredients and use a 9×13-inch pan. Melt the mixture in a large bowl and microwave in slightly longer bursts, stirring very well so everything heats evenly.
7. How do I cut perfectly even fudge squares?
Use a ruler and lightly score guidelines on the top of the chilled fudge before cutting. A long, sharp knife dipped in warm water and wiped dry between cuts helps you get clean edges.
8. Can I make this bubblegum fudge recipe sugar-free?
Not with the same texture. This particular recipe relies on sweetened condensed milk and white chocolate, both of which contain sugar. Sugar-free versions require a very different formula and sugar substitutes designed for candy making.
Wrapping It Up (And A Little Nudge To Try It)
This Bubblegum Fudge Recipe is playful, nostalgic, and wonderfully simple—a creamy, pink, bubblegum flavored fudge that looks like you spent hours making it when it really only took a few minutes and a microwave. It’s the kind of sweet bubblegum dessert that makes kids’ eyes light up and grown-ups suddenly remember the gum machines of their childhood.
If you give this easy bubblegum fudge a try, I’d love to hear how it turned out—especially if you served it as birthday party fudge or tucked it into gift boxes. Leave a comment with your favorite variation, or share what other candy flavored fudge you’d like to see. And if you enjoyed this, you might also like trying a cotton candy fudge or a simple vanilla birthday cake fudge next, keeping that colorful, fun dessert theme going in your kitchen.
Bubblegum Fudge
Ingredients
- 3 cups white chocolate chips about 18 oz / 510 g; use good-quality for smooth melting
- 14 oz can sweetened condensed milk about 396 g; not evaporated milk
- 2 tablespoons unsalted butter cut into pieces
- 1 1/2–2 teaspoons bubblegum flavoring or bubblegum extract start with 1 1/2 tsp, then adjust to taste
- 1/4 teaspoon fine sea salt
- 2–3 drops pink gel food coloring add drop by drop until desired shade is reached
- 2–3 tablespoons rainbow sprinkles jimmies or nonpareils, for topping; jimmies bleed less
- 1/2 cup mini marshmallows optional add-in, folded in at the end for texture
- 1/3 cup finely chopped bubblegum candies optional add-in; choose a brand that stays semi-chewy when cold
- 1/4 cup white chocolate chips or colorful candy pieces optional add-in for a “birthday party fudge” feel
Instructions
- Line an 8×8-inch (20×20 cm) square baking pan with parchment paper, leaving an overhang on two sides to use as handles. Lightly mist the parchment with nonstick spray or brush with a small amount of melted butter.
- In a large microwave-safe mixing bowl, add the white chocolate chips, sweetened condensed milk, and butter pieces. Distribute them evenly in the bowl, but do not stir yet.3 cups white chocolate chips, 14 oz can sweetened condensed milk, 2 tablespoons unsalted butter
- Microwave the mixture on 50% power for 60 seconds. Remove and stir slowly, scraping the bottom and sides. Return to the microwave and heat in 20–30 second bursts at 50% power, stirring thoroughly after each burst, until the mixture is mostly melted and smooth. Stop when only a few small lumps remain; the residual heat will finish melting them.3 cups white chocolate chips, 14 oz can sweetened condensed milk, 2 tablespoons unsalted butter
- Continue stirring the warm mixture for another 20–30 seconds until it is thick, glossy, and completely smooth. If it appears grainy, microwave for an additional 10 seconds at 50% power and stir again.3 cups white chocolate chips, 14 oz can sweetened condensed milk, 2 tablespoons unsalted butter
- Stir in the bubblegum flavoring or extract and the fine sea salt. Taste a tiny amount (caution, it will be warm) and add up to an additional 1/2 teaspoon bubblegum flavoring if desired. Add pink gel food coloring one drop at a time, stirring well after each drop, until you reach your preferred shade of bubblegum pink.1 1/2–2 teaspoons bubblegum flavoring or bubblegum extract, 1/4 teaspoon fine sea salt, 2–3 drops pink gel food coloring
- Let the mixture cool for 2–3 minutes so any mix-ins don’t completely melt. Gently fold in mini marshmallows, chopped bubblegum candies, and/or extra white chocolate chips or colorful candy pieces, if using, until evenly distributed.1/2 cup mini marshmallows, 1/3 cup finely chopped bubblegum candies, 1/4 cup white chocolate chips or colorful candy pieces
- Quickly scrape the fudge mixture into the prepared pan. Use a rubber spatula or small offset spatula to spread it evenly into the corners and smooth the top. Work fairly quickly, as the fudge will begin to firm as it cools.
- While the surface is still soft, sprinkle the top with rainbow sprinkles or other decorative toppings. Press them down very lightly so they adhere to the fudge.2–3 tablespoons rainbow sprinkles
- Place the pan in the refrigerator and chill for at least 2 hours, or until the fudge is firm enough to slice cleanly. For the neatest squares, chill 3–4 hours or overnight.
- Use the parchment overhang to lift the chilled fudge from the pan onto a cutting board. With a sharp knife, cut into about 36 1-inch squares, wiping the knife with a warm, damp cloth and drying between cuts for clean edges. Serve chilled or at cool room temperature.