Would you like to save this?
Easter Bunny Cake Recipe
If there’s ever a dessert that makes people smile before they even take a bite, it’s this Easter Bunny Cake Recipe—soft, sweet, festive, and charming enough to steal the whole Easter table.
A sweet little showstopper for spring
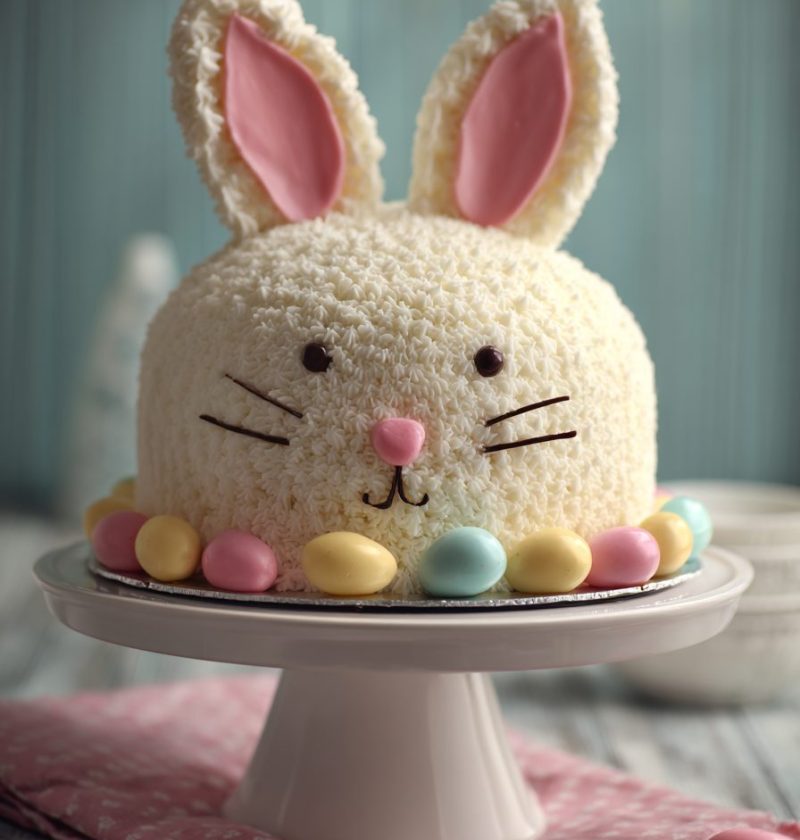
This Easter Bunny Cake Recipe is a classic, cheerful Easter dessert idea made by shaping round cake layers into an adorable bunny face, then decorating it with fluffy frosting, coconut, candies, and a whole lot of personality. It’s the kind of cake that feels nostalgic and fresh at the same time. If you grew up in the United States, there’s a good chance you saw some version of an Easter Bunny Cake at a church potluck, school party, or family brunch. And if you didn’t, well, you’re in for a treat.
What makes this Bunny Cake Recipe special is how doable it is. You don’t need fancy pastry tools, a bakery degree, or nerves of steel. You simply bake two round cakes, cut one into ears and a bow tie, and build a bunny shaped cake that looks far more impressive than the work it takes. I love serving this at Easter lunch right after the ham and deviled eggs, when everyone’s settling into that happy, slightly lazy holiday mood. It also makes a darling kids Easter cake, and honestly, adults get just as excited.
This is not a “healthy” dessert in the strict sense, and I’m not going to pretend otherwise. But it is homemade, which means you control the ingredients, sweetness, colors, and decorations. That counts for a lot in my kitchen. And when a cake brings three generations to the table with cameras out and forks ready? That’s a win.
Why you’ll love this recipe
- It turns simple cake layers into a truly cute bunny cake.
- No special mold required—just round pans and a knife.
- Perfect for Easter brunch, dinner, or a spring birthday.
- Easy enough for beginner bakers and fun for kids to help decorate.
- Works with cake mix or homemade batter.
- Doubles as a centerpiece and dessert, which I always appreciate.
- Flexible decorating options for pastel, classic, or modern styles.
- Great make-ahead holiday Cake Recipe for busy weekends.
- A lovely spring celebration cake that feels joyful and nostalgic.
- Leftovers, if you have any, stay moist and delicious.
Ingredients
For the cake layers:
- 1 box white or yellow cake mix, plus ingredients listed on the box (usually eggs, oil, and water)
(Or use your favorite homemade vanilla cake recipe if that’s your style.) - Nonstick baking spray or butter, for greasing pans
- 2 round 8-inch or 9-inch cake pans
For the frosting:
- 1 cup unsalted butter, softened
- 4 cups powdered sugar
- 2 to 3 tablespoons milk
- 2 teaspoons vanilla extract
- Pinch of salt
For decorating:
- 2 to 3 cups sweetened shredded coconut
(Use finely shredded coconut for a softer, fluffier “fur” look.) - Pink jelly beans or pink candies for the nose
- 2 black jelly beans, mini chocolate chips, or small brown candies for the eyes
- 1 piece pink licorice, pink taffy, or colored frosting for the mouth
- 6 to 8 thin strips licorice or piped frosting for whiskers
- Pink sanding sugar or pink coconut for the inner ears
- Optional: pastel sprinkles, marshmallows, candy eggs, or edible flowers for extra flair
Ingredient tips:
- Use room-temperature butter for smooth frosting. Cold butter gives you lumps, and nobody wants that.
- If using a cake mix, white cake gives you the brightest base for decoration, while yellow cake adds a richer flavor.
- For coconut, I like Baker’s Angel Flake or simple store-brand sweetened coconut. Either works well.
- If you want bold color for the ears or bow tie, tint a little frosting with gel food coloring. Gel works better than liquid because it won’t thin out your frosting.

Directions
-
Prepare your pans and oven.
Preheat your oven according to the cake mix or recipe directions, usually 350°F. Grease two round cake pans well and line the bottoms with parchment if you want extra insurance. That little step saves a lot of heartache later. -
Mix the cake batter.
Prepare the batter as directed on the box, or make your homemade batter. Stir until smooth, but don’t overmix—the cake can turn dense if you go too far. Divide the batter evenly between the two pans. -
Bake until lightly golden.
Bake the cakes according to the package or recipe timing, usually 25 to 32 minutes. You’ll know they’re done when the tops spring back lightly and a toothpick comes out with a few moist crumbs, not wet batter. -
Cool the cakes completely.
Let the cakes rest in the pans for about 10 minutes, then turn them out onto wire racks. Cool completely before frosting. Really completely. Warm cake and buttercream are not friends. -
Make the frosting.
Beat the softened butter until creamy. Add powdered sugar, vanilla, salt, and 2 tablespoons milk, then beat until fluffy. Add more milk a teaspoon at a time if needed. You want a spreadable frosting, not a runny one. -
Shape the bunny.
Place one whole round cake on a large platter or board for the bunny’s face. Cut the second round cake into two oval ear shapes and one bow tie shape. Arrange the ears above the head and the bow tie below it. If your cuts aren’t perfect, don’t fret—frosting and coconut are wonderfully forgiving. -
Apply a crumb coat.
Spread a thin layer of frosting over all the cake pieces. This catches loose crumbs and helps the final coat stay neat. Chill the cake for 15 to 20 minutes if you have room in the fridge. It makes decorating much easier. -
Frost and cover with coconut.
Add a thicker layer of frosting over the face, ears, and bow tie. Gently press shredded coconut over the frosted areas to create the bunny’s fluffy fur. Leave a little space in the center of each ear for pink decorating. -
Decorate the bunny face.
Add jelly beans or candies for the eyes and nose. Use licorice or piped frosting for the mouth and whiskers. Fill the inner ears with pink coconut, pink sugar, or pink-tinted frosting. If using pink coconut, toss the coconut with a drop or two of food coloring in a zip-top bag and shake well. -
Finish the bow tie and add extras.
Tint some frosting for the bow tie if you like, or decorate it with sprinkles or candy dots. Around the cake board, scatter pastel candies, edible flowers, or green-tinted coconut to mimic spring grass. It gives the whole festive Easter dessert a lovely finished look. -
Chill briefly before serving.
Let the cake sit in the fridge for 20 to 30 minutes to help the frosting set. Then bring it out about 15 minutes before serving so the texture stays soft and tender.
Servings & timing
- Yield: 12 to 16 servings
- Prep Time: 30 minutes
- Bake Time: 25 to 32 minutes
- Cooling Time: 1 hour
- Decorating Time: 20 minutes
- Total Time: About 2 hours 15 minutes
If you bake the layers a day ahead, this homemade Easter cake comes together much faster on the big day.
Variations
- Chocolate Bunny Cake: Use chocolate cake and chocolate frosting for a richer, more dramatic version.
- Coconut Lover’s Cake: Add coconut extract to the frosting and use coconut cake layers for extra flavor.
- Lemon Spring Cake: Use lemon cake with vanilla frosting for a bright, sunny spring celebration cake.
- Strawberry Bunny Cake: Add freeze-dried strawberry powder to the frosting for natural pink color and berry flavor.
- Gluten-Free Version: Use a trusted 1:1 gluten-free cake mix and check your candies for gluten-free labeling.
- Birthday Bunny Cake: Add candles and colorful confetti sprinkles to turn it into a sweet bunny birthday cake.
Storage & reheating
Store the finished cake covered in the refrigerator for up to 4 days. Because of the buttercream and decorations, it holds best when chilled, though I like to let slices sit out for 10 to 15 minutes before serving so the frosting softens.
You can also freeze the unfrosted cake layers for up to 2 months. Wrap them tightly in plastic wrap and then foil. Thaw overnight in the fridge before shaping and frosting.
If you want to make this ahead, bake the layers 1 day in advance and prepare the frosting the same day or the next morning. Assemble and decorate the cake a few hours before serving for the freshest look. I don’t recommend freezing the fully decorated cake with coconut on top—the texture gets a bit odd once thawed.
Notes
I tested this cake a few different ways, and here’s what I learned. First, 8-inch pans give you a slightly taller bunny face, while 9-inch pans make a larger, flatter cake that’s easier to decorate for a crowd. Both work, so use what you have.
Second, a crumb coat is worth the extra few minutes. I know it can feel fussy. But it keeps the white frosting clean, especially if you’re using yellow cake or homemade layers with a tender crumb.
Third, coconut hides a lot of little imperfections, which is one reason this easy Easter baking project is such a good choice for families. If an ear cracks, patch it with frosting. If the face looks uneven, add coconut. This cake is forgiving—almost suspiciously forgiving.
One more tip: for the best visual contrast, keep the face simple and don’t overdo the decorations. A nose, eyes, whiskers, and pink ears are often enough. Too much candy can make the bunny look a little busy, and yes, I learned that the hard way one Easter about ten years ago.
FAQs
Can I make this Easter Bunny Cake Recipe with a boxed cake mix?
Absolutely. A boxed mix is one of the easiest ways to make this recipe approachable and consistent.
What size cake pans work best?
Two 8-inch or 9-inch round pans both work well. The 8-inch version looks slightly more compact and traditional.
How do I keep the cake from sticking to the pan?
Grease the pans well and line the bottoms with parchment paper. Let the cakes cool for about 10 minutes before turning them out.
Can I make this without coconut?
Yes. Skip the coconut and use piped frosting stars or smooth frosting instead. It will still be a lovely Easter party cake.
What’s the best frosting for a bunny shaped cake?
Buttercream is my favorite because it spreads easily and holds decorations well. Cream cheese frosting is tasty too, but it tends to be softer.
Can kids help make this cake?
Definitely. Kids can add the coconut, place the candy face, and decorate the bow tie. It’s a fun family baking project.
How far ahead can I decorate the cake?
You can decorate it up to 24 hours in advance. Store it covered in the fridge so it stays fresh and neat.
Can I use this Bunny Cake Recipe for other spring parties?
Yes, and that’s one of the reasons I love it. This cake works beautifully as a holiday cake recipe, a baby shower dessert, or even a playful spring birthday cake.
A cheerful finish for your Easter table
This Easter Bunny Cake Recipe is sweet, simple, nostalgic, and wonderfully festive—the kind of dessert that turns an ordinary meal into a memory. Whether you make it from scratch or start with a cake mix, it’s a charming Easter bunny dessert that’s as fun to decorate as it is to eat.
If you try it, I’d love to hear how your bunny turned out. Leave a comment, share your decorating twist, or save this recipe for your next Easter cake recipe and spring baking day.