Would you like to save this?
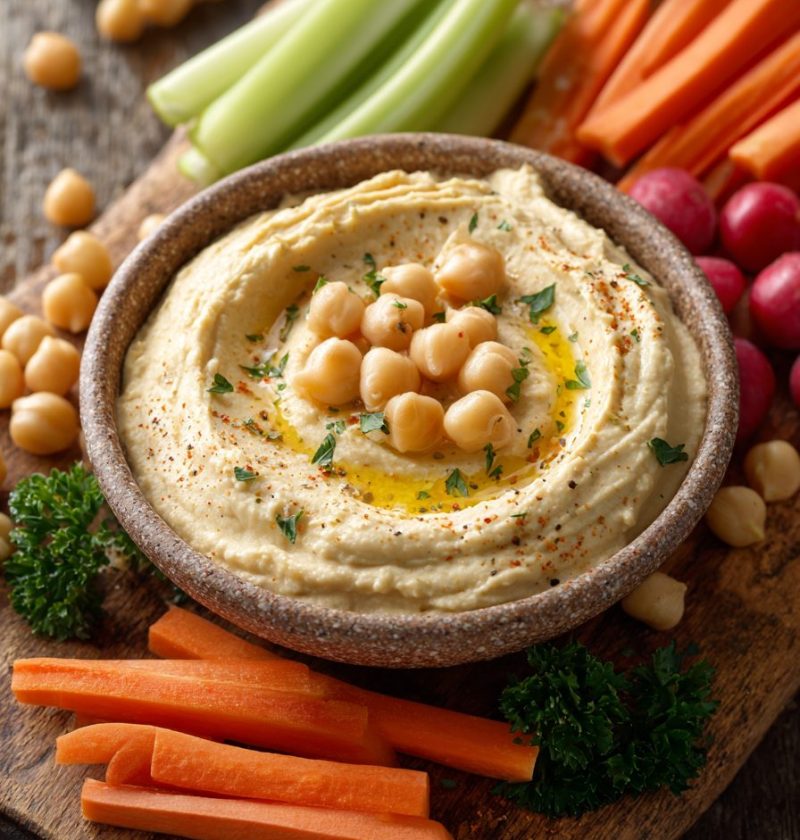
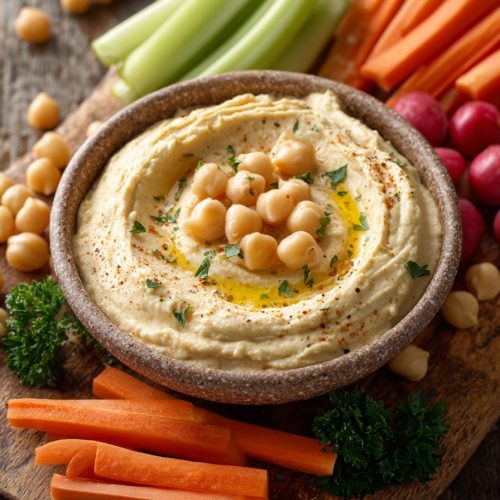
Homemade Hummus Recipe Without Tahini
If you’ve Ever wanted a creamy, healthy hummus but didn’t have tahini on hand, this Homemade Hummus Recipe Without Tahini is exactly what you need—smooth, flavorful, and ready in minutes with pantry ingredients.
What Makes This Homemade Hummus Recipe Without Tahini So Special?
Let me tell you a little story. I grew up in a small Midwestern town where “exotic” food meant adding black olives to a pizza. Tahini wasn’t exactly hanging out on the supermarket shelves back then. But we always had cans of chickpeas (or “garbanzo beans,” as my mom called them) and a jar of lemon juice.
Fast forward a few decades—I’m 50 now, living in the suburbs, and I still love simple recipes that feel a little Mediterranean, a little fresh, and a whole lot doable. This hummus recipe without tahini was born on one of those evenings when I wanted a healthy snack but refused to run to the store.
This homemade hummus is:
- Made with chickpeas, lemon, garlic, and olive oil
- Completely tahini-free, yet still creamy and rich
- Budget-friendly and kid-approved (always a win at my house)
You’ll get all the goodness of a classic Mediterranean hummus recipe—protein, fiber, plant-based ingredients—without needing a specialty seed paste. It’s perfect as an everyday snack, a game-day dip, or tucked into lunchboxes with some crunchy veggies.
And yes, it still tastes like real hummus. Just a touch milder, which honestly makes it a great “starter” hummus for kids or anyone new to chickpea dips.
Why You’ll Love This Homemade Hummus Recipe Without Tahini
You know what? Let’s just lay it all out. Here’s why this simple hummus dip is going to be a regular in your kitchen:
- No tahini needed – Ideal if you don’t have it, don’t like it, or are avoiding sesame.
- Pantry-friendly ingredients – Chickpeas, lemon juice, garlic, and olive oil are all you really need.
- Quick and easy hummus recipe – About 10 minutes from can opener to snack bowl.
- Creamy without cream – Naturally dairy-free, vegan, and still luscious.
- Budget-conscious – Way cheaper than store-bought hummus tubs.
- Customizable flavor – Add more lemon, roasted garlic, or spices to match your mood.
- Healthy and filling – High in plant-based protein and fiber, low in fuss.
- Perfect for meal prep – Make it on Sunday and snack on it all week.
- Kid and party friendly – Mild, smooth chickpea hummus that everyone scoops up.
Ingredients for This Easy, Tahini-Free Hummus
Here’s exactly what you’ll need for this basic hummus recipe, plus a few notes to help you get the creamiest result.
-
1 can (15 oz / about 425 g) chickpeas (garbanzo beans), drained and rinsed
Use low-sodium if you can; it gives you better control over the salt. You can also cook your own dried chickpeas—about 1 ½ cups cooked. -
3–4 tablespoons fresh lemon juice (about 1–2 lemons)
Fresh really does make a difference. Bottled can work in a pinch, but taste and adjust. -
2–3 tablespoons extra-virgin olive oil
Choose a good-tasting olive oil since you’ll really taste it here. It adds flavor and silkiness. -
1–2 small garlic cloves, peeled
Raw garlic is strong; start with 1 clove if you’re sensitive, then add more if you like. -
3–5 tablespoons cold water (or aquafaba – the liquid from the chickpea can)
Cold water (or chilled aquafaba) helps whip air into the hummus and makes it super creamy. -
½ teaspoon ground cumin (optional but recommended)
Adds that warm, classic hummus flavor. -
½–¾ teaspoon fine sea salt (to taste)
Different brands of chickpeas have different sodium levels—always taste and adjust at the end. -
¼ teaspoon smoked paprika or regular paprika (optional, for serving)
Lovely sprinkled on top for color and a hint of flavor. -
1–2 teaspoons extra-virgin olive oil (for drizzling on top, optional)
Adds a restaurant-style finish.
Ingredient tips:
- If your chickpeas seem firm, you can microwave them with a splash of water for 1–2 minutes to soften. Softer beans = smoother hummus.
- For extra-smooth hummus without tahini, some folks peel the chickpeas (slip the skins off). It’s a bit of a project, but very soothing if you like a repetitive kitchen task while listening to a podcast.

Step-by-Step Directions: How to Make Hummus Without Tahini
You’ll want a food processor or a powerful blender here. Both work; the food processor gives you more control.
-
Prep the chickpeas
Drain and rinse your chickpeas under cool water. Let them drain well. If you want extra creamy hummus, gently pinch off and discard the chickpea skins. It’s optional, but it does change the texture. -
Start with the flavor base
In your food processor, add the garlic, lemon juice, salt, and cumin. Pulse a few times until the garlic is finely chopped and the mixture looks cloudy and fragrant. Let it sit for 2–3 minutes—this helps mellow the raw garlic a bit. -
Add the chickpeas and olive oil
Add the drained chickpeas and 2 tablespoons of olive oil. Process for about 30–45 seconds, then stop and scrape down the sides and bottom of the bowl. It’ll look thick and grainy at first—don’t worry, that’s normal. -
Thin and whip with cold water
With the motor running, slowly add 3 tablespoons of cold water (or aquafaba) through the feed tube. Process for 1–2 minutes, stopping once or twice to scrape down the sides. The hummus should get smoother, lighter, and a bit fluffier. -
Taste and adjust
Taste your hummus. Add more salt, lemon juice, or garlic if needed. If it’s still too thick, add more cold water, 1 tablespoon at a time, and process again. You want it to be creamy and spreadable, not stiff like mashed potatoes. -
Final whip for extra creaminess
Once the flavor is where you want it, let the processor run for another 30–60 seconds. This extra whip really helps get that smooth, creamy texture we love in Mediterranean hummus recipes. -
Serve it up
Spoon your tahini free hummus into a shallow bowl. Use the back of a spoon to swirl a little well in the center. Drizzle with a teaspoon or two of olive oil and sprinkle with paprika, a bit more cumin, or even some chopped fresh parsley.
Little trick: If your hummus feels warm from all that blending, pop it in the fridge for 20–30 minutes before serving. It thickens just a bit and the flavors settle together nicely.
Servings & Timing
- Yield: About 1 ¾ to 2 cups hummus
- Prep Time: 10–15 minutes (a bit more if you peel the chickpeas)
- Chill Time (optional): 20–30 minutes
- Total Time: About 15–30 minutes, depending on how creamy you want to get
This is the perfect small batch for a family snack, a simple appetizer with pita chips, or a healthy side for lunch.
Fun Variations on This No Tahini Hummus
Once you’ve got this basic hummus recipe down, the fun really starts. Here are a few of my favorite twists:
- Roasted Garlic Hummus Without Tahini – Swap the raw garlic for 2–3 cloves of roasted garlic for a sweeter, mellow flavor.
- Spicy Hummus – Add ½–1 teaspoon cayenne pepper or a spoonful of harissa or sriracha while blending.
- Herby Green Hummus – Blend in a packed ½ cup of fresh parsley, cilantro, or basil for a bright green, fresh-tasting hummus.
- Smoky Paprika Hummus – Increase the smoked paprika to ½ teaspoon in the blend and sprinkle more on top.
- Lemon-Lovers Hummus – Add extra lemon zest and another tablespoon of lemon juice for a super zippy hummus.
- Greek Yogurt Hummus – Stir in 2–3 tablespoons of plain Greek yogurt at the end for a tangy, extra-protein version (not vegan, but delicious).
Storage & Make-Ahead Tips
One of my favorite things about this simple hummus dip is how well it fits into meal prep.
-
Fridge Storage:
Store your hummus in an airtight container in the refrigerator for 4–5 days. Press a small piece of plastic wrap directly on the surface under the lid if you’re worried about it drying out. -
Freezer Storage:
Yes, you can freeze hummus. Place it in a freezer-safe container, leave a little room at the top for expansion, and freeze for up to 3 months. The texture may change slightly, but it’s still very usable. -
Thawing & “Reheating”:
Thaw frozen hummus in the fridge overnight. Once thawed, stir in a spoonful of olive oil and maybe a splash of water or lemon juice to bring it back to a smoother consistency. -
Make-Ahead:
You can easily make this hummus a day or two before a party. In fact, the flavor actually deepens as it sits. Just give it a stir and a fresh drizzle of olive oil before serving.
Notes from My Kitchen to Yours
A few things I’ve learned while making hummus from scratch over the years:
-
Temperature matters.
Cold water really helps your hummus whip up light and creamy—almost like frosting for veggies. -
Don’t fear the lemon.
If your hummus tastes “flat,” it probably needs more acidity, not more salt. Start with another teaspoon of lemon juice and taste again. -
Older chickpeas = slightly grainier hummus.
Some canned chickpeas are just firmer than others. Softening them with a short simmer in water before blending can help. -
Season to your snacking style.
If you usually eat your hummus with salty chips or crackers, go a little lighter on the salt in the hummus itself. -
Blender vs. food processor.
A high-speed blender can make exceptionally smooth hummus, but you might need more liquid and more scraping. A food processor is more forgiving.
Honestly, homemade chickpea dip is very forgiving. A little more lemon, a splash more water, a bit more salt—you can almost always bring it back to balance.
FAQs About Homemade Hummus Without Tahini
1. Can I really make hummus without tahini?
Yes, absolutely. This hummus without tahini is still creamy and flavorful, just a little milder and more chickpea-forward.
2. What can I use instead of tahini for creaminess?
Olive oil, cold water (or aquafaba), and thorough blending give you a smooth texture; you can also add a spoonful of Greek yogurt or a bit of cashew butter if you like.
3. My hummus is too thick—what do I do?
Add cold water, 1 tablespoon at a time, and blend again until it’s the consistency you like.
4. My hummus tastes bland. How can I fix it?
Usually it needs more salt, more lemon juice, or a little more garlic. Add in small amounts, blend, and taste again.
5. Can I use dried chickpeas instead of canned?
Yes. Cooked-from-dry chickpeas make wonderful hummus. You’ll need about 1 ½ cups cooked chickpeas for this recipe.
6. Is this hummus recipe vegan and gluten-free?
Yes, as written it’s naturally vegan, dairy-free, and gluten-free—just serve it with gluten-free dippers if needed.
7. How do I make this hummus extra smooth?
Peel the chickpeas, use very soft cooked beans, add cold water slowly while blending, and let the machine run a bit longer.
8. What should I serve with this homemade hummus?
Pita, naan, tortilla chips, sliced cucumbers, bell peppers, carrots, cherry tomatoes, pretzels, or even spread on toast or in sandwiches—it’s very flexible.
Conclusion: A Simple, Healthy Hummus You’ll Make Again and Again
This Homemade Hummus Recipe Without Tahini is one of those quietly reliable recipes you’ll keep returning to—simple ingredients, quick prep, and a creamy, healthy hummus that works for snacks, lunches, and parties alike.
If you try this no tahini hummus, I’d love to hear how you served it—did you go spicy, herby, extra lemony? Leave a comment with your tweaks, or share it with a friend who always says, “I’d make hummus, but I never have tahini.” And if you enjoy this, you might also like exploring other easy Mediterranean-style recipes and homemade chickpea dips to add to your weekly rotation.
Homemade Hummus Recipe Without Tahini
Ingredients
- 1 can (15 oz / 425 g) chickpeas (garbanzo beans) drained and rinsed; about 1 1/2 cups cooked
- 3-4 tablespoons fresh lemon juice about 1–2 lemons, or to taste
- 2-3 tablespoons extra-virgin olive oil plus more to taste
- 1-2 cloves garlic small cloves, peeled; start with 1 if sensitive
- 3-5 tablespoons cold water or aquafaba aquafaba is the liquid from the chickpea can
- 1/2 teaspoon ground cumin optional but recommended
- 1/2-3/4 teaspoon fine sea salt to taste
- 1/4 teaspoon smoked paprika or regular paprika optional, for serving
- 1-2 teaspoons extra-virgin olive oil for drizzling on top, optional
Instructions
- Drain and rinse the chickpeas under cool water, then let them drain well. For extra creamy hummus, gently pinch off and discard the chickpea skins. This step is optional but improves the texture.
- In a food processor, add the garlic, lemon juice, salt, and cumin. Pulse several times until the garlic is finely chopped and the mixture looks cloudy and fragrant. Let it sit for 2–3 minutes to slightly mellow the raw garlic.
- Add the drained chickpeas and 2 tablespoons of olive oil to the processor. Process for 30–45 seconds, then stop and scrape down the sides and bottom of the bowl. The mixture will look thick and grainy at this stage.
- With the motor running, slowly add 3 tablespoons of cold water or aquafaba through the feed tube. Process for 1–2 minutes, stopping once or twice to scrape down the sides, until the hummus becomes smoother, lighter, and fluffier.
- Taste the hummus and adjust the seasoning, adding more salt, lemon juice, or garlic as desired. If the hummus is too thick, blend in additional cold water 1 tablespoon at a time until it is creamy and spreadable.
- Once the flavor is balanced, let the food processor run for another 30–60 seconds to whip in more air and achieve an extra smooth, creamy texture.
- Spoon the hummus into a shallow serving bowl. Swirl the top with the back of a spoon to create a small well, then drizzle with 1–2 teaspoons of olive oil and sprinkle with paprika and any additional toppings you like. If the hummus feels warm from blending, chill it in the refrigerator for 20–30 minutes before serving.
Notes
- Roasted Garlic Hummus: Use 2–3 cloves roasted garlic instead of raw.
- Spicy Hummus: Add 1/2–1 teaspoon cayenne, harissa, or sriracha while blending.
- Herby Green Hummus: Blend in 1/2 cup packed fresh parsley, cilantro, or basil.
- Smoky Paprika Hummus: Increase smoked paprika to 1/2 teaspoon in the blend and more on top.
- Lemon-Lovers Hummus: Add extra lemon zest and an additional tablespoon of lemon juice.
- Greek Yogurt Hummus: Stir in 2–3 tablespoons plain Greek yogurt at the end (not vegan).