Would you like to save this?
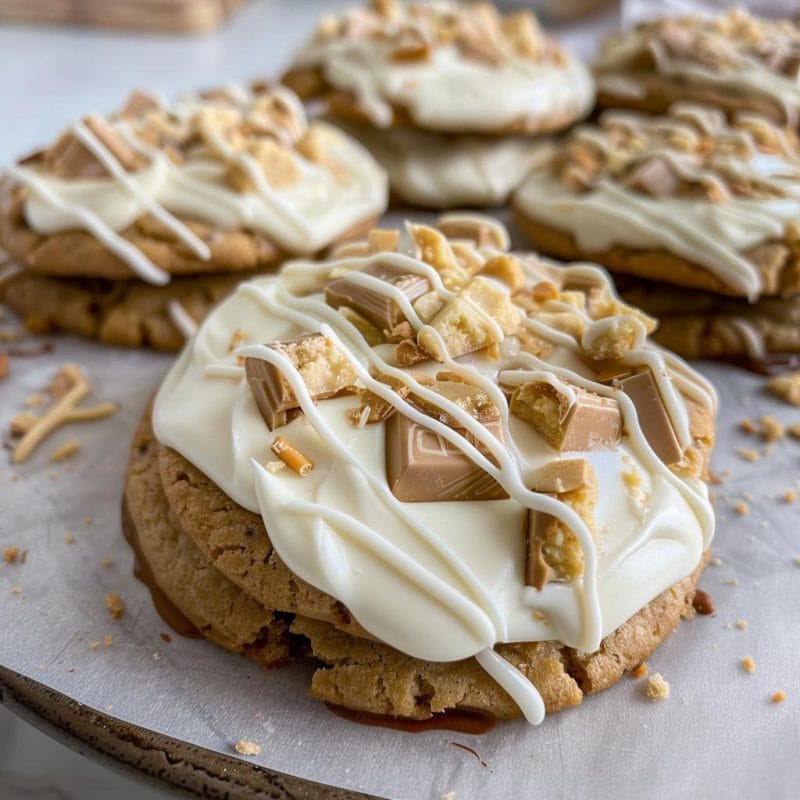
Kitchen Sink Cookies Recipe
If you love a chewy, salty-sweet cookie absolutely loaded with goodies, this Kitchen Sink Cookies Recipe is going to be your new “bake it for everything” treat—easy, flexible, and packed with crunchy pretzels, chocolate, toffee, and more.
What Are Kitchen Sink Cookies, Really?
Kitchen sink cookies, sometimes called everything but the kitchen sink cookies, are those fun, jam-packed cookies where you throw in a little bit of everything you love—chocolate chips, pretzels, toffee, butterscotch chips, maybe even potato chips if you’re feeling bold.
This Kitchen Sink Cookies Recipe is my go-to when:
- The pantry is half-full of random baking bits
- I want a crowd-pleasing dessert cookie recipe
- I need a soft and chewy cookie with some crunch and contrast
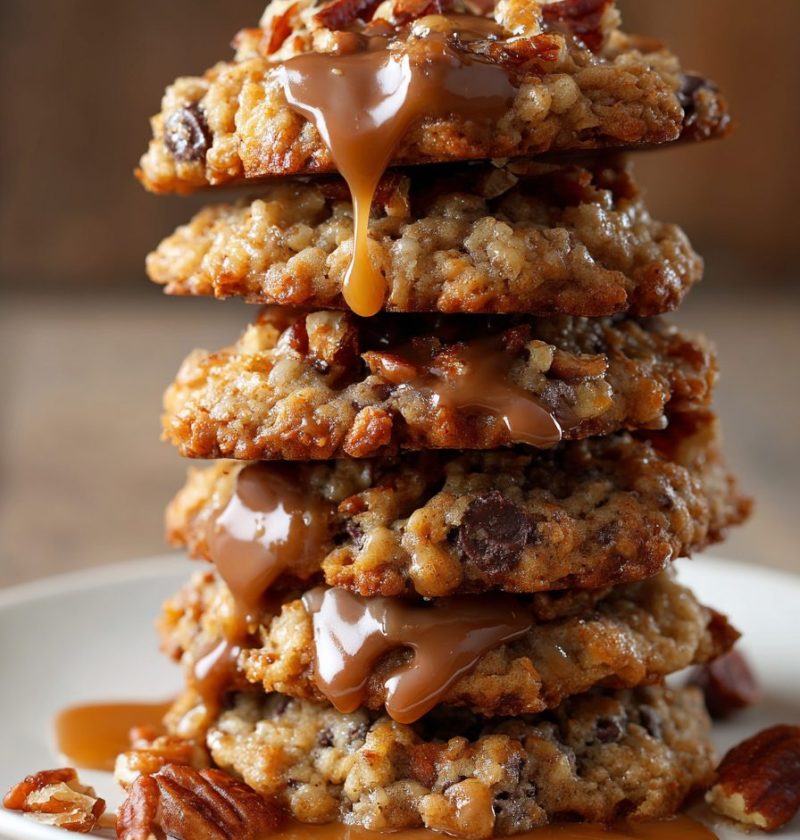
They’re a playful mix between loaded chocolate chip cookies and a salty snack bowl, and that contrast is what makes them so special. You get melty chocolate, caramel-like toffee, crispy edges, a chewy middle, and little hits of salt from the pretzels in every bite.
I’m a 50-year-old mom who’s baked more batches of cookies than I can count—bake sale cookies, sleepover cookies, “Mom had a rough day” cookies. These kitchen sink cookies are the ones my grown kids still ask for when they come home. They’re fun and nostalgic, but they also feel a tiny bit fancy, like something you’d see in a bakery case.
This is also a great from scratch cookie recipe for newer bakers. There’s nothing fussy here—no special tools, no strange ingredients. Just basic pantry staples and a bunch of mix-ins you probably already have.
And if you enjoy that whole sweet and salty dessert vibe—like chocolate-covered pretzels or salted caramel—these salty sweet cookies are going to hit the spot.
Why You’ll Love This Kitchen Sink Cookies Recipe
- Salty-sweet perfection – You get rich chocolate, caramel-like toffee, and salty pretzels all in one chewy cookie.
- Chewy centers, crisp edges – This chewy cookie recipe uses just the right mix of brown sugar and butter for that bakery-style texture.
- Pantry-friendly – This is a true cookie with mix-ins; you can use up small bits of chocolate chips, nuts, or candies you already have.
- Easy cookie recipe for any skill level – No special equipment, no complicated steps, just simple home baking.
- Customizable for your crowd – Make them nut-free, extra chocolatey, or add seasonal candies; you can change the “everything” every time.
- Perfect for sharing – These big, loaded cookie recipes are sturdy enough for gift boxes, bake sales, and lunchbox treats.
- Freezer-friendly dough – You can freeze scooped dough balls and bake fresh cookies whenever you want a warm treat.
- Better than store-bought – This homemade cookie recipe tastes like something from a bakery, but at home—and you control the ingredients.
Ingredients for the Best Kitchen Sink Cookies
This baking cookie recipe makes about 24–26 medium cookies (using a 2-tablespoon scoop).
Dry & Base Ingredients
- 2 ¼ cups (270 g) all-purpose flour – Spoon and level the flour so the cookies stay soft, not dry.
- 1 teaspoon baking soda – Helps the cookies spread and stay chewy.
- ½ teaspoon baking powder – Adds a little lift, so they’re not too flat.
- 1 teaspoon fine sea salt – Balances the sweetness and boosts flavor.
Wet Ingredients
- 1 cup (2 sticks / 226 g) unsalted butter, softened to room temperature – Soft but not greasy; think bendable, not melted.
- 1 cup packed light brown sugar – Gives moisture and that deep, caramel-like chew.
- ½ cup granulated sugar – Adds structure and crisp edges.
- 2 large eggs, at room temperature – Cold eggs can firm up the butter, so let them warm up a bit.
- 2 teaspoons pure vanilla extract – Don’t skip; it rounds out the cookie flavor.
Mix-Ins (The “Kitchen Sink” Part)
Here’s where the magic happens—your loaded cookie recipe mix-ins. You can tweak these, but keep the total amount close to 2 ½–3 cups of mix-ins for best texture.
- 1 cup semisweet chocolate chips (or chunks) – I like Ghirardelli or Guittard, but any brand works.
- ½ cup milk chocolate chips – Adds a slightly creamier sweetness.
- ½ cup butterscotch chips – For a classic butterscotch chip cookies flavor.
- ½ cup toffee bits (like Heath Bits O’ Brickle) – Makes the best little caramelized pockets.
- 1 cup crushed pretzels – Use mini twists or sticks; break them into small pieces, not crumbs.
- ¼–½ cup chopped nuts (optional) – Pecans or walnuts add crunch; skip them for a nut-free version.
Topping (Optional but Recommended)
- Extra chocolate chips and pretzel pieces – For pressing on top before baking.
- Flaky sea salt – A pinch on top right after baking makes them true salty sweet cookies.

How to Make Kitchen Sink Cookies (Step-by-Step)
Follow these simple steps for a soft and chewy cookie with lots of texture.
-
Preheat the oven and prep your pans
Preheat your oven to 350°F (175°C). Line two large baking sheets with parchment paper or silicone baking mats. This keeps the bottoms from over-browning and makes cleanup easier. -
Whisk together dry ingredients
In a medium bowl, whisk the flour, baking soda, baking powder, and salt until well combined. This keeps the rising agents evenly distributed, so some cookies don’t puff while others stay flat. -
Cream the butter and sugars
In a large mixing bowl (a hand mixer or stand mixer both work), beat the softened butter, brown sugar, and granulated sugar on medium speed for 2–3 minutes, until light and fluffy. The mixture should look a bit lighter in color and airy—this step helps create a tender cookie, so don’t rush it. -
Add eggs and vanilla
Beat in the eggs one at a time, mixing on low until just combined after each. Add the vanilla extract and mix again. If the batter looks a little curdled, don’t worry; it will smooth out once you add the flour. -
Combine wet and dry ingredients
Add the dry ingredients to the wet ingredients in two batches, mixing on low speed. Stop mixing as soon as you don’t see streaks of flour. Overmixing at this stage can make the cookies tough. If you need to, finish mixing gently by hand with a spatula. -
Fold in the “kitchen sink” mix-ins
Use a spatula or wooden spoon to fold in the chocolate chips, butterscotch chips, toffee bits, pretzels, and nuts (if using). You want them evenly scattered, but don’t beat the dough; just turn it over a few times. The pretzels may break more as you stir—that’s okay. -
Chill the dough (for best texture)
Cover the bowl and chill the dough for at least 30–45 minutes, or up to 24 hours. Chilling helps the flour hydrate and keeps the cookies from spreading too thin. If you’re in a hurry, you can bake right away, but the chilled cookies bake up thicker and chewier. -
Scoop and shape the cookies
Use a 2-tablespoon cookie scoop or a rounded tablespoon to portion the dough onto the prepared baking sheets, spacing them about 2 inches apart. If you want picture-perfect cookies, press a few extra chocolate chips and pretzel bits on top of each dough ball. -
Bake until golden at the edges
Bake one sheet at a time for 10–12 minutes, or until the edges are lightly golden and the centers still look a little soft and puffy. Every oven runs a bit differently—if your cookies are browning too fast, lower the temperature by 10–15 degrees. -
Add flaky salt and cool
As soon as the cookies come out of the oven, sprinkle a tiny pinch of flaky sea salt on top of each one. Let them cool on the baking sheet for 5–10 minutes before moving them to a wire rack. They’ll set up as they cool, so don’t judge doneness only by how firm they feel hot. -
Serve warm or at room temperature
Serve them slightly warm for melty chocolate and gooey centers, or let them cool fully for neat edges and a chewy texture. Either way, they’re the kind of everything but the kitchen sink cookies that disappear fast.
Servings & Timing
- Yield: About 24–26 medium cookies (2-tablespoon scoop)
- Prep Time: 20 minutes
- Chill Time: 30–45 minutes (longer is fine, up to 24 hours)
- Bake Time: 10–12 minutes per tray
- Total Time: About 1 hour 15 minutes, including chilling (less if you skip the chill, though I really suggest it)
Fun Variations on This Kitchen Sink Cookies Recipe
You know what? Once you master this base cookie baking recipe, you can change the mix-ins to match any season, event, or mood.
- Peanut Butter Crunch – Swap ½ cup of the butter for creamy peanut butter and stir in peanut butter chips and chopped peanuts.
- S’mores Kitchen Sink Cookies – Add mini marshmallows, graham cracker pieces, and milk chocolate chips instead of pretzels and toffee.
- Holiday Party Version – Use red and green candy-coated chocolates, white chocolate chips, and crushed candy cane pieces for a festive twist.
- Potato Chip & Pretzel Mash-Up – Replace half the pretzels with crushed ridged potato chips for extra salty crunch.
- Gluten-Friendly Approach – Use a 1:1 gluten-free flour blend and make sure your pretzels are gluten-free; chill well before baking.
- Extra-Chocolate Lovers – Skip the butterscotch and double up on dark chocolate chunks and mini chips for a truly loaded chocolate chip cookie.
How to Store, Freeze, and Reheat Kitchen Sink Cookies
These cookies keep their texture well, which makes them great for planning ahead.
Storing Baked Cookies
- Room Temperature: Store cooled cookies in an airtight container at room temperature for 3–4 days. Add a slice of sandwich bread to the container if your kitchen is dry; it helps keep the cookies soft.
- Reheating: For that just-baked feel, warm a cookie in the microwave for about 8–10 seconds. The chocolate will soften again, and the center will feel extra chewy.
Freezing Baked Cookies
- Cool cookies completely.
- Place in a freezer-safe bag or container with parchment between layers.
- Freeze for up to 2 months.
- Thaw at room temperature or warm in the microwave for 10–15 seconds.
Freezing Cookie Dough
Freezing dough is my favorite make-ahead trick for any dessert cookie recipe.
- Scoop dough into balls and place on a parchment-lined baking sheet.
- Freeze until solid, about 1 hour.
- Transfer frozen dough balls to a freezer bag and label with baking temp and time.
- Bake from frozen at 350°F, adding 1–2 minutes to the baking time.
This way, you can bake two cookies for a late-night treat, or a whole tray for guests, without dragging out all the ingredients again.
Notes & Tips from My Kitchen
- Measure your flour lightly – Too much flour is the number-one reason homemade cookie recipes end up dry. Spoon the flour into the measuring cup and level it with a flat edge.
- Use room temperature butter—not melted – Melted butter makes flatter cookies. You want soft butter that holds its shape when pressed but isn’t greasy.
- Balance your mix-ins – Try to keep total mix-ins to about 2 ½–3 cups. More than that, and the dough can fall apart or bake unevenly.
- Chill for thicker cookies – I tested this multiple times; the chilled dough always gave me the best soft and chewy cookies with pretty, crinkly tops.
- Rotate your pans – If your oven has hot spots (most do), rotate the pan halfway through baking so all the cookies brown evenly.
- Don’t overbake – Pull them when the edges look set and lightly golden but the center looks a little soft. They’ll continue cooking on the hot tray. Overbaked cookies will be crisp, not chewy.
- Play with chip flavors – Dark chocolate, white chocolate, peanut butter, and butterscotch chips all behave about the same in this recipe, so have fun with the blend.
I always tell my readers: cookies are forgiving. If your first batch isn’t perfect, use it as a test run. Adjust the size, time, or mix-ins and bake another tray.
Frequently Asked Questions About Kitchen Sink Cookies
1. What makes this Kitchen Sink Cookies Recipe “kitchen sink”?
Because it uses “everything but the kitchen sink”—a mix of chocolates, pretzels, toffee pieces, and more. The idea is that you can toss in a variety of small leftover bits from your baking drawer.
2. Can I make these cookies without pretzels?
Yes. You can skip the pretzels and replace them with more chocolate chips, nuts, or even crushed graham crackers. Just keep the total mix-ins amount about the same so the dough still holds together.
3. How do I keep my cookies from spreading too much?
Use room temperature, not melted, butter and be sure to chill the dough for at least 30 minutes. Also, check that your baking soda isn’t old; expired leavening can cause texture issues.
4. Can I make these cookies smaller or larger?
Absolutely. For smaller cookies, use about 1 tablespoon of dough and reduce baking time by 1–2 minutes. For big bakery-style cookies, use 3 tablespoons of dough and add a couple of minutes to the bake time, keeping an eye on the edges.
5. Are these cookies suitable for kids with nut allergies?
They can be. Simply leave out the nuts and double-check that your mix-ins (like toffee bits and pretzels) are nut-free and made in a safe facility if that’s a concern.
6. Can I use only one type of chocolate?
Yes. You can use all semisweet, all milk chocolate, or even dark chocolate. The mix of chocolates adds depth, but a simple chocolate chip pretzel cookie is still delicious.
7. Why are my cookies dry or cakey instead of chewy?
This usually means there was too much flour or they were overbaked. Try measuring the flour more lightly next time and baking just until the edges are set and the centers still look a bit soft.
8. Can I make this dough ahead of time?
Yes. You can keep the dough in the fridge for up to 24–36 hours. Scoop it while it’s slightly soft—if it gets too firm in the fridge, let it sit at room temperature for 10–15 minutes, then scoop and bake.
Wrapping It Up (and Grabbing a Cookie)
This Kitchen Sink Cookies Recipe is the kind of baking project that feels fun, relaxed, and a little bit creative—exactly what a from scratch cookie recipe should feel like. You get chewy centers, crisp edges, and that perfect mix of sweet and salty in every single bite.
If you try these kitchen sink cookies, I’d love to hear how you loaded yours—did you go heavy on the chocolate, add peanut butter chips, or toss in some fun seasonal candies? Leave a comment with your version, share a photo, or bookmark this page for your next cookie baking day. And if you enjoyed this, you might like exploring more of my chewy cookie recipes and sweet-and-salty desserts next time you’re in a baking mood.
Kitchen Sink Cookies
Ingredients
- 2 1/4 cups all-purpose flour spooned and leveled
- 1 teaspoon baking soda
- 1/2 teaspoon baking powder
- 1 teaspoon fine sea salt
- 1 cup unsalted butter softened to room temperature (2 sticks / 226 g)
- 1 cup light brown sugar packed
- 1/2 cup granulated sugar
- 2 large eggs at room temperature
- 2 teaspoons pure vanilla extract
- 1 cup semisweet chocolate chips or chunks
- 1/2 cup milk chocolate chips
- 1/2 cup butterscotch chips
- 1/2 cup toffee bits such as Heath Bits O’ Brickle
- 1 cup pretzels crushed into small pieces
- 1/4-1/2 cup chopped nuts optional; such as pecans or walnuts
- extra chocolate chips and pretzel pieces optional, for topping
- flaky sea salt optional, for sprinkling on top after baking
Instructions
- Preheat the oven to 350°F (175°C). Line two large baking sheets with parchment paper or silicone baking mats to prevent over-browning and make cleanup easier.
- In a medium bowl, whisk together the all-purpose flour, baking soda, baking powder, and fine sea salt until well combined. Set aside.2 1/4 cups all-purpose flour, 1 teaspoon baking soda, 1/2 teaspoon baking powder, 1 teaspoon fine sea salt
- In a large mixing bowl, beat the softened butter, light brown sugar, and granulated sugar with a hand mixer or stand mixer on medium speed for 2–3 minutes, until light and fluffy and slightly paler in color.1 cup unsalted butter, 1 cup light brown sugar, 1/2 cup granulated sugar
- Add the eggs one at a time, mixing on low speed just until combined after each addition. Mix in the vanilla extract. The mixture may look slightly curdled; it will smooth out once the dry ingredients are added.2 large eggs, 2 teaspoons pure vanilla extract
- Add the dry ingredient mixture to the wet ingredients in two additions, mixing on low speed just until no streaks of flour remain. If needed, finish folding gently by hand with a spatula to avoid overmixing.
- Using a spatula or wooden spoon, gently fold in the semisweet chocolate chips, milk chocolate chips, butterscotch chips, toffee bits, crushed pretzels, and nuts (if using) until evenly distributed throughout the dough.1 cup semisweet chocolate chips, 1/2 cup milk chocolate chips, 1/2 cup butterscotch chips, 1/2 cup toffee bits, 1 cup pretzels, 1/4-1/2 cup chopped nuts
- Cover the bowl and refrigerate the dough for 30–45 minutes, or up to 24 hours. Chilling helps the flour hydrate and keeps the cookies from spreading too thin, resulting in thicker, chewier cookies.
- Using a 2-tablespoon cookie scoop or a rounded tablespoon, portion the chilled dough into balls and place them on the prepared baking sheets about 2 inches apart. For a bakery-style look, gently press a few extra chocolate chips and pretzel pieces onto the tops of each dough ball.extra chocolate chips and pretzel pieces
- Bake one sheet at a time for 10–12 minutes, or until the edges are lightly golden and set but the centers still look slightly soft and puffy. If your oven browns quickly, reduce the temperature by 10–15 degrees as needed.
- Immediately after removing the cookies from the oven, sprinkle a small pinch of flaky sea salt on top of each cookie, if using. Let the cookies cool on the baking sheet for 5–10 minutes, then transfer to a wire rack to cool completely.flaky sea salt
- Serve the cookies slightly warm for melty chocolate and gooey centers, or at room temperature for neat edges and a chewy texture.