
Would you like to save this?
Peanut Butter Blondies Recipe
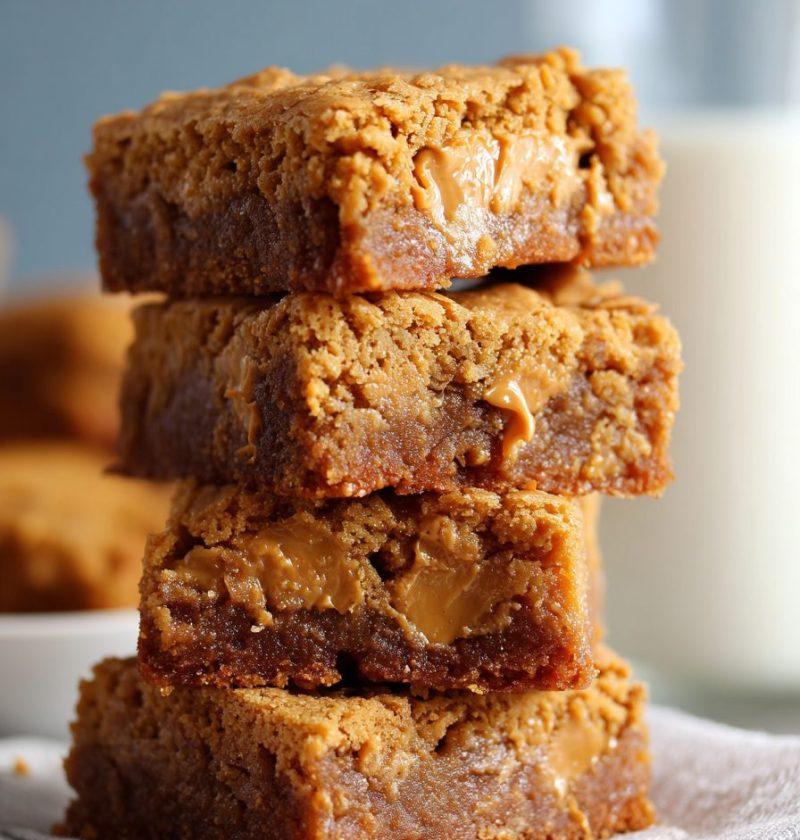
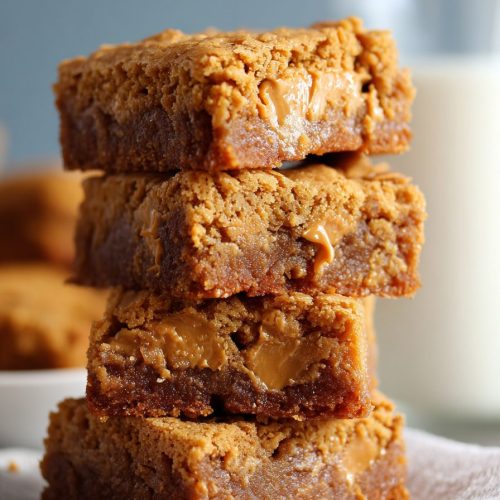
If you love soft, chewy dessert bars that taste like a cross between a peanut butter cookie and a fudgy brownie, this Peanut Butter Blondies Recipe is going to be your new go-to sweet treat.
These chewy blondie bars are rich with peanut butter, loaded with buttery flavor, and come together with simple pantry ingredients—no mixer, no fuss, just a classic peanut butter dessert that always hits the spot.
What Makes This Peanut Butter Blondies Recipe So Special
Blondies are the “blonde” cousin of Brownies—no cocoa powder, but all the dense, rich, chewy texture we love in a bar dessert. This Peanut Butter Blondies Recipe leans hard into that texture: thick, soft, slightly fudgy blondie bars with a strong peanut butter flavor and a shiny, crackly top.
I started making these decades ago when my kids were little and I needed a quick peanut butter bar recipe that could ride along to school bake sales, church potlucks, or just a Tuesday night “we need dessert” moment. Over the years, I’ve tested them with different sugars, different amounts of flour, even different peanut butter brands—so what you see here is the version that never fails.
A few reasons this recipe feels extra special to me:
- It’s an easy blondie recipe that uses one bowl and a whisk.
- The bars stay soft for days thanks to brown sugar and peanut butter.
- It scales beautifully—double it for a crowd, or bake in two pans for gifting.
- It’s flexible: you can add chocolate chips, peanuts, or leave them plain.
From a “data” angle for my fellow food nerds: peanut butter recipes routinely rank among the top dessert searches in the U.S., and bar desserts get a big bump around holidays and game days. This means a peanut butter dessert bar recipe like this isn’t just comforting—it’s also exactly what a lot of home bakers are searching for when they want something easy, nostalgic, and shareable.
Why You’ll Love This Peanut Butter Blondies Recipe
You know what? Let me just spell it out. These homemade blondies really check all the boxes:
- Simple pantry ingredients – You probably have everything you need in your kitchen already.
- One-bowl, no-mixer method – Less cleanup, less hassle, same chewy, fudgy blondie bars.
- Perfect chewy texture – Thick, soft peanut butter bars with crisp edges and a tender middle.
- Customizable mix-ins – Add chocolate chips, white chocolate, peanuts, or even a swirl of jam.
- Great for beginner bakers – Clear, forgiving steps; this is a very simple blondie recipe.
- Travel-friendly dessert bar recipe – They pack well for picnics, lunch boxes, or potlucks.
- Freezer-friendly – Bake once, freeze half, and future-you has dessert waiting.
- Reliable every time – No fancy tools, just straightforward peanut butter baking that works.
Ingredients For Soft, Chewy Peanut Butter Blondies
Here’s everything you need to make this Peanut Butter Blondies Recipe. I’ll include a few notes and swaps based on what I’ve tested over the years.
-
1/2 cup (113 g) unsalted butter, melted and slightly cooled
Use real butter for the best flavor. If you only have salted butter, reduce the added salt slightly. -
3/4 cup (190 g) creamy peanut butter
Stick with a standard creamy peanut butter like Jif or Skippy. Natural peanut butters that separate can make the bars greasy or crumbly unless stirred very well. -
1 cup (200 g) packed light brown sugar
Brown sugar adds moisture and that caramel note that makes blondie brownie recipes so good. -
1/4 cup (50 g) granulated sugar
Helps the top get that lovely shiny, slightly crackly finish. -
1 large egg + 1 large egg yolk, room temperature
The extra yolk adds rich chewiness. If your eggs are cold, set them in warm water for a few minutes. -
2 teaspoons pure vanilla extract
Real vanilla makes a difference here; it rounds out the peanut butter flavor. -
1 cup (125 g) all-purpose flour, spooned and leveled
Too much flour makes dry bars, so measure carefully—no packing the cup. -
1/2 teaspoon baking powder
Just enough lift to keep them from being dense bricks. -
1/2 teaspoon fine sea salt
Balances the sweetness and brings out the peanut flavor. -
3/4 cup (135 g) chocolate chips or peanut butter chips (optional but highly recommended)
Semi-sweet is classic, but milk chocolate makes these feel very bakery-style. -
Flaky sea salt for topping (optional)
A tiny sprinkle on top right after baking makes these taste like they came from a fancy coffee shop.
If you bake gluten-free, you can use a 1:1 gluten-free all-purpose flour blend that contains xanthan gum. Just know the texture may be slightly more crumbly but still very tasty.

Step-By-Step Directions For The Best Peanut Butter Blondies
Let’s walk through the method. This easy blondie recipe doesn’t need a mixer—just a bowl, whisk, and spatula.
-
Prep your pan and oven
Preheat your oven to 350°F (175°C). Line an 8×8-inch baking pan with parchment paper, leaving some overhang on two sides for easy lifting. Lightly grease the exposed sides of the pan. This helps the blondies release cleanly and prevents stuck edges. -
Melt the butter
In a microwave-safe bowl or small saucepan, melt the butter until just melted, not sizzling. Let it cool for 3–5 minutes. If the butter is too hot when it meets the eggs, you risk scrambling them. -
Whisk in the peanut butter and sugars
In a medium mixing bowl, whisk the melted butter and peanut butter together until smooth and glossy. Add the brown sugar and granulated sugar, then whisk well. The mixture will thicken slightly and look like a very shiny peanut butter frosting. -
Add egg, yolk, and vanilla
Whisk in the egg, extra yolk, and vanilla extract until the mixture is smooth and a little lighter in color. This step helps create that fudgy blondie bar texture since you’re building some structure before adding the dry ingredients. -
Mix the dry ingredients separately
In a small bowl, whisk together the flour, baking powder, and salt. This keeps any pockets of baking powder from clumping in the batter—no one wants a bitter bite. -
Combine wet and dry gently
Switch to a spatula and fold the dry mixture into the wet mixture. Stir just until no dry flour patches remain. The batter will be thick—closer to cookie dough than a pourable batter—which is exactly what we want for chewy dessert bars. -
Fold in chips or mix-ins
If you’re using chocolate chips, peanut butter chips, chopped nuts, or even mini pretzels, fold them in now. Reserve a small handful to sprinkle on top for a bakery-style look. -
Spread batter in the pan
Scrape the batter into your prepared 8×8 pan. Use a spatula or the back of a spoon to press and smooth the top into an even layer. It doesn’t have to be perfect, but try to push it evenly into the corners so the bars bake level. -
Bake until just set
Bake for 22–26 minutes, depending on your oven. The edges should look set and lightly golden, and the center should look matte but still slightly soft. A toothpick inserted in the center should come out with a few moist crumbs, not wet batter. Err on the side of slightly underbaked for fudgy blondie bars. -
Cool before slicing (the hardest part!)
Place the pan on a wire rack and let the blondies cool completely—about 1–1.5 hours. If you like a very clean cut, chill them in the fridge for 30 minutes before slicing. Use the parchment overhang to lift the whole slab out, then slice into 16 small squares or 9 large bars.
A little note from a 50-year-old with some kitchen miles: underbaking by one or two minutes is usually better than overbaking with blondies. They continue to set as they cool, and slightly gooey centers turn into perfectly chewy blondie bars.
Servings, Prep Time, And Baking Schedule
Keeping timing clear makes planning easier, especially if you’re juggling dinner, homework, and a soccer run like I used to.
- Yield: 16 smaller blondies or 9 large bars
- Prep Time: About 15 minutes
- Bake Time: 22–26 minutes
- Cooling Time: 1–1.5 hours (hands-off, but important)
- Total Time: Around 1 hour 45 minutes, most of it cooling
If you’re making these for a party, you can bake them the night before, let them cool, and store them covered on the counter. They actually slice better the next day, which makes this blondie brownie recipe a great make-ahead dessert.
Fun Variations To Try With This Peanut Butter Blondies Recipe
Once you’ve made the base recipe, it’s fun to play a little. Here are some easy twists that still keep things simple for weeknights:
- PB & J Blondies – Swirl 1/4 cup of your favorite jam (strawberry or grape) over the top of the batter before baking for a peanut butter and jelly dessert bar.
- Chocolate Chunk Peanut Butter Blondies – Swap the chips for chopped dark chocolate chunks for a bakery-style, bittersweet contrast.
- Gluten-Free Blondies – Use a 1:1 gluten-free all-purpose flour and check the label on your mix-ins; the bars will be a bit softer but still delicious.
- Peanut Butter Cup Blondies – Gently press halved mini peanut butter cups into the top of the batter before baking for an extra peanut butter treat.
- Salted Pretzel Crunch Blondies – Fold 1/2 cup crushed mini pretzels into the batter along with the chocolate chips for a salty-sweet snack bar.
- White Chocolate & Peanut Blondies – Use white chocolate chips and add 1/3 cup chopped roasted peanuts for a sweet-salty combo.
Think of this as your base peanut butter bar recipe. Once you like the texture, you can tweak flavors for different seasons—peppermint chips at Christmas, pastel M&M’s at Easter, team-colored sprinkles for game day, and so on.
How To Store, Freeze, And Reheat Your Blondies
One of my favorite things about chewy blondie bars is how well they keep. They’re like the low-maintenance friend of the dessert world.
Room temperature (short-term):
- Store cooled blondies in an airtight container at room temperature for 3–4 days.
- Place parchment or wax paper between layers to keep them from sticking.
Refrigerator (for extra chew):
- Store in an airtight container in the fridge for up to 1 week.
- Chilled blondies taste denser and chewier—almost like fudge. If you prefer them softer, let them sit at room temp for 15–20 minutes before eating.
Freezer (for make-ahead)
- Wrap individual bars tightly in plastic wrap, then place in a freezer bag or airtight container.
- Freeze for up to 2–3 months.
- To thaw, let a bar sit on the counter for about 30 minutes, or microwave it for 10–15 seconds for a warm, soft peanut butter dessert.
If you’re planning snacks for the week, bake a pan, keep a few pieces out, and freeze the rest. I used to tuck frozen blondies into lunch boxes in the morning; they’d be perfectly thawed (and still a little cool) by lunchtime.
Notes From My Kitchen Tests
After many, many pans of homemade blondies, here are some little things that make a big difference:
-
Use a metal pan if you can.
Glass pans tend to bake more slowly and can make the edges over-brown before the center sets. A light-colored metal pan gives more even results. -
Don’t overbake.
Chewy dessert bars depend on moisture. If the blondies look completely firm in the center when you pull them, they’re probably already a bit overdone. -
Measure flour lightly.
I know I sound like a broken record, but packing flour into the cup is the fastest way to dry, cakey blondies. Spoon it into the cup, level off, and you’re good. -
Stir the peanut butter well.
Even if you aren’t using a natural brand, give the jar a quick stir before measuring. This helps avoid uneven fat distribution, which can create greasy spots. -
Chill before cutting for clean edges.
If you like sharp, bakery-style squares, chill the slab in the pan or on a board for 30–45 minutes, then slice with a sharp knife, wiping the blade between cuts. -
Flavor improves the next day.
Peanut butter baked goods often taste even better after resting overnight. The flavors settle and the texture gets even more moist and chewy.
Honestly, this recipe has forgiven everything from distracted measuring to kids “helping” and stirring way too long. It’s pretty sturdy, which is why it’s in regular rotation here.
Peanut Butter Blondies Recipe FAQs
Can I double this Peanut Butter Blondies Recipe?
Yes. Double all ingredients and bake in a 9×13-inch pan. Start checking at 24–26 minutes; they may need up to 30 minutes depending on your oven.
Can I use natural peanut butter?
You can, but results vary. If you do, make sure it’s very well stirred and slightly thicker, not runny. Expect the bars to be a little more fragile and possibly oilier around the edges.
What if I only have salted butter?
Use salted butter and reduce the added salt to 1/4 teaspoon. Taste your batter (just a little) if you’re unsure; it should taste sweet with a light salty edge.
Why did my blondies turn out cakey instead of chewy?
This usually means too much flour or overbaking. Next time, measure the flour with the scoop-and-level method and pull them out when the center is just set.
Can I make these peanut-free?
You can swap the peanut butter for a thick, creamy sunflower seed butter or almond butter. The flavor will change, but you’ll still get a soft, chewy bar.
Do I have to use both an egg and an extra yolk?
You don’t have to—but the extra yolk adds richness and chew. If you omit it, the blondies will still work, just a touch less fudgy.
Can I make this recipe dairy-free?
Yes. Use a dairy-free butter substitute (a stick-style baking margarine works better than a soft tub) and check that your chocolate chips are dairy-free.
How do I know when blondies are done without overbaking?
Look for golden edges and a center that’s just set but still soft. A toothpick should come out with a few moist crumbs. If it’s bone dry, they’re overbaked.
Final Thoughts On This Peanut Butter Blondies Recipe
This Peanut Butter Blondies Recipe is one of those low-stress, high-reward desserts—simple ingredients, quick prep, and a soft, chewy peanut butter treat that makes everyone happy. Whether you keep them plain, swirl in jam, or pack them with chocolate, these homemade blondies are the kind of dessert bar recipe you’ll reach for again and again.
If you bake a batch, I’d love to hear how they turned out for you—tell me what mix-ins you used or how you served them. And if you’re in a blondie mood, you might also like trying a classic chocolate chip blondie or a butterscotch-studded version next.
Peanut Butter Blondies
Ingredients
- 1/2 cup unsalted butter 113 g, melted and slightly cooled
- 3/4 cup creamy peanut butter 190 g; use a standard brand like Jif or Skippy, well stirred
- 1 cup light brown sugar 200 g, packed
- 1/4 cup granulated sugar 50 g
- 1 large egg room temperature
- 1 large egg yolk room temperature
- 2 teaspoons pure vanilla extract
- 1 cup all-purpose flour 125 g, spooned and leveled
- 1/2 teaspoon baking powder
- 1/2 teaspoon fine sea salt
- 3/4 cup chocolate chips or peanut butter chips 135 g; optional but recommended
- flaky sea salt for topping, optional
Instructions
- Preheat the oven to 350°F (175°C). Line an 8x8-inch metal baking pan with parchment paper, leaving overhang on two sides for easy lifting, and lightly grease any exposed sides of the pan.
- In a microwave-safe bowl or small saucepan, melt the butter until just melted but not sizzling. Let cool for 3–5 minutes so it does not cook the eggs later.1/2 cup unsalted butter
- In a medium mixing bowl, whisk together the melted butter and peanut butter until smooth and glossy. Add the brown sugar and granulated sugar and whisk until well combined and slightly thickened.1/2 cup unsalted butter, 3/4 cup creamy peanut butter, 1 cup light brown sugar, 1/4 cup granulated sugar
- Whisk in the egg, egg yolk, and vanilla extract until the mixture is smooth and slightly lighter in color.1 large egg, 1 large egg yolk, 2 teaspoons pure vanilla extract
- In a small bowl, whisk together the flour, baking powder, and fine sea salt until evenly combined.1 cup all-purpose flour, 1/2 teaspoon baking powder, 1/2 teaspoon fine sea salt
- Switch to a spatula and fold the dry ingredients into the wet mixture, stirring just until no dry streaks of flour remain. The batter will be thick, similar to cookie dough.
- Fold in the chocolate chips or peanut butter chips, reserving a small handful to sprinkle on top if desired.3/4 cup chocolate chips or peanut butter chips
- Scrape the thick batter into the prepared 8x8-inch pan. Use a spatula or the back of a spoon to press it into an even layer, pushing it into the corners so it bakes level. Sprinkle reserved chips on top if using.
- Bake for 22–26 minutes, until the edges are set and lightly golden and the center looks matte but still slightly soft. A toothpick inserted in the center should come out with a few moist crumbs, not wet batter.
- Place the pan on a wire rack and cool the blondies completely, about 1–1.5 hours. If using, sprinkle flaky sea salt on top right after baking while they are still warm. For cleaner slices, chill in the fridge for 30 minutes, then use the parchment to lift the slab out and cut into 16 small squares or 9 large bars.flaky sea salt
Notes
Tips: Use a light-colored metal pan for the most even baking. Measure the flour by spooning and leveling to avoid cakey blondies, and avoid overbaking—pull them when the center is just set. Stir peanut butter well before measuring so the fat is evenly distributed. Chilling before slicing gives sharp, bakery-style edges.
Variations: Swirl 1/4 cup jam over the top before baking for PB&J blondies; use chopped dark chocolate instead of chips; fold in crushed pretzels or chopped peanuts; or press halved mini peanut butter cups into the top before baking.


