Would you like to save this?
Lemon Crinkle Bars Recipe
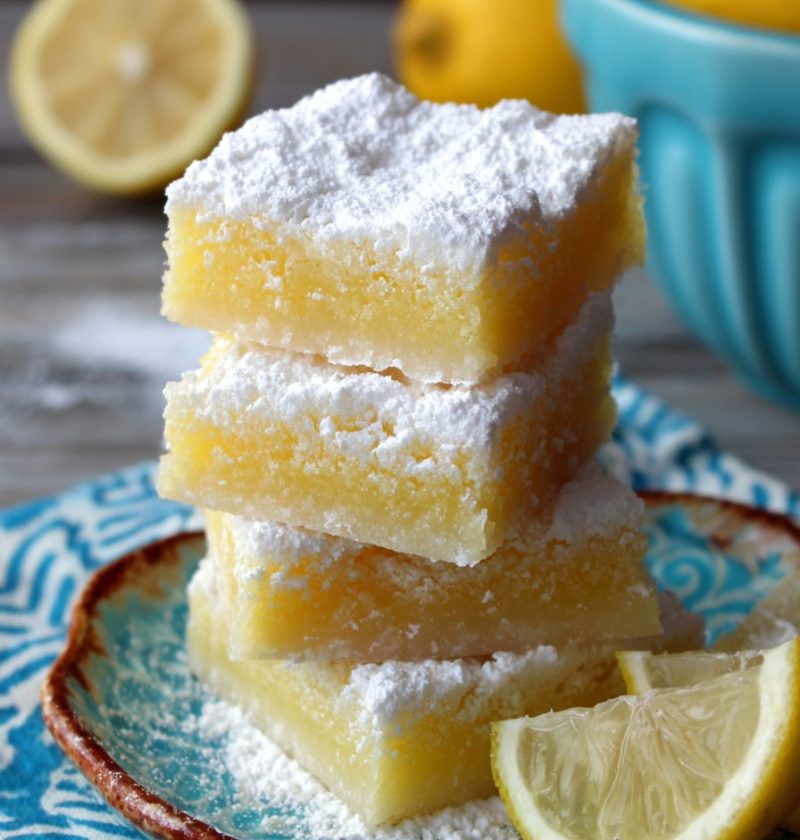
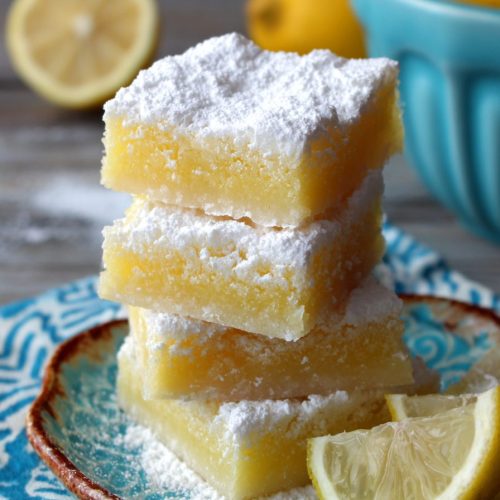
If you love soft lemon Cookies and classic lemon bars, this Lemon Crinkle Bars Recipe gives you the best of both worlds—thick, chewy lemon cookie bars with a crackly, sugary top and bright citrus flavor in every bite.
What Makes This Lemon Crinkle Bars Recipe So Special?
These lemon crinkle bars are basically your favorite lemon sugar Cookies and lemon dessert bars baked into one cozy pan. They’re chewy in the middle, a little crisp at the edges, and that pretty crinkle top makes them look like they came from a bakery case instead of your 9×13 pan.
I started working on this recipe one spring when my youngest asked for “those crinkle cookie bars you made at Christmas, but lemon.” He meant my chocolate crinkle cookie bars, but I had a bowl of lemons on the counter (and honestly, a serious lemon mood going), so this tangy version was born.
They’re simpler than classic lemon bar recipes—no separate shortbread crust, no stovetop lemon curd. Everything mixes in one bowl like lemon cookie dough, gets pressed into a pan, and baked into soft, chewy lemon bars that slic e beautifully for potlucks, showers, or just a Tuesday night treat.
Compared with old-school lemon bars, these have:
- A thicker, chewy cookie texture instead of a custard layer
- Less butter and sugar per serving, but still plenty of flavor
- A kid-friendly, non-messy bite (no oozy lemon curd spilling everywhere)
They’re perfect citrus dessert bars when you want something easy, pretty, and not fussy—but still special enough for company.
Why You’ll Love This Lemon Crinkle Bars Recipe
Here’s why these lemon cookie bars have become a regular in my kitchen:
- Big lemon flavor: Fresh lemon juice and lots of zest give these tangy lemon bars a bright, sunny flavor.
- Chewy, soft texture: They bake up like thick, soft lemon cookies—set at the edges and chewy in the center.
- Simple ingredients: Everything comes from a basic pantry and a few fresh lemons.
- No mixer required: A whisk, a spatula, and a big bowl are all you need for these homemade lemon bars.
- Perfect for sharing: They slice into neat squares that pack well for bake sales, school events, and office treats.
- Freezer-friendly: These lemon treat bars freeze beautifully, so you can stash extras for later.
- Make-ahead friendly: The flavor actually improves by the next day as the citrus settles into the crumb.
- Customizable: From glaze to white chocolate chips, you can tweak these crinkle cookie bars to match your mood or season.
If you’re a fan of easy lemon bars or soft lemon cookies, this recipe sits right in the sweet spot—familiar, nostalgic, but just different enough to feel new.
Ingredients for the Best Chewy Lemon Crinkle Bars
Let me walk you through what you’ll need for these lemon dessert bars and how to get the best flavor from each item.
Dry Ingredients
- 2 ¾ cups (330 g) all-purpose flour
- Spoon and level the flour, or weigh it, so the bars stay soft and not Cakey.
- 1 teaspoon baking powder
- ½ teaspoon baking soda
- ½ teaspoon fine sea salt (or table salt, slightly less if very salty)
Wet Ingredients
- 1 cup (2 sticks / 226 g) unsalted butter, melted and slightly cooled
- Melted butter gives these lemon pastry bars that dense, chewy texture like good blondies.
- 1 ½ cups (300 g) granulated sugar
- If you like a lighter texture, you can swap up to ¼ cup of the sugar with light brown sugar.
- 2 large eggs, at room temperature
- Room temp eggs mix more easily and give a more even crumb.
- 2 teaspoons pure vanilla extract
- 2 tablespoons fresh lemon juice (about 1 medium lemon)
- 2–3 tablespoons finely grated lemon zest (from 2–3 lemons)
- The zest is where the real lemon flavor lives—don’t skip it.
Crinkle Sugar Coating
- ⅓ cup (65 g) granulated sugar (for sprinkling on top)
- ⅓ cup (40 g) powdered sugar (for the classic crinkle look)
Optional but Delicious Add-Ins
- ½ cup white chocolate chips or chunks
- These make the bars a little sweeter and pair so nicely with the citrus.
- 1–2 tablespoons coarse sugar (for extra sparkle on top)
Ingredient Tips
- Lemons: Look for bright yellow lemons that feel heavy for their size—that means they’re juicy.
- Butter: If you only have salted butter, reduce the added salt to a pinch.
- Flour: If you’re sensitive to gluten, a 1:1 gluten-free baking flour usually works well here; just let the dough rest 10 minutes before baking.

Step-by-Step Directions for Lemon Crinkle Bars
These lemon baking recipe instructions are written for a 9×13-inch metal pan. If you use glass, you may need an extra few minutes of baking.
1. Prep your pan and oven.
Preheat your oven to 350°F (175°C). Line a 9×13-inch baking pan with parchment paper, leaving a slight overhang on two sides so you can lift the bars out later. Lightly grease the parchment and sides of the pan.
2. Mix the dry ingredients.
In a medium bowl, whisk together the flour, baking powder, baking soda, and salt until well combined. This keeps any pockets of baking powder from hiding in the batter. Set aside.
3. Combine the melted butter and sugar.
In a large mixing bowl, whisk together the melted, cooled butter and granulated sugar for about 1 minute. The mixture will look thick and glossy. This step helps give you that chewy center we love in lemon cookie bars.
4. Add eggs, vanilla, and all that lemon.
Whisk in the eggs one at a time until smooth. Stir in the vanilla extract, fresh lemon juice, and lemon zest. Take a second here and just smell the bowl—this is when you know these citrus dessert bars are going to be good.
5. Add the dry ingredients.
Add the flour mixture to the wet ingredients in two additions, folding gently with a spatula. Mix just until no dry streaks of flour remain. The dough will be thick, like cookie dough, not pourable like cake batter.
6. Fold in any add-ins.
If you’re using white chocolate chips or other mix-ins, gently fold them into the dough now so they’re evenly distributed.
7. Press the dough into the pan.
Transfer the dough to your prepared pan. Use a spatula or your fingertips (lightly greased or slightly damp) to press it into an even layer, reaching all the corners. Try to keep the top as smooth as you can so the crinkle sugar sits evenly.
8. Add the crinkle sugar topping.
Sprinkle the granulated sugar evenly over the top of the dough, followed by the powdered sugar. Don’t worry if it looks like a lot. As the bars bake, the dough rises and cracks, giving that classic crinkle cookie bar look.
9. Bake until just set.
Bake for 18–23 minutes, depending on your oven. You’re looking for:
- Lightly golden edges
- A puffed center that still looks slightly soft
- A toothpick inserted near the center coming out with a few moist crumbs (not wet batter)
Don’t overbake—chewy lemon bars can turn cakey if left in the oven too long. If your oven runs hot, start checking around 16 minutes.
10. Cool completely before slicing.
Set the pan on a wire rack and let the bars cool completely in the pan. This helps them firm up and makes cutting easier. Once cool, use the parchment sling to lift the bars out and cut them into squares or rectangles.
For the cleanest slices, use a sharp knife and wipe the blade between cuts.
Servings & Timing
- Yield: About 24 lemon crinkle bars (more or fewer depending on how large you slice)
- Prep Time: 15–20 minutes
- Bake Time: 18–23 minutes
- Cooling Time: 45–60 minutes (worth the wait!)
- Total Time: About 1 hour 20 minutes, mostly hands-off
These easy lemon bars come together quickly, but like a lot of homemade lemon bars and blondies, they taste even better after resting a bit.
Fun Variations on These Lemon Dessert Bars
Once you’ve made the base Lemon Crinkle Bars Recipe, you can play with flavors and textures. Here are a few reader-favorite twists we’ve loved at home:
- Meyer Lemon Crinkle Bars: Use Meyer lemons for a sweeter, slightly floral twist on these lemon pastry bars.
- Glazed Lemon Crinkle Bars: Whisk 1 cup powdered sugar with 1–2 tablespoons lemon juice and drizzle over cooled bars for extra tang and shine.
- Lemon-Raspberry Crinkle Bars: Gently press ½ cup fresh raspberries into the top of the dough before baking for a pretty, bakery-style look.
- Lemon Coconut Bars: Fold ½–¾ cup shredded sweetened coconut into the dough for a tropical spin.
- Lemon Poppy Seed Bars: Add 1–2 tablespoons poppy seeds to the dry ingredients for a nod to lemon poppy seed muffins.
- Gluten-Friendly Lemon Bars: Use a cup-for-cup gluten-free baking flour and add 1 extra tablespoon lemon juice to keep the crumb tender.
You know what? Half the fun of this kind of lemon baking recipe is tweaking it—so don’t be afraid to try your own add-ins.
How to Store, Freeze, and Make Ahead
You can absolutely make these lemon treat bars ahead of time, which makes them perfect for parties, bake sales, and busy weeks.
Storing at room temperature
- Keep sliced bars in an airtight container at room temperature for 3–4 days.
- Separate layers with parchment or wax paper so the tops don’t stick together.
Storing in the fridge
- For a slightly firmer, fudge-like texture, store them in the refrigerator.
- They’ll keep well for up to 1 week in an airtight container.
- Let them sit at room temp for 10–15 minutes before serving so the flavor opens up.
Freezing instructions
- Place sliced lemon crinkle bars on a baking sheet in a single layer and freeze until solid.
- Transfer frozen bars to a freezer bag or container, pressing out extra air.
- Label and freeze for up to 2 months.
Thawing
- Thaw at room temperature for 30–45 minutes, or in the fridge overnight.
- The crinkle top may soften slightly after freezing, but the bars stay delicious and chewy.
Make-ahead tip
Bake the bars a day before you need them; once they cool, cover the whole slab tightly and slice the next day. The lemon flavor deepens, which makes them taste like you fussed with them all day.
Recipe Notes from My Kitchen
A few personal notes, from one home baker to another:
- Don’t skimp on the zest. The zest is what makes these tangy lemon bars really sing. I usually go on the heavier side—closer to 3 tablespoons.
- Taste your lemons. Some lemons are sharper, some sweeter. If your lemons are very tart, you can gently round the flavor with an extra tablespoon of sugar.
- Pan differences matter. A dark metal pan will brown faster along the edges than a light-colored one. If you use a dark pan, start checking doneness 2–3 minutes earlier.
- Rest time improves flavor. These lemon dessert bars taste good warm, but they taste great once they’ve had time to cool completely and sit for a few hours.
- Don’t overbake. I’d rather pull them a tiny bit under than risk dry bars. Remember, they’ll keep cooking for a minute or two from the residual heat of the pan.
- For a thinner, crisper bar: Use a larger pan (like a 10×15 jelly roll pan) and reduce baking time by several minutes, checking early.
When I tested this recipe for the third time (yes, my neighbors loved that week), the batch with slightly underbaked centers and extra zest disappeared first. So if you’re not sure, lean toward moist and lemony.
FAQs About Lemon Crinkle Bars Recipe
Can I use bottled lemon juice instead of fresh?
You can, but I don’t recommend it. Fresh lemon juice plus zest gives a brighter, cleaner flavor than bottled juice, which can taste dull or a bit harsh.
Do I have to use both granulated and powdered sugar on top?
Using both helps create that classic crackly, crinkle top. You can use only one type, but the appearance and texture will be a little different.
Why are my lemon cookie bars dry or cakey?
They were likely overbaked or had too much flour. Make sure you’re measuring flour carefully (spoon and level or weigh it), and pull the bars when the center still looks just slightly soft.
Can I make these lemon bars without eggs?
You can experiment with egg replacers—2 “flax eggs” (2 tablespoons ground flax + 6 tablespoons water, rested until thick) usually work, though the texture will be slightly denser.
Can I halve this recipe?
Yes, bake a half batch in an 8×8-inch or 9×9-inch pan and start checking for doneness around 18 minutes.
Can I add a glaze even with the powdered sugar on top?
Absolutely. Just make sure the bars are fully cool before glazing, and keep the glaze on the thinner side so it doesn’t overwhelm the crinkle top.
How do I keep my lemon bars from sticking to the pan?
Line the pan with parchment and leave a little overhang. Lightly grease the parchment too. This makes lifting and cutting so much easier.
Are these like classic lemon bars?
They have the same bright lemon flavor, but the texture is more like soft lemon cookies baked as bars—no separate crust and custard layers, just one chewy lemon bar from top to bottom.
Final Thoughts
These chewy, soft Lemon Crinkle Bars bring together everything I love about lemon baking recipes: big citrus flavor, a pretty crinkle top, and a no-fuss method that fits into real life. They’re simple enough for a weeknight, but special enough for baby showers, holidays, or that friend who “doesn’t like chocolate” (yes, they exist).
If you try this Lemon Crinkle Bars Recipe, I’d love to hear how it goes—tell me in the comments how you served them and whether you added your own twist. And if lemon desserts are your thing, make sure to check out my other lemon cookie bars and citrus dessert bars on the blog for even more bright, sunny bakes.
Lemon Crinkle Bars
Ingredients
- 2 3/4 cups all-purpose flour 330 g; spoon and level or weigh for best texture
- 1 teaspoon baking powder
- 1/2 teaspoon baking soda
- 1/2 teaspoon fine sea salt or table salt; use slightly less if very salty
- 1 cup unsalted butter 2 sticks / 226 g; melted and slightly cooled
- 1 1/2 cups granulated sugar 300 g; up to 1/4 cup can be swapped with light brown sugar
- 2 large eggs at room temperature
- 2 teaspoons pure vanilla extract
- 2 tablespoons fresh lemon juice about 1 medium lemon
- 2 tablespoons lemon zest finely grated, from about 2–3 lemons; use up to 3 tbsp for stronger flavor
- 1/3 cup granulated sugar 65 g; for sprinkling on top
- 1/3 cup powdered sugar 40 g; for the classic crinkle look on top
- 1/2 cup white chocolate chips or chunks optional; makes bars a bit sweeter and pairs well with lemon
- 1 tablespoon coarse sugar optional; 1–2 tbsp for extra sparkle on top
- nonstick spray or butter for greasing the pan and parchment
- parchment paper for lining a 9x13-inch pan with overhang
Instructions
- Preheat your oven to 350°F (175°C). Line a 9x13-inch metal baking pan with parchment paper, leaving an overhang on two sides for easy removal. Lightly grease the parchment and sides of the pan.nonstick spray or butter, parchment paper
- In a medium bowl, whisk together the all-purpose flour, baking powder, baking soda, and salt until well combined. Set aside.2 3/4 cups all-purpose flour, 1 teaspoon baking powder, 1/2 teaspoon baking soda, 1/2 teaspoon fine sea salt
- In a large mixing bowl, whisk together the melted, slightly cooled butter and 1 1/2 cups granulated sugar for about 1 minute, until thick and glossy.1 cup unsalted butter, 1 1/2 cups granulated sugar
- Whisk in the eggs one at a time until smooth. Stir in the vanilla extract, fresh lemon juice, and lemon zest until evenly distributed.2 large eggs, 2 teaspoons pure vanilla extract, 2 tablespoons fresh lemon juice, 2 tablespoons lemon zest
- Add the flour mixture to the wet ingredients in two additions, folding gently with a spatula just until no dry streaks of flour remain. The dough will be thick, like cookie dough.2 3/4 cups all-purpose flour, 1 teaspoon baking powder, 1/2 teaspoon baking soda, 1/2 teaspoon fine sea salt
- If using white chocolate chips or other mix-ins, gently fold them into the dough until evenly distributed.1/2 cup white chocolate chips or chunks
- Transfer the dough to the prepared pan. Use a spatula or lightly greased or damp fingertips to press it into an even layer all the way to the corners, smoothing the top.
- Sprinkle the 1/3 cup granulated sugar evenly over the top of the dough, followed by the 1/3 cup powdered sugar. If using coarse sugar, sprinkle it on top as well.1/3 cup granulated sugar, 1/3 cup powdered sugar, 1 tablespoon coarse sugar
- Bake at 350°F (175°C) for 18–23 minutes, or until the edges are lightly golden, the center is puffed but still looks slightly soft, and a toothpick inserted near the center comes out with a few moist crumbs (not wet batter). Start checking around 16 minutes if your oven runs hot.
- Place the pan on a wire rack and let the bars cool completely in the pan. Once cool, use the parchment sling to lift the slab out. Cut into squares or rectangles, wiping the knife between cuts for clean slices.