Would you like to save this?
Seven Layer Magic Bars Recipe
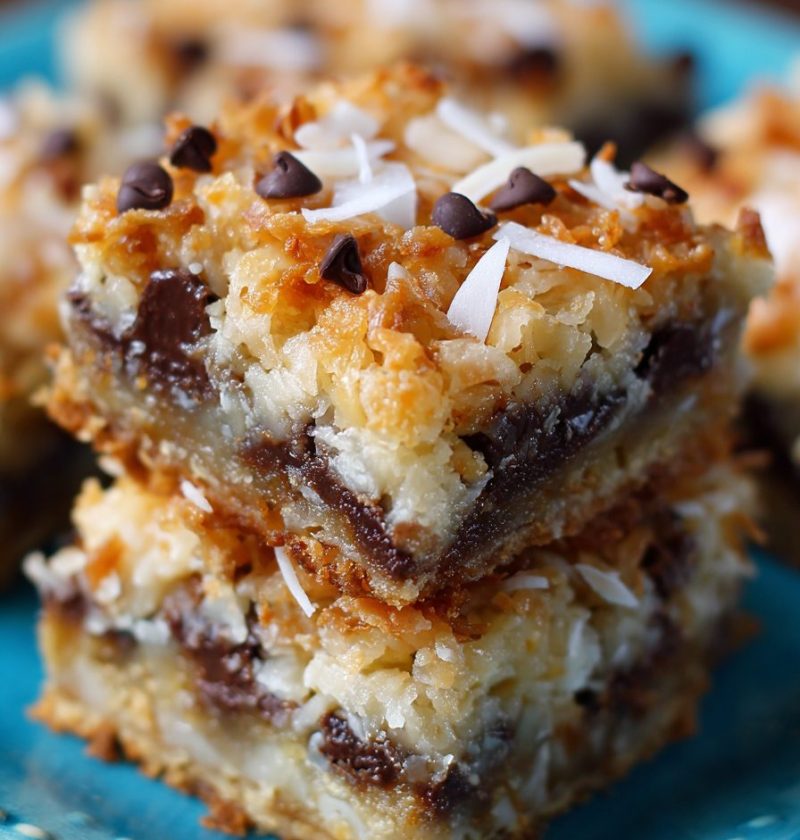
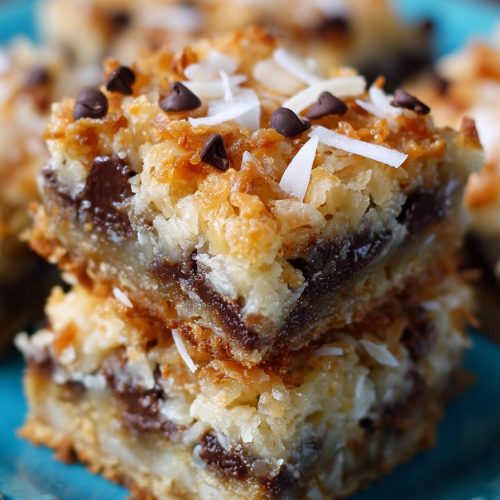
If you love gooey, chocolatey, coconutty desserts that basically bake themselves, this Seven Layer Magic Bars Recipe is about to become your new “bring-it-to-every-party” favorite.
These classic seven layer magic bars (sometimes called layered cookie bars or chocolate coconut bars) stack a buttery graham cracker crust, rich sweetened condensed milk, chocolate chips, butterscotch chips, nuts, and sweetened coconut flakes into one glorious, sticky, sweet bar cookie recipe. I’ve been making these holiday dessert bars since my kids were in elementary school—now they’re grown, and these bars are still the first thing they ask for when they walk in the door.

What Makes This Seven Layer Magic Bars Recipe So Special?
Let me explain what you’re getting with this Seven Layer Magic Bars Recipe: it’s a no-fuss, layered dessert bar that tastes like you spent all day baking, but really, you just stirred and sprinkled a few things in a pan.
You start with a classic graham cracker crust, soak it in sweetened condensed milk (that’s what gives you that “magic” gooey center), then add layers of chocolate chips, butterscotch chips, nuts, and coconut. The whole pan turns into golden, chewy, chocolate chip bars with crisp edges and a soft, candy-like center. It’s a condensed milk dessert, a coconut dessert bar, and a chocolate chip bar all in one.
I tend to bake these around the holidays for cookie exchanges, church potlucks, and office parties, but honestly, they’re just as welcome at a summer barbecue or a last-minute game night. They keep well, travel well, and cut into perfect party dessert bars. And because you don’t have to cream butter or fuss with dough, they’re ideal for beginner bakers or tired grandmas (like me) who still want something special on the table.
From a little data perspective—these bars hit all the “easy dessert recipe” boxes that readers love: minimal prep, pantry ingredients, and no mixer needed. If your family likes chocolate, Caramel flavors, and coconut, the odds are very high this pan will disappear fast.
Why You’ll Love This Seven Layer Magic Bars Recipe
- Minimal prep time: About 10–15 minutes of actual work—then the oven does the rest.
- One-pan wonder: Everything bakes in one 9×13 pan, so clean-up stays nice and simple.
- No mixer required: Just bowls, a spoon, and your baking dish—perfect for small kitchens or busy days.
- Customizable layers: Easy to tweak—add more chocolate, different nuts, or change the chips to match your craving.
- Great make-ahead dessert: These layered cookie bars taste even better the next day once they’ve set.
- Travel-friendly: They pack beautifully for potlucks, school events, bake sales, or holiday dessert bars for gifting.
- Freezer-friendly: Bake once, freeze slices, and you’ve got instant dessert ready for surprise guests.
- Crowd-pleasing flavor: That mix of chocolate, butterscotch, toasted coconut, and buttery graham cracker crust hits every sweet tooth.
- Perfect for the holidays (and beyond): Classic on a Christmas cookie tray, but just as good for game day or birthday parties.
Ingredients for the Best Seven Layer Magic Bars Recipe
You’ll need a standard 9×13-inch baking pan for this recipe. A metal pan works best for even browning, but glass is okay too—just watch the baking time near the end.
Graham Cracker Crust
- 1 1/2 cups (about 12 full sheets) graham cracker crumbs
- Use classic honey graham crackers; you can crush them in a zip-top bag with a rolling pin or pulse in a food processor.
- 1/2 cup (1 stick, 113 g) unsalted butter, melted
- Salted butter also works; if using salted, you can skip the extra pinch of salt below.
- 1/4 cup granulated sugar
- This helps the crust hold together and adds a little snap.
- 1/4 teaspoon fine sea salt
- Balances all the sweetness in the bars.
Gooey “Magic” Layer
- 1 can (14 ounces) sweetened condensed milk
- This is the heart of any condensed milk dessert; make sure you’re using sweetened condensed milk, not evaporated milk (different product!).
Toppings (The Fun Layers)
- 1 1/2 cups semi-sweet chocolate chips
- You can use milk chocolate chips for a sweeter bar or dark chocolate for a deeper flavor.
- 1 cup butterscotch chips
- These are what give these butterscotch chip bars their nostalgic flavor; you can swap with white chocolate chips if you don’t like butterscotch.
- 1 cup chopped nuts (walnuts, pecans, or a mix)
- Walnuts give a classic taste; pecans add a buttery crunch. For nut-free, use more chips or coconut instead.
- 1 1/3 cups sweetened shredded coconut flakes
- Sweetened coconut flakes toast beautifully on top and give you that classic coconut dessert bar vibe.
- 1/2 cup white chocolate chips or peanut butter chips (optional)
- Not strictly traditional, but they add a fun twist and extra layers of flavor.
Helpful Ingredient Notes & Substitutions
- Graham cracker crust alternatives: Try crushed digestive biscuits, vanilla wafers, or even chocolate graham crackers for a richer base.
- Gluten-free version: Use gluten-free graham-style crumbs or gluten-free cookies and check that all chips are certified gluten-free.
- Dairy-free version: Use dairy-free butter and coconut-based sweetened condensed milk (many grocery stores now carry it in the baking aisle), plus dairy-free chocolate chips.
- Sweetness control: If you like a slightly less sweet bar, replace some of the semi-sweet chocolate chips with chopped dark chocolate or reduce the butterscotch chips by 1/4 cup.
Step-by-Step Directions for Perfect Layered Cookie Bars
1. Preheat and Prep Your Pan
Preheat your oven to 350°F (175°C).
Lightly grease a 9×13-inch baking pan with cooking spray or butter, then line it with parchment paper, leaving a little overhang on the long sides. This parchment “sling” makes it much easier to lift the bars out and cut clean squares later.
2. Make the Graham Cracker Crust
In a medium bowl, combine the graham cracker crumbs, granulated sugar, and salt.
Pour in the melted butter and stir until all the crumbs are evenly moistened and the mixture feels like damp sand. If it looks dry or sandy, add 1–2 more tablespoons of melted butter.
Pour the crumb mixture into the prepared pan and use the bottom of a measuring cup or a flat glass to press it firmly and evenly across the bottom. Press well into the corners so the crust doesn’t crumble later.
3. Pour on the Sweetened Condensed Milk
Slowly pour the sweetened condensed milk evenly over the graham cracker crust.
You can tilt the pan slightly or use a small offset spatula to nudge it into an even layer. Try not to scrape too hard or you’ll lift up the crust. This step is what makes the center of these layered dessert bars so gooey and “magical.”
4. Add the Chocolate and Butterscotch Layers
Sprinkle the semi-sweet chocolate chips evenly over the condensed milk layer.
Next, sprinkle on the butterscotch chips and any extra chips you’re using, like peanut butter or white chocolate. You want a fairly even layer so every bite of these chocolate chip bars has a little bit of everything.
5. Add Nuts for Crunch
Scatter the chopped nuts across the top.
Press them down very gently with your hand so they nestle into the chips and condensed milk a bit. If you’re serving kids or anyone who doesn’t care for nuts, you can do half the pan with nuts and leave half plain—just sprinkle them on one side.
6. Finish with Coconut Flakes
Sprinkle the sweetened shredded coconut flakes evenly over everything.
Try to cover the whole surface without building big piles, or they’ll brown faster in those spots. The coconut will toast and turn golden in the oven, giving you that classic look of coconut dessert bars.
7. Bake Until Golden and Bubbly
Bake at 350°F (175°C) for 22–28 minutes, or until the edges are deeply golden brown and the coconut on top is lightly to moderately toasted.
You’ll see the condensed milk bubbling up a bit along the edges—that’s a good sign.
Every oven runs a little different, so start checking around 20 minutes. If the coconut is browning too fast but the center still looks very pale, loosely tent the pan with foil for the last few minutes.
8. Cool Completely (This Part Is Hard, I Know)
Remove the pan from the oven and place it on a cooling rack.
Now the important part: let the bars cool completely in the pan. This can take 2–3 hours at room temperature. You can speed it along by cooling for 30–45 minutes on the counter, then transferring the pan to the fridge for about an hour.
If you try to cut them while warm, they’ll be very gooey and may not hold their shape. Patience really does make for cleaner, prettier layered cookie bars.
9. Slice and Serve
Once fully cool, use the parchment sling to lift the whole slab of bars out of the pan and onto a cutting board.
Use a sharp knife to cut into 24–32 bars, depending on how big you like them. Wipe the knife with a warm, damp cloth between cuts for neat edges.
Serve as-is, or—if you’re feeling fancy—add a tiny pinch of flaky sea salt on top of each bar for a sweet-salty finish that keeps them from tasting too sugary.
Servings & Timing
- Yield: About 24–32 bars, depending on size
- Prep Time: 10–15 minutes
- Bake Time: 22–28 minutes
- Cooling Time: 2–3 hours
- Total Time: About 3 hours (mostly hands-off; the hardest part is waiting for them to cool)
If you’re planning these for a party dessert bar, I recommend baking them the day before so they have time to set and you’re not rushing around cutting sticky bars at the last minute.
Tasty Variations on Classic Seven Layer Magic Bars
You know what? Once you’ve made this Seven Layer Magic Bars Recipe once or twice, you’ll probably start playing around with the layers—here are some ideas to get you started:
- Nut-Free Magic Bars: Skip the nuts and replace with an extra 1/2 cup of chocolate chips or a mix of mini chocolate chips and more coconut.
- S’mores Magic Bars: Use chocolate graham crackers for the crust, add mini marshmallows along with the chips, and drizzle melted chocolate over the cooled bars.
- Peanut Butter Chocolate Bars: Use peanut butter chips instead of butterscotch and swirl 1/3 cup melted peanut butter over the condensed milk layer before adding the chips.
- Mocha Magic Bars: Add 1 tablespoon of instant espresso powder to the sweetened condensed milk and use dark chocolate chips for a grown-up coffee-chocolate twist.
- Tropical Coconut Dessert Bars: Mix 1/2 cup chopped dried pineapple or dried mango into the coconut layer and use macadamia nuts instead of walnuts.
- Holiday Dessert Bars: Use red and green candy-coated chocolate pieces along with the chocolate chips for a festive touch at Christmas.
How to Store, Freeze, and (If Needed) Reheat These Bars
These layered cookie bars are very forgiving, which is one more reason I love them.
Room Temperature
- Store cooled bars in an airtight container at room temperature for 3–4 days.
- Place parchment or wax paper between layers if you stack them so they don’t stick.
Refrigerator
- For slightly firmer, chewier bars, store in the fridge for up to 1 week.
- Let them sit at room temperature for 10–15 minutes before serving so the flavors soften a bit.
Freezer
- Freeze cut bars in a single layer on a baking sheet until firm, then transfer to a freezer-safe container or zip-top bag with parchment between layers.
- They’ll keep well in the freezer for up to 2 months.
- Thaw at room temperature for about 30 minutes, or overnight in the refrigerator.
There’s no real “reheating” needed; they’re meant to be eaten at room temperature or just slightly chilled. If you like them warm (no judgment), a 5–10 second burst in the microwave softens them nicely—just don’t go longer or the condensed milk can get too hot and sticky.
Make-Ahead Tips
- Bake these bars 1–2 days before serving for a gathering; the flavors mingle and they slice cleanly.
- For holiday planning, you can bake, cool, slice, freeze, and then thaw the bars the day before your event—one less thing to worry about when your kitchen is already busy.
Notes from My Kitchen (And My Family’s Reactions)
- Thickness of the crust: If you like a thicker graham cracker crust, bump the crumbs up to 2 cups and the butter to 3/4 cup. The bars will be slightly more stable and a little more “cookie-like” on the bottom.
- Watch the coconut: Coconut can go from golden to burned quickly. If your oven runs hot, rotate the pan halfway through baking and keep an eye on the top during the last 5 minutes.
- Salt is your secret weapon: A tiny bit of salt in the crust (and a sprinkle of flaky salt on top, if you like) keeps these from being overwhelmingly sweet. Don’t skip it.
- Resting time matters: When I rushed and cut them too soon (because my grandkids were hovering around the counter), the bars were still delicious but very messy. Cooling really does help them set.
- Pan type: In my old, darker metal pan, they bake a bit faster and brown more deeply at the edges. In a glass pan, they took a couple extra minutes, so adjust based on what you’re using.
- Serving suggestion: For special occasions, I like to cut them into small squares and place them in mini cupcake liners on a platter. It makes them feel a little more fancy and keeps everyone’s fingers from getting sticky.
If you enjoy this recipe, you might also love exploring other bar cookie recipes like lemon bars, brownie bars, or blondies—look around my recipe index for more easy dessert recipes that work well for potlucks and parties.
Frequently Asked Questions About Seven Layer Magic Bars
1. Can I make these seven layer magic bars without coconut?
Yes. Just leave the coconut off and replace it with extra chocolate chips, nuts, or even mini marshmallows. The bars will still set and taste great—just a little less like classic coconut dessert bars.
2. Why are my bars crumbly when I cut them?
They may not have cooled long enough, or the crust might not have been packed firmly. Next time, press the graham cracker crust more tightly and wait until the bars are completely cool (or even slightly chilled) before cutting.
3. Can I halve this recipe?
Absolutely. Use an 8×8 or 9×9-inch pan and halve all the ingredients. Check for doneness a few minutes earlier, since smaller pans can bake a bit faster.
4. Do I have to use nuts in these layered dessert bars?
No. You can skip the nuts entirely if you’re serving someone with allergies or just don’t care for them. Add a little extra coconut or more chips so you still get a nice full layer.
5. How do I keep the bars from sticking to the pan?
Grease the pan lightly and always line with parchment paper, leaving an overhang on at least two sides. That way you can lift out the whole slab and avoid digging sticky pieces out of the corners.
6. Can I use different kinds of chips?
Yes, that’s the fun part! Try dark chocolate, white chocolate, peanut butter chips, or even caramel chips. Just keep the total amount of chips (plus any nuts or add-ins) roughly the same so the bars hold together.
7. What’s the difference between sweetened condensed milk and evaporated milk?
Sweetened condensed milk is thick, sweet, and syrupy—it’s essential for these chocolate coconut bars. Evaporated milk is unsweetened and much thinner; if you use it here, the bars will not set correctly.
8. How long do seven layer magic bars stay fresh?
Stored in an airtight container at room temperature, they’re best within 3–4 days, but they usually disappear much sooner around my house. You can extend that to about a week by refrigerating them.
Wrapping It Up: A Pan of Sweet Nostalgia
This Seven Layer Magic Bars Recipe is one of those old-fashioned, no-fuss desserts that always feels like coming home—simple ingredients, big flavor, and a pan full of something everyone reaches for first on the dessert table.
Whether you’re building a holiday cookie tray, packing layered cookie bars for a school event, or just craving a cozy condensed milk dessert with chocolate, butterscotch, and coconut, these bars deliver every single time.
Try them, tweak them to fit your family’s tastes, and let me know how it goes—leave a comment with your favorite variation, or browse my other bar cookie recipes and easy dessert ideas next. There’s always room for one more sweet treat on the table.
Seven Layer Magic Bars
Ingredients
- 1 1/2 cups graham cracker crumbs about 12 full sheets; use classic honey graham crackers
- 1/2 cup unsalted butter melted; salted butter also works
- 1/4 cup granulated sugar
- 1/4 teaspoon fine sea salt skip if using salted butter, or to taste
- 14 ounces sweetened condensed milk 1 can; do not substitute evaporated milk
- 1 1/2 cups semi-sweet chocolate chips or milk/dark chocolate chips
- 1 cup butterscotch chips can substitute white chocolate chips
- 1 cup chopped nuts walnuts, pecans, or a mix
- 1 1/3 cups sweetened shredded coconut flakes
- 1/2 cup white chocolate chips or peanut butter chips optional
- Cooking spray or extra butter for greasing the pan
- Flaky sea salt optional, for sprinkling on top after baking
Instructions
- Preheat your oven to 350°F (175°C). Lightly grease a 9x13-inch baking pan with cooking spray or butter, then line it with parchment paper, leaving an overhang on the long sides to create a sling for easy removal.
- In a medium bowl, combine the graham cracker crumbs, granulated sugar, and fine sea salt. Pour in the melted butter and stir until all the crumbs are evenly moistened and the mixture feels like damp sand. If the mixture looks too dry, add 1–2 more tablespoons melted butter.1 1/2 cups graham cracker crumbs, 1/2 cup unsalted butter, 1/4 cup granulated sugar, 1/4 teaspoon fine sea salt
- Pour the crumb mixture into the prepared pan. Use the bottom of a measuring cup or a flat glass to press the mixture firmly and evenly across the bottom, making sure to press well into the corners so the crust holds together.1 1/2 cups graham cracker crumbs, 1/2 cup unsalted butter, 1/4 cup granulated sugar, 1/4 teaspoon fine sea salt
- Slowly pour the sweetened condensed milk evenly over the graham cracker crust. Tilt the pan gently or use a small offset spatula to nudge it into an even layer without disturbing the crust.14 ounces sweetened condensed milk
- Sprinkle the semi-sweet chocolate chips evenly over the condensed milk layer. Then sprinkle the butterscotch chips and any optional white chocolate or peanut butter chips evenly over the top.1 1/2 cups semi-sweet chocolate chips, 1 cup butterscotch chips, 1/2 cup white chocolate chips or peanut butter chips
- Scatter the chopped nuts evenly over the chips. Press them down very gently with your hand so they nestle slightly into the layers. If desired, you can add nuts over only half the pan to keep part nut-free.1 cup chopped nuts
- Sprinkle the sweetened shredded coconut flakes evenly over the entire surface, covering the chips and nuts without creating thick mounds so the coconut browns evenly.1 1/3 cups sweetened shredded coconut flakes
- Bake at 350°F (175°C) for 22–28 minutes, or until the edges are deeply golden brown and the coconut on top is lightly to moderately toasted. The sweetened condensed milk should be bubbling around the edges. Start checking at about 20 minutes. If the coconut is browning too quickly while the center is still pale, loosely tent the pan with foil for the remaining time.
- Remove the pan from the oven and place it on a cooling rack. Allow the bars to cool completely in the pan, about 2–3 hours at room temperature. For faster cooling, let cool 30–45 minutes on the counter, then transfer the pan to the refrigerator for about 1 hour. Do not cut while warm or the bars will be very soft and messy.
- Once fully cool and set, use the parchment sling to lift the slab of bars out of the pan onto a cutting board. Use a sharp knife to cut into 24–32 bars, wiping the blade with a warm, damp cloth between cuts for clean edges. If desired, sprinkle each bar with a tiny pinch of flaky sea salt before serving.Flaky sea salt