Would you like to save this?
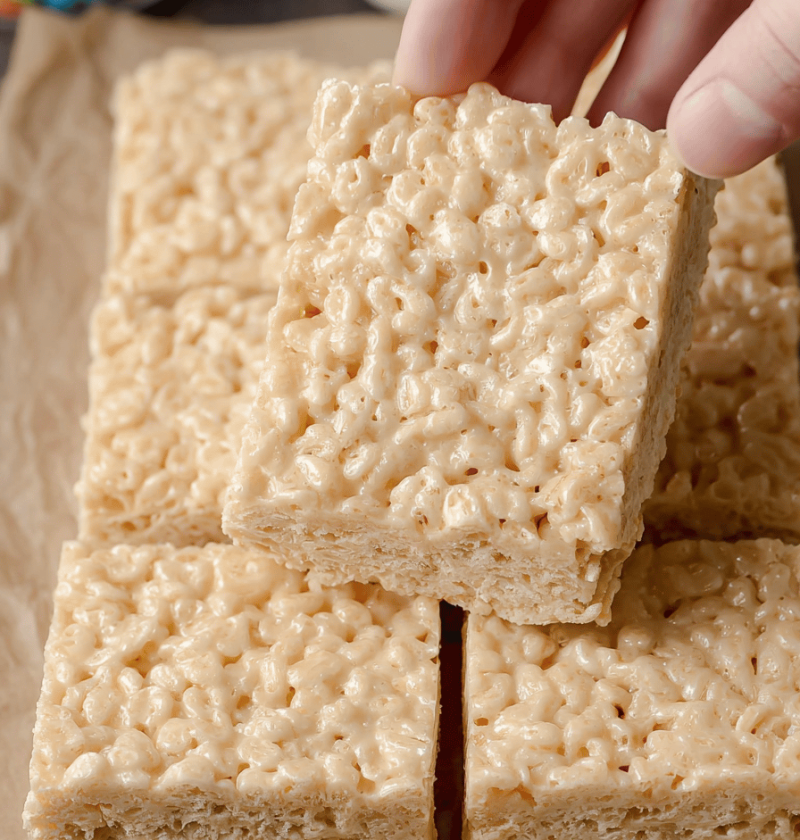
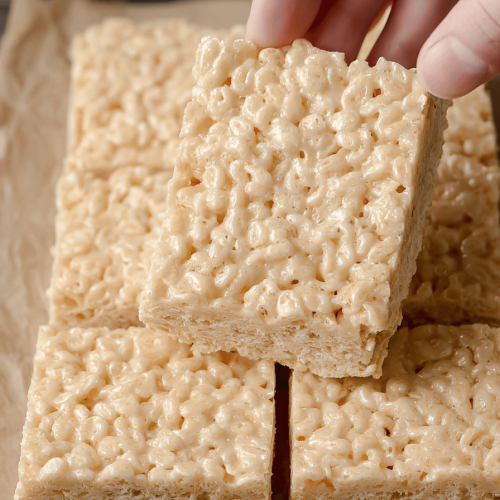
Indulge in these no-bake Browned Butter Krispies Treats—a crispy, sweet homemade snack bursting with toasty marshmallow goodness.
I still remember the first time I browned butter for a batch of classic Krispies treats—it smelled like toasted nuts and Sunday mornings at Grandma’s. These Browned Butter Krispies Treats take the simple dessert you know and love, jazzing it up with an indulgent, nutty flavor that’s impossible to resist. Whether you’re packing them in lunchboxes, sharing at potlucks, or sneaking a late-night sweet, they hit that perfect balance between crispy cereal, gooey marshmallows, and rich, caramel-like butter. You know what? They might just become your new go-to snack.
Why You’ll Love This Recipe
• No oven needed—just a stovetop and a pan.
• Ready in under 30 minutes (seriously, quick and easy recipe).
• Crisp, sweet, and slightly chewy all at once.
• Browned butter adds a gourmet, nutty twist.
• Perfect for gift boxes, lunch treats, or movie-night munchies.
• Uses pantry staples—marshmallows, cereal, butter.
• Customizable with mix-ins like chocolate chips or nuts.
• Kid-friendly activity: great hands-on snack project.
Ingredients
• 6 tablespoons unsalted butter (I like Kerrygold or Land O’Lakes)
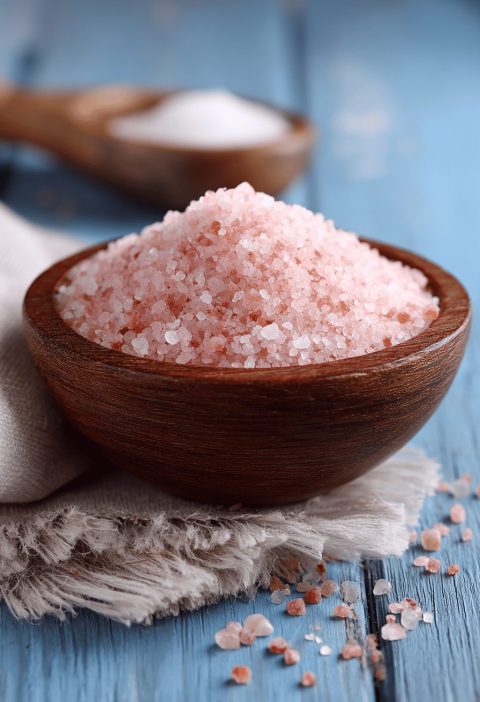
• 1 teaspoon coarse sea salt (optional, for contrast)
• 10 ounces mini marshmallows (about 4 cups; sub: large marshmallows, torn)
• 6 cups Rice Krispies cereal (or your favorite crispy rice cereal)
• 1 teaspoon pure vanilla extract (optional, boosts sweetness)
• ½ cup chopped toasted nuts, toffee bits, or semi-sweet chocolate chips (optional mix-ins)
Tips:
– Use old-fashioned unsalted butter for cleaner browning.
– Measure cereal by gently packing into the cup for uniform crispiness.
– Toast nuts lightly in a dry skillet before chopping to deepen that nutty flavor.
Directions
1. Brown the butter. In a large, light-colored saucepan over medium heat, melt the butter, swirling constantly. Watch for foam, then golden specks—once the aroma smells nutty (about 4–5 minutes), remove from heat immediately to avoid burning.
2. Stir in salt and vanilla. Off the heat, whisk in the coarse sea salt and vanilla extract; this amps up the complexity.
3. Melt the marshmallows. Add all the mini marshmallows to the browned butter pan, return to low heat, and stir continuously until smooth—no big clumps, about 2–3 minutes. If you see streaks of white, keep stirring gently until fully melted.
4. Fold in the cereal. Quickly add the Rice Krispies, gently folding with a silicone spatula so every crisp is coated in that gooey, browned butter mixture. Work swiftly but gently—overmixing can crush the cereal.
5. Press into pan. Transfer mixture into a parchment-lined 9×13-inch baking dish. Use lightly buttered hands or an oiled spatula to press evenly—press too hard and treats turn brick-like; too soft and they fall apart. Aim for a light, even layer.
6. Add mix-ins (optional). Sprinkle chocolate chips or nuts on top; press them in lightly so they stick. If you prefer them mixed throughout, fold in before pressing.
7. Chill and slice. Let the pan rest at room temperature for 10 minutes, then refrigerate for at least 20 more. Slice into squares or fun shapes using a sharp knife dipped in warm water for clean cuts.
Servings & Timing
Yield: Makes 16–20 squares
Prep Time: 10 minutes
Mixing & Melting: 15 minutes
Chill Time: 20–30 minutes
Total Time: About 45 minutes
Variations
• Chocolate Drizzle: Melt ¼ cup dark chocolate chips and zigzag on top for extra decadence.
• Peanut Butter Twist: Stir in ⅓ cup creamy peanut butter with the marshmallows.
• Fruity Krispies: Swap half the cereal for Fruity Pebbles or colored puffed rice.
• Vegan Version: Use vegan butter and marshmallows; check labels for gelatin-free brands.
• Nutty Crunch: Mix in ½ cup chopped pecans or almonds for a hearty bite.
• S’mores Style: Add crushed graham crackers and mini chocolate chunks.
Storage & Reheating
Store treats in an airtight container at room temperature for up to 3 days. For longer life, refrigerate up to 5 days or freeze up to 1 month—separate layers with parchment paper. No reheating needed—just let frozen bars thaw at room temperature for 10–15 minutes before serving. Make-ahead tip: Prep the mix and chill, then wrap individual bars in cling film for grab-and-go convenience.
Notes
I learned that browning butter in a light pan helps you see when it’s just right—too dark and it tastes burnt, too light and you miss the depth. If your treats ever come out too sticky, next time press a little firmer or pop them in the fridge a few minutes longer. For extra shine, brush warm butter on top before adding mix-ins.
FAQs
Q: Can I use salted butter?
A: Yes, but skip the extra sea salt and adjust to taste—salted butter varies by brand.
Q: Why are my treats hard?
A: Pressing too firmly or over-chilling can make them dense; next batch, press gently and reduce chill time by 5–10 minutes.
Q: Can I microwave the marshmallows?
A: You can, but browning the butter in a pan first deepens the flavor—microwaving may skip that nutty aroma.
Q: What’s the best pan size?
A: A 9×13-inch pan yields about ½-inch thick bars; a smaller pan makes thicker, chewier treats.
Q: How do I clean gooey pans?
A: Fill the warm pan with hot water and a drop of dish soap immediately—the marshmallow residue melts away.
Q: Are there gluten-free options?
A: Swap Rice Krispies for a certified gluten-free crispy rice cereal or quinoa pops.
Q: Can I add sprinkles?
A: Absolutely—mix in rainbow or holiday sprinkles right before chilling for a festive twist.
Q: Why did my cereal lose its crisp?
A: If marshmallow mixture is too hot, it can soften the cereal; cool the butter-marshmallow blend for 30 seconds before folding in.
Conclusion
These Browned Butter Krispies Treats bring a sweet, crispy upgrade to a classic snack—no oven required, just simple steps and pantry staples. Go on, give this easy recipe a try, share your favorite mix-in, and let me know how they turned out in the comments below!
Browned Butter Krispies Treats
Ingredients
- 6 tablespoons unsalted butter I like Kerrygold or Land O’Lakes
- 1 teaspoon coarse sea salt optional, for contrast
- 10 ounces mini marshmallows about 4 cups; sub: large marshmallows, torn
- 6 cups Rice Krispies cereal or your favorite crispy rice cereal
- 1 teaspoon pure vanilla extract optional, boosts sweetness
- 1/2 cup chopped toasted nuts, toffee bits, or semi-sweet chocolate chips optional mix-ins
Instructions
- In a large, light-colored saucepan over medium heat, melt the butter, swirling constantly. Watch for foam, then golden specks—once the aroma smells nutty (about 4–5 minutes), remove from heat immediately to avoid burning.
- Off the heat, whisk in the coarse sea salt and vanilla extract; this amps up the complexity.
- Add all the mini marshmallows to the browned butter pan, return to low heat, and stir continuously until smooth—no big clumps, about 2–3 minutes. If you see streaks of white, keep stirring gently until fully melted.
- Quickly add the Rice Krispies, gently folding with a silicone spatula so every crisp is coated in that gooey, browned butter mixture. Work swiftly but gently—overmixing can crush the cereal.
- Transfer mixture into a parchment-lined 9×13-inch baking dish. Use lightly buttered hands or an oiled spatula to press evenly—press too hard and treats turn brick-like; too soft and they fall apart. Aim for a light, even layer.
- Sprinkle chocolate chips or nuts on top; press them in lightly so they stick. If you prefer them mixed throughout, fold in before pressing.
- Let the pan rest at room temperature for 10 minutes, then refrigerate for at least 20 more. Slice into squares or fun shapes using a sharp knife dipped in warm water for clean cuts.

