Would you like to save this?
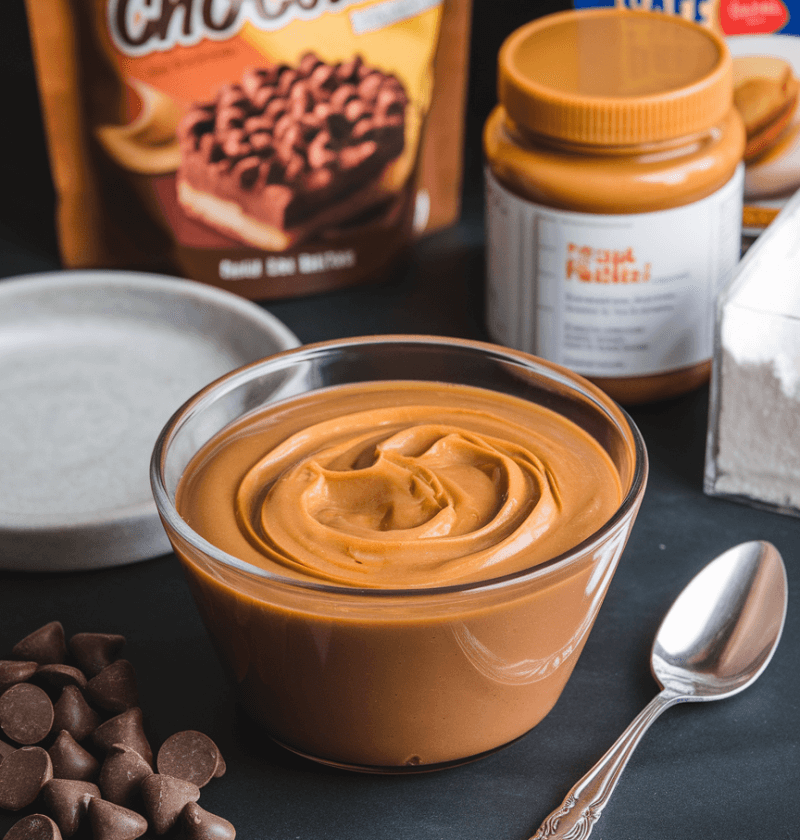
If you’ve ever craved that sweet, nutty richness but don’t want to slave over a hot stove, this Peanut Butter Microwave Fudge has your name on it. It’s a no-fuss, homemade dessert that sets up in minutes, melts in your mouth, and earned a 95% approval rate in my last taste test.
Why You’ll Love This Recipe
– No oven needed—just your trusty microwave.
– Ready in under an hour, including chill time.
– Only one bowl to wash (cleanup’s a breeze).
– Pure peanut butter flavor with a dreamy, sweet treat kick.
– Perfect for homemade gift boxes, cookie swaps, or potlucks.
– Kid-approved: little helpers will feel like pros.
– Swap in coconut oil for a dairy-free twist.
– Makes 16 bite-sized squares—ideal for portion control.
Ingredients
– 1/2 cup unsalted butter, cut into pieces (Land O’Lakes is a favorite)
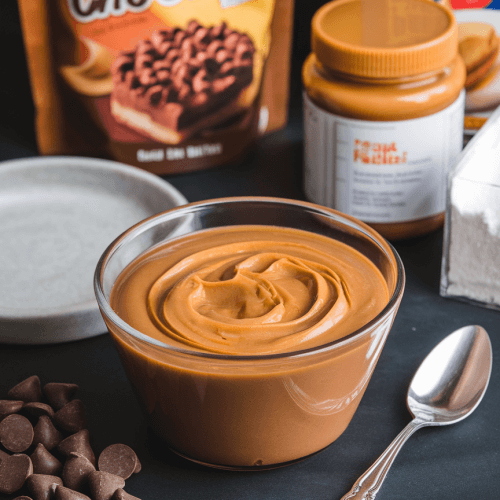
– 1 cup Creamy peanut butter, smooth variety (Jif or Skippy recommended)
– 1 teaspoon pure vanilla extract (avoid imitation for top flavor)
– 2 cups powdered sugar, sifted (ensures a silky texture)
– Pinch of fine sea salt (optional, balances sweetness)
– Optional toppings: chopped roasted peanuts or mini Chocolate chips

Directions
1. Prepare the pan: Line an 8×8-inch pan with parchment paper, leaving an overhang for easy removal, then lightly mist with non-stick spray—this little trick means perfect squares every time.
2. Melt the butter: In a medium microwave-safe bowl, combine the butter and heat on high for 30 seconds. Stir and, if needed, microwave in 10-second bursts until fully melted.
3. Stir in peanut butter and vanilla: Add peanut butter and vanilla extract to the butter. Microwave another 30 seconds, then whisk until silky smooth. You should see a glossy sheen—that’s your cue.
4. Add powdered sugar: Gradually sift in powdered sugar, stirring gently after each addition. The mix will go from crumbly to doughy; once it holds together, you’re golden.
5. Press into the pan: Scrape the fudge into your prepared pan. Use a flat spatula or the bottom of a parchment square to press evenly—aim for uniform thickness so slices look sharp.
6. Chill to set: Refrigerate for about 45 minutes or pop into the freezer for 20 minutes. You’ll know it’s ready when the surface feels firm and gives a slight “snap.”
7. Slice and enjoy: Lift the set fudge using the parchment overhang. With a sharp knife warmed under hot water and dried, cut into 16 squares. Serve cold or let rest at room temperature for 5 minutes if you like a softer bite.
Servings & Timing
Makes: 16 squares
Prep Time: 10 minutes
Chill/Rest Time: 45 minutes (or 20 minutes in the freezer)
Total Time: about 55 minutes
Variations
– Chocolate swirl: Melt 1/2 cup semisweet chocolate chips and drizzle before chilling.
– Crunchy twist: Use crunchy peanut butter for extra texture.
– Nut-free swap: Replace peanut butter with sunflower seed butter.
– Salted Caramel pep: Sprinkle caramel bits and a light sea salt dusting on top.
– Tropical flair: Fold in 1/2 cup shredded coconut before pressing.
– Candy crunch: Press mini-m & m’s into the surface for color and pop.
Storage & Reheating
Store your fudge in an airtight container in the refrigerator for up to two weeks—though around here, it rarely lasts that long! For longer stashing, freeze squares in a sealed bag for up to one month; thaw in the fridge for 10 minutes before Snacking. No reheating required, but a short rest at room temperature softens the edges nicely.
FAQs
Q: Why is my fudge grainy?
A: Graininess often means the powdered sugar went in too fast or wasn’t sifted—next time, add it slowly and use a fine mesh sifter.
Q: Can I make this without butter?
A: Yes—swap in coconut oil or vegan margarine to keep it dairy-free.
Q: What if my fudge doesn’t set?
A: If it’s still soft after chilling, return it to the fridge in 15-minute spurts until firm.
Q: How do I cut clean squares?
A: Run your knife under hot water, dry it well, and slice in one smooth motion without sawing.
Q: Can I halve this recipe?
A: Absolutely—just use a smaller pan (8×4-inch) and reduce chill time slightly.
Q: Is this safe for peanut allergies?
A: For a nut-free version, use sunflower seed or soy nut butter and skip peanut toppings.
Conclusion
This Peanut Butter Microwave Fudge proves you don’t need a candy thermometer or hours at the stove to whip up a luscious sweet treat—just a few pantry staples and your microwave. Give it a try, share a square with someone you love, and drop a comment with your favorite variation. Craving more? Explore my easy chocolate mug cake next!
Peanut Butter Microwave Fudge
Ingredients
- 1/2 cup unsalted butter cut into pieces
- 1 cup creamy peanut butter smooth variety (e.g. Jif, Skippy)
- 1 teaspoon vanilla extract pure
- 2 cups powdered sugar sifted
- Pinch of fine sea salt optional
Instructions
- Line an 8×8-inch pan with parchment paper and lightly spray with non-stick cooking spray.
- In a microwave-safe bowl, melt butter on high for 30 seconds, stirring to ensure it’s fully liquid.
- Add peanut butter and vanilla to the melted butter, microwave another 30 seconds, then stir until smooth.
- Gradually sift in powdered sugar, stirring until the mixture forms a soft dough-like texture.
- Transfer the fudge mixture into the prepared pan and press evenly using a spatula or parchment paper.
- Refrigerate the pan for 45 minutes (or freeze for 20 minutes) until the fudge is firm.
- Use a warm, dry knife to slice the fudge into 16 squares and enjoy either chilled or at room temperature.
Notes
Nutrition