Would you like to save this?
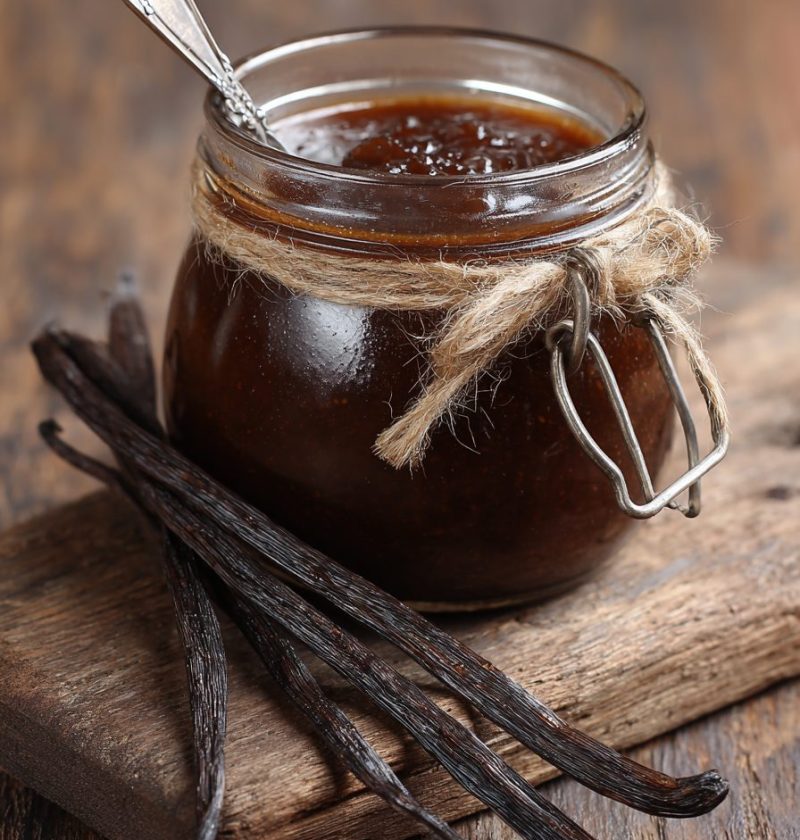
Vanilla Paste Recipe (Better Than Store-Bought, With Real Beans!)
If you’ve ever wished your bakes tasted like they came from a cozy little bakery, this Vanilla Paste Recipe is your new secret weapon—rich, fragrant, full of real vanilla bean specks, and surprisingly easy to make at home.
What Is Vanilla Paste (And Why Bother Making It)?
Let me start with a confession: I’m a 50-year-old woman who has collected way too many kinds of vanilla—extracts, beans, powders, you name it. But the one thing I kept reaching for again and again was vanilla paste. It has that deep, floral, almost caramelized aroma you just don’t get from regular extract.
Vanilla paste (sometimes called vanilla bean paste or vanilla extract paste) is a thick, syrupy mixture made from vanilla beans, a sweetener (usually sugar or syrup), and a thickening agent. It gives you:
- The flavor of pure vanilla extract
- The pretty black vanilla specks you see in fancy desserts
- A concentrated punch of flavor that doesn’t water down your recipes
The problem? Store-bought vanilla paste is expensive, and quality can be hit or miss. That’s where a good homemade vanilla paste recipe comes in. When you make vanilla paste from beans yourself, you control every ingredient. No artificial flavor, no weird stabilizers—just natural vanilla paste, tailored to your kitchen.
I like to whip up a batch in late fall so I have plenty on hand for holiday baking. It stirs beautifully into custards, ice cream bases, whipped cream, cakes, cookies—anything that needs a hug of vanilla. Honestly, once you learn how to make vanilla paste at home, you’ll feel just a tiny bit smug every time you skip the store-bought bottle.
Why You’ll Love This Vanilla Paste Recipe
- Big flavor, small effort – You get bakery-level vanilla flavor with simple steps and basic tools.
- Budget-friendly – Homemade vanilla paste costs far less than those tiny jars at gourmet shops.
- Customizable – Adjust sweetness, thickness, and intensity to match your cooking and baking style.
- Pure ingredients – You control the vanilla paste ingredients; no artificial flavors or unnecessary additives.
- Perfect for baking and cooking – Ideal for cakes, cookies, custards, ice cream, and even coffee.
- Keeps for months – One batch of DIY vanilla paste will last through many rounds of baking.
- Show-off factor – It makes a gorgeous homemade gift, especially in small glass jars with labels.
- Flavor consistency – You get a steady, rich vanilla flavor that’s more reliable than extract alone.
- A great use for “imperfect” beans – Dry or crooked beans still shine in this vanilla bean paste recipe.
Ingredients for Homemade Vanilla Paste
Here’s the full list for this pure vanilla paste recipe. I’ll include some flexible options so you can work with what you have.
Core Ingredients
- 12 whole vanilla beans (Grade B beans are perfect; Grade A works too)
- 1 cup (200 g) granulated sugar
- 1/2 cup (120 ml) water
- 1/2 cup (120 ml) light corn syrup OR glycerin (helps keep paste smooth and glossy)
- 2 teaspoons pure vanilla extract (boosts flavor, especially if your beans are older)
- 1 tablespoon cornstarch or arrowroot powder (for thickening)
Ingredient Notes & Substitutions
-
Vanilla beans:
- Type: Madagascar (classic, creamy), Tahitian (floral, a bit fruity), or Mexican (warm, spicy) all work.
- Quality: Grade B “extract” beans are cheaper and absolutely perfect when you make vanilla paste.
- Quantity: If your beans are very plump and fresh, you can use 10 instead of 12.
-
Sugar:
- White granulated sugar gives a clean flavor.
- You can use cane sugar or light brown sugar for a deeper, slightly caramel note.
- For a more natural vanilla paste, organic cane sugar works nicely.
-
Water:
- Filtered water is ideal, especially if your tap water has a strong taste.
-
Corn syrup or glycerin:
- Corn syrup keeps the paste smooth and helps prevent crystallization.
- Food-grade vegetable glycerin is a good choice if you’d like a more natural approach and a slightly thicker, glossy texture.
- Honey or maple syrup can work in a pinch, but they’ll change the flavor.
-
Vanilla extract:
- Use pure vanilla extract, not imitation.
- This “double vanilla” approach (beans + extract) creates a full, rounded flavor.
-
Thickener (cornstarch or arrowroot):
- Cornstarch is classic and easy to find.
- Arrowroot is a good gluten-free and slightly more natural alternative; it stays clear and glossy.
Directions: How To Make Vanilla Paste Step by Step
You don’t need fancy equipment for this DIY vanilla paste—just a small saucepan, knife, cutting board, whisk, and either a blender or food processor.
1. Prep the Vanilla Beans
Place your vanilla beans on a cutting board. Using a small, sharp knife, slice each bean lengthwise to split it open.
Gently press the bean flat and use the back of your knife to scrape out the seeds (the tiny black caviar-like specks). Add both the seeds and the emptied pods to a small bowl.
Tip: Don’t throw away those scraped pods—most of the aroma is in the pod itself, not just the seeds.
2. Make a Simple Vanilla Syrup Base
In a small saucepan, add:
- 1 cup sugar
- 1/2 cup water
- All the vanilla seeds and pods
Stir to combine, then set the pan over medium heat. Warm the mixture gently, stirring now and then, until the sugar dissolves and the syrup just begins to steam.
You don’t need a hard boil here—just a gentle simmer. We’re coaxing flavor from the beans, not making candy.
3. Simmer for Deep Flavor
Once the sugar is dissolved, reduce the heat to low. Let the mixture simmer very gently for 10–15 minutes.
You’re looking for:
- A light amber or slightly golden tint
- A warm, strong vanilla aroma filling your kitchen
If the syrup reduces too quickly or seems to thicken a lot, turn the heat down. You still want it pourable.
Tip: Stir occasionally and use a silicone spatula to scrape the sides of the pan so sugar doesn’t crystalize.
4. Add Corn Syrup or Glycerin
Turn off the heat. Carefully fish out the vanilla pods with tongs and set them aside (we’ll use them again).
Stir in:
- 1/2 cup light corn syrup or glycerin
Whisk until the mixture is smooth and fully combined.
This step gives you that classic, scoopable kitchen vanilla paste texture—thick but spoonable, glossy but not sticky like caramel.
5. Blend Until Smooth
Pour the warm mixture (carefully!) into a blender or food processor. Add the vanilla pods back in.
Blend on low, then medium, until:
- The pods are broken down into small bits
- The mixture looks speckled and slightly thick
If your blender struggles, cut the pods into smaller pieces first, or remove them and reserve just the liquid plus seeds. You can always dry the pods and grind them for vanilla sugar later.
6. Thicken the Paste
In a small bowl, whisk together:
- 1 tablespoon cornstarch or arrowroot
- 2 tablespoons cool water
You’ll get a smooth slurry.
Return the blended vanilla mixture to the saucepan. Bring it back to low heat, and whisk in the slurry gradually.
Cook over low, whisking constantly, for 3–5 minutes, until:
- The mixture thickens to a loose jam or molasses-like consistency
- It coats the back of a spoon
Remember, it will thicken a bit more as it cools, so don’t overdo it.
7. Finish With Vanilla Extract and Cool
Remove from heat. Stir in:
- 2 teaspoons pure vanilla extract
This final hit of extract rounds out the flavor and brightens the aroma.
Let the vanilla paste cool to room temperature. Then transfer it to a clean, dry glass jar with a tight-sealing lid.
Storage tip: A small funnel helps you avoid wasting a single drop—this stuff is liquid gold.
Servings & Timing
- Yield: About 1 to 1 1/4 cups vanilla paste (roughly 16–20 tablespoons)
- Prep Time: 10 minutes (bean scraping and setup)
- Cook Time: 20–25 minutes
- Total Time: 30–35 minutes, plus 30 minutes to cool
How to Use Vanilla Paste in Baking & Cooking
You might be wondering, “Alright, I made it—now how do I actually use this stuff?”
Here’s a simple rule of thumb for baking with vanilla paste:
- 1 teaspoon vanilla paste ≈ 1 teaspoon vanilla extract
Because it’s a bit more intense, I often start with 3/4 teaspoon paste where a recipe calls for 1 teaspoon extract, then adjust to taste. It’s especially dreamy in:
- Custards, puddings, and crème brûlée
- Cheesecakes and pound cakes
- Ice cream and frozen yogurt
- Whipped cream and buttercream
- Pancake and waffle batters
- Hot cocoa, lattes, or even your morning coffee
If you love seeing those tiny black specks in vanilla ice cream or pastry cream, this homemade vanilla paste is your new best friend.
Variations: Fun Twists on Classic Vanilla Paste
Once you’ve mastered the base recipe, you can play a bit:
- Bourbon Vanilla Paste – Add 2–3 tablespoons bourbon at the end instead of some of the vanilla extract for a warm, boozy note (great for holiday baking).
- Honey Vanilla Paste – Swap half the sugar for mild honey; you’ll get a floral, cozy flavor that’s lovely in tea and yogurt.
- Coconut Sugar Vanilla Paste – Use coconut sugar instead of white sugar for a darker, toasty flavor that’s fantastic in chocolate desserts.
- Low-Sugar Vanilla Paste – Reduce sugar by one-third and use more glycerin; you’ll still get sweetness without being overly sugary.
- Spiced Vanilla Paste – Add a pinch of cinnamon and cardamom while simmering for a warm, chai-adjacent vanilla paste for fall baking.
Storage & Make-Ahead Tips
Homemade vanilla paste is easy to store and keeps well, especially if you handle it with clean utensils.
-
Fridge:
Store your vanilla paste in an airtight glass jar in the refrigerator. It will keep for 3–6 months. -
Freezer:
For long-term storage, spoon it into small freezer-safe containers (or even silicone ice cube trays) and freeze for up to 1 year. Thaw in the fridge before use. -
Make-ahead:
You can absolutely make this weeks before heavy baking seasons like Thanksgiving and Christmas. The flavor actually melds and deepens slightly over time. -
Reheating/loosening:
If the paste thickens too much in the fridge, just let it sit at room temperature for 10–15 minutes or stir in 1–2 teaspoons of warm water until it loosens.
Notes From My Kitchen (Little Things That Help a Lot)
- Older or drier beans are fine – This vanilla paste recipe is a wonderful way to use beans that have gotten a bit firm or dry. As long as they still smell good, you’re golden.
- Don’t skip the cooling time – The true texture of your paste only shows up once it’s completely cool. It might look runny when hot but set up beautifully later.
- Taste as you go – Vanilla can be subtle or bold depending on the beans. If it tastes a bit mild, stir in another 1/2 teaspoon of vanilla extract at the end.
- Label your jar – Write the date and type of beans (Madagascar, Tahitian, Mexican) on a piece of tape or label. Future-you will appreciate that.
- Use clean spoons only – To extend shelf life, avoid double-dipping or using a spoon that’s been in batter. It helps prevent spoilage.
- Gifting idea – Pour into small 4-ounce jars, tie with twine, and add a tag: “Homemade Vanilla Paste – 1 tsp = 1 tsp vanilla extract.” It’s a thoughtful, “wow” kind of gift.
FAQs About Homemade Vanilla Paste
1. How long does homemade vanilla paste last?
Stored in a clean, airtight jar in the fridge, your vanilla paste should last 3–6 months, sometimes longer if you’re very careful with cleanliness.
2. Can I make vanilla paste without a blender?
Yes—just simmer the mixture a little longer, skip blending, and strain out the pods at the end; you’ll still get a flavorful vanilla extract paste, just with fewer visible specks.
3. How many vanilla beans equal one tablespoon of vanilla paste?
This recipe uses about 12 beans for 1–1 1/4 cups paste; that works out to roughly 1 bean per tablespoon of paste, though it’s not an exact science.
4. Is vanilla paste stronger than vanilla extract?
Usually yes—because it includes both the seeds and concentrated flavor from the pods, homemade vanilla paste tends to taste a bit more intense and rounded than plain extract.
5. Can I use vanilla paste in everything that calls for vanilla extract?
Pretty much. For most recipes, use it 1:1 with extract, starting slightly lower in delicate desserts, then adjusting to taste.
6. My paste is too thick. Can I fix it?
Yes. Whisk in 1–2 teaspoons warm water or a splash of glycerin until it returns to a smooth, spoonable texture.
7. My paste is too runny. What did I do wrong?
Most likely it just needs more cooking time. Return it to low heat, whisk in an extra 1/2 teaspoon cornstarch mixed with a teaspoon of cool water, and cook gently until it thickens.
8. Can I make this recipe alcohol-free?
Absolutely. Just skip the vanilla extract if it’s alcohol-based and rely fully on the beans—or use an alcohol-free vanilla extract if you prefer.
Wrapping It Up: Your New Vanilla Secret
This homemade Vanilla Paste Recipe gives you a jar full of real vanilla flavor—warm, fragrant, speckled with those gorgeous bean seeds—without spending a fortune on store-bought versions. It’s simple, it keeps well, and it turns everyday desserts into something that tastes just a little more special.
If you try this vanilla paste from beans, I’d love to hear how you use it—cakes, cookies, morning coffee, all of the above? Leave a comment, share your tweaks, or pass the recipe along to a friend who bakes. And when you’re ready for the next flavor project, you might enjoy experimenting with homemade extracts or flavored sugars to build your own little flavor “library” in the pantry.
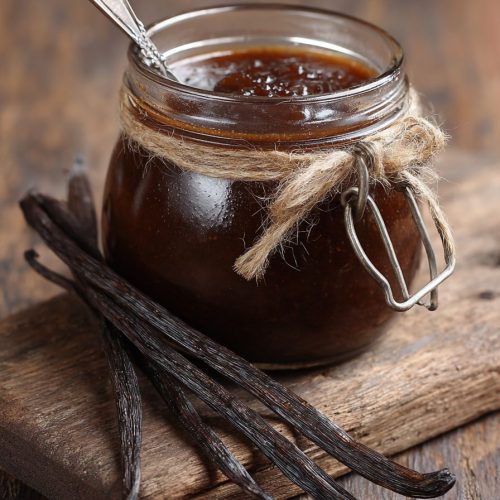
Homemade Vanilla Bean Paste
Ingredients
- 12 vanilla beans Grade B preferred; Grade A also works
- 1 cup granulated sugar
- 1/2 cup water
- 1/2 cup light corn syrup or food-grade vegetable glycerin
- 2 teaspoons pure vanilla extract
- 1 tablespoon cornstarch or arrowroot powder
- 2 tablespoons cool water for slurry with thickener
Instructions
- Place the vanilla beans on a cutting board. Using a small, sharp knife, slice each bean lengthwise to split it open. Gently press each bean flat and use the back of the knife to scrape out the seeds. Collect both the seeds and scraped pods in a small bowl.12 vanilla beans
- In a small saucepan, combine the sugar, 1/2 cup water, and all of the vanilla seeds and pods. Stir to combine, then place over medium heat and warm gently, stirring occasionally, until the sugar dissolves and the mixture just begins to steam.12 vanilla beans, 1 cup granulated sugar, 1/2 cup water
- Reduce the heat to low and let the mixture simmer very gently for 10–15 minutes, until lightly golden and very aromatic. Stir occasionally and scrape down the sides of the pan to prevent crystallization. The syrup should remain pourable.
- Turn off the heat. Using tongs, remove the vanilla pods and set them aside. Stir in the light corn syrup or glycerin until the mixture is smooth and fully combined.1/2 cup light corn syrup or food-grade vegetable glycerin
- Carefully pour the warm mixture into a blender or food processor. Add the vanilla pods back in. Blend on low, then medium, until the pods are broken into small bits and the mixture looks speckled and slightly thick. If your blender struggles, cut pods into smaller pieces first.12 vanilla beans
- In a small bowl, whisk the cornstarch or arrowroot with 2 tablespoons cool water to make a smooth slurry. Return the blended vanilla mixture to the saucepan over low heat and gradually whisk in the slurry. Cook, whisking constantly, for 3–5 minutes, until it thickens to a loose jam or molasses-like consistency and coats the back of a spoon. Remember it will thicken further as it cools.1 tablespoon cornstarch or arrowroot powder, 2 tablespoons cool water
- Remove the pan from the heat and stir in the pure vanilla extract. Let the paste cool completely to room temperature, then transfer to a clean, dry glass jar with a tight-sealing lid. Store in the refrigerator.2 teaspoons pure vanilla extract
- Use vanilla bean paste in place of vanilla extract in most recipes. As a guideline, 1 teaspoon vanilla paste is approximately equal to 1 teaspoon vanilla extract. Start with slightly less in delicate desserts and adjust to taste.
Notes
Storage: Store in an airtight glass jar in the refrigerator for 3–6 months, or freeze in small portions for up to 1 year. If the paste is too thick, stir in 1–2 teaspoons warm water or a splash of glycerin. If too thin, return to low heat and whisk in an additional 1/2 teaspoon cornstarch mixed with 1 teaspoon cool water and cook until thickened.
Usage: 1 teaspoon vanilla paste ≈ 1 teaspoon vanilla extract. Especially good in custards, ice cream, cheesecake, pound cake, whipped cream, buttercream, pancakes, waffles, and coffee.
Beans: Roughly 1 tablespoon of paste contains about the flavor of 1 vanilla bean, though this is approximate.