Would you like to save this?
Tiramisu Brownies Recipe
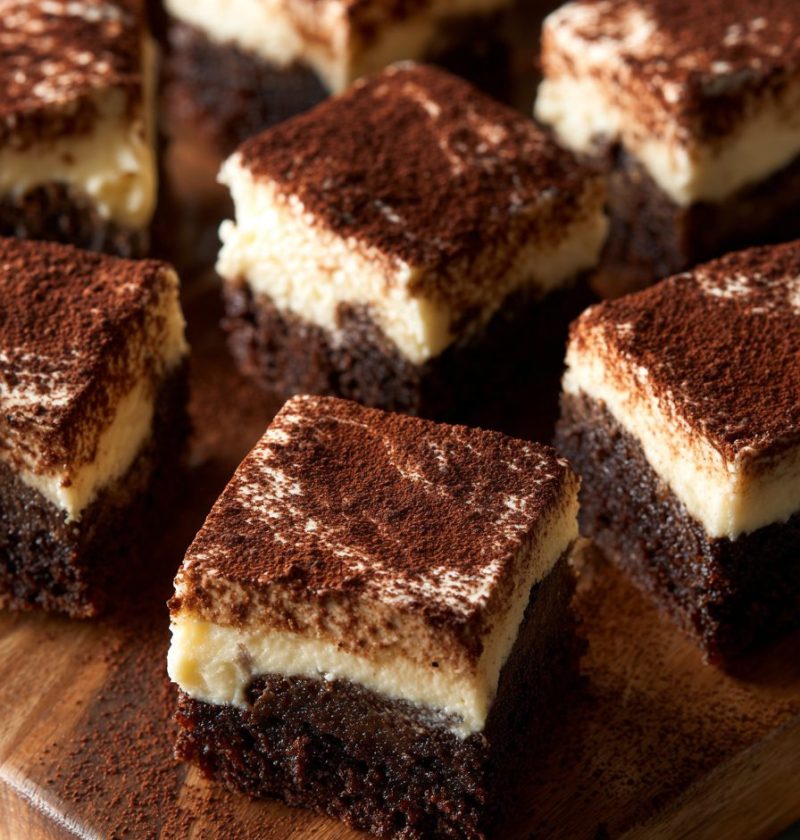
If you love classic tiramisu and rich, fudgy brownies, this Tiramisu Brownies Recipe is about to become your new “bring-it-to-every-party” dessert—layers of espresso brownies, creamy mascarpone, and a dusting of cocoa that tastes like your favorite Italian café in bar form.
What Makes This Tiramisu Brownies Recipe So Special?
These tiramisu brownies are a cozy mash-up of two beloved desserts: deep, rich chocolate brownies and the creamy, coffee-kissed flavors of traditional tiramisu. You get a fudgy espresso brownie base, a silky mascarpone cream layer on top, and a generous shower of cocoa powder to finish.
Instead of ladyfingers, we’re using cocoa powder brownies as the base—sturdy enough to slice into neat coffee dessert bars, but still soft and decadent. The brownie layer is infused with espresso, so every bite has that gentle coffee flavor that pairs so beautifully with mascarpone.
I like to make these Italian inspired brownies for holidays, birthdays, and honestly, random Tuesdays when the week needs a little pick-me-up. They look fancy enough for a dinner party, but they’re secretly simple: one pan, basic ingredients, and the oven does most of the work while you clean up and make a cup of coffee.
They’re not “health food,” of course, but there are a few small wins—no heavy frosting, no cloying sweetness, and mascarpone has a naturally light, creamy texture, so you don’t need heaps of sugar to make it taste good. It’s a dessert that feels indulgent without knocking you over.
If you’re a coffee lover or you always order tiramisu at Italian restaurants, this tiramisu Brownie Recipe will feel like bringing that dessert menu magic straight into your kitchen.
Why You’ll Love This Tiramisu Brownies Recipe
- Fudgy, not Cakey – These espresso brownies stay rich and moist, even after chilling.
- Coffee + chocolate heaven – Perfect for anyone who loves a good mocha or chocolate coffee dessert.
- Crowd-pleasing – Slice into brownie bars that travel well for potlucks, parties, or office treats.
- Make-ahead friendly – The mascarpone cream layer actually sets better after a few hours in the fridge.
- Simple ingredients – No fancy tools or hard-to-find items, just pantry basics plus mascarpone and espresso.
- Beautiful presentation – Cocoa-dusted, layered brownie dessert that looks bakery-quality with minimal effort.
- Flexible flavor – Easy to adjust the coffee strength, sweetness, or add a splash of liqueur for adults.
- Freezer-friendly – You can freeze individual coffee dessert bars for “emergency” treats later.
Ingredients
Before we start baking, let’s walk through what you’ll need for these mascarpone brownies and a few smart substitutions.

For the Fudgy Espresso Brownie Layer
- 1 cup (2 sticks / 226 g) unsalted butter, melted and slightly cooled
- 1 ½ cups (300 g) granulated sugar
- ½ cup (100 g) lightly packed brown sugar (adds moisture and depth)
- 3 large eggs, room temperature
- 2 tsp pure vanilla extract
- ¾ cup (75 g) unsweetened cocoa powder (natural or Dutch-process both work)
- 1 cup (125 g) all-purpose flour, spooned and leveled
- ½ tsp fine sea salt
- 2 tbsp instant espresso powder or instant coffee granules (for strong espresso brownies)
- ½ cup (90 g) semi-sweet chocolate chips or chopped chocolate (extra fudginess, optional but wonderful)
For the Espresso Soak
This is our little wink to classic tiramisu—an espresso-soaked dessert without the ladyfingers.
- ¼ cup (60 ml) hot brewed espresso or very strong coffee
- 1–2 tbsp coffee liqueur, such as Kahlúa or Tia Maria (optional; skip or use extra coffee for a non-alcoholic version)
- 1–2 tsp granulated sugar, to taste (just to mellow any bitterness)
For the Mascarpone Cream Layer
- 8 oz (227 g) mascarpone cheese, cold but soft enough to mix (BelGioioso is widely available and works well)
- 4 oz (115 g) cream cheese, softened (adds stability so the layer slices cleanly)
- ¾ cup (90 g) powdered sugar, sifted
- 1 tsp pure vanilla extract
- ½ cup (120 ml) heavy whipping cream, cold
For the Topping
- 2–3 tbsp unsweetened cocoa powder, for dusting
- Optional: dark chocolate curls or finely grated chocolate for extra drama
Ingredient Tips
- Mascarpone: Keep it just slightly cold; if it gets too warm, it can turn grainy.
- Espresso powder: Look for instant espresso in the baking aisle (brands like Medaglia d’Oro work nicely). Regular instant coffee is fine, but espresso gives more punch.
- Cocoa powder: Higher-quality cocoa means darker, richer brownies. Hershey’s Special Dark, Ghirardelli, or Valrhona all make excellent cocoa powder brownies.
- Cream cheese: Full-fat cream cheese works best—reduced-fat versions can get watery.
Step-by-Step Directions
Take a breath, grab your mixing bowls, and let’s make these creamy tiramisu topping brownies.
1. Prepare Your Pan and Oven
- Preheat your oven to 350°F (175°C).
- Line a 9×13-inch baking pan with parchment paper, leaving some overhang on the long sides so you can lift the brownies out later. Lightly grease the parchment and exposed sides.
Tip: The parchment “sling” makes it so much easier to get neat brownie bars.
2. Make the Espresso Brownie Batter
- In a large mixing bowl, whisk together the melted butter, granulated sugar, and brown sugar until glossy and smooth, about 1 minute.
- Add the eggs, one at a time, whisking well after each addition. Stir in the vanilla extract. The mixture should look thick and shiny.
- In a separate bowl, whisk the cocoa powder, flour, salt, and espresso powder until no streaks remain.
- Gently fold the dry ingredients into the wet ingredients using a spatula. Stop when everything is just combined—overmixing can make brownies tough.
- Fold in the chocolate chips, if using, for rich chocolate brownies with those gooey pockets of melted chocolate.
The batter will be thick, almost like frosting. That’s what you want for fudgy tiramisu brownies.
3. Bake the Brownie Layer
- Spread the brownie batter evenly into the prepared pan, smoothing the top with an offset spatula or the back of a spoon.
- Bake for 22–28 minutes, depending on your oven. Start checking at 22 minutes. A toothpick inserted in the center should come out with a few moist crumbs, not wet batter.
Tip: If the edges look set and the center is just barely firm, they’re ready. Slight underbaking keeps that signature fudgy texture.
- Set the pan on a cooling rack and let the brownies cool to room temperature in the pan. This is important—if the brownies are warm, the mascarpone cream layer can melt or slide.
4. Mix the Espresso Soak
While the brownies cool, we add that tiramisu vibe.
- In a small bowl, stir together the hot brewed espresso (or strong coffee), coffee liqueur, and sugar. Let it cool to room temperature.
You should taste it here—if it’s too bitter, add a tiny bit more sugar. You want a bold, pleasant coffee flavor.
5. Brush the Brownies With Espresso
- Once the brownies are cool, use a fork or skewer to gently poke small holes all over the surface (don’t go too deep; just enough to help the coffee seep in).
- Using a pastry brush or spoon, evenly drizzle and brush the espresso mixture over the top of the brownie layer.
You’re not soaking them like sponge Cake—just adding enough to perfume the brownies with coffee and give that espresso-soaked dessert flavor.
6. Make the Mascarpone Cream Layer
- In a medium bowl, beat the mascarpone and cream cheese together with a hand mixer on medium speed until smooth and creamy, about 1–2 minutes.
- Add the powdered sugar and vanilla extract and beat again until fully combined and silky.
- In a separate chilled bowl, whip the heavy cream with a clean whisk or mixer until it reaches soft-to-medium peaks.
Tip: Don’t beat the mascarpone for too long or it can curdle. If it starts to look grainy, stop and gently fold in the whipped cream.
- Gently fold the whipped cream into the mascarpone mixture, using a spatula, until no streaks remain. The mascarpone cream layer should be smooth, fluffy, and spreadable.
7. Assemble the Tiramisu Brownies
- Spread the mascarpone cream evenly over the cooled, espresso-brushed brownie layer. Use an offset spatula to smooth the top.
- Cover the pan lightly with plastic wrap and refrigerate for at least 3–4 hours, or overnight if you can. This helps the creamy tiramisu topping firm up and lets the flavors mingle.
8. Finish With Cocoa and Slice
- Just before serving, sift unsweetened cocoa powder over the top in an even layer. Be generous—it’s part of that signature tiramisu look.
- Use the parchment sling to lift the brownies from the pan onto a cutting board.
- With a sharp knife, cut into 24 smaller bars or 16 larger squares, wiping the knife clean between cuts for tidy layers.
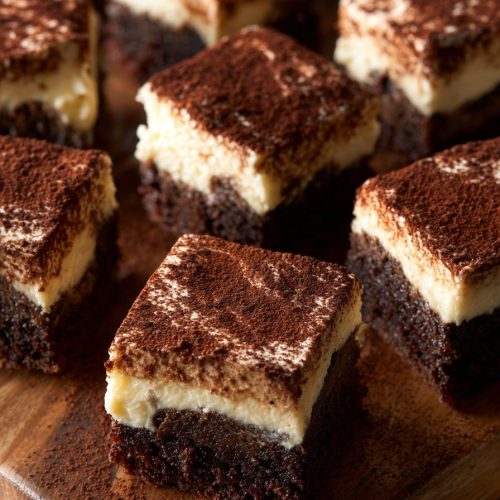
And there you go: fudgy tiramisu brownies with a thick mascarpone cream layer and a cocoa-dusted top that looks like it came from a café display case.
Servings & Timing
- Yield: About 16–24 tiramisu brownies, depending on how large you slice
- Prep Time: 25–30 minutes
- Bake Time: 22–28 minutes
- Chill Time: 3–4 hours (or overnight)
- Total Time: About 4–5 hours, most of it hands-off while the dessert chills
If you’re serving these coffee dessert bars for a party, I recommend baking the brownies in the morning and adding the mascarpone layer so they’re ready by evening—or making everything the night before.
Easy Variations on Tiramisu Brownies
You know what? Once you’ve made this once, it’s very easy to play around with flavors.
- Tiramisu Brownies Without Alcohol: Skip the coffee liqueur and simply use extra espresso or strong coffee for a family-friendly version.
- Extra Mocha Kick: Add ½ cup mini chocolate chips into the mascarpone cream and bump the espresso powder in the brownies to 3 tbsp for bolder espresso brownies.
- Tiramisu Brownies with Rum: Swap the coffee liqueur for dark rum or Marsala wine for a more classic tiramisu flavor profile.
- Gluten-Free Brownie Base: Use a 1:1 gluten-free all-purpose baking blend in place of regular flour—look for one with xanthan gum for better structure.
- Smaller Batch: Halve the recipe and bake in an 8×8-inch pan if you’re baking for a smaller household (or you don’t trust yourself with a full pan in the fridge—ask me how I know).
- Cinnamon Espresso Twist: Add ½ tsp ground cinnamon to the brownie batter for a warm, fall-inspired chocolate coffee dessert.
Storage & Reheating (Well, Chilling) Tips
These tiramisu brownies are best served chilled or just slightly cool, much like classic tiramisu.
Refrigerator:
- Store sliced brownies in an airtight container, with parchment paper between layers, for 3–4 days.
- The mascarpone cream layer stays stable but soft, and the coffee flavor deepens over time.
Freezer:
- Freeze individual brownie bars on a parchment-lined tray until solid, then transfer to a zip-top freezer bag or container.
- They’ll keep well for about 2 months.
- To serve, thaw in the fridge overnight or let sit at room temperature for 20–30 minutes until just tender and cool.
Make-Ahead Advice:
- For the best texture, assemble the full tiramisu brownie recipe the day before serving.
- If you’re really pressed for time, you can bake the brownie layer up to 2 days ahead, keep it well wrapped at room temperature, then add the espresso soak and mascarpone topping the night before.
No reheating needed—these mascarpone brownies are meant to be enjoyed chilled, like a layered brownie dessert meets tiramisu cheesecake.
Notes from My Kitchen (a 50-Year-Old Brownie Lover’s Perspective)
I’ve been baking brownies since boxed mixes came with those little canned frosting tubs—I thought I was very fancy back then. Over the years, though, I’ve learned a few things that really help when you’re making rich chocolate brownies like this.
- Don’t skimp on the espresso powder. It doesn’t make everything taste “too coffee-ish.” Instead, it deepens the chocolate flavor and gives that subtle tiramisu edge.
- Brownies keep baking after you pull them out. If they’re fully firm when you test them, they’ll be overbaked once they cool. A few moist crumbs on the toothpick are your friend.
- Chilling is non-negotiable. I know it’s tempting to slice into them early, but the mascarpone cream layer needs time to set. Overnight really is best.
- Adjust the sweetness. If you prefer a less sweet dessert, you can reduce the powdered sugar in the mascarpone layer to about ½ cup. The cocoa powder on top will balance things out.
- Use real vanilla. This is one place where pure vanilla makes a big difference, especially in a creamy tiramisu topping where you’ll notice the flavor.
I also like to serve these with a little espresso shot or a small coffee on the side. There’s something very “European café” about that, and it makes a simple dessert feel like a treat-yourself moment.
Frequently Asked Questions About Tiramisu Brownies
1. Can I make this Tiramisu Brownies Recipe without mascarpone?
Yes. You can replace mascarpone with additional cream cheese, but the flavor will be more like cheesecake brownies. For a closer taste, use ¾ cream cheese and ¼ sour cream to mimic mascarpone’s mild tang.
2. Do I have to use espresso powder, or can I use regular coffee?
You can use strong brewed coffee in the soak and instant coffee in the batter, but espresso powder gives more concentrated flavor without extra liquid.
3. Can I reduce the sugar in the brownie layer?
You can reduce the sugar by about ¼ cup without affecting texture too much, but remember that sugar contributes to fudginess. Cutting too much can make the brownies dry and cakey.
4. My mascarpone layer turned grainy—what happened?
Mascarpone can split if it’s warmed too much or beaten for too long. Next time, keep it slightly cold and stop mixing as soon as it’s smooth, then fold in the whipped cream gently.
5. How strong is the coffee flavor in these espresso brownies?
It’s noticeable but not overwhelming. Coffee lovers will taste it right away, but most people will just notice that the chocolate flavor is deeper and more complex.
6. Can kids eat these tiramisu brownies if I use coffee liqueur?
If you’re serving children, skip the alcohol and use all coffee or espresso. Even though some alcohol evaporates, in no-bake or lightly baked parts, it can still linger.
7. Can I make this recipe in a smaller pan?
Yes, you can bake in a 9×9-inch pan for thicker brownies; just extend the baking time by 3–5 minutes and keep an eye on the center.
8. How do I get clean, sharp layers when slicing?
Chill the brownies thoroughly, then use a long, sharp knife and wipe it clean between cuts. You can even warm the knife briefly under hot water and dry it before slicing.
Conclusion: A Coffee Shop Dessert in Brownie Form
This Tiramisu Brownies Recipe brings together everything I love: fudgy espresso brownies, a creamy mascarpone layer, and that cloud of cocoa on top that whispers “one more piece.” It looks elegant, slices beautifully, and tastes like your favorite Italian dessert and your favorite brownie decided to share a plate.
If you try these tiramisu brownies, let me know how they turned out—leave a comment, share a photo, or tell me if you added your own twist (extra espresso? a splash of rum?). And if you’re hooked on coffee-flavored treats now, you might enjoy experimenting next with mocha cupcakes or a simple espresso chocolate chip loaf. Happy baking, and save yourself a corner piece!
Tiramisu Brownies
Ingredients
- 1 cup unsalted butter melted and slightly cooled (2 sticks / 226 g)
- 1 1/2 cups granulated sugar (300 g)
- 1/2 cup light brown sugar lightly packed (100 g)
- 3 large eggs room temperature
- 2 teaspoons pure vanilla extract
- 3/4 cup unsweetened cocoa powder natural or Dutch-process (75 g)
- 1 cup all-purpose flour spooned and leveled (125 g)
- 1/2 teaspoon fine sea salt
- 2 tablespoons instant espresso powder or instant coffee granules
- 1/2 cup semi-sweet chocolate chips or chopped chocolate about 90 g, optional
- 1/4 cup hot brewed espresso or very strong coffee for espresso soak (60 ml)
- 1–2 tablespoons coffee liqueur such as Kahlúa or Tia Maria, optional
- 1–2 teaspoons granulated sugar for espresso soak, to taste
- 8 oz mascarpone cheese cold but soft enough to mix (227 g)
- 4 oz cream cheese softened (115 g)
- 3/4 cup powdered sugar sifted (90 g)
- 1 teaspoon pure vanilla extract for mascarpone layer
- 1/2 cup heavy whipping cream cold (120 ml)
- 2–3 tablespoons unsweetened cocoa powder for dusting
- dark chocolate curls or finely grated chocolate optional, for topping
Instructions
- Preheat your oven to 350°F (175°C). Line a 9×13-inch baking pan with parchment paper, leaving some overhang on the long sides to form a sling. Lightly grease the parchment and exposed sides of the pan.
- In a large mixing bowl, whisk together the melted butter, granulated sugar, and brown sugar until glossy and smooth, about 1 minute. Add the eggs one at a time, whisking well after each addition, then whisk in the vanilla extract until the mixture is thick and shiny.1 cup unsalted butter, 1 1/2 cups granulated sugar, 1/2 cup light brown sugar, 3 large eggs, 2 teaspoons pure vanilla extract
- In a separate bowl, whisk together the cocoa powder, flour, salt, and instant espresso powder until well combined. Gently fold the dry mixture into the wet ingredients with a spatula just until combined. Fold in the chocolate chips, if using. The batter will be thick.3/4 cup unsweetened cocoa powder, 1 cup all-purpose flour, 1/2 teaspoon fine sea salt, 2 tablespoons instant espresso powder, 1/2 cup semi-sweet chocolate chips or chopped chocolate
- Spread the brownie batter evenly into the prepared pan and smooth the top. Bake for 22–28 minutes, or until the edges are set and a toothpick inserted in the center comes out with a few moist crumbs but no wet batter. Place the pan on a cooling rack and let the brownies cool completely to room temperature in the pan.
- While the brownies cool, stir together the hot brewed espresso or strong coffee, coffee liqueur (if using), and sugar in a small bowl until the sugar dissolves. Let the mixture cool to room temperature, then taste and adjust sugar as needed for a bold but pleasant coffee flavor.1/4 cup hot brewed espresso or very strong coffee, 1–2 tablespoons coffee liqueur, 1–2 teaspoons granulated sugar
- Once the brownie layer is fully cool, use a fork or skewer to gently poke small holes all over the surface, without piercing all the way through. Using a pastry brush or spoon, evenly drizzle and brush the cooled espresso mixture over the brownies so it soaks in lightly but does not saturate them.
- In a medium bowl, beat the mascarpone cheese and cream cheese together with a hand mixer on medium speed until smooth and creamy, 1–2 minutes. Do not overbeat.8 oz mascarpone cheese, 4 oz cream cheese
- Add the powdered sugar and vanilla extract to the mascarpone mixture and beat again until fully combined and silky.3/4 cup powdered sugar, 1 teaspoon pure vanilla extract
- In a separate chilled bowl, whip the cold heavy cream to soft–medium peaks. Gently fold the whipped cream into the mascarpone mixture with a spatula until no streaks remain and the cream is smooth, fluffy, and spreadable.1/2 cup heavy whipping cream
- Spread the mascarpone cream evenly over the cooled, espresso-brushed brownie layer. Use an offset spatula to smooth the top. Cover the pan lightly with plastic wrap and refrigerate for at least 3–4 hours, or overnight, until the mascarpone layer is set and chilled.
- Just before serving, sift unsweetened cocoa powder generously over the top. Add dark chocolate curls or finely grated chocolate if desired. Use the parchment sling to lift the brownies from the pan onto a cutting board, then cut into 16 larger squares or up to 24 smaller bars, wiping the knife clean between cuts for sharp layers.2–3 tablespoons unsweetened cocoa powder, dark chocolate curls or finely grated chocolate