Would you like to save this?
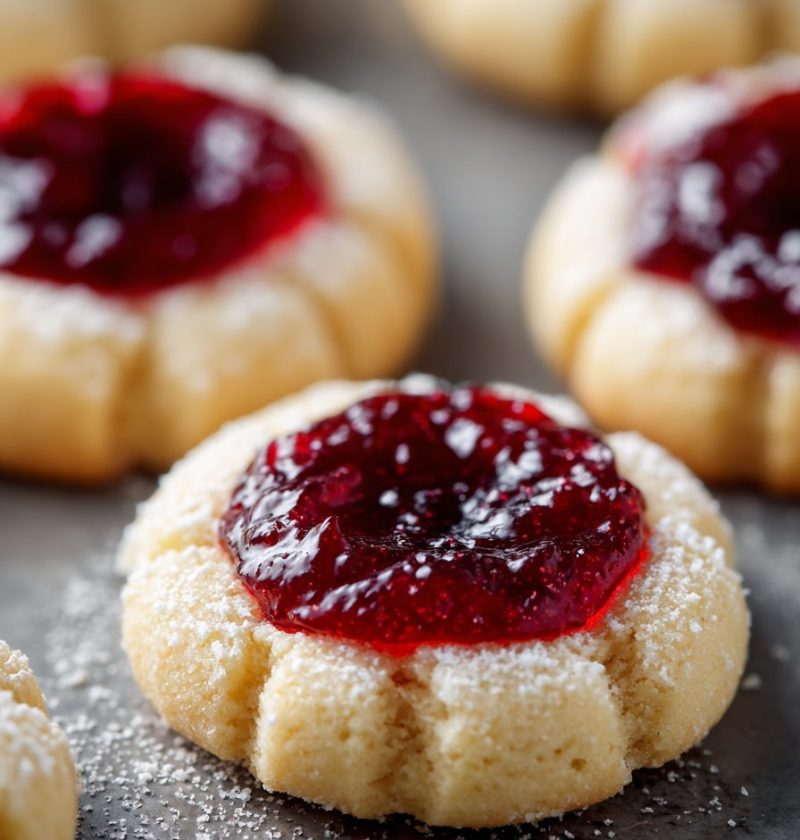
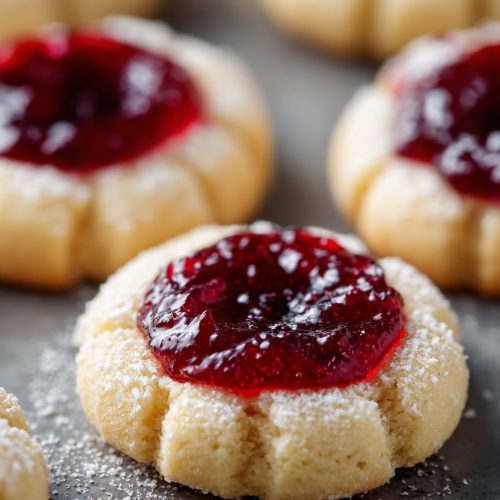
Thumbprint Cookies with Jam Recipe
If you’re craving something buttery, nostalgic, and just plain cozy, this Thumbprint Cookies with Jam Recipe is going to be your new go‑to for holidays, bake sales, and “just because” afternoons.
What Makes These Thumbprint Cookies with Jam So Special?
Thumbprint cookies are classic little shortbread-style cookies with a soft center that’s filled with sweet jam. They’re the kind of jam thumbprint cookies you see on holiday platters, at cookie exchanges, and in those old church cookbooks many of us still have tucked in a drawer.
This particular Thumbprint Cookies with Jam Recipe gives you a tender, buttery base and a sparkling edge of sugar, with a jewel-like center of jam. Strawberry, raspberry, apricot—use whatever makes you happy. These homemade thumbprint cookies are simple enough for a weekday baking project, but pretty enough that people always think you spent way more time on them than you did.
I’ve been baking these cookies with jam since my kids were little. We’d line up different jars on the counter like paint colors and “decorate” our cookies together. Now, they’re grown, but these jam filled cookies still show up for Christmas, bridal showers, and the occasional Sunday when it’s raining and I just feel like baking. You know those recipes that feel like a hug? This is one of them.
And if you landed here after searching “thumbprint Cookies Recipe” or “easy thumbprint cookies,” you’re exactly where you need to be—this version is simple, reliable, and very forgiving.

Why You’ll Love This Thumbprint Cookies with Jam Recipe
- Buttery and tender: These buttery thumbprint cookies practically melt in your mouth.
- Perfect for holidays: They’re classic holiday thumbprint cookies and look beautiful on any dessert tray.
- Customizable flavors: Use your favorite jam—raspberry, strawberry, apricot, blackberry, or even Lemon curd.
- Simple pantry ingredients: No fancy stuff; just butter, sugar, flour, and jam.
- Kid-friendly baking project: Rolling the dough balls and making the “thumbprint” is big fun for little helpers.
- Great for gifting: They hold their shape and color, so they’re ideal for cookie boxes and tins.
- Make-ahead friendly: The dough and baked cookies both freeze well, so you can spread out the work.
- Crowd-pleasing texture: Crisp edges with a soft, jammy center—people always reach for “just one more.”
Ingredients for Classic Thumbprint Cookies with Jam
This Thumbprint Cookies with Jam Recipe uses simple ingredients, but a few little choices make a big difference in flavor and texture.
For the cookies:
- 1 cup (2 sticks / 226 g) unsalted butter, softened to room temperature
(Use real butter, not margarine; European-style butter gives even richer flavor.) - 2/3 cup (135 g) granulated sugar, plus extra for rolling
(You can use superfine sugar if you have it; it coats the dough more evenly.) - 1 large egg yolk, room temperature
(The yolk adds richness and tenderness.) - 1 teaspoon pure vanilla extract
(You can add 1/4 teaspoon almond extract for a bakery-style twist.) - 1/4 teaspoon fine sea salt
(If you only have table salt, use a scant 1/4 teaspoon.) - 2 cups (240 g) all-purpose flour, spooned and leveled
(Use a kitchen scale if you can—it keeps the dough from getting too dry.)
For the jam filling:
- 1/2 cup jam or preserves, any flavor you like
(Raspberry, strawberry, or apricot are classic jam thumbprint cookies flavors.) - 1–2 teaspoons water (optional, for thinning thick jam)
A quick note on jam: Seedless preserves give a smoother look, while jams with seeds or chunks give more texture and “homemade” charm. Both work beautifully for cookies with jam; just avoid jellies that are very loose, as they can run during baking.
How to Make Thumbprint Cookies with Jam (Step-by-Step)
-
Preheat the oven and prepare your pans.
Preheat your oven to 350°F (175°C). Line two baking sheets with parchment paper or silicone baking mats. This helps the jam filled cookies bake evenly and makes cleanup easy. -
Cream the butter and sugar.
In a large mixing bowl (or the bowl of a stand mixer fitted with the paddle), beat the softened butter and 2/3 cup granulated sugar on medium speed for 2–3 minutes, until light and fluffy. Scrape down the sides of the bowl once or twice; you want all the butter and sugar fully combined. -
Add egg yolk, vanilla, and salt.
Add the egg yolk, vanilla extract, and salt. Beat again on low–medium speed until the mixture looks creamy and uniform. If it looks slightly curdled at first, keep mixing—it will smooth out. -
Mix in the flour.
Add the flour in two additions, mixing on low speed just until the dough comes together. It may look a little crumbly at first, but it should start to form a soft dough that holds when you squeeze it. Avoid overmixing; once the flour disappears, stop. Overworking the dough can make your classic thumbprint cookies tough instead of tender. -
Chill the dough briefly (recommended).
Cover the bowl and chill the dough for 20–30 minutes. This step isn’t absolutely required, but it helps the easy thumbprint cookies hold their shape and keeps the jam from spreading too much. During busy holiday baking, I often mix this dough first, then chill it while I prep another recipe. -
Roll the dough into balls.
Pour a few tablespoons of granulated sugar into a small bowl. Using a small cookie scoop or a tablespoon, scoop dough and roll between your palms to make 1-inch balls (about 15 g each). Roll each ball lightly in the sugar, then place on the prepared baking sheets, spacing them about 2 inches apart. -
Create the “thumbprint.”
Using your thumb, the back of a small spoon, or the handle of a wooden spoon, gently press into the center of each dough ball to create a deep indent. Press slowly so the dough doesn’t crack too much around the edges. If it does crack, just nudge it back together with your fingers. You want a well in the center for the jam, but don’t push all the way through. -
Stir the jam.
In a small bowl, stir your jam with a spoon. If it’s very thick, add a teaspoon or two of water and stir until it’s smooth and spoonable. This helps the jam settle nicely into the cookie wells and bake up glossy, not clumpy. -
Fill the cookies with jam.
Using a small spoon or a piping bag, fill each indent with about 1/2 teaspoon of jam. Don’t overfill; the jam will bubble slightly as the jam thumbprint cookies bake. I like to mix flavors on one tray—some raspberry, some apricot, maybe one row of strawberry—so there’s a colorful mix after baking. -
Bake the thumbprint cookies.
Bake one sheet at a time for 12–14 minutes, or until the edges are just set and barely golden. The centers will still look soft, which is exactly what you want. If the indent puffs up a bit during baking, you can gently press it back with the back of a spoon while the cookies are still hot (be careful of the hot jam). -
Cool completely.
Let the cookies cool on the baking sheet for 5 minutes, then transfer them to a wire rack to cool completely. The jam will thicken and set as it cools, and the cookies will firm up but stay tender. -
Serve and enjoy.
Once cooled, arrange your buttery thumbprint cookies on a platter and watch them disappear. They’re wonderful with coffee or tea, and they look especially pretty tucked into holiday cookie tins.
Servings & Timing
- Yield: About 30–34 thumbprint cookies with jam
- Prep Time: 20 minutes (plus 20–30 minutes optional chilling)
- Bake Time: 12–14 minutes per batch
- Total Time: About 1 hour, including chilling and cooling
If you skip chilling the dough, you can have warm jam filled cookies on the table in under 45 minutes, though I still recommend a short chill if your kitchen is warm.
Easy Variations on Jam Thumbprint Cookies
Once you’ve made this classic version, it’s fun to play a little. Here are some favorite twists:
- Almond thumbprint cookies: Replace half the vanilla with almond extract and top raspberry jam with a few sliced almonds before baking.
- Lemon curd center: Use lemon curd instead of jam for bright, tangy thumbprint cookies that are perfect for spring or Easter.
- Nutty coating: Roll the dough balls in finely chopped pecans or walnuts instead of sugar for extra crunch and flavor.
- Chocolate thumbprints: Swap 2 tablespoons of the flour for cocoa powder and fill with raspberry or cherry jam.
- Glazed finish: After cooling, drizzle with a simple powdered sugar and milk glaze for a bakery-style finish.
- Spiced holiday thumbprint cookies: Add 1/2 teaspoon cinnamon and a tiny pinch of nutmeg to the dough for a warm winter twist.
How to Store, Freeze, and Make Ahead
One of the reasons I love this thumbprint cookies recipe for the holidays is how well it fits a busy schedule.
- Room temperature storage: Store cooled cookies with jam in an airtight container at room temperature for 3–4 days. Layer them with parchment paper so the jam centers don’t stick to other cookies.
- Refrigerator storage: For slightly longer storage, keep them in the fridge up to 1 week. Let them sit at room temperature for 15–20 minutes before serving so the butter softens again.
- Freezing baked cookies: Arrange cooled cookies in a single layer on a baking sheet and freeze until solid. Then transfer to a freezer bag or container, with parchment between layers. Freeze up to 2 months. Thaw at room temperature—no reheating needed.
- Freezing the dough: Shape the dough into balls, freeze on a tray, and then store in a freezer bag up to 2–3 months. When ready to bake, thaw slightly, roll in sugar, make the thumbprints, fill with jam, and bake. You may need to add 1–2 minutes of extra bake time.
- Make-ahead tip: During the busy holiday season, I often make the dough on a weeknight, refrigerate it overnight, then scoop and bake my jam thumbprint cookies the next day. The chilled dough is very easy to work with.
Notes from My Kitchen
- Butter temperature matters: The butter should be soft enough to press a finger into but not greasy or melty. If it’s too soft, the cookies may spread more and lose that pretty thumbprint shape.
- Measure flour carefully: Too much flour is the main reason homemade thumbprint cookies turn out dry or crumbly. If you don’t have a scale, stir the flour, spoon it into your measuring cup, and level it off with a knife.
- Don’t overfill the jam: It’s tempting to heap it in there—trust me, I’ve done it—but a modest amount gives a clean look and prevents bubbling over.
- Use parchment or silicone mats: Jam can get sticky on bare pans. Lining the sheet pans makes your life easier and helps the cookies bake evenly.
- Mixing jam flavors: For a pretty cookie tray, use at least two or three different jams. Raspberry and apricot are a classic combination, but blackberry and cherry are lovely too.
- Baking one sheet at a time: If your oven has hot spots (most do), bake one tray at a time on the center rack. If you bake two together, rotate the pans halfway through for more even results.
And a little data point for my fellow holiday planners: search trends for “thumbprint cookies” and “jam thumbprint cookies” start ramping up in November and peak in December. So if you’re seeing this around that time, you’re in good company—lots of us are preheating our ovens right along with you.
Thumbprint Cookies with Jam Recipe FAQs
1. Why did my thumbprint cookies crack so much around the edges?
A few small cracks are normal, but big ones usually mean the dough was too cold or too dry. Let the dough warm up for a few minutes if it’s very firm, and be gentle when you press the indent.
2. Can I use salted butter instead of unsalted?
Yes, you can; just reduce the added salt to a tiny pinch or leave it out. The flavor will be a bit more savory, but still delicious.
3. My jam ran all over the pan—what happened?
That usually means the jam was very loose or jelly-like. Next time, use a thicker jam or preserves, or stir in a spoonful of extra jam to thicken it up. Chilling the shaped cookies for 10 minutes before baking can also help.
4. Can I make these thumbprint cookies gluten-free?
Yes. Use a good-quality 1:1 gluten-free baking flour blend. The texture will be slightly different, but still lovely. Chill the dough well so it doesn’t spread too much.
5. Do I have to chill the dough?
Technically no, but I recommend at least 20 minutes of chilling. It keeps the cookies with jam from spreading and helps them keep that neat, round shape with a defined thumbprint.
6. How do I keep thumbprint cookies from getting soggy?
Make sure the cookies are baked through (but not browned) and cooled completely before storing. Keep them in an airtight container, and avoid storing them in a very humid spot.
7. Can I double this Thumbprint Cookies with Jam Recipe?
Absolutely. This recipe doubles nicely. Just be sure not to crowd your mixer; if you’re using a hand mixer or a smaller stand mixer, mix in two separate batches.
8. Are these cookies good for shipping?
Yes, these jam filled cookies ship fairly well, especially if the jam is thick. Pack them snugly in a tin or sturdy container, with parchment between layers, and avoid very hot weather.
Wrapping Up: A Sweet Little Bite of Comfort
These classic thumbprint cookies with jam are everything I love about home baking—simple ingredients, cozy flavor, and a presentation that looks far fancier than the effort it takes. Whether you’re filling your holiday tins, baking with kids on a lazy Saturday, or treating yourself to something sweet with your afternoon coffee, this Thumbprint Cookies with Jam Recipe is one you’ll come back to again and again.
If you make these, I’d love to hear which jams you used and how they turned out—leave a comment, share your tweaks, or tell me if they made it onto your holiday cookie platter. And if you’re in the mood for more classic treats, you might enjoy exploring my other cookie recipes next time you’re ready to turn on the oven.
Thumbprint Cookies with Jam
Ingredients
- 1 cup unsalted butter 2 sticks / 226 g, softened to room temperature
- 2/3 cup granulated sugar plus extra for rolling
- 1 large egg yolk room temperature
- 1 teaspoon pure vanilla extract
- 1/4 teaspoon fine sea salt
- 2 cups all-purpose flour 240 g, spooned and leveled
- 1/2 cup jam or preserves any flavor; raspberry, strawberry, or apricot are classic
- 1-2 teaspoons water optional, for thinning thick jam
Instructions
- Preheat the oven to 350°F (175°C). Line two baking sheets with parchment paper or silicone baking mats to help the cookies bake evenly and prevent the jam from sticking.
- In a large mixing bowl or stand mixer fitted with the paddle attachment, beat the softened butter and 2/3 cup granulated sugar on medium speed for 2–3 minutes, until light and fluffy. Scrape down the bowl as needed so everything is fully combined.1 cup unsalted butter, 2/3 cup granulated sugar
- Add the egg yolk, vanilla extract, and salt to the creamed mixture. Beat on low–medium speed until the mixture looks creamy and uniform.1 large egg yolk, 1 teaspoon pure vanilla extract, 1/4 teaspoon fine sea salt
- Add the flour in two additions, mixing on low speed just until the dough comes together. It may look slightly crumbly at first, but should form a soft dough that holds when you squeeze it. Do not overmix.2 cups all-purpose flour
- Cover the bowl and chill the dough in the refrigerator for 20–30 minutes. This helps the cookies hold their shape and keeps the jam from spreading too much while baking.
- Pour a few tablespoons of granulated sugar into a small bowl. Using a small cookie scoop or tablespoon, portion the dough and roll it between your palms into 1-inch balls (about 15 g each). Roll each ball lightly in sugar and place on the prepared baking sheets, spacing about 2 inches apart.2/3 cup granulated sugar
- Using your thumb, the back of a small spoon, or the handle of a wooden spoon, gently press into the center of each dough ball to create a deep indent without pressing all the way through. If the edges crack, gently press them back together.
- In a small bowl, stir the jam until smooth. If it is very thick, add 1–2 teaspoons of water and stir until the jam is loosened and spoonable.1/2 cup jam or preserves, 1-2 teaspoons water
- Using a small spoon or piping bag, fill each indent with about 1/2 teaspoon of jam. Do not overfill, as the jam will bubble slightly as the cookies bake.1/2 cup jam or preserves
- Bake one sheet at a time for 12–14 minutes, or until the edges are just set and barely golden while the centers remain soft. If any indent puffs up during baking, gently press it back down with the back of a spoon while the cookies are still hot (use caution; the jam will be very hot).
- Let the cookies cool on the baking sheet for 5 minutes, then transfer to a wire rack to cool completely. The jam will thicken as it cools and the cookies will firm up while staying tender. Serve at room temperature or pack into tins for gifting.