Would you like to save this?
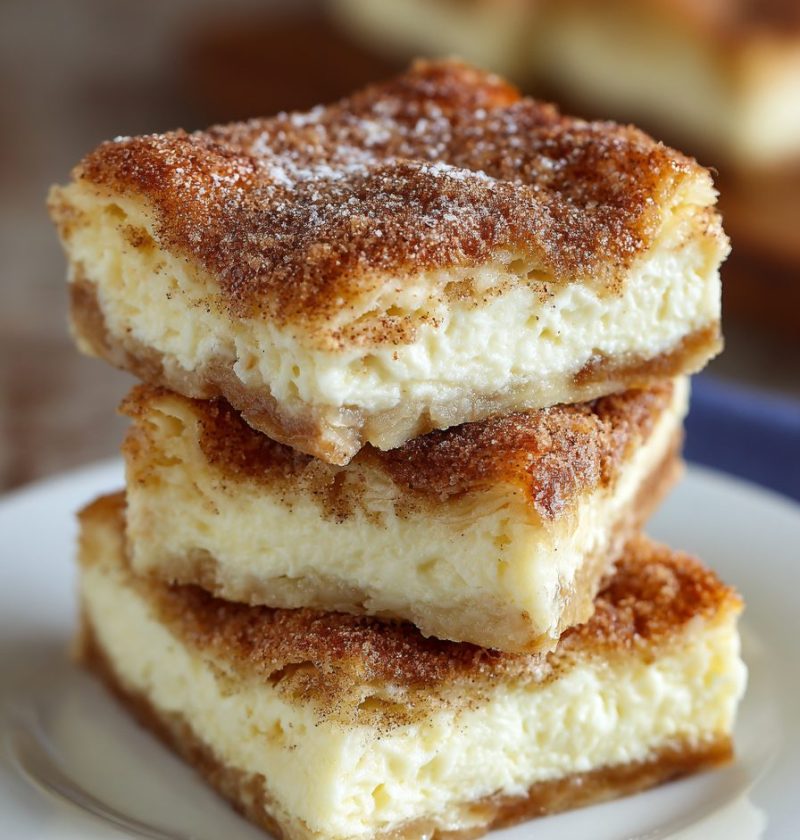
Sopapilla Cheesecake Bars Recipe
If you love warm cinnamon sugar and creamy cheesecake, this Sopapilla Cheesecake Bars Recipe is about to become your new go-to dessert for potlucks, parties, and “just because” nights at home.

Full Recipe Introduction
Let me explain what we’re doing here, because this is such a fun mash-up.
These sopapilla cheesecake bars take everything we love about a classic Mexican-inspired dessert—flaky pastry, cinnamon sugar, Buttery goodness—and layer it with a sweet cream cheese filling, baked together into easy cheesecake bars you can slice, share, and pack up for any gathering. Instead of making a traditional sopapilla from scratch, we lean on refrigerated crescent roll dough for a simple crescent roll crust, then add a rich cream cheese filling and a golden cinnamon sugar topping that bakes up into the most irresistible layered dessert bars.
I started making this sopapilla dessert years ago after a church potluck where a friend brought something similar. You know how there’s always that one dish everybody crowds around? That was it. I went home, tinkered with the recipe (as any 50-year-old home cook does), and tuned it to be just sweet enough, sturdy enough to hold in your hand, but still soft and creamy inside.
These baked cheesecake bars are lovely any time of year, but I especially love them:
- In the fall, when cinnamon and warm desserts feel extra cozy
- For Cinco de Mayo or Taco Tuesday dessert, as a fun Mexican-inspired dessert
- During the holidays, because they travel well and feed a crowd
They’re not health food, let’s be honest—but they are made with simple, familiar ingredients you probably recognize and can pronounce. No fancy baking gear, no water baths, no stress.
Why You’ll Love This Sopapilla Cheesecake Bars Recipe
You know what? Let’s talk about why this one deserves a spot in your recipe binder:
- Ridiculously easy – Crescent roll dough means you skip making pastry from scratch.
- Beginner-friendly baked cheesecake bars – No fussing with springform pans or water baths.
- Perfect for crowds – Makes a big 9×13 pan; ideal potluck dessert recipe or party dessert bars.
- Warm cinnamon sugar topping – That sweet cinnamon dessert vibe everyone loves.
- Make-ahead friendly – Tastes even better once it chills and sets.
- Flexible and forgiving – A little extra cinnamon? Slightly soft cream cheese? It still works.
- Customizable – Add honey, nuts, or even fruit for your own twist on sopapilla cheesecake.
- Travel-ready – Sturdy enough for lunch boxes, bake sales, or road trip treats.
Ingredients for Sopapilla Cheesecake Bars
Let’s walk through what you’ll need for this Sopapilla Cheesecake Bars Recipe. I’ll add a few notes and swaps as we go.
For the Crescent Roll Crust and Top Layer
- 2 cans (8 oz each) refrigerated crescent roll dough
- (You can use crescent sheet dough if available—easier to work with, fewer seams.)
- 2 tablespoons unsalted butter, melted (for brushing the bottom crust – optional but tasty)
For the Cream Cheese Filling
- 2 packages (8 oz each) cream cheese, softened to room temperature
- Full-fat gives the best texture; reduced-fat works but is slightly less creamy.
- 1 cup granulated sugar
- 1 large egg
- 2 teaspoons pure vanilla extract
- 1/8 teaspoon fine sea salt or table salt (just a pinch to balance the sweetness)
For the Cinnamon Sugar Topping
- 1/2 cup unsalted butter, melted
- 3/4 cup granulated sugar
- 1 1/2–2 teaspoons ground cinnamon (adjust to taste)
- 1–2 tablespoons honey, for drizzling after baking (optional, but very sopapilla-like)
A quick tip from years of baking:
- Cream cheese: Let it sit on the counter for 30–45 minutes before you start. Soft cream cheese blends more smoothly and avoids little lumps.
- Butter: Use real butter here, not margarine. The flavor really matters in a simple dessert like this.
- Cinnamon: If your cinnamon has been sitting in the cabinet since your last Thanksgiving, give it a sniff; it should smell strong and warm. If it smells faint, it’s time for a new jar.
Step-by-Step Directions for Sopapilla Cheesecake Bars
These directions are written for a standard 9×13-inch baking pan. If your pan is glass, you may want to lower the oven temperature by about 15–25 degrees to avoid overbrowning.
-
Preheat your oven and prep the pan
Preheat your oven to 350°F (175°C). Lightly grease a 9×13-inch baking dish with butter or nonstick spray. You can also line it with parchment paper, leaving overhang on the long sides for easy lifting later. -
Lay down the bottom crescent roll crust
Open one can of crescent roll dough. Unroll it gently and press it into the bottom of the dish, pinching the seams together so you have one even layer. If it tears, don’t stress—just patch it with your fingers.
If you’d like a richer flavor, brush the crust lightly with the 2 tablespoons of melted butter. It’s optional, but it gives a lovely, slightly crisp base. -
Beat the cream cheese filling
In a large mixing bowl, add the softened cream cheese and beat with a hand mixer on medium speed until smooth and creamy, about 1–2 minutes.
Add the sugar, egg, vanilla, and salt. Beat again until the mixture is completely smooth and no lumps remain, scraping down the sides of the bowl with a spatula. It should look thick, shiny, and pourable. -
Spread the cream cheese filling over the crust
Pour the cream cheese filling over the bottom crescent roll crust. Use a spatula or the back of a spoon to level it out, nudging it gently into the corners. Try not to dig into the crust; think of it like frosting a cake. -
Add the top crescent roll layer
Open the second can of crescent dough. This step can feel a little fussy, but it doesn’t have to look perfect.- If you’re using crescent sheet dough, just unroll and lay it carefully over the filling.
- If you’re using regular crescent triangles, unroll and arrange them across the top, pressing the seams together with your fingers as best you can.
A small gap or uneven seam here and there is fine—the topping will hide it.
-
Brush with melted butter
Pour the 1/2 cup melted butter over the top crescent roll layer and gently spread it around with a pastry brush or spoon to coat the entire surface. This is what helps the cinnamon sugar cling and gives you that golden, almost caramelized top. -
Mix and sprinkle the cinnamon sugar topping
In a small bowl, stir together the granulated sugar and cinnamon until evenly combined. Sprinkle this mixture evenly over the buttery top layer. Try to cover every bit of dough—any bare spots might bake up a little pale. -
Bake until golden and puffed
Place the pan in the preheated oven and bake for 28–35 minutes, or until:- The top is golden brown
- The filling looks set but still slightly jiggly in the center
- The edges are bubbly and smell like heaven (that’s the technical term)
Every oven is a little different, so start checking around the 25-minute mark.
-
Cool, chill, and slice
Remove the pan from the oven and place it on a cooling rack. Let the sopapilla cheesecake bars cool at room temperature for at least 30–45 minutes.
For the cleanest slices and best texture, cover the pan and chill it in the refrigerator for at least 2–3 hours, or overnight. Once chilled, cut into squares or bars with a sharp knife, wiping the blade between cuts. -
Finish with honey (optional but lovely)
Right before serving, drizzle a thin stream of honey across the bars, just like classic sopapillas. Not too much—just enough for a glossy finish and that signature flavor.
Servings & Timing
Yield:
- Makes about 16 large bars or up to 24 smaller bars, depending on how you slice them.
Timing:
- Prep Time: 15–20 minutes
- Bake Time: 28–35 minutes
- Chill Time: 2–3 hours (for best texture)
- Total Time: About 3–4 hours, mostly hands-off
If you’re making this for a party or potluck dessert, I recommend baking it the night before, chilling overnight, and slicing the next day. It sets up beautifully and tastes even better.
Easy Variations and Fun Twists
Once you’ve made this Sopapilla Cheesecake Bars Recipe once or twice, you may start playing with flavors—like I did. Here are some ideas to get you started:
- Honey-lovers’ Sopapilla Cheesecake – Stir 2–3 tablespoons of honey into the cream cheese filling for a deeper honey note.
- Nutty cinnamon crunch – Sprinkle 1/2 cup finely chopped pecans or walnuts over the cinnamon sugar topping before baking.
- Berry swirl cheesecake bars – Dollop 1/3–1/2 cup seedless raspberry or strawberry jam over the cream cheese layer and swirl lightly with a knife.
- Chocolate-cinnamon sopapilla bars – Add 1/2 cup mini chocolate chips to the filling, or sprinkle them between the filling and top crust.
- Holiday orange twist – Add 1 teaspoon orange zest to the cream cheese filling and a pinch of nutmeg to the cinnamon sugar for a cozy winter flavor.
- Lighter version – Use reduced-fat cream cheese and reduce the sugar in the filling to 3/4 cup; it’s still sweet, just a bit gentler.
Storage, Freezing & Reheating
One great thing about these cheesecake bars is how well they store. They’re the kind of Mexican-inspired dessert you can make ahead for busy weeks or upcoming gatherings.
Refrigerator:
- Store leftover sopapilla cheesecake bars covered in the pan or in an airtight container.
- They’ll keep well for 4–5 days in the fridge. The cinnamon sugar top may soften slightly after a couple of days, but the flavor stays wonderful.
Freezer:
- For longer storage, freeze the bars after they’ve cooled and chilled.
- Slice into bars, place them on a parchment-lined baking sheet, and freeze until firm. Then transfer to a freezer bag or container with parchment between layers.
- Freeze for up to 2 months.
Thawing & Serving:
- Thaw frozen bars in the refrigerator overnight.
- You can serve them chilled straight from the fridge, or let them sit at room temperature for 15–20 minutes for a softer texture.
- I don’t usually reheat these in the oven, but if you love a warm dessert, you can gently warm a bar in the Microwave for 10–15 seconds. Just note the top may lose a bit of its texture.
Make-Ahead Tip:
Bake the bars a day in advance for parties or holidays. Chill overnight, slice the next day, and drizzle with honey right before serving. They’re even better on day two.
Notes from My Kitchen
A few little lessons and tips I’ve picked up after making sopapilla dessert bars more times than I can count:
- Room-temperature ingredients matter. Soft cream cheese, room-temperature egg, and slightly relaxed crescent dough make everything easier to spread and layer without tearing.
- Don’t overbake. The bars continue to set as they cool. It’s okay if the center jiggles slightly when you pull them from the oven—like a traditional cheesecake.
- Let them chill fully. I know it’s tempting to cut into them while they’re warm, but if you can wait for that full chill time, the bars will slice neatly and the layers will hold together.
- Adjust the sweetness. If you’re sensitive to sweetness, you can reduce the sugar in the filling to 3/4 cup and keep the topping as is. The cinnamon sugar is where most of the “sopapilla” character comes from, so I leave that alone.
- Honey timing. If you drizzle honey on while the bars are hot, it tends to soak in and disappear. Drizzle shortly before serving so you get that glossy look and clear flavor.
- Great for kids in the kitchen. This is a fun recipe to make with kids or grandkids—let them sprinkle the cinnamon sugar topping or help pinch the crescent seams together. It doesn’t need to be perfect to be delicious.
Frequently Asked Questions
1. What are sopapilla cheesecake bars, exactly?
They’re layered dessert bars with a crescent roll crust, a sweet cream cheese filling like cheesecake, and a buttery cinnamon sugar topping inspired by traditional sopapillas.
2. Can I make this Sopapilla Cheesecake Bars Recipe without crescent roll dough?
You can, but it’s more work. You’d need to use a homemade pastry dough or puff pastry. Crescent roll dough gives a reliable, soft, slightly flaky crust that’s hard to beat for ease.
3. Do I have to use full-fat cream cheese?
Full-fat cream cheese gives the richest, creamiest texture. You can use Neufchâtel or reduced-fat cream cheese, but the filling may be slightly softer and less rich.
4. My bars turned out runny—what went wrong?
Usually that means they were underbaked or you didn’t let them chill long enough. Make sure the edges are set and golden, then chill for at least 2–3 hours before slicing.
5. Can I make these sopapilla cheesecake bars ahead for a party?
Absolutely. In fact, they’re perfect make-ahead party dessert bars. Bake them the day before, chill overnight, slice the next day, and drizzle with honey before serving.
6. How can I cut neat, clean bars?
Make sure the bars are fully chilled. Use a sharp knife, and wipe the blade clean between cuts. You can also run the knife under hot water, dry it, then slice for even smoother edges.
7. Can I reduce the sugar or make these less sweet?
Yes. Reduce the sugar in the cream cheese filling to 3/4 cup and keep the topping as written. The flavor will still be delicious, just a bit less sugary.
8. Are these sopapilla dessert bars served warm or cold?
Traditionally, I serve them chilled or at cool room temperature, like cheesecake bars. But if you enjoy a slightly warm dessert, you can let them sit out for 20–30 minutes before serving, or warm briefly in the microwave.
Conclusion
These sopapilla cheesecake bars bring together the best of two worlds: the cozy, cinnamon sugar charm of a classic sopapilla and the creamy comfort of easy cheesecake bars. They’re simple enough for a busy weeknight and special enough for holidays, potlucks, or birthday dessert tables.
If you try this Sopapilla Cheesecake Bars Recipe, I’d love to hear how it turned out for you—tell me if you added your own twist, too. And if you’re in the mood for more sweet cinnamon desserts or layered dessert bars, take a look around my other recipes and keep baking something you’re excited to share.
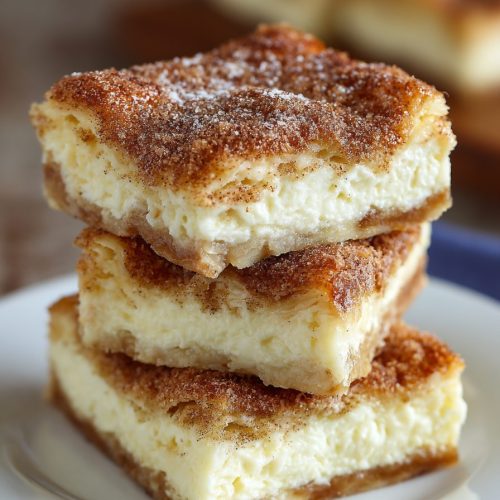
Sopapilla Cheesecake Bars
Ingredients
- 2 cans (8 oz each) refrigerated crescent roll dough crescent sheet dough if available
- 2 tablespoons unsalted butter melted, for brushing bottom crust (optional)
- 16 oz cream cheese 2 packages (8 oz each), softened to room temperature; full-fat preferred
- 1 cup granulated sugar
- 1 large egg room temperature if possible
- 2 teaspoons pure vanilla extract
- 1/8 teaspoon fine sea salt or table salt just a pinch, to balance sweetness
- 1/2 cup unsalted butter melted, for topping
- 3/4 cup granulated sugar for cinnamon sugar topping
- 1 1/2–2 teaspoons ground cinnamon adjust to taste
- 1–2 tablespoons honey for drizzling after baking (optional, for classic sopapilla flavor)
Instructions
- Preheat your oven to 350°F (175°C). Lightly grease a 9×13-inch baking dish with butter or nonstick spray. Optionally line with parchment paper, leaving overhang on the long sides for easy lifting after baking.
- Open one can of crescent roll dough. Unroll and press it evenly into the bottom of the prepared baking dish, pinching the seams together to form one solid layer. If it tears, simply patch with your fingers. Brush lightly with the 2 tablespoons of melted butter if using.
- In a large mixing bowl, beat the softened cream cheese with a hand mixer on medium speed until smooth and creamy, about 1–2 minutes. Add the 1 cup granulated sugar, egg, vanilla, and salt. Beat again until completely smooth and no lumps remain, scraping down the sides of the bowl as needed.
- Pour the cream cheese mixture over the bottom crescent roll crust. Use a spatula or the back of a spoon to spread it into an even layer, gently nudging it into the corners without disturbing the crust underneath.
- Open the second can of crescent dough. If using crescent sheet dough, unroll and carefully place it over the cream cheese layer in one piece. If using regular crescent triangles, arrange them across the top and pinch the seams together as best you can. Small gaps are fine and will be covered by the topping.
- Pour the 1/2 cup melted butter evenly over the top crescent roll layer. Use a pastry brush or the back of a spoon to spread it so the entire surface is coated.
- In a small bowl, stir together the 3/4 cup granulated sugar and 1 1/2–2 teaspoons ground cinnamon until well combined. Sprinkle this mixture evenly over the buttery top layer, covering as much of the dough as possible.
- Bake in the preheated oven for 28–35 minutes, or until the top is golden brown, the edges are bubbly, and the center looks set but still slightly jiggly, similar to cheesecake. Start checking around 25 minutes, as ovens vary.
- Transfer the pan to a cooling rack and let the bars cool at room temperature for 30–45 minutes. Cover and refrigerate for at least 2–3 hours, or overnight, until fully chilled and set for the cleanest slices.
- Once chilled, lift the bars from the pan if using parchment, and cut into squares or bars with a sharp knife, wiping the blade between cuts. Right before serving, drizzle lightly with honey if desired.