Would you like to save this?
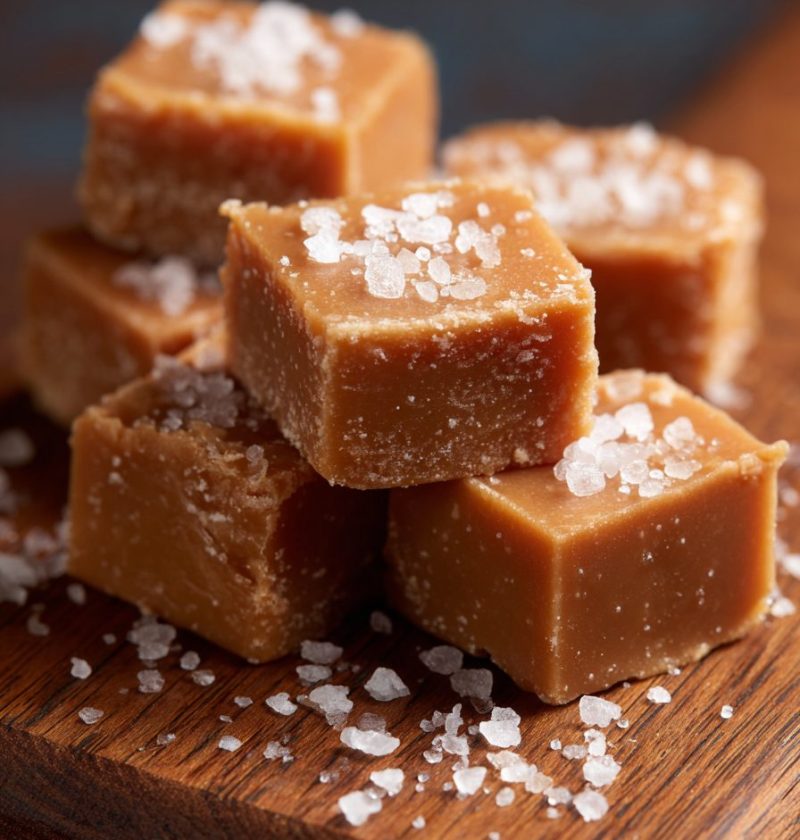
Salted Caramel Fudge Recipe
If you love a sweet and salty dessert, this Salted Caramel Fudge Recipe is about to become your new “make it for everything” treat—no oven, minimal fuss, and pure creamy caramel bliss in every bite.
Full Recipe Introduction
This Salted Caramel Fudge Recipe is a rich, creamy caramel fudge loaded with buttery sweetness and just enough flaky sea salt to keep it from ever feeling too sugary. It’s a no bake fudge that uses sweetened condensed milk and the microwave, so you can pull it together even on a busy weeknight or right before guests arrive.
I started making salted caramel fudge for my holiday cookie trays a few years ago after my kids gently told me, “Mom, we love cookies… but could you add something fudgy too?” You know what? They were right. Cookies vanish first, but the caramel fudge squares are the ones people talk about and ask for later. That soft, creamy texture with the light crunch of sea salt on top is just unforgettable.
This easy Fudge Recipe is perfect for:
- Christmas dessert platters
- Teacher gifts
- Baby showers and bridal showers
- Summer “no-oven-please” dessert nights
- Or, let’s be honest, a quiet Tuesday evening on the couch with a Hallmark movie
Compared to old-fashioned stovetop fudge that needs a candy thermometer and a little prayer, this microwave Fudge Recipe is fast, dependable, and very forgiving. It’s a condensed milk fudge base, which means it sets up beautifully, stays creamy, and doesn’t get grainy if you follow a few small tips I’ll share.
And while this isn’t exactly “health food,” you do control the ingredients—no weird aftertaste, no strange oils. Just good butter, real chocolate, real caramel, and a sprinkle of salt to bring everything to life.

Why You’ll Love This Recipe
- No oven needed – This is a true no bake fudge; your microwave does the heavy lifting.
- Ridiculously easy – No candy thermometer, no soft-ball stage, no stress.
- Ready fast – About 10 minutes of hands-on time, plus chilling.
- Perfect texture – Soft, creamy caramel fudge that slices cleanly and melts in your mouth.
- Great for gifting – These caramel fudge squares hold their shape and travel well in tins or boxes.
- Crowd-pleasing flavor – That sweet-salty combo of salted caramel fudge makes adults and kids both happy.
- Foolproof ingredients – Sweetened condensed milk keeps the mixture smooth and prevents crystallizing.
- Flexible flavor base – You can easily add nuts, chocolate chips, or even espresso for your own twist.
- Small-batch friendly – Easy to halve or double depending on your crowd.
Let me explain how to pick the right ingredients next, because a few small choices really do matter here.
Ingredients for Creamy Salted Caramel Fudge
This homemade fudge recipe uses simple pantry staples. Use the best quality you reasonably can—it really shines in a recipe like this.
For the fudge:
- 2 cups (340 g) white chocolate chips
- (Use a good melting brand like Ghirardelli or Guittard; store brands can be hit or miss.)
- 1 can (14 oz / 396 g) sweetened condensed milk
- (This is the base of our condensed milk fudge—make sure it’s sweetened, not evaporated milk.)
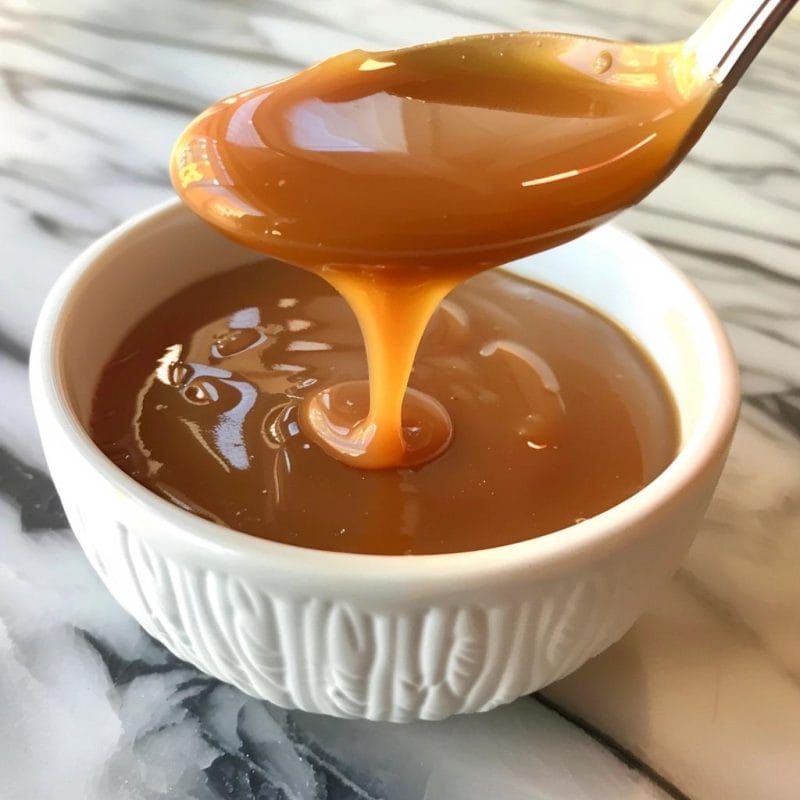
- 1/2 cup (120 g) thick caramel sauce
- (Store-bought is fine; choose a good, thick one, not a thin ice cream syrup. I like Smucker’s Simple Delight or Trader Joe’s salted caramel.)
- 4 tablespoons (56 g) unsalted butter, cut into pieces
- 1 teaspoon pure vanilla extract
- 1/2 teaspoon fine sea salt
- (This goes inside the fudge for that gentle salty background.)
For the topping:
- 2–3 tablespoons thick caramel sauce, warmed slightly
- 1–1 1/2 teaspoons flaky sea salt
- (Maldon or Jacobsen are both lovely—flaky salt makes a big difference.)
Helpful substitutions and notes:
- White chocolate chips – You can use chopped white chocolate bars instead, but make sure they’re real chocolate with cocoa butter, not “baking melts.”
- Caramel sauce – If you’d like, you can use homemade caramel sauce; just make sure it’s fully cooled and thick, not runny.
- Butter – Salted butter can work; if you use it, reduce the added fine sea salt in the fudge to 1/4 teaspoon and then adjust to taste next time.
- Flaky salt – Don’t swap flaky salt with table salt on top. Table salt is much stronger and will taste harsh; if you only have fine salt, use a tiny pinch or skip the topping and keep the salt inside the fudge only.
A quick tip from my own kitchen: line your pan and prep everything before you start melting. This fudge sets up fast once it cools, so you want to be ready.
Directions: Step-by-Step to Silky Fudge
You’ll need:
- An 8×8-inch square baking pan
- Parchment paper or foil
- Microwave-safe bowl
- Rubber spatula
1. Prepare the pan
- Line an 8×8-inch pan with parchment paper, leaving some overhang on two sides to form a sling. This makes it easy to lift the fudge out later.
- Lightly grease the parchment with a bit of butter or nonstick spray—this helps the caramel topping spread nicely and prevents sticking.
2. Combine the base ingredients
- In a large microwave-safe bowl, add the white chocolate chips, sweetened condensed milk, and butter pieces.
- Stir them together just enough to coat the chips—this helps everything melt more evenly.
Little trick: Use a large bowl. The mixture gets thick, and you’ll be glad you gave yourself room to stir.
3. Melt gently in the microwave
- Microwave the mixture on 50% power for 1 minute. Remove and stir well.
- Continue microwaving in 20–30 second bursts at 50% power, stirring after each burst, until the mixture is mostly smooth.
- When only a few small lumps remain, stop microwaving. The residual heat will melt them as you stir.
You don’t want the mixture to get too hot; overheated white chocolate can seize. It should look thick, glossy, and pourable, like a very thick pudding.
4. Add caramel, vanilla, and salt
- Add 1/2 cup caramel sauce, vanilla extract, and fine sea salt to the warm mixture.
- Stir slowly and gently until everything is fully combined and you don’t see streaks of caramel.
If you prefer a marbled look, you can under-mix a little and keep some caramel ribbons running through the fudge. I usually stir mine a bit more because my family loves that deep caramel flavor all through.
5. Spread and smooth the fudge
- Quickly pour the fudge mixture into your prepared 8×8-inch pan. It will start to thicken as it cools, so don’t wander off here.
- Use a rubber spatula to spread it into an even layer, pressing into the corners and smoothing the top as best you can.
If it’s too sticky to smooth, lightly grease the back of a spoon or an offset spatula and glide it over the surface.
6. Add the caramel swirl and salt topping
- Warm the remaining 2–3 tablespoons caramel sauce in the microwave for about 10–15 seconds, just so it’s pourable.
- Drizzle the warm caramel over the top of the fudge in thin lines or random squiggles.
- Use a toothpick or butter knife to gently swirl the caramel into the top of the fudge—don’t go too deep or you’ll lose the pretty pattern.
- Sprinkle the flaky sea salt evenly over the top. Start with less if you’re worried about it being too salty; you can always add a bit more next time.
7. Chill until set
- Cover the pan loosely with plastic wrap or foil, being careful not to touch the surface.
- Refrigerate for at least 2–3 hours, or until the fudge is firm enough to cut cleanly. Overnight is even better for neat edges.
You’ll know it’s ready when you can press a finger gently on the surface and it feels set, not sticky.
8. Slice into caramel fudge squares
- Use the parchment sling to lift the slab of fudge out of the pan and onto a cutting board.
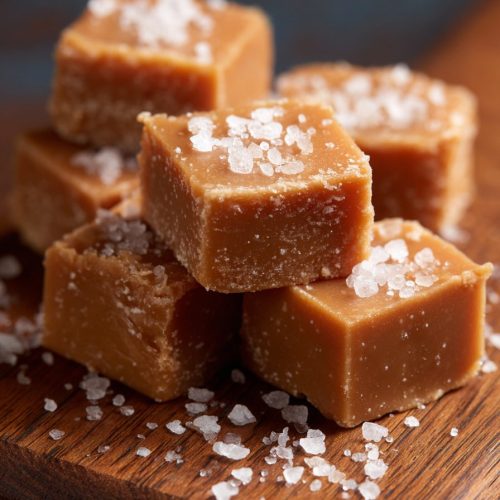
- Use a long, sharp knife to cut into 1-inch squares (or bigger, no judgment). Wipe the knife with a warm, damp cloth between cuts for those perfect bakery-style edges.
And there you have it—creamy caramel fudge squares with that lovely salty sparkle on top.
Servings & Timing
- Yield: About 36 small squares (1-inch pieces), or 25 larger pieces
- Prep Time: 10–15 minutes
- Chill Time: 2–3 hours (hands-off)
- Total Time: About 2 1/2–3 1/4 hours
For parties, I like to cut them small—people always come back for “just one more,” and you get more servings on a tray.
Easy Variations and Fun Twists
Once you master this base Salted Caramel Fudge Recipe, you can play around with it quite a bit.
- Nutty Crunch Fudge – Stir 1/2–3/4 cup chopped toasted pecans or walnuts into the fudge before spreading in the pan.
- Double Chocolate Salted Caramel Fudge – Drizzle melted dark chocolate over the top along with the caramel for a richer, layered look.
- Espresso Caramel Fudge – Stir in 1–2 teaspoons instant espresso powder with the vanilla for a coffeehouse-style fudge.
- Peanut Butter Caramel Swirl – Drop spoonfuls of slightly warmed peanut butter over the top and swirl it with the caramel.
- Holiday Sprinkle Fudge – Skip the flaky salt on top for kids’ parties and add red and green sprinkles instead (still keep a pinch of fine salt in the fudge itself).
- Gluten-Free Party Fudge – The recipe is naturally gluten-free as written; just double-check your caramel and chocolate brands.
If you love this kind of “base recipe you can dress up,” you might also like making a simple chocolate microwave fudge recipe using dark chocolate chips and then swirling caramel on top the same way.
Storage & Make-Ahead Tips
Fudge is one of those desserts that actually gets better after a day or two, which makes it perfect for hosting and gifting.
Room temperature:
- If your kitchen is cool, you can store the fudge in an airtight container at room temperature for 3–4 days.
- Place parchment or wax paper between layers so the pieces don’t stick.
Refrigerator:
- For longer storage, keep in an airtight container in the fridge for up to 2 weeks.
- Let the fudge sit out for 10–15 minutes before serving so it softens slightly—this brings back that creamy texture.
Freezer:
- Yes, this salted caramel dessert freezes well. Place cut pieces on a baking sheet to freeze solid, then transfer to a freezer bag or container.
- Freeze for up to 2–3 months.
- Thaw in the fridge overnight or at room temperature for about 30 minutes before serving.
Make-ahead:
- You can make this homemade fudge recipe 3–5 days in advance for parties. Keep it chilled and cut it the day you serve for the cleanest edges.
- For gift boxes, I usually make it on a Sunday and hand it out midweek—it holds up beautifully.
Notes from My Kitchen (Little Lessons Learned)
- Use good white chocolate. Cheap white chips sometimes don’t melt smoothly and can give you a waxy texture. If your budget allows, a mid-range brand makes a difference in creamy caramel fudge.
- Don’t rush the melting. Short bursts at reduced power are your friend. If the mixture looks thick and a little stubborn, more stirring, not more heat, is usually the answer.
- Salt balance is personal. My husband likes “just a whisper” of salt, while I like a very clear salty bite. Start modest with the flaky salt on top and adjust next time to suit your taste.
- Cut small for kids. This is rich. Really rich. For little ones, tiny squares feel special and keep sugar intake reasonable—at least that’s what I tell myself.
- Line the pan well. I’ve tried skipping the parchment, and it’s always a regret. The parchment sling makes cleanup a breeze and keeps the bottom edges nice and clean.
- Let it chill fully. If you try to cut too soon, it can squish and stick. I know it’s hard to wait, but your patience is rewarded with picture-perfect pieces.
Honestly, the first batch I made years ago was a bit too sweet because I used a very sugary caramel sauce and skipped the salt in the fudge itself. Adding a touch of fine salt inside the fudge, plus the flakes on top, created that sweet and salty dessert balance I’d been chasing.
Frequently Asked Questions
1. Can I make this Salted Caramel Fudge Recipe without a microwave?
Yes. Melt the white chocolate chips, condensed milk, and butter in a heavy-bottomed saucepan over very low heat, stirring constantly until smooth, then proceed with the recipe as written.
2. My fudge turned grainy—what happened?
Usually grainy fudge means the chocolate overheated. Next time, use 50% power in short bursts, stir often, and stop when it’s mostly smooth; the residual heat will finish the job.
3. Can I use evaporated milk instead of sweetened condensed milk?
No—evaporated milk doesn’t have the sugar or thickness needed for this easy fudge recipe, and it won’t set properly.
4. How do I keep the caramel on top from staying too sticky?
Use a thick caramel sauce and chill the fudge fully. If your caramel is very runny, simmer it a bit first to reduce and thicken it before swirling.
5. Is this recipe gluten-free?
The base ingredients are usually gluten-free, but always check labels on your caramel sauce and chocolate chips, as some brands may add flavorings or stabilizers.
6. Can I double the recipe?
Yes. Double all ingredients and use a 9×13-inch pan. The fudge will be about the same thickness, and chilling time may be slightly longer.
7. How long can I keep this fudge for gifting?
Stored in the refrigerator, it stays fresh for up to 2 weeks. For gift boxes, I like to use it within 7–10 days and keep the boxes in a cool spot.
8. Can I reduce the sweetness?
You can use a slightly darker caramel sauce and add a bit more fine salt in the fudge (up to 3/4 teaspoon) to balance the sweetness, but remember, fudge is meant to be rich and sweet.
Conclusion: A Sweet and Salty Little Showstopper
This Salted Caramel Fudge Recipe gives you everything you want from a homemade fudge recipe: creamy texture, quick prep, and that irresistible mix of sweet caramel and sea salt. It’s simple enough for a busy weeknight and special enough for Christmas platters, baby showers, and every potluck in between.
If you try this easy fudge recipe, let me know how it goes—tell me if you kept it classic or added your own twist. And if you’re in a fudge mood, you might also enjoy experimenting with a classic chocolate or peanut butter version using the same condensed milk fudge method. Happy stirring, and enjoy every sweet, salty bite.
Salted Caramel Fudge
Ingredients
- 2 cups white chocolate chips about 340 g; use a good melting brand
- 14 oz sweetened condensed milk 1 can (about 396 g), not evaporated milk
- 1/2 cup thick caramel sauce for the fudge base; cooled and not runny
- 4 tablespoons unsalted butter 56 g, cut into pieces
- 1 teaspoon pure vanilla extract
- 1/2 teaspoon fine sea salt for mixing into the fudge
- 2 tablespoons thick caramel sauce for drizzling on top; warmed slightly, up to 3 tbsp if desired
- 1 teaspoon flaky sea salt for sprinkling on top, up to 1 1/2 tsp to taste
Instructions
- Line an 8x8-inch square baking pan with parchment paper, leaving some overhang on two opposite sides to form a sling. Lightly grease the parchment with butter or nonstick spray.
- In a large microwave-safe bowl, add the white chocolate chips, sweetened condensed milk, and butter pieces. Stir just enough to coat the chips so they melt more evenly.
- Microwave the mixture on 50% power for 1 minute, then remove and stir well. Continue microwaving at 50% power in 20–30 second bursts, stirring after each burst, until the mixture is mostly smooth. Stop when only a few small lumps remain; the residual heat will melt them as you stir.
- To the warm mixture, add 1/2 cup thick caramel sauce, vanilla extract, and fine sea salt. Stir gently until fully combined and no caramel streaks remain, or leave it slightly under-mixed for a marbled effect if you prefer.
- Quickly pour the fudge mixture into the prepared 8x8-inch pan. Use a rubber spatula to spread it into an even layer, pressing into the corners and smoothing the top. If it is very sticky, lightly grease the spatula or back of a spoon.
- Warm 2–3 tablespoons of thick caramel sauce in the microwave for about 10–15 seconds, just until pourable. Drizzle it over the surface of the fudge in thin lines or squiggles. Use a toothpick or butter knife to gently swirl the caramel into the top layer without going too deep. Sprinkle flaky sea salt evenly over the top.
- Cover the pan loosely with plastic wrap or foil, avoiding contact with the surface. Refrigerate for at least 2–3 hours, or until the fudge is firm enough to cut cleanly. For the neatest edges, chill overnight.
- Use the parchment sling to lift the chilled fudge out of the pan and onto a cutting board. With a long, sharp knife, cut into about 1-inch squares (or larger if desired), wiping the knife with a warm, damp cloth between cuts. Serve slightly chilled or at cool room temperature.