Would you like to save this?
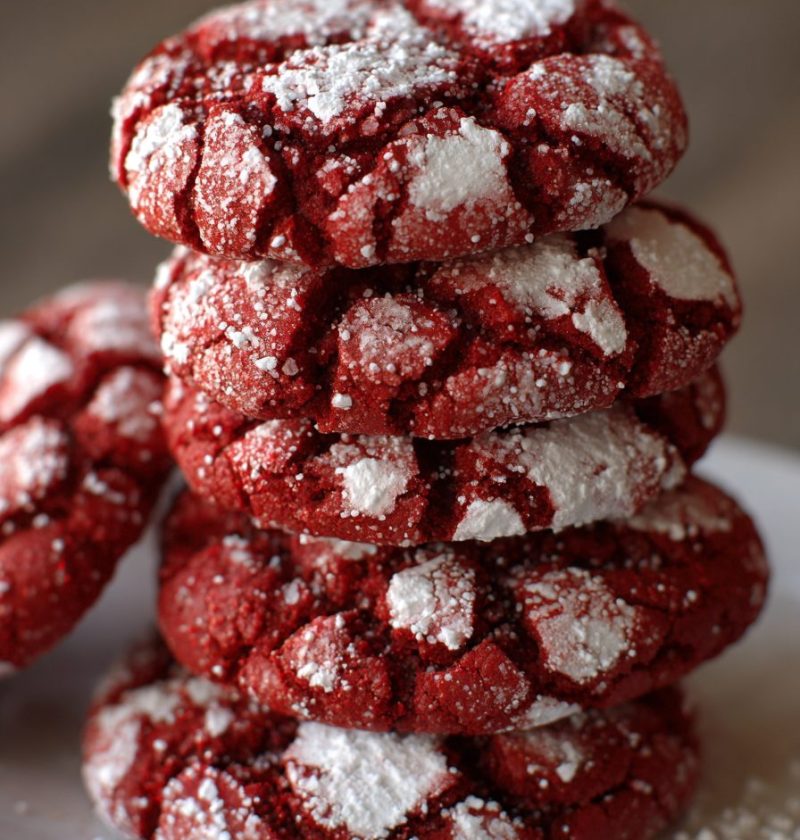
Red Velvet Crinkle Cookies Recipe
If you love soft, chewy cookies with a pretty, festive crackle on top, this Red Velvet Crinkle Cookies Recipe is about to become your new holiday favorite—and honestly, they’re easy enough for any weekend baking spree.
Meet Your New Favorite Red Velvet Crinkle Cookies
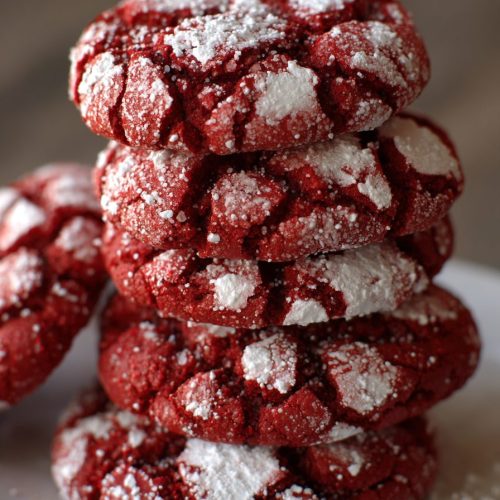
These red velvet crinkles are everything I want in a Christmas cookie recipe: soft centers, slightly crisp edges, that powdered sugar “snow” on top, and that gorgeous deep red color peeking through every crackle. Think classic cocoa crinkle cookies dressed up for a holiday party.
Red velvet cookies hold a special place in my kitchen. When my kids were younger, we used to make red velvet cake from a boxed mix for every birthday. As I got more comfortable baking from scratch, I started playing with a red velvet baking recipe for cookies instead. These chewy red velvet crinkle cookies were the winner—rich cocoa flavor, a hint of tang, and the prettiest exterior for cookie trays and gift boxes.
This Red Velvet Crinkle Cookies Recipe gives you bakery-style results with simple pantry ingredients. No fancy equipment, no complicated steps. Just a bowl, a whisk, and a little patience while the dough chills. They’re perfect for Christmas, Valentine’s Day, or any time you want a red velvet dessert recipe that looks like you fussed—when you really didn’t.
You know what? I still get a little thrill every time I pull a tray of these out of the oven and see the powdered sugar split into that perfect crackle pattern. It never gets old.
Why You’ll Love This Red Velvet Crinkle Cookies Recipe
Let me explain why these red velvet crinkles are such a keeper:
- Soft and chewy centers with lightly crisp edges—classic bakery cookie texture.
- Gorgeous deep red color that makes them a standout holiday cookie recipe.
- Uses basic ingredients you probably already have on hand.
- No stand mixer required—just a whisk and a sturdy spoon.
- Perfect for Christmas cookie exchanges, Valentine’s treats, and party platters.
- The dough chills well, so you can make it ahead and bake later.
- Easy to double for big batches or gifting.
- Holds its shape well, so you get those pretty crackles every single time.
- Adaptable—add white chocolate chips, sandwich with cream cheese frosting, or tweak for dietary needs.
- Great “starter” baking project for kids or newer bakers; the steps are simple and forgiving.
Ingredients for Soft Red Velvet Crinkle Cookies
A good red velvet cookies recipe is all about balance: cocoa, sweetness, a little tang, and that classic texture. Here’s exactly what you’ll need.

Dry Ingredients
- 2 cups (240 g) all-purpose flour
- Use a kitchen scale if you have one—too much flour makes dry cookies.
- 3 tbsp unsweetened cocoa powder (natural, not Dutch-processed)
- Natural cocoa gives that classic red velvet flavor and reacts well with baking soda.
- 1 ½ tsp baking powder
- ¼ tsp baking soda
- ½ tsp fine sea salt (or table salt)
Wet Ingredients
- 1 cup (200 g) granulated sugar
- ¼ cup (50 g) light brown sugar, packed
- Brown sugar adds moisture and chewiness.
- ½ cup (113 g / 1 stick) unsalted butter, melted and cooled slightly
- You can use salted butter and cut the added salt in half.
- 2 large eggs, room temperature
- 1 ½ tsp pure vanilla extract
- 1 ½ tsp distilled white vinegar
- Classic red velvet tang; it also reacts with baking soda for a softer crumb.
- 2–3 tsp red gel food coloring
- Gel works best for a deep color without thinning the dough. (I like AmeriColor “Super Red.”)
- 3 tbsp whole milk or buttermilk
- Buttermilk gives a slightly tangier flavor—perfect for red velvet.
For Rolling
- ½ cup (100 g) granulated sugar
- ¾ cup (90 g) powdered sugar
- Double-coating in both sugars helps keep that snowy, crinkle look after baking.
Ingredient Substitution Tips
- Butter: Swap with ½ cup neutral oil (like canola or vegetable) for an even softer, slightly denser cookie.
- Gluten-free: Use a 1:1 gluten-free baking blend with xanthan gum; chilling becomes even more important for GF dough.
- Food coloring: If you’re sensitive to food dyes, you can reduce the amount for a more muted red—or leave it out for cocoa crinkle cookies with the same great texture.
- Dairy-free: Use vegan butter sticks and dairy-free milk; the cookies will still crinkle nicely.
Step-by-Step Directions
This Red Velvet Crinkle Cookies Recipe is beginner-friendly, but like most good cookies, it rewards a little care and patience. Chilling is key, so don’t skip that part.
1. Mix the dry ingredients
In a medium bowl, whisk together:
- Flour
- Cocoa powder
- Baking powder
- Baking soda
- Salt
Whisk for 20–30 seconds so everything is evenly distributed. Cocoa likes to clump, and those little pockets can cause bitter bites if they’re not broken up.
2. Combine the sugars and butter
In a large mixing bowl, add:
- Granulated sugar
- Brown sugar
Pour in the melted, slightly cooled butter. Whisk until the mixture looks glossy and thick, about 30–45 seconds. This helps dissolve some of the sugar and sets you up for a chewy, soft red velvet cookie.
3. Add eggs, vanilla, vinegar, and food coloring
Add the eggs, one at a time, whisking well after each addition. Then whisk in:
- Vanilla extract
- White vinegar
- Red gel food coloring (start with 2 teaspoons)
Your mixture should look like a bright, uniform red. If it looks a bit pale, add another ½ to 1 teaspoon food coloring. Remember: it will darken slightly once flour and cocoa are added, so go just a touch darker than you think you want.
4. Stir in the milk or buttermilk
Whisk in the milk (or buttermilk) until everything is smooth. The batter will be on the thinner side at this stage—that’s exactly right.
5. Fold in the dry ingredients
Switch to a spatula or sturdy wooden spoon. Add the dry mixture in 2–3 additions, gently folding after each one.
Stop mixing as soon as you don’t see streaks of flour. The dough will be thick, soft, and a bit sticky—almost like brownie batter that decided to be cookie dough. Overmixing can make your red velvet crinkles tough, so keep a light hand here.
6. Chill the dough
Cover the bowl with plastic wrap or a silicone lid and refrigerate for at least 2 hours, or up to 24 hours.
- For very neat, puffy cookies, chill closer to 4 hours.
- If you’re in a rush, you can chill 1 hour, but the cookies will spread a bit more.
Chilling allows the flour to hydrate and the butter to firm up, so your chewy red velvet crinkle cookies stay thick, not flat and sad.
7. Prep your rolling station and pans
When you’re ready to bake:
- Preheat the oven to 350°F (175°C).
- Line 2 baking sheets with parchment paper or silicone baking mats.
- Place granulated sugar in one shallow bowl and powdered sugar in another.
That double sugar coating is the secret to snowy, picture-perfect red velvet crinkles. The granulated sugar gives a base layer, and the powdered sugar sticks beautifully on top without melting away.
8. Scoop and roll the dough
Use a 1 ½ tablespoon cookie scoop (about a medium scoop). If you don’t have one, roll slightly heaped tablespoons of dough.
For each cookie:
- Scoop the dough and roll it quickly between your palms to form a smooth ball.
- Roll the ball in granulated sugar, coating it fully.
- Transfer it immediately to the powdered sugar and roll again, heavily, until no red shows.
Place the coated dough balls on the prepared baking sheets, spacing them about 2 inches apart. These cookies do spread a bit, but not as much as traditional drop cookies.
9. Bake
Bake one sheet at a time in the preheated oven for 10–12 minutes.
You’ll know they’re done when:
- The cookies have puffed up and developed deep crackles.
- The edges look just set.
- The centers still look slightly soft and underbaked.
They’ll continue to cook on the hot pan out of the oven, so don’t wait until they look “fully done” or you’ll lose that soft, chewy texture.
10. Cool and set
Let the cookies cool on the baking sheet for 5–7 minutes, then transfer to a wire rack to cool completely.
Fresh from the oven, the powdered sugar will look a little shiny; as they cool, it will matte out and give that pretty “snow-dusted” look you want for a holiday cookie recipe.
You can serve these slightly warm or at room temperature. The flavor actually deepens after a few hours, so they’re fantastic the next day.
Servings & Timing
- Yield: About 24–28 cookies (depending on scoop size)
- Prep Time: 20 minutes (plus measuring and chatting with whoever’s in the kitchen)
- Chill Time: At least 2 hours; up to 24 hours
- Bake Time: 10–12 minutes per batch
- Total Time: About 3 hours (most of that hands-off chilling time)
If you’re planning these for a party or Christmas cookie swap, I recommend making the dough the night before, chilling overnight, and baking the next day. That schedule is the least stressful—and the cookies turn out beautifully.
Fun Variations on Red Velvet Crinkles
Once you’ve made this Red Velvet Crinkle Cookies Recipe once or twice, it’s easy to play around a bit.
- Red Velvet & White Chocolate: Fold in ¾ cup white chocolate chips for a sweet, creamy contrast.
- Cream Cheese Swirl: Gently knead in small, cold cubes of cream cheese before chilling for little pockets of tangy flavor.
- Valentine’s Version: Roll in pink sanding sugar after the powdered sugar for a romantic sparkle.
- Mocha Red Velvet Crinkles: Add 1–2 teaspoons instant espresso powder to the dry ingredients to deepen the cocoa flavor.
- Gluten-Free Batch: Use a cup-for-cup gluten-free flour blend and chill at least 4 hours for best shape.
- Red Velvet Sandwich Cookies: Spread a thin layer of cream cheese frosting between two cookies for a rich red velvet dessert recipe that eats like a mini Whoopie pie.
How to Store and Freeze Red Velvet Crinkle Cookies
Storing these cookies is easy—if they last long enough to store, that is.
Room Temperature
- Store fully cooled cookies in an airtight container at room temperature for 3–4 days.
- Layer them with parchment or wax paper so the powdered sugar doesn’t rub off too much.
Refrigerator
- You can refrigerate baked cookies, but it’s usually not necessary.
- If your kitchen runs warm, they’ll keep in the fridge for up to 1 week in an airtight container.
Freezing Baked Cookies
- Place cooled cookies in a single layer on a baking sheet and freeze until solid.
- Transfer to a freezer bag or container, separating layers with parchment.
- Freeze for up to 2 months.
To serve, thaw at room temperature for 20–30 minutes. The texture holds up very well.
Freezing Cookie Dough
I love making this red velvet cookies recipe ahead by freezing unbaked dough balls:
- Scoop and coat the chilled dough in both sugars.
- Place on a parchment-lined tray and freeze until firm.
- Transfer to a freezer-safe bag or container and freeze for up to 2 months.
Bake from frozen at 350°F, adding 1–2 minutes to the bake time. If you want the powdered sugar extra snowy, roll lightly in a bit more powdered sugar right before baking (just a quick touch-up).
Notes from My Kitchen (and a 50-Year-Old Baker’s Brain)
- Chill, chill, chill. I know I’m repeating myself, but chilled dough is the main difference between thick, chewy red velvet crinkle cookies and thin, flat ones.
- Measure your flour carefully. If you’re using cups, spoon flour into the measuring cup and level with a knife—don’t scoop straight from the bag. Too much flour is the number one reason cookies turn out dry.
- Use gel food coloring. Liquid food coloring will water down your dough. If all you have is liquid, use it sparingly and expect a slightly softer dough and lighter color.
- Check your baking powder and soda. Both lose strength over time. If they’re more than 9–12 months old or have been open forever, it might be time to refresh. Flat leavening = flat cookies.
- Rotate pans if needed. Every oven has hot spots. If you notice the back row browning faster, rotate your baking sheet halfway through.
- Altitude adjustments. If you live at high altitude, you may need 1–2 extra tablespoons flour and to reduce baking powder slightly; start small and adjust future batches.
And one more thing: if your first tray doesn’t look “perfect,” don’t stress. Cookies are very forgiving. Take mental notes, adjust chilling time or baking time a minute or two either direction, and by the second tray, you’ll feel like a seasoned pro.
Frequently Asked Questions
Can I make this Red Velvet Crinkle Cookies Recipe without food coloring?
Yes. You’ll get more of a classic cocoa crinkle cookie; the flavor will still be delicious, just not red. You might want to bump the cocoa up by 1 tablespoon for a deeper chocolate note.
Why did my crinkles lose their powdered sugar coating in the oven?
Usually this means the dough wasn’t well-chilled or the cookies weren’t coated generously enough. Make sure to roll in granulated sugar first, then powdered sugar, and chill the dough thoroughly.
My cookies turned out cakey instead of chewy—what happened?
Cakey cookies usually come from too much flour or overbaking. Try weighing your flour, and pull the cookies when the centers still look slightly soft.
Can I use a boxed red velvet cake mix for these?
Cake mix recipes exist, but this version is formulated from scratch for the right cookie texture—chewy, not fluffy. If you substitute cake mix, you’ll likely need to adjust fat and eggs and may lose the classic crinkle look.
Do I have to chill the dough overnight?
Not strictly, but longer chilling—4 hours to overnight—gives a thicker cookie with a better crackle pattern. If you’re short on time, aim for at least 1–2 hours.
Can I add mix-ins like chocolate chips or nuts?
Absolutely. Stir in up to 1 cup of add-ins, like white chocolate chips, mini dark chocolate chips, or finely chopped pecans, right after you mix in the dry ingredients.
Why do you use both baking powder and baking soda?
Baking powder gives lift and softness, while baking soda reacts with the vinegar and cocoa for a tender crumb and better spread. That combo gives these red velvet cookies their signature texture.
Are these good for mailing in holiday cookie boxes?
Yes. Red velvet crinkles ship well because they’re chewy and not too delicate—just pack them snugly in a tin or box with parchment between layers.
Wrapping It Up (and Pouring the Coffee)
These Red Velvet Crinkle Cookies bring together everything I love about holiday baking: simple ingredients, cozy cocoa flavor, a little old-school baking science, and a whole lot of visual “wow” with very little fuss. They’re that rare red velvet dessert recipe that works just as well for Christmas cookie trays as for a random Tuesday treat.
Give this Red Velvet Crinkle Cookies Recipe a try, and let me know how it goes—leave a comment with your tweaks, your family’s reactions, or what you served them with (I’m partial to a big mug of coffee or cold milk). And if you’re building a cookie platter, you might also like pairing these with classic chocolate chip cookies or a lighter citrus cookie for contrast. Happy baking, and don’t forget to save a few cookies for yourself.
Red Velvet Crinkle Cookies
Ingredients
- 2 cups all-purpose flour 240 g; spooned and leveled
- 3 tablespoons unsweetened cocoa powder natural, not Dutch-processed
- 1 1/2 teaspoons baking powder
- 1/4 teaspoon baking soda
- 1/2 teaspoon fine sea salt or table salt
- 1 cup granulated sugar 200 g
- 1/4 cup light brown sugar 50 g, packed
- 1/2 cup unsalted butter 113 g / 1 stick, melted and slightly cooled
- 2 large eggs room temperature
- 1 1/2 teaspoons pure vanilla extract
- 1 1/2 teaspoons distilled white vinegar
- 2-3 teaspoons red gel food coloring to desired shade; gel recommended
- 3 tablespoons whole milk or buttermilk buttermilk for tangier flavor
- 1/2 cup granulated sugar for rolling
- 3/4 cup powdered sugar 90 g, for rolling
Instructions
- In a medium bowl, whisk together the flour, cocoa powder, baking powder, baking soda, and salt for 20–30 seconds until well combined and any cocoa lumps are broken up.2 cups all-purpose flour, 3 tablespoons unsweetened cocoa powder, 1 1/2 teaspoons baking powder, 1/4 teaspoon baking soda, 1/2 teaspoon fine sea salt
- In a large mixing bowl, add the granulated sugar and light brown sugar. Pour in the melted, slightly cooled butter and whisk until the mixture looks glossy and thick, about 30–45 seconds.1 cup granulated sugar, 1/4 cup light brown sugar, 1/2 cup unsalted butter
- Whisk in the eggs one at a time, mixing well after each addition. Then whisk in the vanilla extract, white vinegar, and 2 teaspoons of red gel food coloring. If the mixture looks pale, add up to 1 teaspoon more food coloring until you have a deep red; it will darken slightly once the dry ingredients are added.2 large eggs, 1 1/2 teaspoons pure vanilla extract, 1 1/2 teaspoons distilled white vinegar, 2-3 teaspoons red gel food coloring
- Whisk in the milk or buttermilk until the batter is smooth. The mixture will be on the thinner side at this stage.3 tablespoons whole milk or buttermilk
- Switch to a spatula or sturdy wooden spoon. Add the dry ingredients in 2–3 additions, gently folding after each just until no dry streaks of flour remain. The dough will be thick, soft, and slightly sticky. Avoid overmixing to keep the cookies tender and chewy.2 cups all-purpose flour, 3 tablespoons unsweetened cocoa powder, 1 1/2 teaspoons baking powder, 1/4 teaspoon baking soda, 1/2 teaspoon fine sea salt
- Cover the bowl tightly and refrigerate the dough for at least 2 hours and up to 24 hours. For puffier, neater cookies, chill closer to 4 hours. Proper chilling helps the cookies bake thick with well-defined crackles.
- When ready to bake, preheat the oven to 350°F (175°C). Line 2 baking sheets with parchment paper or silicone baking mats. Place the extra granulated sugar in one shallow bowl and the powdered sugar in another for rolling.1/2 cup granulated sugar, 3/4 cup powdered sugar
- Using a 1 1/2-tablespoon cookie scoop or slightly heaped tablespoons, portion the chilled dough. Roll each portion quickly between your palms into a smooth ball. Roll each ball first in granulated sugar to coat completely, then immediately roll in powdered sugar, coating heavily until no red shows. Place on the prepared baking sheets about 2 inches apart.1/2 cup granulated sugar, 3/4 cup powdered sugar
- Bake one sheet at a time in the preheated oven for 10–12 minutes. The cookies are done when they have puffed, developed deep crackles, the edges look set, and the centers still appear slightly soft and underbaked. Do not overbake or they will lose their chewy texture.
- Let the cookies cool on the baking sheet for 5–7 minutes, then transfer to a wire rack to cool completely. The powdered sugar will turn from slightly shiny to matte as they cool. Serve slightly warm or at room temperature.
Notes
Chilling the dough for at least 2 hours (4 hours or overnight for best results) is key for thick, chewy cookies with defined crackles. Measure flour carefully or by weight to avoid dry, cakey cookies. For variations, you can add up to 1 cup of mix-ins such as white chocolate chips, mini dark chocolate chips, or finely chopped nuts after combining the dry ingredients. Cookies keep in an airtight container at room temperature for 3–4 days. Baked cookies or coated dough balls can be frozen for up to 2 months; bake dough from frozen at 350°F, adding 1–2 minutes to the bake time.