Would you like to save this?
Pumpkin Lush Bars Recipe
If you love creamy, layered Pumpkin desserts but don’t love fussing with the oven, this Pumpkin Lush Bars Recipe is about to become your new fall favorite—cool, silky, no-bake, and perfect for both weeknights and Thanksgiving dessert tables.
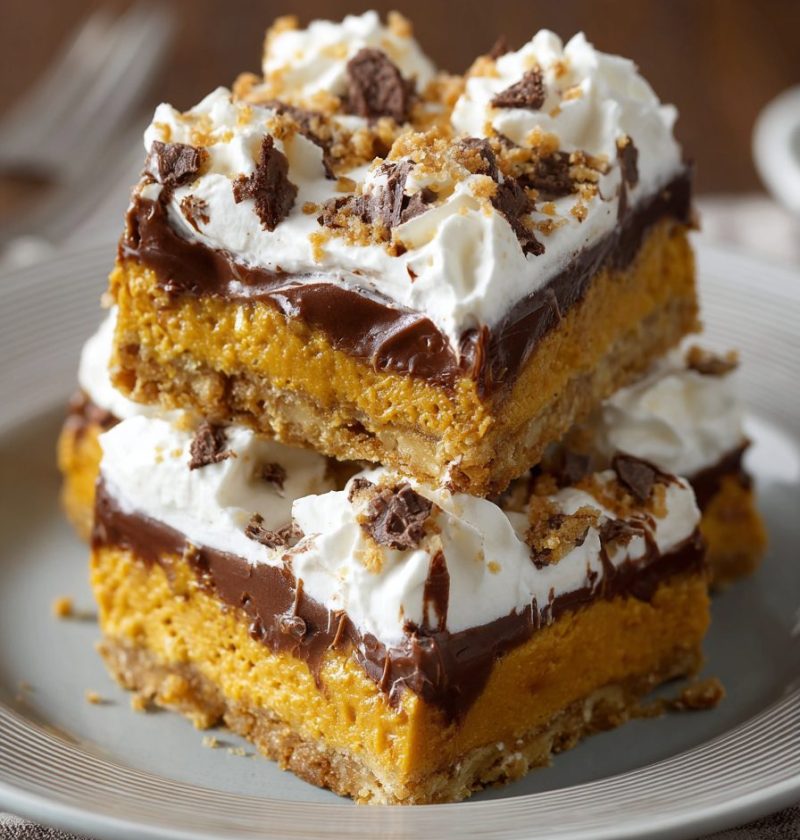
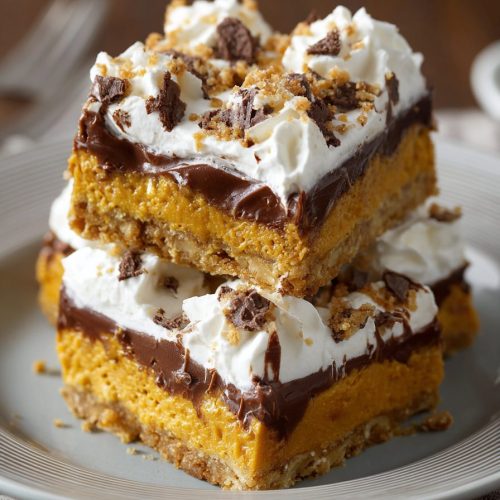
These pumpkin lush bars are a chilled, layered pumpkin dessert with a buttery graham cracker crust, sweet cream cheese layer, fluffy pumpkin pudding layer, and a cloud of whipped topping on top. They taste like pumpkin pie and Cheesecake had a very soft, very cozy baby.
As a 50-year-old mom who’s hosted more fall potlucks and Thanksgiving dinners than I can count, I can tell you: no bake pumpkin dessert recipes like this one save my sanity. While the turkey hogs the oven, your pumpkin cream cheese dessert sits quietly in the fridge, chilling into creamy perfection. It’s a fall dessert recipe that feels special enough for a holiday but simple enough for a random Tuesday when the pumpkin craving hits.
And from a little data side of things—every year, searches for “pumpkin lush bars,” “pumpkin dessert bars,” and “easy pumpkin recipe” climb as soon as the first leaf turns. There’s a reason. Layered pumpkin desserts like this are easy on the cook and a guaranteed crowd-pleaser.
Let me walk you through my favorite version of this Pumpkin Lush Bars Recipe, along with variations and make-ahead tips that I’ve tested in my very real, very lived-in kitchen.
What Are Pumpkin Lush Bars, Exactly?
Pumpkin lush bars are a cold, layered pumpkin dessert made in a 9×13 pan and sliced into bars. Think of them as:
- A no bake pumpkin dessert
- A lighter, creamier cousin of pumpkin pie
- A holiday dessert bar that feels fancy but isn’t fussy
We start with a buttery graham cracker crust (you can use gingersnaps if you want extra pumpkin spice dessert vibes). Then comes a fluffy cream cheese layer, almost like cheesecake but softer. Next is a creamy pumpkin layer made with pumpkin puree and instant pudding. Finally, a generous blanket of whipped topping (or homemade whipped cream if you’re feeling a little extra).
I love serving these as Thanksgiving dessert bars when I know not everyone wants a heavy slice of pie after a big meal. These feel cool and light on the tongue, but still taste like fall. And if you’re the “bring a dessert to the office” person, these pumpkin layered bars travel well and slice neatly after a good chill.
Why You’ll Love This Pumpkin Lush Bars Recipe
You know what? There are a lot of pumpkin desserts out there. Here’s why this one earns a permanent spot in my fall rotation:
- No oven needed – This is a true no bake pumpkin dessert; perfect when your oven is busy or your kitchen is already hot.
- Easy, forgiving layers – Each layer is simple to mix and spread; no fancy equipment or pastry skills required.
- Feeds a crowd – Made in a 9×13 pan, this makes generous pumpkin dessert bars for parties, potlucks, and family gatherings.
- Make-ahead friendly – Tastes even better after resting in the fridge; ideal for busy holiday prep.
- Kid and adult approved – Mild pumpkin spice flavor, soft texture, and no crunchy bits—everyone from toddlers to grandparents is happy.
- Customizable crust – Use graham cracker crust, gingersnaps, or a gluten-free cookie to match your needs.
- Creamy but not heavy – Layers of cream cheese, pumpkin, and whipped topping give you creamy pumpkin bars that still feel light.
- Perfect seasonal flavor – Pumpkin, cinnamon, and pumpkin pie spice give you that cozy fall dessert recipe flavor in every bite.
- Great for sharing – Cut into small squares for a dessert platter or bigger bars for a “just hand me a fork” moment.
Ingredients for Pumpkin Lush Bars Recipe
Let’s break down everything you need for this Pumpkin Lush Bars Recipe. I’ll include a few simple substitutions and tips as we go.
For the Graham Cracker Crust
- 2 1/2 cups graham cracker crumbs
(About 18 full sheets; you can use regular, honey, or cinnamon grahams. Gluten-free graham crackers work too.) - 1/2 cup (1 stick) unsalted butter, melted
(Salted butter works; just reduce the added salt a bit.) - 1/4 cup granulated sugar
(Helps the crust hold and adds just a touch of sweetness.) - 1/4 teaspoon fine sea salt
(Balances all the flavors.)
Tip: For extra fall flair, swap half the graham crumbs with crushed gingersnaps. It turns this into a gingersnap pumpkin spice dessert that tastes like the holidays in bar form.
For the Cream Cheese Layer
- 8 ounces cream cheese, softened to room temperature
(Use full-fat for the best creamy texture; Neufchâtel (1/3 less fat) works but will be slightly softer.) - 1 cup powdered sugar, sifted if lumpy
- 1 teaspoon pure vanilla extract
- 1 cup cold heavy whipping cream
(Or 1 1/2 cups thawed whipped topping if you prefer; Cool Whip or store brand both work.)
Tip: Room temperature cream cheese is your friend. If it’s cold, you’ll get lumps and a cranky arm from mixing.
For the Pumpkin Layer
- 1 (15-ounce) can pumpkin puree
(Not pumpkin pie filling—just pure pumpkin.) - 2 (3.4-ounce) boxes instant vanilla pudding mix
(Or instant pumpkin spice pudding if you can find it.) - 2 cups cold milk
(Whole or 2% sets the best. Almond or oat milk can work, but the layer may be softer.) - 1 teaspoon pumpkin pie spice
- 1/2 teaspoon ground cinnamon
- 1/4 teaspoon fine sea salt
(A little salt sharpens all those cozy flavors.)
Tip: If you like an intense pumpkin spice dessert, add an extra 1/2 teaspoon pumpkin pie spice.
For the Whipped Topping Layer
- 2 cups thawed whipped topping
(Like Cool Whip, kept in the fridge until soft but still cool)
OR - 1 1/2 cups heavy whipping cream + 3 tablespoons powdered sugar + 1 teaspoon vanilla extract
(Whipped until medium-soft peaks.)
Optional Garnishes
- Crushed graham crackers or gingersnaps
- Light sprinkle of cinnamon or pumpkin pie spice
- Caramel drizzle
- Chopped toasted pecans or walnuts (for crunch on top)
Here’s a quick peek at how pretty these creamy pumpkin bars look:

Step-by-Step Directions
This Pumpkin Lush Bars Recipe comes together in layers. Give yourself a little space on the counter and enjoy the process. It’s very forgiving.
1. Prepare Your Pan
Spray a 9×13-inch baking dish lightly with nonstick spray or grease it with a thin layer of butter. You can also line it with parchment paper, leaving some overhang for easier lifting and slicing later.
2. Make the Graham Cracker Crust
In a medium bowl, mix together the graham cracker crumbs, granulated sugar, and salt. Pour in the melted butter and stir until the crumbs are evenly coated and feel like wet sand.
Dump the mixture into the prepared pan. Use the bottom of a measuring cup or a flat glass to press it firmly and evenly across the bottom. Take your time with this—it helps the crust hold together when you slice your pumpkin dessert bars.
No-bake method: Chill the crust in the fridge for at least 20–30 minutes while you make the next layer.
Optional baked method: If you like a firmer crust, bake at 350°F (175°C) for 8–10 minutes, then cool completely before adding the cream cheese.
3. Make the Cream Cheese Layer
In a large mixing bowl, beat the softened cream cheese with an electric mixer on medium speed until smooth and fluffy. Add the powdered sugar and vanilla, and beat again until creamy and well combined.
If you’re using heavy cream, pour it in and beat on medium-high until the mixture is thick, light, and holds soft peaks. If you’re using whipped topping, gently fold it in with a spatula until blended and smooth.
You want this layer to be thick but spreadable—like a very soft cheesecake filling.
4. Spread the Cream Cheese Layer
Once your crust is firm (and cooled, if you baked it), gently spread the cream cheese mixture over the crust. Go slowly so you don’t pull up the crumbs. I like to dollop it around the pan first, then connect the dots with an offset spatula.
Smooth the top as best you can. Small swirls are fine; we’re laying more layers on top.
Place the pan in the fridge while you make the pumpkin layer. This quick chill helps keep your layers clean and defined.
5. Make the Pumpkin Layer
In a clean bowl, whisk together the instant pudding mixes and cold milk for about 2 minutes, until it starts to thicken. Add the pumpkin puree, pumpkin pie spice, cinnamon, and salt. Whisk until smooth and fully blended.
The mixture will thicken more as it sits for a few minutes. You’re aiming for a thick, spoonable pudding consistency that holds its shape.
6. Spread the Pumpkin Layer
Take the pan out of the fridge. Gently spoon the pumpkin mixture over the cream cheese layer. Again, dollop it across the surface, then spread carefully.
Try not to dig your spatula into the cream cheese layer. If a little blending happens, don’t stress—it’ll still taste wonderful, and the bars will still look pretty.
Smooth the top. You now have a gorgeous pumpkin layered dessert coming together.
7. Add the Whipped Topping Layer
Top the pumpkin layer with your whipped topping or freshly whipped cream. Spread it evenly all the way to the edges.
For a prettier finish, you can swirl the top with the back of a spoon or create little wave patterns. This is your pumpkin lush—make it look as fancy or rustic as you like.
8. Chill Thoroughly
This is the hard part: waiting.
Cover the pan gently with plastic wrap or foil. Chill in the refrigerator for at least 4 hours, but overnight is even better. The layers set, the flavors blend, and the bars slice much more cleanly.
9. Garnish Before Serving
Right before serving, add any garnishes you like:
- Sprinkle with crushed graham crackers or gingersnaps
- Dust lightly with cinnamon or pumpkin pie spice
- Drizzle with caramel sauce
- Add a few chopped toasted nuts on top (leave one corner plain for nut-free guests)
10. Slice and Serve
Use a sharp knife to cut into bars—anywhere from 15 to 20 bars, depending on how big you like them. Wipe the knife with a warm, damp cloth between cuts for cleaner edges.
Serve chilled. These pumpkin lush bars are cool, creamy, and just sweet enough.
Servings & Timing
- Yield: About 15–20 pumpkin dessert bars
- Prep Time: 25–30 minutes
- Chill Time: Minimum 4 hours (8 hours or overnight for best texture)
- Total Time: About 4 1/2–8 hours, depending on how long you chill
For planning: if you’re serving these as Thanksgiving dessert bars, I suggest making them the day before and chilling overnight. That’s one less thing on your day-of list.
Variations on Pumpkin Lush Bars
Once you’ve made this Pumpkin Lush Bars Recipe once, you might want to play a little. Here are some favorite twists:
- Gingersnap Pumpkin Lush Bars – Replace all the graham cracker crumbs with crushed gingersnaps for a spicier, holiday dessert bar vibe.
- Pecan Pie Pumpkin Version – Sprinkle a layer of chopped toasted pecans mixed with a tablespoon of brown sugar over the crust before adding the cream cheese.
- Lightened-Up Pumpkin Bars – Use Neufchâtel cream cheese, low-fat whipped topping, and 2% milk for a slightly lighter creamy pumpkin bars version.
- Gluten-Free Pumpkin Lush – Use gluten-free graham crackers or cookies for the crust and check your pudding and toppings for gluten-free labels.
- Pumpkin Spice Latte Bars – Add 1 tablespoon instant espresso powder to the pumpkin layer for a subtle coffee note.
- Chocolate Pumpkin Lush Bars – Use chocolate graham crackers for the crust and sprinkle mini chocolate chips between the cream cheese and pumpkin layers.
Storage, Freezing & Make-Ahead Tips
These pumpkin layered bars are very forgiving when it comes to storage, which is one reason they’re a great easy pumpkin recipe for the holidays.
How to Store in the Fridge
- Cover the pan tightly with plastic wrap or foil.
- Store in the refrigerator for up to 4 days.
- The crust will soften slightly over time, but the flavors get even better by day two.
If your fridge tends to dry things out, I like to press the plastic wrap gently so it almost kisses the whipped topping (but doesn’t flatten it).
Can You Freeze Pumpkin Lush Bars?
Yes—mostly.
- Freeze the bars before adding fresh garnishes like nuts or caramel.
- Wrap the pan tightly in plastic, then foil, and freeze for up to 1 month.
- Thaw overnight in the fridge.
- The texture will be a bit softer but still tasty.
If you know you’re freezing, I recommend using whipped topping rather than fresh whipped cream; it holds up better after freezing and thawing.
Make-Ahead Advice
- Day before serving: Make the entire layered pumpkin dessert and chill overnight.
- Two days before serving: Make the crust and cream cheese layer, then wrap and chill; add pumpkin and whipped layers the day before serving.
- Traveling with it: Assemble in a pan with a tight-fitting lid or a disposable foil pan with a lid; keep chilled with ice packs if you’re on the road.
Notes from My Kitchen
A few things I’ve learned after testing this Pumpkin Lush Bars Recipe more times than I’ll admit:
- Cold milk matters. For the pudding to thicken well, the milk needs to be cold from the fridge. Room temperature milk makes a looser pumpkin layer.
- Don’t rush the chill time. It’s tempting, but cutting into these too soon gives you messy scoops instead of neat pumpkin dessert bars. Still good, just more like a trifle.
- Gingersnap crust for spice lovers. If your family loves strong pumpkin spice flavor, the gingersnap crust takes this from “yum” to “oh my goodness, what is this?” very fast.
- Sweetness level. These bars are gently sweet. If you prefer a sweeter pumpkin cream cheese dessert, add an extra 1/4 cup powdered sugar to the cream cheese layer.
- Pan size. A glass 9×13 pan makes it easy to see the layers and check thickness. Metal pans work too; just line if you plan to lift out and slice on a board.
- Kids in the kitchen. This is a fantastic recipe for kids to help with—crushing graham crackers, whisking pudding, spreading layers. Just keep an extra spoon for “quality control” tastes.
Honestly, this is one of those holiday dessert bars that looks like you fussed but feels almost like assembling a layered Salad—just the sweet, happy version.
Pumpkin Lush Bars Recipe FAQs
1. Can I make these pumpkin lush bars without instant pudding mix?
You can, but it’s a bit more work. You’d need a homemade cooked pudding that sets firmly; cool it slightly, then whisk in the pumpkin and spices. Instant pudding keeps this an easy pumpkin recipe.
2. My pumpkin layer is too soft. What happened?
Most often, the milk wasn’t cold enough, or too much milk was added. Also check that you used instant pudding, not cook-and-serve.
3. Can I use homemade whipped cream instead of whipped topping?
Yes, absolutely. Just whip it to medium peaks and sweeten slightly. Keep the bars chilled, since fresh cream is less stable than store-bought whipped topping.
4. Is canned pumpkin pie filling okay to use?
I don’t recommend it here. Pumpkin pie filling is already sweetened and spiced, which can make the pumpkin layer too loose and too sweet. Use plain pumpkin puree and add your own spices.
5. How far ahead can I make this pumpkin layered dessert?
You can make it up to 2 days ahead. For the very best texture, I like making it the day before serving and chilling overnight.
6. Can I cut this recipe in half?
Yes. Use an 8×8 or 9×9 pan and halve all the ingredients. Chill time stays about the same.
7. My crust is crumbly when I cut the bars. Any tips?
Press the crust firmly into the pan, make sure it has chilled long enough, and use a sharp knife. If you like, bake the crust for 8–10 minutes and cool completely for a firmer hold.
8. Are these pumpkin dessert bars very spicy?
They’re gently spiced—more cozy than bold. For stronger flavor, increase the pumpkin pie spice or use a gingersnap crust.
Final Thoughts
This Pumpkin Lush Bars Recipe checks every fall dessert box: creamy, cool, layered, full of pumpkin spice flavor, and surprisingly easy. It’s the kind of pumpkin dessert bar that works just as well for a relaxed Sunday supper as it does for a big Thanksgiving spread.
If you try these pumpkin lush bars, let me know how they turn out—tell me if your family prefers the classic graham cracker crust or the gingersnap twist. And if you’re building a whole fall dessert lineup, pair these with a simple apple crisp or a pan of brownies for the chocolate lovers in your life.
Pumpkin Lush Bars
Ingredients
- 2 1/2 cups graham cracker crumbs about 18 full sheets; regular, honey, or cinnamon; gluten-free okay; can swap some with gingersnaps
- 1/2 cup unsalted butter melted; salted butter okay, reduce added salt slightly
- 1/4 cup granulated sugar
- 1/4 teaspoon fine sea salt for crust
- 8 ounces cream cheese softened to room temperature; full-fat preferred, Neufchâtel works but is softer
- 1 cup powdered sugar sift if lumpy
- 1 teaspoon pure vanilla extract for cream cheese layer
- 1 cup heavy whipping cream cold; or substitute 1 1/2 cups thawed whipped topping
- 15 ounces pumpkin puree 1 can; not pumpkin pie filling
- 2 boxes instant vanilla pudding mix 3.4 ounces each; or instant pumpkin spice pudding if available
- 2 cups milk cold; whole or 2% sets best; almond or oat milk makes a softer layer
- 1 teaspoon pumpkin pie spice for pumpkin layer; add extra 1/2 teaspoon for stronger spice, optional
- 1/2 teaspoon ground cinnamon for pumpkin layer
- 1/4 teaspoon fine sea salt for pumpkin layer
- 2 cups whipped topping thawed, such as Cool Whip, for top layer; keep chilled until using
- OR homemade whipped cream for topping 1 1/2 cups heavy whipping cream + 3 tablespoons powdered sugar + 1 teaspoon vanilla; whipped to medium-soft peaks
- crushed graham crackers or gingersnaps optional, for garnish
- ground cinnamon or pumpkin pie spice optional, light sprinkle on top
- caramel sauce optional drizzle for garnish
- chopped toasted pecans or walnuts optional, for garnish; leave part plain for nut-free guests
Instructions
- Lightly grease a 9x13-inch baking dish with nonstick spray or a thin layer of butter. Optionally, line with parchment paper, leaving an overhang on the long sides for easy lifting and slicing.
- In a medium bowl, combine the graham cracker crumbs, granulated sugar, and 1/4 teaspoon fine sea salt. Pour in the melted butter and stir until the mixture is evenly moistened and resembles wet sand.2 1/2 cups graham cracker crumbs, 1/2 cup unsalted butter, 1/4 cup granulated sugar, 1/4 teaspoon fine sea salt
- Transfer the crumb mixture to the prepared pan. Use the bottom of a measuring cup or flat glass to press it firmly and evenly over the bottom of the pan. For no-bake method, chill the crust in the refrigerator for 20–30 minutes while you prepare the next layer. For a firmer crust, you may bake at 350°F (175°C) for 8–10 minutes, then cool completely before continuing.
- In a large mixing bowl, beat the softened cream cheese with an electric mixer on medium speed until smooth and fluffy. Add the powdered sugar and vanilla extract and beat again until creamy and well combined.8 ounces cream cheese, 1 cup powdered sugar, 1 teaspoon pure vanilla extract
- If using heavy whipping cream, pour it into the cream cheese mixture and beat on medium-high until thick, light, and holding soft peaks. If using whipped topping, gently fold it into the cream cheese mixture with a spatula until fully blended and smooth. The mixture should be thick but spreadable.1 cup heavy whipping cream
- Once the crust is firm and cooled if baked, dollop the cream cheese mixture evenly over the crust. Carefully spread it into an even layer, taking care not to disturb the crumbs. Smooth the top, then place the pan in the refrigerator to chill while you prepare the pumpkin layer.
- In a clean mixing bowl, whisk together the instant vanilla pudding mixes and cold milk for about 2 minutes, until the mixture begins to thicken. Add the pumpkin puree, pumpkin pie spice, ground cinnamon, and 1/4 teaspoon fine sea salt. Whisk until smooth and fully blended. Let stand a few minutes to thicken to a spoonable pudding consistency.15 ounces pumpkin puree, 2 boxes instant vanilla pudding mix, 2 cups milk, 1 teaspoon pumpkin pie spice, 1/2 teaspoon ground cinnamon, 1/4 teaspoon fine sea salt
- Remove the pan from the refrigerator. Spoon the pumpkin pudding mixture in dollops over the chilled cream cheese layer, then gently spread it into an even layer, trying not to disturb the layer beneath. Smooth the top.
- Top the pumpkin layer with the whipped topping or homemade whipped cream, spreading it evenly all the way to the edges. Swirl the top with the back of a spoon for a decorative finish, if desired.2 cups whipped topping, OR homemade whipped cream for topping
- Cover the pan gently with plastic wrap or foil. Refrigerate for at least 4 hours, or preferably 8 hours or overnight, until the layers are fully set and the bars slice cleanly.
- Just before serving, garnish the top as desired with crushed graham crackers or gingersnaps, a light sprinkle of cinnamon or pumpkin pie spice, a drizzle of caramel sauce, and/or chopped toasted pecans or walnuts. Leave a portion plain if serving nut-free guests.crushed graham crackers or gingersnaps, ground cinnamon or pumpkin pie spice, caramel sauce, chopped toasted pecans or walnuts
- Using a sharp knife, cut into 15–20 bars, wiping the blade with a warm, damp cloth between cuts for neat edges. Serve chilled.