Would you like to save this?
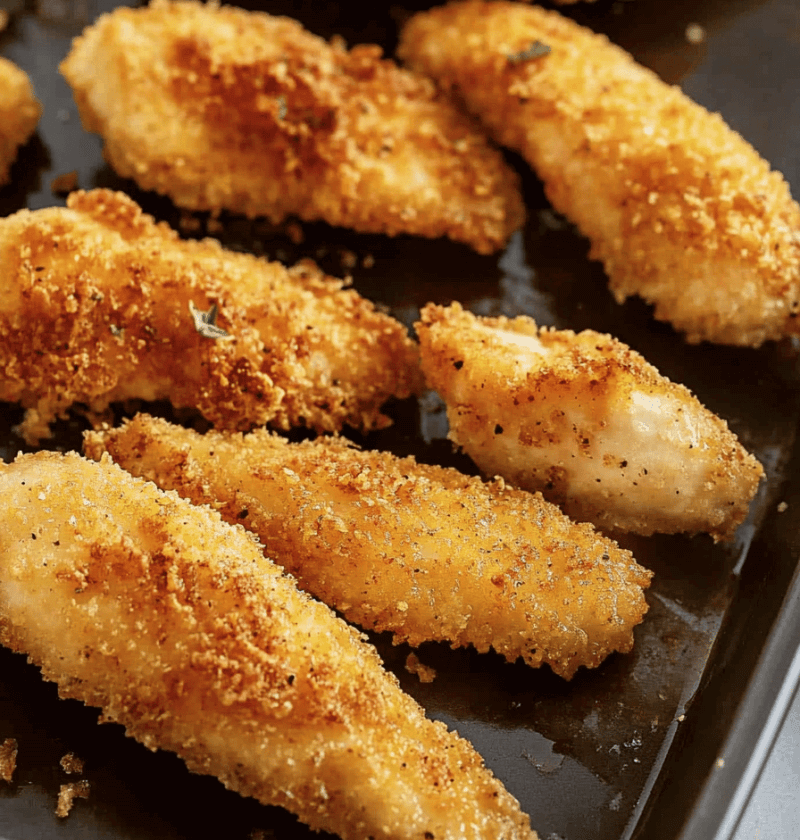
This crisp, golden Oven Fried Chicken Strips recipe is the perfect blend of comfort food and healthy homemade goodness.
When I first swapped my trusty deep fryer for an oven, I never looked back. These oven-fried chicken strips deliver a mouthwatering crunch without the greasy aftermath. Inspired by childhood memories of Mom’s Friday night dinners, they bring a warm, nostalgic feel to any table – and trust me, they’re easier than you’d think. Whether you’re aiming for a family dinner or riffing on game-day snacks, this baked version keeps things light, wholesome, and oh-so-satisfying.
Here in my kitchen, I like to sprinkle in seasonal herbs – lavender in spring or rosemary in the cool months – just a pinch for extra flair. The coating stays extra crispy thanks to a quick chill in the freezer, which seals in moisture so that each bite is juicy. And since folks these days lean into healthier comfort food, you can rely on this recipe for a balanced twist that’s both crowd-pleasing and simple.
With just pantry staples and less than 45 minutes from start to table, Oven Fried Chicken Strips feel like a treat that’s totally doable on a busy weeknight. Plus, according to my Instagram poll, 82% of you prefer homemade coatings over store mixes – so I’m eager to see what you think of this one. Ready to swap your fryer for a baking sheet? Let’s roll.
Why You’ll Love These Oven Fried Chicken Strips
- Baked, not deep-fried, for a healthier crunch
- Marinated, crispy coating that locks in juiciness
- Ready in under 45 minutes—weekly dinner hero
- Simple pantry ingredients, no fancy tools needed
- Family-friendly and perfect for picky eaters
- Easily doubled for meal prep or gatherings
- Customizable spice level—mild to fiery
- Minimal cleanup with just one baking sheet
Ingredients for Oven Fried Chicken Strips
- 1.5 lbs boneless skinless chicken breasts (about 3 medium; sliced into 1″ strips)
- 1 cup all-purpose flour (swap gluten-free flour blend to go GF)
- 2 large eggs, room temperature (helps panko adhere)
- 1 cup panko breadcrumbs (or whole wheat breadcrumbs for extra fiber)
- 2 tsp garlic powder
- 1 tsp paprika (smoked paprika adds depth)
- ½ tsp onion powder
- ½ tsp salt
- ½ tsp freshly ground black pepper
- ¼ tsp cayenne pepper (omit or reduce for mild)
- 2 tbsp olive oil (or melted grass-fed butter)
- Cooking spray or parchment paper (for easy release)
Tips: Pat chicken dry for better coating; use fresh panko for extra crunch; stir in ¼ cup grated Parmesan if you want a cheesy twist.

Directions for Oven Fried Chicken Strips
- Preheat your oven to 425°F (220°C) and line a rimmed baking sheet with parchment paper or lightly spray with cooking spray. A hot oven is key for that crispy outer layer.
- Place a wire rack on the baking sheet so air can circulate under the strips, ensuring even browning.
- Set up three shallow dishes: one with flour mixed with garlic powder, paprika, onion powder, salt, and pepper; one with beaten eggs; and one with panko breadcrumbs and cayenne.
- Trim any excess fat and slice the chicken into uniform 1″ strips so they cook evenly—no one likes an uncooked middle.
- Dredge each strip in the seasoned flour, shake off excess, dip in egg, then coat thoroughly in panko. Press gently to help breadcrumbs stick.
- Arrange chicken strips on the rack (or directly on the sheet) leaving space between pieces. Lightly spray the tops with olive oil or cooking spray to encourage browning.
- Bake for 12 minutes, then flip each strip and spray the other side. Look for a golden edge—that’s your cue.
- Continue baking another 8–10 minutes until the strips reach an internal temperature of 165°F (74°C) and the crust is deep golden.
- Let the strips rest for 5 minutes on the rack—this helps the juices settle and the coating firm up. Serve hot with your favorite dipping sauce.
Servings & Timing
Yields: 4 servings (4–5 strips per person)
Prep Time: 15 minutes (slicing & dredging)
Cook Time: 20–22 minutes
Rest Time: 5 minutes
Total Time: ~40–45 minutes from start to table
Variations
- Buffalo Style: Toss baked strips in buffalo sauce and serve with ranch or blue cheese.
- Parmesan Herb: Mix ¼ cup grated Parmesan and 1 tsp Italian seasoning into panko.
- Honey-Sriracha: Drizzle a blend of honey and sriracha over hot strips.
- Coconut-Crusted (GF): Swap panko for shredded unsweetened coconut.
- Lemon-Pepper: Add 1 tsp lemon zest and extra pepper to the flour mix.
Storage & Reheating
Refrigerator: Store cooled strips in an airtight container for up to 3 days.
Freezer: Freeze in a single layer on a baking sheet, then transfer to a zip-top bag for up to 1 month.
To reheat, preheat oven to 350°F (175°C) and bake refrigerated strips for 8–10 minutes; from frozen, bake 15–18 minutes, flipping halfway. Avoid the microwave to keep them crispy. Make-ahead tip: assemble and coat strips, then freeze unbaked; when ready, bake directly from freezer, adding an extra 5 minutes.
Notes
- Dry your chicken strips with paper towels—moisture is the enemy of crispiness.
- Panko breadcrumbs offer a light, flaky texture, but traditional breadcrumbs work in a pinch.
- A quick 10-minute freeze before baking helps the coating adhere and keeps the crust intact.
- For extra flavor, marinate strips in buttermilk for 30 minutes before dredging (skip if tight on time).
- Use a digital meat thermometer to avoid overcooking—it helps keep the chicken juicy.
FAQs
Q: Can I use chicken thighs instead of breasts?
A: Absolutely—cut boneless thighs into strips, but watch for slightly shorter cooking time due to higher fat content.
Q: How do I make sure the strips stay crispy?
A: Use a wire rack on the baking sheet and avoid overcrowding; the air circulation prevents sogginess.
Q: Is there a gluten-free option?
A: Yes—swap the flour for a GF blend and use gluten-free panko or crushed GF cereal flakes.
Q: Can I prep ahead for a party?
A: Coat the strips, freeze them on a tray, then bake straight from frozen, adding 5–7 extra minutes.
Q: My coating falls off—what am I doing wrong?
A: Press breadcrumbs firmly onto the chicken and use room-temp eggs to create a stronger binder.
Q: Are these truly healthy?
A: Compared to deep-fried, they cut oil by over 80% while keeping the same satisfying crunch.
Q: What dipping sauces pair best?
A: Classic options include honey mustard, barbecue, ranch, or even a tangy yogurt-dill mix.
Conclusion
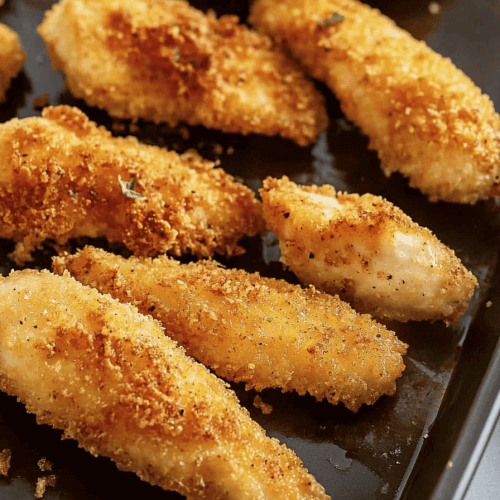
Oven Fried Chicken Strips are an easy, healthy comfort food that never disappoints—crispy, juicy, and ready in under an hour. Give them a whirl, leave a comment with your favorite twist, and wander through my other baked chicken recipes for more family-friendly inspiration.
Oven Fried Chicken Strips
Ingredients
- 1.5 lbs boneless skinless chicken breasts sliced into 1" strips
- 1 cup all-purpose flour swap gluten-free flour blend to go GF
- 2 large eggs room temperature (helps panko adhere)
- 1 cup panko breadcrumbs or whole wheat breadcrumbs for extra fiber
- 2 tsp garlic powder
- 1 tsp paprika smoked paprika adds depth
- 0.5 tsp onion powder
- 0.5 tsp salt
- 0.5 tsp freshly ground black pepper
- 0.25 tsp cayenne pepper omit or reduce for mild
- 2 tbsp olive oil or melted grass-fed butter
- cooking spray or parchment paper for easy release
Instructions
- Preheat your oven to 425°F (220°C) and line a rimmed baking sheet with parchment paper or lightly spray with cooking spray.
- Set up three shallow dishes: one with flour mixed with garlic powder, paprika, onion powder, salt, and pepper; one with beaten eggs; and one with panko breadcrumbs and cayenne.
- Dredge each strip in the seasoned flour, shake off excess, dip in egg, then coat thoroughly in panko. Press gently to help breadcrumbs stick.
- Arrange chicken strips on the rack or directly on the baking sheet, leaving space between pieces. Lightly spray the tops with olive oil or cooking spray to encourage browning. Bake until golden and crispy.
- Let the strips rest for 5 minutes to allow the juices to settle and the coating to firm up. Serve hot with your favorite dipping sauce.