Would you like to save this?
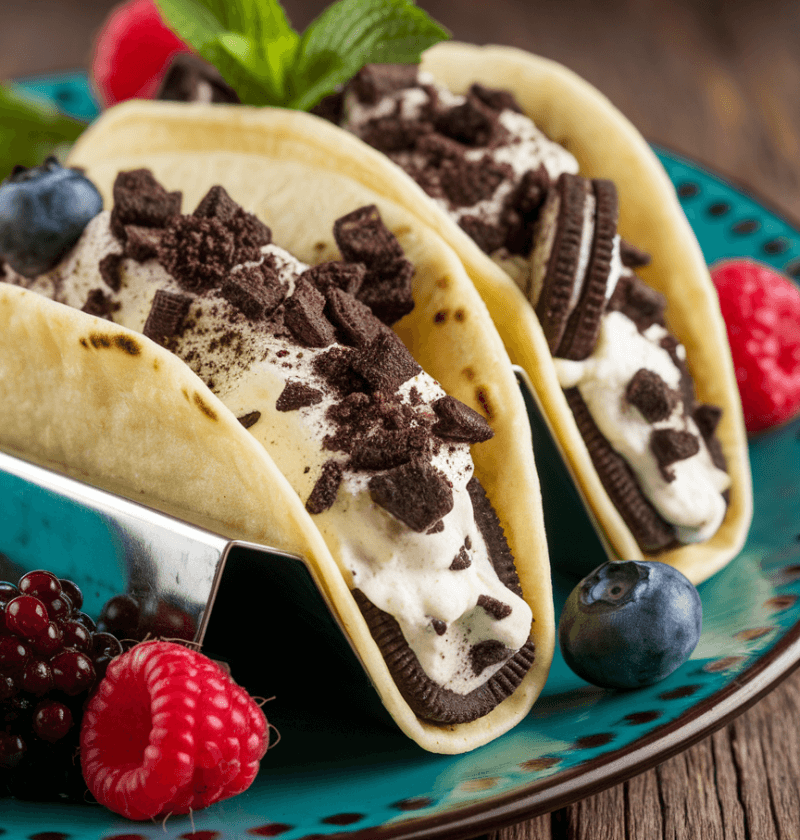
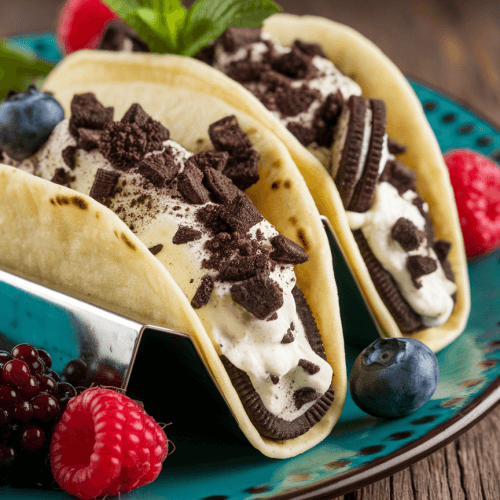
Indulge in this Oreo Cheesecake Tacos Recipe that combines crunchy, chocolatey Oreo shells with a creamy cheesecake filling—no oven needed for this easy, sweet dessert taco. It’s a fun twist on classic cheesecake that your friends and family will adore.
Why You’ll Love This Recipe
- No-bake dessert perfect for warm days
- Ready in under 90 minutes—30 minutes hands-on
- Crunchy Oreo taco shells add chocolate bliss
- Creamy cheesecake filling with a velvety texture
- Customizable with your favorite mix-ins
- Ideal for parties, potlucks, or after-dinner treats
- Gluten-free option using certified gluten-free cookies
- Kid-friendly assembly—get little helpers involved
Ingredients
- 20 Oreo sandwich cookies (original or mint for a twist)
- 4 tablespoons unsalted butter, melted (I like Kerrygold)
- 8 ounces (225g) cream cheese, softened (Philadelphia recommended)
- ½ cup powdered sugar (or substitute with ⅓ cup honey)
- 1 teaspoon pure vanilla extract
- 1 cup heavy whipping cream, cold (for best volume)
- ½ cup mini chocolate chips (semi-sweet or dark)
- ¼ cup extra Oreo crumbs, divided (for topping)
- Chocolate syrup, for drizzling (optional for garnish)

Directions
- Prepare the Oreo Shells
Place 16 Oreo cookies in a sturdy zip-top bag, pressing out excess air. Crush into fine crumbs with a rolling pin until sandy. In a bowl, combine crumbs with melted butter, stirring until the mixture holds together when pressed. - Shape and Chill Shells
Pack the Oreo mixture firmly into mini taco molds or small silicone taco shells (spray lightly with non-stick spray first). Transfer molds to the freezer for 20 minutes to set. - Whip Up the Cheesecake Filling
In a large bowl, beat softened cream cheese until smooth. Add powdered sugar and vanilla, mixing until fully incorporated. In a separate chilled bowl, whip heavy cream to stiff peaks, then gently fold into the cream cheese mixture until light and fluffy. - Fill the Taco Shells
Remove shells from the freezer and gently pop them out. If a shell cracks, press the crumb pieces back together with a little extra butter and refreeze briefly. Use a pastry bag or small spoon to fill each shell generously. - Garnish and Personalize
Sprinkle mini chocolate chips and extra Oreo crumbs over the filled tacos. Drizzle with chocolate syrup for a decadent finish. Add whipped cream or fresh berries if you like a fruity pop. - Final Chill Before Serving
Arrange the tacos on a platter and refrigerate for at least 30 minutes to let the filling set. Serve chilled for the perfect contrast of crunchy shells and creamy filling.
Servings & Timing
Makes 8–10 dessert tacos
Prep Time: 20 minutes hands-on
Chill/Rest Time: 1 hour (20 minutes for shells, 30 minutes for assembled tacos)
Total Time: 1 hour 20 minutes
Variations
- Mint Oreo twist: Swap original Oreos for mint-flavored cookies for a chocolate-mint vibe.
- Gluten-free delight: Use certified gluten-free sandwich cookies for a celiac-friendly dessert.
- Fruit infusion: Fold finely chopped strawberries or raspberries into the cheesecake filling.
- Peanut Butter swirl: Add 2 tablespoons of creamy peanut butter to the filling.
- Caramel drizzle: Finish with salted caramel sauce instead of chocolate syrup.
- Vegan option: Use vegan cream cheese and coconut whipped cream with dairy-free cookies.
Storage & Reheating
Store assembled Oreo Cheesecake Tacos in an airtight container in the refrigerator for up to 3 days—best enjoyed within 48 hours. Shells may soften over time but remain delicious. No reheating needed, as these are best served cold. For make-ahead ease, prep shells and filling separately and assemble just before serving.
FAQs
- Can I make these ahead of time?
Yes—prepare shells and filling up to a day in advance. Keep shells frozen or refrigerated and filling in an airtight container; assemble before serving. - My shells cracked—how do I fix them?
Press broken pieces back into the mold with a touch of melted butter, then refreeze for 10–15 minutes to set. - Can I use store-bought waffle or taco shells?
Absolutely—swap in mini waffle cone taco shells or edible taco shells for an even quicker shortcut. - How can I reduce sugar in the filling?
Substitute half the powdered sugar with honey or maple syrup and adjust sweetness; note liquid sweeteners may soften the filling slightly. - Is there a non-dairy version?
Yes—use vegan cream cheese, coconut whipped topping, and dairy-free Oreos for a vegan, no-bake dessert. - Can these be frozen?
Store unfilled shells in a freezer bag for up to 1 month; fill after thawing overnight in the fridge. - What’s a good drink pairing?
Serve alongside cold milk, coffee, or a minty black tea to balance the richness. - How do I prevent the shells from getting soggy?
Chill unfilled shells thoroughly before filling and assemble just before serving to maintain crispness.
Conclusion
This Oreo Cheesecake Tacos Recipe brings a delightful mix of crunchy chocolate and creamy cheesecake to your dessert table—no baking required! Easy enough for weeknight treats and elegant enough for special occasions. Give them a try, and leave a comment to share your favorite twist or explore more no-bake desserts on the blog.
Oreo Cheesecake Tacos
Ingredients
- 20 cookies Oreo sandwich cookies finely crushed
- 4 tablespoons unsalted butter melted
- 8 ounces cream cheese softened (Philadelphia recommended)
- 1/2 cup powdered sugar or substitute with 1/3 cup honey
- 1 teaspoon vanilla extract pure
- 1 cup heavy whipping cream cold
- 1/2 cup mini chocolate chips for filling
- 1/4 cup Oreo crumbs for topping
- to taste chocolate syrup for drizzling
Instructions
- Combine crushed Oreo crumbs with melted butter, then press firmly into mini taco molds or silicone shells to shape. Chill in the freezer for 20 minutes to set.
- Beat softened cream cheese until smooth. Add powdered sugar and vanilla, then fold in whipped heavy cream until light and fluffy.
- Gently unmold the chilled Oreo shells and pipe or spoon the cheesecake filling into each shell, filling to the top.
- Sprinkle mini chocolate chips and extra Oreo crumbs over the filled tacos, then drizzle with chocolate syrup for extra decadence.
- Place the assembled tacos on a platter and refrigerate for at least 30 minutes to let the filling set before serving.