Would you like to save this?
We'll email this post to you, so you can come back to it later!
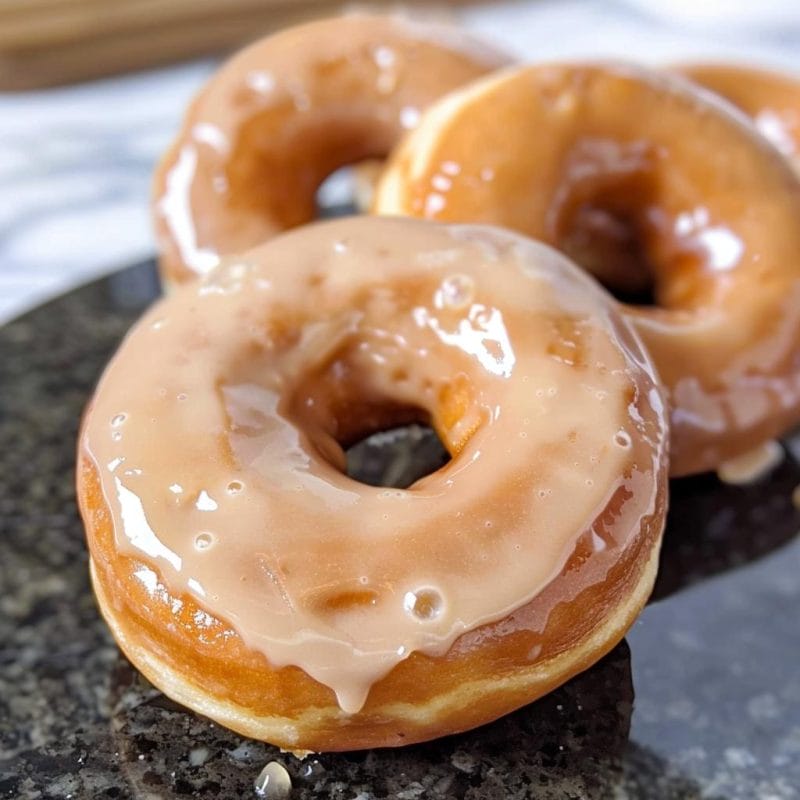
I remember the first time I attempted to make doughnuts at home. It was a rainy Saturday afternoon, and I was craving something sweet yet comforting. Inspired by the iconic Krispy Kreme doughnuts, I decided to take on the challenge of making them from scratch. The result was nothing short of magical—golden, pillowy doughnuts with a glaze that was the perfect balance of sweetness and richness. The process, while a bit involved, was incredibly rewarding. Sharing these homemade doughnuts with family and friends turned an ordinary day into something extraordinary.
Ingredients
For the Doughnuts:
3 tbsp milk
3 tbsp boiling water
1 tsp dry active yeast
8 oz all-purpose flour (a little under 2 cups, but it’s best to weigh it)
1 1/2 oz sugar (about 3 tablespoons)
1 egg
1 oz butter, cold to room temperature (avoid melting)
Dash of salt
Enough oil to cover the bottom few inches of a wok or a deep fryer
For the Glaze:
1/3 cup butter
2 cups confectioners’ sugar
1 1/2 teaspoons vanilla extract
4 tablespoons hot water (or as needed)
Instructions
Step 1: Prepare the Yeast Mixture
Start by preparing the yeast mixture, which is the foundation of your doughnut dough. In a large measuring jug, combine 3 tablespoons of milk with 3 tablespoons of boiling water. The boiling water helps to slightly warm the milk, creating the ideal environment for the yeast to activate. Stir in a teaspoon of sugar, which feeds the yeast and promotes its growth. Then, sprinkle the yeast over the mixture and gently stir. Allow it to sit in a warm place for about 5-10 minutes. You should see the mixture start to foam and bubble—this means the yeast is active and ready to work its magic.
Step 2: Prepare the Dry Ingredients
While the yeast mixture is activating, turn your attention to the dry ingredients. In a large mixing bowl, combine the flour, remaining sugar, and a dash of salt. The sugar adds sweetness to the dough, while the salt enhances the overall flavor. Cut the cold butter into the flour mixture using your fingers or a pastry blender. The goal is to incorporate the butter until the mixture resembles coarse crumbs. This step ensures a tender, flaky texture in your doughnuts.
Step 3: Mix the Dough
Once the yeast mixture is ready, it’s time to combine everything. Make a small well in the center of the flour mixture and pour in the yeast mixture along with the beaten egg. Mix until everything comes together into a smooth dough. This typically takes about 5 minutes of mixing. The dough should be soft but not sticky. If it’s too sticky, add a bit more flour; if it’s too dry, add a touch more milk.
Step 4: Knead and Rise
Turn the dough out onto a lightly floured surface. Knead the dough for about 5 to 10 minutes. The dough should feel springy and elastic, and small bubbles should form under the surface as you knead. This process develops the gluten, which gives the doughnuts their structure and airy texture.
Place the kneaded dough back into the mixing bowl and cover it with a cloth or plastic wrap. Let it rise in a warm, draft-free place for about an hour, or until it has doubled in size. This rising period is crucial for developing the light, fluffy texture of the doughnuts.
Step 5: Shape the Doughnuts
Once the dough has risen, turn it out onto a floured surface. Divide the dough into four pieces. Working with one piece at a time, roll the dough into a long rope about 1 to 1 1/2 inches wide. Cut the rope into small strips, roughly an inch long, and shape them into balls with your hands. Place these doughnut balls onto a baking tray or wire rack to rise further while you prepare for frying.
Step 6: Heat the Oil
In a large wok or deep fryer, heat enough oil to cover the bottom few inches. The oil needs to reach 375°F (190°C). You can use a kitchen thermometer to monitor the temperature. Heating the oil properly is essential for achieving the perfect texture—too hot, and the doughnuts will burn; too cool, and they will become greasy.
Step 7: Fry the Doughnuts
Carefully place the doughnut balls into the hot oil, being careful not to overcrowd the pan. Fry them in batches if necessary. Cook each doughnut for about 1 minute on each side, or until they are golden brown. Use a slotted spoon to remove the doughnuts from the oil and let them drain on a paper towel or wire rack.
Step 8: Glaze the Doughnuts
While the doughnuts are cooling slightly, prepare the glaze. In a small saucepan, melt the butter over low heat. Stir in the confectioners’ sugar and vanilla extract until smooth. Gradually add the hot water, one tablespoon at a time, until you achieve the desired consistency. The glaze should be thick enough to coat the doughnuts but still fluid enough to drizzle.
Once the doughnuts are slightly cooled but still warm, dip them into the glaze. Allow any excess glaze to drip off before placing them on a wire rack to let the glaze set.
Variations and Substitutions
Flavored Glazes: Experiment with flavored extracts such as almond, lemon, or cinnamon to customize your glaze.
Toppings: Add sprinkles, chopped nuts, or shredded coconut to the glaze for extra texture and flavor.
Doughnut Fillings: For a filled doughnut, consider piping in jams, custards, or chocolate ganache after frying.
Baking Option: If you prefer not to fry, you can bake the doughnut balls in a preheated oven at 375°F (190°C) for about 10-12 minutes. They will be less greasy but still delicious.
Summary
Homemade Krispy Kremes are more than just a sweet treat—they’re a journey into the heart of comfort food. From the initial mixing of ingredients to the final, glorious glaze, every step in making these doughnuts is an opportunity to create something truly special. The combination of a light, fluffy doughnut with a rich, glossy glaze is a match made in dessert heaven.
Making Krispy Kremes at home not only allows you to enjoy these iconic doughnuts fresh out of the fryer but also gives you the satisfaction of mastering a classic recipe. Whether you’re sharing them with family, friends, or simply indulging yourself, these homemade doughnuts bring joy and a touch of nostalgia to any occasion.

