Would you like to save this?
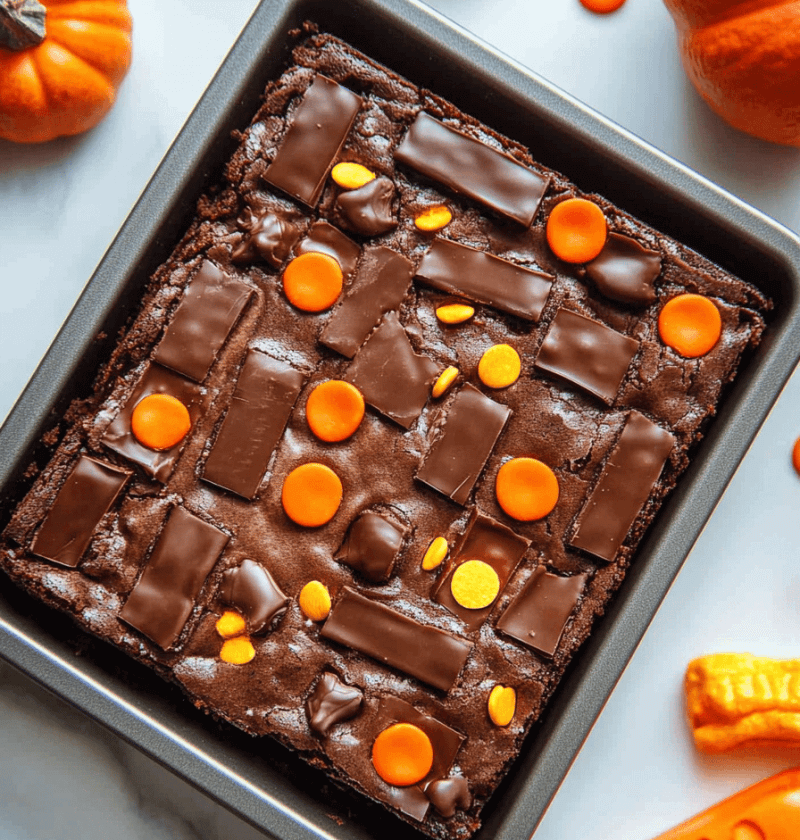
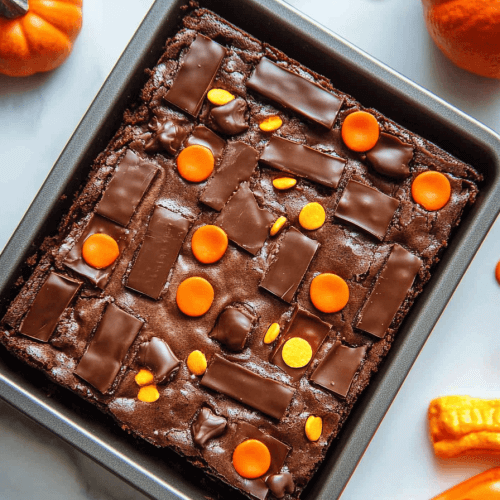
Looking for spooky treats for your Halloween bash? My no‐bake Halloween Brownies mix festive fun with rich chocolate, cute ghosts, and tiny pumpkin faces in under an hour.
I first dreamed up these Halloween Brownies when my grandkids begged for treats that felt a bit scary but tasted oh-so sweet. Instead of fudgy cake-style bars, I riffed on brownie batter to create soft, truffle-like bites—no oven required, which is perfect if you’re juggling carnival prep or ghost stories by candlelight. They’re studded with mini chocolate chips and decorated with simple white-chocolate ghosts or candy-pumpkin smiles. Plus, I swap out a bit of butter for Greek yogurt to keep them just a touch lighter. Who says spooky can’t be sensible?
You’ll often find me packing these into gift boxes for neighbors or tucking them into lunchboxes on the morning of October 31st. Honestly, they vanish faster than you can say “BOO!” And the best part? They’re so easy, you can whip up a batch while listening to your favorite scary podcast or humming along to classic Halloween tunes.
Why You’ll Love This Recipe
• No oven needed—just mix, chill, and decorate.
• Ready in under an hour, including chilling.
• Perfect for Halloween parties, school treats, or office spook-fest.
• Greek yogurt swap makes them lighter than traditional brownies.
• Customizable decorations—ghosts, pumpkins, spooky sprinkles.
• Freezer-friendly for make-ahead convenience.
• Family-friendly: kids can help shape & decorate.
• Gluten-free option with simple flour swap.
Ingredients
• 1 cup (2 sticks) unsalted butter, softened (or vegan butter for dairy-free)
• 1 cup plain whole-milk Greek yogurt (adds creaminess without too much fat)
• 2 cups granulated sugar
• 1½ cups unsweetened cocoa powder (use Dutch-process for deeper color)
• 1 teaspoon pure vanilla extract
• 3 cups all-purpose flour (swap 1:1 gluten-free flour blend to make it GF)
• 1 teaspoon kosher salt
• 1 cup mini semi-sweet chocolate chips (milk-chocolate chips for a milder flavor)
• White chocolate chips or candy melts, for decorating
• Halloween sprinkles—ghosts, pumpkins, or spooky silhouettes
Tips on ingredients:
– Pick a high-quality cocoa (≥22% cacao) for that rich chocolate punch.
– Let your butter sit at room temp—too cold, and it won’t blend smoothly.
– If Greek yogurt feels tangy, stir in an extra teaspoon of vanilla.
– Use mini chips so you get chocolate in every bite without big lumps.
Directions
1. Whisk Butter & Yogurt
In a large bowl, cream together softened butter and Greek yogurt until smooth and light—about 2–3 minutes with an electric mixer. You’ll see it turn pale; that’s your cue.
2. Add Sugar & Cocoa
Stir in sugar, cocoa powder, and vanilla. Mix just until no dry streaks remain. It’ll look thick—like brownie batter but slightly drier.
3. Fold in Flour Mix
In a separate bowl, whisk flour and salt. Gradually fold the dry mix into the chocolate batter until combined; avoid overmixing or you’ll get chewy bites, and we want tender.
4. Stir in Chips
Gently fold mini chocolate chips into the batter with a silicone spatula, saving a handful for topping.
5. Shape & Chill
Use a small cookie scoop or tablespoon to portion out truffle-sized mounds onto a parchment-lined baking sheet. Press down lightly so each is about 1 inch thick. Sprinkle tops with reserved chips.
6. Chill for Flavor
Pop the baking sheet into the fridge for at least 30 minutes—this firms them up so the decorations stick.
7. Decorate & Serve
Melt white chocolate chips or candy melts according to package instructions (microwave in 20-second bursts). Drizzle or pipe little ghost faces, tiny pumpkin grins, or random spooky shapes. Let set, then transfer treats to a festive platter.
Servings & Timing
Makes 24–28 brownie bites
Prep Time: 20 minutes
Chill Time: 30–45 minutes (minimum)
Total Time: about 1 hour
Variations
• Pumpkin Spice Swirl: Stir in 1 tsp pumpkin pie spice for a harvest twist.
• Nutty Surprise: Fold in ½ cup chopped pecans or walnuts.
• Peanut Butter Halloween: Drop a dollop of peanut butter in each mound before chilling.
• Vegan Version: Swap butter for coconut oil and use dairy-free yogurt.
• Boozy Boo Bites: Add 1 tbsp rum or bourbon for grown-up flair.
• Caramel Drizzle: Drizzle dulce de leche instead of white chocolate.
Storage & Reheating
Store in an airtight container in the fridge for up to 5 days—ideal for a week of spooky snacking. Freeze un-decorated bites in a single layer for up to 2 months; thaw in the fridge overnight before decorating. Bites soften at room temperature in about 10 minutes, so no microwave needed.
Notes
• I discovered that chilling longer makes the flavor pop (and it’s easier to handle).
• Too dry? Add a tsp of milk or extra yogurt for moisture.
• If you prefer deeper flavor, toast the flour at 300°F for 5 minutes—let it cool before mixing.
• For ultra-smooth decorations, stir a tiny bit of vegetable oil into melted candy melts.
FAQs
Q: Can I bake these instead of chilling?
A: You could bake at 325°F for 8–10 minutes, but they won’t have the dense, fudgy bite of the no-bake version.
Q: How do I prevent cracked decorations?
A: Let chocolate cool slightly but remain fluid—too hot and it’ll scorch, too cold and it cracks.
Q: Are these nut-free?
A: Yes, if you skip nut add-ins and verify your chocolate chips are processed in a nut-free facility.
Q: Can I make them ahead for a party?
A: Absolutely—decorate up to 24 hours in advance and keep chilled in a sealed box.
Q: What’s the best way to cut sweetness?
A: Use dark cocoa (no sugar added) and semi-sweet or bittersweet chips.
Q: Can kids help decorate?
A: Definitely—and trust me, they’ll sneak more than a few bites of melted chocolate!
Q: Why is Greek yogurt better than sour cream here?
A: It’s thicker and less tangy, giving richness without thinning the batter.
Q: How to get sturdy shapes?
A: A silicone scoop gives uniform sizes, and an extra 10 minutes in the fridge helps them hold up.
Conclusion
These Halloween Brownies strike the perfect balance between spooky fun and chocolatey comfort—no oven required, and totally customizable. Give them a try at your next haunted gathering, then drop a comment below to let me know how your ghosts and pumpkins held up! Don’t forget to explore my Festive Pumpkin Spice Muffins or Ghostly Meringue Cookies for more seasonal treats. Happy haunting—and happy snacking!
Halloween Brownies
Ingredients
- 2 sticks unsalted butter softened (or vegan butter for dairy-free)
- 1 cup plain whole-milk Greek yogurt
- 2 cups granulated sugar
- 1 ½ cups unsweetened cocoa powder
- 1 tsp pure vanilla extract
- 3 cups all-purpose flour
- 1 tsp kosher salt
- 1 cup mini semi-sweet chocolate chips
- White chocolate chips or candy melts, for decorating
- Halloween sprinkles (ghosts, pumpkins, or spooky silhouettes)
Instructions
- In a large bowl, cream together softened butter and Greek yogurt until smooth and light—about 2–3 minutes with an electric mixer. You’ll see it turn pale; that’s your cue.
- Stir in sugar, cocoa powder, and vanilla. Mix just until no dry streaks remain. It’ll look thick—like brownie batter but slightly drier.
- In a separate bowl, whisk flour and salt. Gradually fold the dry mix into the chocolate batter until combined; avoid overmixing or you’ll get chewy bites, and we want tender.
- Gently fold mini chocolate chips into the batter with a silicone spatula, saving a handful for topping.
- Use a small cookie scoop or tablespoon to portion out truffle-sized mounds onto a parchment-lined baking sheet. Press down lightly so each is about 1 inch thick. Sprinkle tops with reserved chips.
- Pop the baking sheet into the fridge for at least 30 minutes—this firms them up so the decorations stick.
- Melt white chocolate chips or candy melts according to package instructions. Drizzle or pipe little ghost faces, tiny pumpkin grins, or random spooky shapes. Let set, then transfer treats to a festive platter.

