Would you like to save this?
Chocolate Depression Cake Bars Recipe
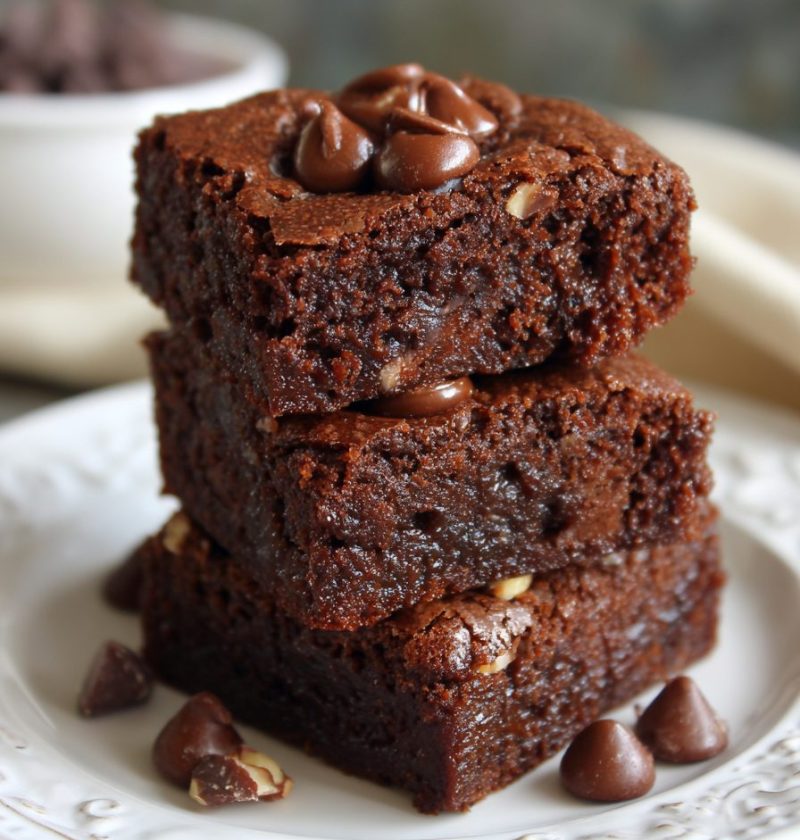
This Chocolate Depression Cake Bars Recipe gives you a rich, moist chocolate dessert that uses no eggs, no milk, and no butter—just simple pantry staples that bake up into the softest, fudgy little squares. It’s a vintage chocolate cake made modern, and it’s as kind to your budget as it is to your sweet tooth.
A Little Story Behind These Chocolate Depression Cake Bars
If you’ve never heard of chocolate depression cake before, it’s an old fashioned chocolate cake that became popular in the 1930s, when ingredients like eggs, milk, and butter were expensive or hard to find. Home cooks got clever. They figured out how to make a moist chocolate cake with shelf-stable ingredients and a bit of creativity.
This Chocolate Depression Cake Bars Recipe takes that same thrifty, vintage idea and bakes it in bar form. You get neat squares that are easy to share, pack in lunch boxes, or line up on a potluck table. They’re naturally eggless chocolate cake bars, and if you use plant-based milk or water for the frosting, they’re also a simple vegan chocolate cake bars recipe.
I like to think of these as “grandma’s cake meets busy weeknight.” You stir everything together in one bowl. No mixer. No fancy steps. And yet you end up with tender, moist chocolate cake bars that taste like you fussed.
I make these when:
- I’m low on groceries but still want an easy chocolate dessert
- Someone with an egg or dairy allergy is coming over
- I need a budget friendly dessert that feeds a crowd
- The teens are roaming the kitchen asking, “What’s for dessert?”
You know what? There’s also something very comforting about baking a vintage chocolate cake that our grandparents might have eaten, especially when grocery prices feel wild. It’s a little reminder that good food doesn’t have to be fancy or expensive.

Why You’ll Love This Chocolate Depression Cake Bars Recipe
- Naturally egg-free and dairy-free – Perfect if you need a no milk chocolate cake or no eggs chocolate cake, without hunting for specialty ingredients.
- True one-bowl chocolate cake – Minimal dishes, minimal mess, maximum satisfaction.
- Moist, fudgy texture – Feels like a cross between Brownies and chocolate cake bars.
- Budget friendly dessert – Uses Flour, cocoa, sugar, oil, and vinegar—things most of us already have.
- Vegan-friendly – Just use water or plant milk for the optional glaze and you’ve got vegan chocolate cake bars.
- Super simple and forgiving – Great for beginner bakers, kids, and “I’m tired but I want cake” nights.
- Easily doubles for a crowd – Make a big batch for potlucks, church coffee hour, or office parties.
- Stays moist for days – This old fashioned chocolate cake actually tastes even better on day two.
- Customizable – Add chocolate chips, coffee, orange zest, or spices without changing the base recipe.
Ingredients For The Best Chocolate Depression Cake Bars
Let’s talk ingredients. Everything in this Chocolate Depression Cake Bars Recipe is easy to find and simple to substitute. I’ll list the basics, then give you some swap ideas.
For the chocolate depression cake bars:
-
1 ½ cups (180 g) all-purpose flour
Use regular all-purpose. If you’re using a kitchen scale, you’ll get the best consistency. -
1 cup (200 g) granulated sugar
White sugar gives a classic flavor. Light brown sugar also works for a deeper taste. -
¼ cup (20 g) unsweetened cocoa powder
Natural cocoa powder works best. Make sure it’s unsweetened. Sift if it looks clumpy. -
1 teaspoon baking soda
This is your main lift. Check the date on the box; old baking soda can give flat cake. -
½ teaspoon fine sea salt
Salt makes the chocolate flavor pop. Table salt is okay; just use a scant ½ teaspoon. -
1 teaspoon vanilla extract
Use real vanilla if you can. It matters more in simple recipes like this. -
1 tablespoon white vinegar or apple cider vinegar
The acid reacts with baking soda and gives a lighter texture. You won’t taste the vinegar. -
⅓ cup (80 ml) neutral oil
Canola, vegetable, grapeseed, or light olive oil all work. The oil keeps the cake moist. -
1 cup (240 ml) water or cooled coffee
Water gives a classic taste. Brewed coffee deepens the chocolate flavor without making it “coffee cake.”
Optional but lovely mix-ins:
-
½ cup (90 g) chocolate chips or chunks
Great for extra fudginess. Use dairy-free chocolate to keep it a dairy free chocolate cake. -
¼ cup (30 g) chopped nuts
Walnuts or pecans give a nice crunch if you like texture in your chocolate cake bars.
For a simple chocolate glaze (optional but recommended):
You can leave the top plain, dust with powdered sugar, or use this very easy glaze:
- 1 cup (120 g) powdered sugar, sifted
- 2 tablespoons unsweetened cocoa powder
- 2–3 tablespoons water, strong coffee, or plant milk
- 1 teaspoon vanilla extract
- Pinch of salt
Whisk until smooth. Add more liquid a teaspoon at a time if it’s too thick.
Ingredient tips:
- Want a slightly richer bar but still eggless? Replace half the water with dairy-free yogurt or unsweetened applesauce for extra moisture.
- Baking for someone gluten-free? A good 1:1 gluten-free baking blend often works, though the texture may be a bit more delicate.
- If you’re sensitive to caffeine, choose water instead of coffee and skip chocolate chips made with caffeine-heavy dark chocolate.
Step-By-Step Directions
This Chocolate Depression Cake Bars Recipe is classic “stir and bake” comfort. No mixer, no fancy steps, just a bowl and a whisk.
1. Preheat and prep your pan
Preheat your oven to 350°F (175°C).
Lightly grease an 8×8-inch baking pan or line it with parchment paper, leaving a little overhang so you can lift the bars out later. This makes cutting the chocolate cake bars much easier.
2. Mix the dry ingredients
In a medium mixing bowl, whisk together:
- Flour
- Sugar
- Cocoa powder
- Baking soda
- Salt
Whisk until everything looks even and there are no streaks of cocoa. This step matters; it helps prevent little pockets of dry ingredients in your baked bars.
3. Make three “wells” in the dry mix (the vintage way)
This is a classic depression cake step and it’s oddly satisfying.
Use the back of a spoon to make three small wells in the dry mixture:
- One for the vanilla
- One for the vinegar
- One for the oil
Pour each wet ingredient into its own little well. This doesn’t change the science much, but it’s true to the old fashioned chocolate cake method and mixes the liquids evenly.
4. Add the water or coffee and whisk
Pour the 1 cup water or coffee over everything.
Whisk gently at first so cocoa doesn’t puff everywhere, then whisk until the batter is mostly smooth. A few small lumps are fine. It should look loose and glossy—thinner than brownie batter, thicker than crepe batter.
If you’re adding chocolate chips or nuts, fold them in with a spatula now.
5. Pour into the pan and level
Pour the batter into your prepared pan. Use a spatula to scrape the bowl and smooth the top.
Tap the pan once or twice on the counter to pop any big air bubbles. This helps the moist chocolate cake bars bake evenly.
6. Bake
Bake at 350°F (175°C) for 25–30 minutes, or until:
- The top looks set and slightly matte
- A toothpick inserted in the center comes out with a few moist crumbs but no wet batter
Every oven runs a little differently—my older gas oven is on the “hot” side—so start checking at 23–24 minutes.
7. Cool completely
Place the pan on a cooling rack. Let the cake cool completely in the pan, at least 45–60 minutes.
This helps set the texture so you can cut tidy chocolate cake bars. If you’re in a rush, you can chill the pan in the fridge after it comes to room temp.
8. Make the simple chocolate glaze (optional)
While the cake cools, whisk together:
- Powdered sugar
- Cocoa powder
- Pinch of salt
Then add:
- Vanilla
- 2 tablespoons water, coffee, or plant milk
Whisk until smooth. If it’s too thick, add extra liquid 1 teaspoon at a time until it’s pourable but not runny.
9. Glaze and slice into bars
Pour the glaze over the cooled cake and spread it gently with an offset spatula or the back of a spoon.
Let the glaze set for about 20–30 minutes (it may stay a little soft, which is lovely and fudgy).
Use the parchment overhang to lift the cake out. Place it on a cutting board and slice into:
- 9 large bars
- 12–16 smaller squares
Wipe the knife with a warm, damp cloth between cuts for the neatest edges.
Now you’ve got a tray of old fashioned chocolate depression cake in bar form—ready to share, or not share, depending on your mood.
Servings & Timing
- Yield: About 9 large or 12–16 smaller chocolate cake bars
- Prep Time: 10–15 minutes
- Bake Time: 25–30 minutes
- Cooling + Glazing Time: 1–1½ hours (mostly hands-off)
- Total Time: About 1 hour 45 minutes from start to first bite
If you skip the glaze, you can shave about 20–30 minutes off the total time; just cool, slice, and eat.
Easy Variations & Flavor Twists
This basic Chocolate Depression Cake Bars Recipe is a great canvas. Here are some simple ways to change things up:
- Mocha Depression Cake Bars – Replace all or part of the water with strong coffee and stir in ½ teaspoon espresso powder.
- Chocolate Orange Bars – Add 1 tablespoon orange zest to the batter and a teaspoon to the glaze for a bright, citrusy twist.
- Spiced Vintage Chocolate Cake – Whisk ½ teaspoon cinnamon and a pinch of nutmeg or chili powder into the dry ingredients.
- Peanut Butter Swirl Bars – Dollop ¼ cup warmed peanut butter on top of the batter and swirl with a knife before baking.
- Mint Chocolate Cake Bars – Add ½ teaspoon peppermint extract to the glaze and sprinkle with crushed candy canes around the holidays.
- Double Chocolate Chunk Bars – Fold in ½ cup chocolate chunks and drizzle melted chocolate over the cooled bars instead of glaze.
Storage, Freezing & Reheating
One of the perks of this eggless chocolate cake is how well it holds up.
Room temperature:
- Store the bars in an airtight container at room temperature for 2–3 days.
- Keep them in a cool, dry spot away from direct sunlight.
Refrigerator:
- For longer storage, refrigerate for up to 5 days.
- Let bars sit at room temp for 15–20 minutes before serving so the texture softens and flavors bloom again.
Freezer:
- Slice the bars and place them on a sheet pan to freeze until firm, about 1 hour.
- Transfer to a freezer-safe bag or container, with parchment between layers, and freeze for up to 2 months.
- Thaw on the counter for 30–45 minutes or in the fridge overnight.
No real “reheating” needed—these are meant to be eaten at room temperature. If you like them warm, a quick 8–10 seconds in the microwave per bar is plenty. Just don’t overdo it or they can dry out around the edges.
Make-ahead tip:
Bake the cake, cool, wrap the whole uncut slab tightly, and refrigerate for up to 2 days. Glaze and slice the day you plan to serve for the freshest look.
Notes From My Kitchen
- Don’t skimp on the salt. That tiny ½ teaspoon takes this from “sweet” to “chocolatey.” If your cake tastes flat, you probably need a bit more salt next time.
- Vinegar is your friend. I know it sounds odd if you’re new to depression cake, but vinegar and baking soda are what give this one bowl chocolate cake a nice lift. You truly won’t taste it.
- Use fresh baking soda. If your cake doesn’t rise well or seems dense in the center, your baking soda may be past its prime. I replace mine every few months.
- Don’t overbake. Pull the cake when you still see a few moist crumbs on the toothpick. This is the key to soft, moist chocolate cake bars.
- Let it cool. I know, waiting is hard. But cutting too soon can make the bars crumbly. A little patience here pays off.
- Play with the liquid. Water is classic, but coffee, oat milk, or soy milk each give a slightly different flavor. This is a fun place to experiment.
Honestly, every time I bake this, I’m still a little amazed that something so simple can taste this cozy and satisfying.
Frequently Asked Questions
Can I make this Chocolate Depression Cake Bars Recipe gluten-free?
Yes, usually. Use a 1:1 gluten-free baking blend meant for baking. The texture may be slightly more tender, so let the cake cool well before slicing.
Is this recipe vegan?
The bars themselves are naturally vegan as written. Just use water or plant milk in the glaze and dairy-free chocolate chips if you add them.
Can I bake this as a regular cake instead of bars?
You can. Use the same batter in an 8×8 or 9-inch round pan. Baking time should be similar—start checking at 23–25 minutes.
Why does this cake use vinegar?
The vinegar reacts with the baking soda, helping the cake rise and stay soft. It’s a classic trick in old fashioned chocolate cake recipes, especially when there are no eggs.
Can I double the recipe?
Yes. Double all ingredients and bake in a 9×13-inch pan. The baking time will likely be closer to 30–35 minutes, so keep an eye on it.
My cake turned out dry. What happened?
Most likely it baked a bit too long or your oven runs hot. Next time, check a few minutes earlier and consider using an oven thermometer to check the actual temperature.
Can I skip the glaze?
Absolutely. The cake is moist and sweet enough on its own. Try a dusting of powdered sugar or a spoonful of whipped cream or dairy-free whipped topping if you like.
Can I reduce the sugar?
You can cut the sugar to about ¾ cup without ruining the texture, though the bars will be less sweet and a bit less moist. I don’t recommend going much lower on your first try.
Wrapping Up: Bake A Little History Today
This Chocolate Depression Cake Bars Recipe is one of those simple, old-fashioned treats that quietly wins everyone over—no eggs, no milk, no butter, just humble pantry ingredients baked into soft, fudgy chocolate cake bars. It’s a budget friendly dessert, a lovely vegan chocolate cake bars option, and a sweet reminder that “simple” can taste pretty wonderful.
If you make these chocolate depression cake bars, I’d love to hear how they turned out—tell me your twists, what you served them with, or who you shared them with. And if you enjoy vintage chocolate cake recipes, you might also like exploring other one bowl chocolate cake and easy chocolate dessert ideas for your weekly baking rotation.
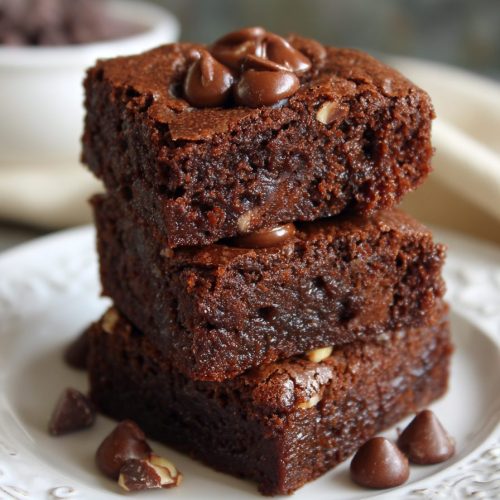
Chocolate Depression Cake Bars
Ingredients
- 1 1/2 cups all-purpose flour (180 g)
- 1 cup granulated sugar (200 g)
- 1/4 cup unsweetened cocoa powder (20 g), natural, sift if clumpy
- 1 teaspoon baking soda
- 1/2 teaspoon fine sea salt or scant 1/2 teaspoon table salt
- 1 teaspoon vanilla extract
- 1 tablespoon white vinegar or apple cider vinegar
- 1/3 cup neutral oil such as canola, vegetable, grapeseed, or light olive oil (about 80 ml)
- 1 cup water or cooled brewed coffee (240 ml)
- 1/2 cup chocolate chips or chunks (90 g), optional; use dairy-free if needed
- 1/4 cup chopped nuts (30 g), such as walnuts or pecans, optional
- 1 cup powdered sugar (120 g), sifted, for optional glaze
- 2 tablespoons unsweetened cocoa powder for optional glaze
- 2-3 tablespoons water, strong coffee, or plant milk for optional glaze, plus more as needed
- 1 teaspoon vanilla extract for optional glaze
- 1 pinch salt for optional glaze
Instructions
- Preheat your oven to 350°F (175°C). Lightly grease an 8×8-inch baking pan or line it with parchment paper, leaving some overhang on two sides to make it easy to lift the bars out for slicing.
- In a medium mixing bowl, whisk together the all-purpose flour, granulated sugar, cocoa powder, baking soda, and salt until evenly combined and no streaks of cocoa remain.1 1/2 cups all-purpose flour, 1 cup granulated sugar, 1/4 cup unsweetened cocoa powder, 1 teaspoon baking soda, 1/2 teaspoon fine sea salt
- Use the back of a spoon to make three small wells in the dry mixture. Pour the vanilla extract into one well, the vinegar into the second, and the neutral oil into the third.1 teaspoon vanilla extract, 1 tablespoon white vinegar or apple cider vinegar, 1/3 cup neutral oil
- Pour the water or cooled coffee over the dry ingredients and wells. Whisk gently at first to avoid cocoa puffing out, then whisk until the batter is mostly smooth. A few small lumps are fine. The batter will be looser than brownie batter but thicker than crepe batter.1 cup water or cooled brewed coffee
- If using, gently fold in the chocolate chips or chunks and chopped nuts with a spatula until evenly distributed.1/2 cup chocolate chips or chunks, 1/4 cup chopped nuts
- Pour the batter into the prepared 8×8-inch pan. Use a spatula to scrape the bowl and smooth the top. Tap the pan once or twice on the counter to release any large air bubbles.
- Bake at 350°F (175°C) for 25–30 minutes, or until the top looks set and slightly matte and a toothpick inserted in the center comes out with a few moist crumbs but no wet batter. Start checking around 23–24 minutes, as ovens vary.
- Place the pan on a cooling rack and let the cake cool completely in the pan, at least 45–60 minutes. This helps the bars set so they slice cleanly. For faster cooling after it reaches room temperature, you can chill the pan briefly in the refrigerator.
- In a small bowl, whisk together the powdered sugar, cocoa powder, and a pinch of salt. Add the vanilla extract and 2 tablespoons of water, strong coffee, or plant milk. Whisk until smooth, adding more liquid 1 teaspoon at a time as needed until the glaze is pourable but not runny.1 cup powdered sugar, 2 tablespoons unsweetened cocoa powder, 1 pinch salt, 1 teaspoon vanilla extract, 2-3 tablespoons water, strong coffee, or plant milk
- Pour the glaze over the fully cooled cake and spread it gently with an offset spatula or the back of a spoon. Let the glaze set for 20–30 minutes (it may remain slightly soft and fudgy). Use the parchment overhang to lift the cake from the pan onto a cutting board. Slice into 9 large bars or 12–16 smaller squares, wiping the knife with a warm, damp cloth between cuts for neat edges.
- Serve the bars at room temperature. Store in an airtight container at room temperature for 2–3 days or in the refrigerator for up to 5 days. For longer storage, freeze the sliced bars on a sheet pan until firm, then transfer to an airtight container and freeze for up to 2 months.
Notes
• For a richer texture, replace up to half of the water with dairy-free yogurt or unsweetened applesauce.
• To make gluten-free, use a good 1:1 gluten-free baking blend; the texture may be slightly more delicate, so cool fully before slicing.
• Avoid overbaking to keep the bars moist and fudgy; remove them when a toothpick shows a few moist crumbs.
• The flavor actually improves on day two and the bars stay moist for several days.