Would you like to save this?
Ingredients
1 can (10 ¾ ounces) cream of chicken soup
¼ cup milk
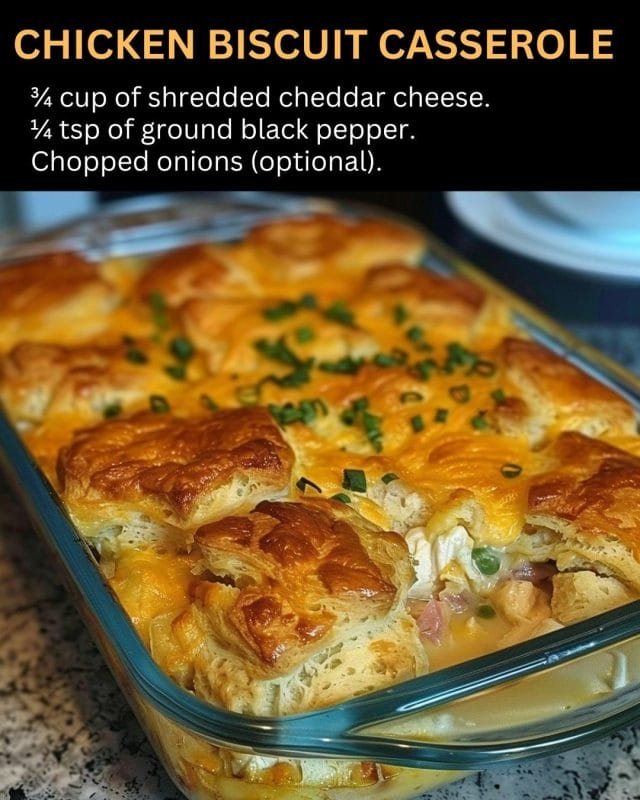
¾ cup shredded cheddar cheese
¼ teaspoon ground black pepper
½ cup chopped onions (optional)
1 cup green peas (frozen or canned, drained)
2 cups boiled potatoes, diced
2 cups boiled chicken, shredded
1 (7.5 ounces) package of refrigerated biscuit dough
Step-by-Step Instructions
Step 1: Prepare the Ingredients
Preheat the Oven: Start by preheating your oven to 400°F (200°C). This ensures that the oven is hot enough to bake the casserole evenly and thoroughly.
Boil the Chicken and Potatoes: If you haven’t done so already, boil the chicken breasts and potatoes until fully cooked. Shred the chicken and dice the potatoes into bite-sized pieces. This step can be done ahead of time to save preparation time.
Step 2: Mix the Casserole Base
Combine Soup and Milk: In a 3-quart shallow baking dish, mix together 1 can of cream of chicken soup and ¼ cup of milk. Stir until well combined. The cream of chicken soup acts as a rich and creamy base for the casserole.
Add Cheese and Seasoning: Add ¾ cup of shredded cheddar cheese and ¼ teaspoon of ground black pepper to the soup mixture. Stir until the cheese is evenly distributed. The cheddar cheese adds a nice tangy flavor and helps to thicken the sauce.
Incorporate Vegetables and Chicken: Mix in ½ cup of chopped onions (if using), 1 cup of green peas, 2 cups of diced boiled potatoes, and 2 cups of shredded boiled chicken. Stir until all the ingredients are well-coated with the creamy sauce.
Step 3: Bake the Casserole
First Bake: Place the baking dish in the preheated oven and bake for 15 minutes. This initial bake helps to meld the flavors together and ensures the vegetables and chicken are heated through.
Stir and Top with Biscuits: After 15 minutes, remove the dish from the oven and stir the casserole to combine the ingredients more thoroughly. Open the package of refrigerated biscuit dough and place the biscuits on top of the casserole. Arrange them evenly to cover the surface.
Second Bake: Return the dish to the oven and bake for an additional 15 minutes, or until the biscuits are golden brown and cooked through. The biscuits should be fluffy and slightly crispy on top.
Step 4: Serve and Enjoy
Cool Slightly: Once the casserole is done, remove it from the oven and let it cool for a few minutes. This makes it easier to serve and allows the flavors to set.
Garnish (Optional): If desired, you can garnish the casserole with a sprinkle of fresh parsley or additional shredded cheese for added flavor and color.
Serve: Scoop out generous portions of the Chicken Biscuit Casserole and serve hot. This dish pairs well with a simple green salad or steamed vegetables.
Variations and Substitutions
Vegetarian Option: Substitute the chicken with a can of drained and rinsed chickpeas or a mixture of sautéed mushrooms and tofu for a vegetarian version.
Different Vegetables: Feel free to add or substitute other vegetables such as carrots, corn, or broccoli to the casserole for added nutrition and variety.
Gluten-Free: Use a gluten-free cream of chicken soup and gluten-free biscuit dough to make this dish suitable for those with gluten sensitivities.
Cheese Alternatives: Experiment with different cheeses like mozzarella, Swiss, or pepper jack to change up the flavor profile.
Spicy Kick: Add a dash of hot sauce or a sprinkle of red pepper flakes to the soup mixture for a bit of heat.
Conclusion
Chicken Biscuit Casserole is a delightful, easy-to-make dish that brings warmth and comfort to any meal. The combination of creamy chicken, tender vegetables, and fluffy biscuits makes for a satisfying and hearty meal that’s perfect for any occasion.
The recipe is straightforward and adaptable, allowing you to customize it to suit your family’s tastes and dietary needs. Whether you’re making it for a weeknight dinner, a potluck, or a cozy weekend meal, this casserole is sure to be a hit.
In summary, Chicken Biscuit Casserole is appealing because it’s both delicious and easy to prepare. The rich, creamy filling paired with the golden, flaky biscuits makes each bite a comforting delight. So gather your ingredients, follow these detailed instructions, and enjoy a dish that’s sure to become a favorite in your home.


