Would you like to save this?
Blackberry Jelly Recipe (Old-Fashioned, Seed-Free, and Perfectly Jiggly)
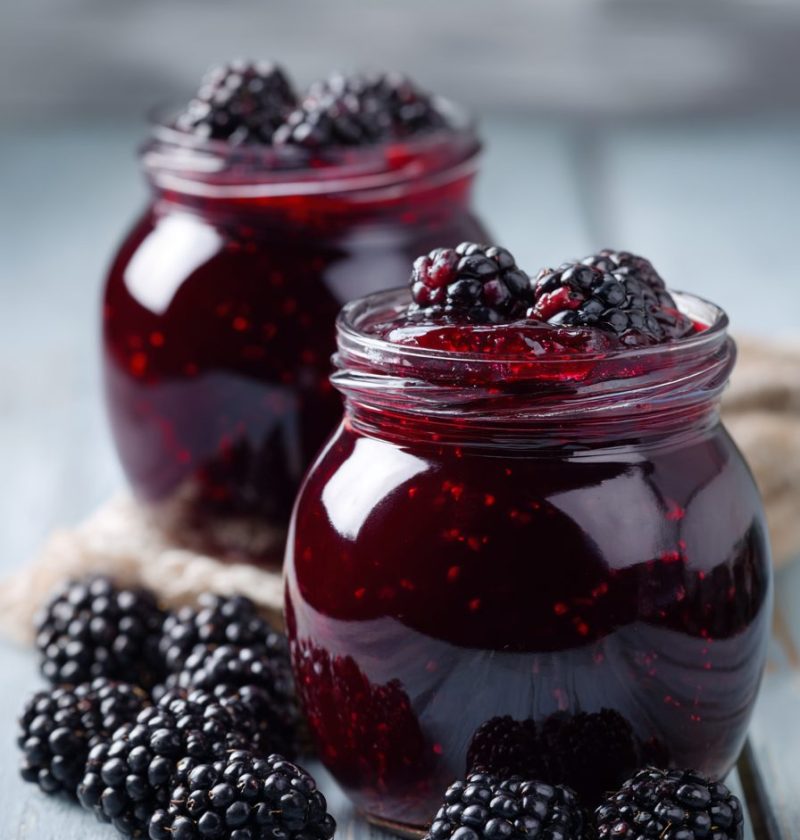
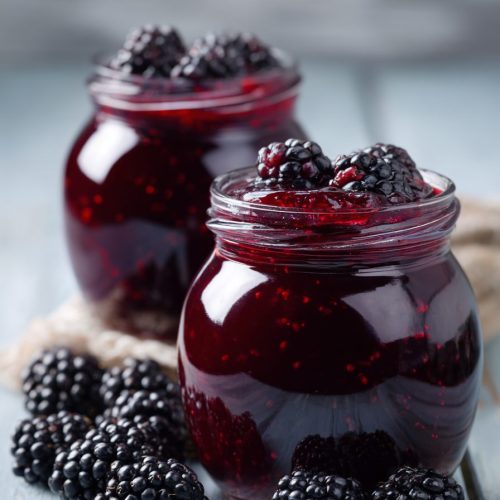
This Blackberry Jelly Recipe gives you a glossy, seed-free jelly with deep berry flavor, perfect for spreading on hot biscuits, swirling into yogurt, or tucking into holiday gift baskets.
A Little Story Behind This Blackberry Jelly Recipe
If you grew up in the U.S. with a grandmother who canned every summer, this homemade blackberry jelly will feel like a warm hug from your childhood.
This is a traditional blackberry jelly recipe—no seeds, just a smooth, jewel-toned spread with that wild blackberry tang. It’s the kind of easy blackberry jelly that tastes like you fussed all day, even though you really just need a good pot, some sugar, and a bit of patience. I make a small batch most summers, especially in late July and August when blackberries are bursting at the farmers’ market and prices finally make sense.
You know what? There’s something very grounding about stirring a pot of bubbling berries on a quiet weekend afternoon. This recipe is especially helpful if your kids (or grandkids) don’t like seeds, or you want a more elegant texture for thumbprint cookies and jelly rolls. It’s also a practical way to preserve a big haul of berries before they go soft.
We’ll walk through exactly how to make blackberry jelly, how to get it to set properly, and how to can it safely if you’d like shelf-stable jars. Whether you’re brand-new to canning or you’ve been putting up fruit for decades, these blackberry jelly instructions are laid out step-by-step so you can feel calm and confident.
Why You’ll Love This Blackberry Jelly
- Seed-free and silky – This blackberry jelly without seeds is smooth, glossy, and perfect for picky eaters.
- Classic, old-fashioned flavor – Tastes like grandma’s pantry: simple blackberry jelly ingredients and no fancy tricks.
- Small batch friendly – This recipe scales well, so you can make a small batch blackberry jelly with just a few pints of berries.
- Beginner-friendly canning – Straightforward blackberry jelly canning instructions that don’t feel overwhelming.
- Freezer-friendly option – Skip the canner entirely and store jars in the freezer if that fits your life better.
- Versatile – Great on toast, biscuits, pancakes, layered in cakes, or as a glaze for pork and chicken.
- Budget-conscious – Use peak-season or even slightly overripe berries you’ve bought on sale or picked yourself.
- Make-ahead gift idea – Keeps beautifully, so you can prep jars for holidays, hostess gifts, or teacher thank-yous.
Ingredients for Homemade Blackberry Jelly
For a classic, old fashioned blackberry jelly that sets well and tastes bright, you’ll need:
- 4 cups blackberry juice
(From about 3–3½ quarts fresh blackberries or 3–4 pounds frozen; more on getting the juice below.) - 5 cups granulated sugar
(Regular white cane sugar works best; don’t use sugar substitutes with this method.) - 1 box (1.75 oz) powdered fruit pectin
(Like Sure-Jell or Ball; use regular, not low-sugar, for this formula.) - 2 tablespoons bottled lemon juice
(Bottled is more consistent and safer for canning than fresh; it helps flavor and acidity.) - 1–2 teaspoons unsalted butter (optional)
(Helps reduce foam while boiling.)
That’s it—those are your core blackberry jelly ingredients.
A Few Ingredient Tips
- Fresh vs. frozen blackberries: Frozen berries are picked at peak ripeness and work just as well as fresh. Don’t thaw them fully before cooking; they’ll release juice as they heat.
- Choosing berries: Slightly soft berries are fine for jelly; just avoid moldy or badly bruised ones. The riper the berries, the fuller the flavor.
- Sugar: For a reliable set, stick to standard granulated sugar. If you want reduced-sugar, you’ll need a low- or no-sugar pectin and a different ratio.
- Pectin: Different brands have slightly different instructions. This recipe follows a common method for standard powdered pectin, but if your box says something very different, let that guide you.
How to Extract Blackberry Juice (Seed-Free Base)
Before we get into the main directions, we need to talk about juice extraction, because that’s the backbone of a good blackberry jelly recipe.
-
Rinse the berries:
Place blackberries in a colander and quickly rinse under cool water. Let them drain well—excess water can weaken flavor. -
Cook the berries:
In a large nonreactive pot (stainless steel or enameled), add blackberries and just enough water to barely cover the bottom—about ½ cup per quart of berries. Bring to a simmer over medium heat. -
Crush as they soften:
As the berries soften, mash them gently with a potato masher. You want them juicy and broken, but not pulverized into oblivion. -
Simmer:
Let the berries simmer for 10–15 minutes, stirring now and then, until they’re very soft and have released plenty of juice. -
Strain:
Pour the hot mixture through a jelly bag, fine mesh strainer lined with two layers of cheesecloth, or a nut milk bag set over a large bowl. Let it drip for at least 30 minutes, or up to a few hours. -
Don’t squeeze (if you want clear jelly):
For a crystal-clear, traditional blackberry jelly, let gravity work. If you squeeze the bag, you’ll get more juice but also more pulp, which makes the jelly cloudier. If you don’t mind a bit of haze, go ahead and gently squeeze—it won’t hurt the flavor.
Measure out 4 cups of juice for this recipe. If you have extra, you can freeze it for later or make a second small batch.
Step-by-Step Directions: Blackberry Jelly Recipe
Once you have your juice, the rest comes together quickly. This is where we actually make the jelly and, if you like, process it for long-term blackberry jelly preservation.
1. Prep Your Jars and Tools
-
Wash jars:
Wash 5–6 half-pint (8 oz) canning jars in hot, soapy water. Rinse well. Inspect for chips or cracks. -
Heat jars:
Keep jars hot until ready to fill—either in a pot of simmering water or on a hot dishwasher cycle. Hot jelly in hot jars helps prevent breakage. -
Lids and rings:
Wash lids and bands in warm, soapy water. Set aside at room temperature. (Most modern lids don’t need pre-boiling; check the package.) -
Set up your canning station:
Have a canning funnel, jar lifter, clean damp dishcloth, and a large stockpot or water bath canner ready.
2. Cook the Juice and Pectin
-
Combine juice, lemon juice, and pectin:
In a large, wide pot, add the 4 cups blackberry juice and 2 tablespoons bottled lemon juice. Sprinkle in the powdered pectin and whisk to dissolve. -
Bring to a rolling boil:
Over high heat, bring the mixture to a full rolling boil—one that doesn’t stop bubbling when you stir. Stir occasionally to keep it from scorching.
3. Add Sugar and Boil to Set
-
Add sugar all at once:
Once boiling, add the 5 cups of sugar in one go, stirring constantly so it dissolves quickly. -
Add butter (optional):
Stir in 1–2 teaspoons butter to help cut down on foam. -
Return to a rolling boil:
Bring the mixture back to a hard boil, stirring often. Once it hits a full rolling boil, start timing. -
Boil 1–2 minutes:
Boil hard for 1 minute (up to 2 if your pectin brand suggests it), stirring constantly. The jelly will look glossy and a bit thicker. -
Check for set (optional but helpful):
You can:- Use a cold plate test: Place a spoonful on a chilled plate, wait 30 seconds, then run your finger through it. If it wrinkles slightly and holds a line, it’s ready.
- Or just trust the timing and pectin instructions, especially on your first try.
-
Remove from heat and skim foam:
Take the pot off the heat. Skim any remaining foam with a spoon. (Or leave a little; it won’t hurt a thing.)
4. Fill Jars and Process
-
Ladle into hot jars:
Using a canning funnel, ladle hot blackberry jelly into hot jars, leaving ¼-inch headspace at the top. -
Remove air bubbles:
Run a clean knife or bubble remover around the inside of the jar to release any trapped air. -
Wipe rims and add lids:
Wipe jar rims with a clean, damp cloth. Center lids on jars and screw bands on fingertip-tight (snug, not cranked down hard). -
Water bath canning:
- Place filled jars on a rack in a boiling-water canner.
- Make sure water covers jars by at least 1 inch.
- Return to a gentle boil, then process for 10 minutes (adjust for altitude per USDA guidelines).
-
Cool and check seals:
Turn off heat, remove canner lid, and let jars rest 5 minutes. Lift jars out and let cool on a towel for 12–24 hours. Then check seals: lids should be concave and not flex when pressed.
Servings & Timing
- Yield: About 5–6 half-pint (8 oz) jars of blackberry jelly
- Prep Time: 25–30 minutes (washing berries, extracting juice, prepping jars)
- Cook Time: 25–30 minutes (cooking juice, boiling jelly, processing jars)
- Total Time: About 1–1½ hours, plus 12–24 hours for jelly to fully set and cool
Easy Variations and Flavor Twists
Once you’ve mastered the base blackberry jelly recipe, try a few fun riffs:
-
Blackberry-Lemon Jelly:
Add 1 tablespoon finely grated lemon zest to the juice before boiling; it adds bright, citrusy notes. -
Blackberry-Vanilla Jelly:
Stir in 1–2 teaspoons pure vanilla extract after boiling, just before filling jars, for a deeper, dessert-like flavor. -
Blackberry-Herb Jelly (for meats):
Simmer a sprig or two of fresh thyme or rosemary in the juice, then strain before adding sugar for a savory twist. -
Spiced Blackberry Jelly:
Add ¼–½ teaspoon ground cinnamon and a tiny pinch of cloves to the sugar for a cozy fall flavor. -
Low-Sugar Version:
Use a low- or no-sugar pectin and follow the box directions for blackberry jelly with less sugar. -
Freezer Blackberry Jelly:
Use freezer-safe containers and skip the water bath; let cool, then freeze for up to a year.
Storage, Shelf Life, and Reheating (If Needed)
One of the big perks of a traditional blackberry jelly recipe is how well it keeps. Let’s walk through storage options.
Room Temperature (Canned)
- Properly processed jars:
If sealed correctly and stored in a cool, dark place, jars of blackberry jelly can last 12–18 months at room temperature. - After opening:
Once opened, store in the fridge and use within 3–4 weeks for best flavor and quality.
Refrigerator
- No-canning option:
If you skip the water bath and simply pour the hot jelly into clean jars, cool, and refrigerate, it should keep 4–6 weeks in the fridge. (Not shelf-stable—treat it like fresh jam.)
Freezer
- Freezer jelly or extra jars:
Leave ½-inch headspace for expansion, cool completely, then freeze for up to 12 months. - Thawing:
Thaw overnight in the fridge. Give it a good stir before using.
Reheating or Fixing Jelly
- Too firm jelly:
If it’s a bit stiff, you can gently warm the jar in a bowl of warm water and stir before using. - Too soft (didn’t set):
You can re-cook it with a little extra pectin following a “remake” method on most pectin packages.
Notes from My Kitchen (Little Lessons & Tips)
- Use a wider pot if you can:
A wide, shallow pot helps the jelly reach the right temperature more quickly and evenly. Taller, narrow pots can slow things down. - Don’t double the batch:
Jelly sets more predictably in smaller batches. If you have lots of juice, make two separate batches rather than one big one. - Sugar matters for set and safety:
This easy blackberry jelly recipe relies on the sugar ratio to help the pectin set and to stabilize the jelly. If you want to experiment, use pectin formulated for low sugar and follow those instructions closely. - Let it rest:
Jelly can take a full 24 hours to reach its final set. Don’t panic if it seems a bit wobbly when it’s still warm. - Adjust sweetness next time:
If you like a sharper, less sweet jelly, you can try cutting sugar by ½–1 cup on your next batch, but know the set may be softer unless you adjust pectin accordingly.
Honestly, the biggest “secret” I’ve learned testing blackberry jelly over the years is this: give yourself grace. Even if the jelly is a little softer or firmer than you pictured, it’s still homemade, still delicious, and still miles better than store-bought.
Frequently Asked Questions About Blackberry Jelly
1. Can I make this blackberry jelly recipe without pectin?
Yes, but you’ll need a higher proportion of fruit and a longer cooking time. Traditional no-pectin recipes rely on natural pectin and often use apple or under-ripe fruit. The flavor is wonderful, but it’s a bit more advanced to get a perfect set.
2. Why didn’t my blackberry jelly set?
Common reasons: not boiling long enough after adding sugar, using less sugar than called for, or not enough pectin. Give it 24 hours; if it’s still runny, you can remake it with additional pectin following your pectin package’s “remake jelly” instructions.
3. Can I use frozen blackberries for homemade blackberry jelly?
Absolutely. Frozen berries work beautifully—just cook them from frozen to extract juice. You may get a touch more liquid, so measure carefully.
4. How do I make blackberry jelly without seeds but keep it thick?
Strain the cooked berries through a jelly bag or cheesecloth for seed-free juice, then follow this recipe using pectin. Straining removes the seeds and a lot of pulp, so pectin is your friend for a good gel.
5. Can I cut the sugar in this easy blackberry jelly recipe?
Not with regular pectin if you want a guaranteed set. If you prefer less sugar, use a low- or no-sugar pectin and follow those directions—they’re designed specifically for reduced-sugar jellies.
6. Do I really need bottled lemon juice, or can I use fresh?
For canning safety and consistency, bottled is recommended because the acidity is standardized. Fresh can vary, which might affect both flavor and preservation.
7. How long is home-canned blackberry jelly safe to eat?
Stored in a cool, dark place, sealed jars are best used within 12–18 months. They’re usually safe beyond that if the seal is intact and there’s no sign of spoilage, but the color and flavor can fade.
8. Can I make a very small batch blackberry jelly, like just 2 jars?
Yes. Halve the juice, sugar, and pectin (you can weigh the pectin or approximate half a box) and follow the same method. Just be sure to keep the ratios consistent.
Wrapping It All Up
This blackberry jelly recipe gives you a classic, glossy, seed-free spread that feels nostalgic and a little bit special—but it’s still easy enough for a busy weeknight project. With simple blackberry jelly instructions, flexible storage options, and a few fun variations, you can turn a basket of berries into something that brightens breakfasts and makes beautiful gifts.
If you make this homemade blackberry jelly, I’d love to hear how it went—did you can it, freeze it, or eat half a jar on warm toast like I do? Leave a comment, share your tweaks, and if you’re in the mood for more preserves, you might enjoy trying strawberry jam, peach butter, or a spicy pepper jelly next.
Blackberry Jelly (Old-Fashioned, Seed-Free, and Perfectly Jiggly)
Ingredients
- 3 to 3.5 quarts blackberries fresh, or 3–4 pounds frozen; for extracting about 4 cups juice
- 1/2 cup water per quart of berries, for cooking and juice extraction
- 4 cups blackberry juice strained and seed-free, from cooked berries
- 5 cups granulated sugar regular white cane sugar; do not substitute sugar-free sweeteners with this method
- 1.75 oz powdered fruit pectin 1 box, such as Sure-Jell or Ball; regular, not low-sugar
- 2 tablespoons bottled lemon juice used for consistent acidity and flavor
- 1 to 2 teaspoons unsalted butter optional; helps reduce foaming while boiling
Instructions
- Place the blackberries in a colander and quickly rinse under cool water. Let them drain well so excess water doesn’t dilute the flavor.3 to 3.5 quarts blackberries
- Add the rinsed blackberries to a large nonreactive pot. Add just enough water to barely cover the bottom of the pot, about 1/2 cup per quart of berries. Bring to a simmer over medium heat, stirring occasionally. As the berries soften, gently crush them with a potato masher until they are juicy and broken up.3 to 3.5 quarts blackberries, 1/2 cup water
- Simmer the crushed berries for 10–15 minutes, stirring occasionally, until they are very soft and have released plenty of juice. Pour the hot mixture through a jelly bag, fine-mesh strainer lined with two layers of cheesecloth, or a nut milk bag set over a large bowl. Let it drip for at least 30 minutes, or up to a few hours. For the clearest jelly, do not squeeze the bag; letting gravity work keeps the juice clear. Measure out 4 cups of strained blackberry juice.4 cups blackberry juice
- Wash 5–6 half-pint (8 oz) canning jars in hot, soapy water. Rinse well and inspect for chips or cracks. Keep jars hot in a pot of simmering water or a hot dishwasher cycle until ready to fill. Wash lids and bands in warm, soapy water and set aside at room temperature (most modern lids do not need pre-boiling; check package directions). Set up your canning station with a canning funnel, jar lifter, clean damp dishcloth, and a large stockpot or water bath canner with a rack.
- In a large, wide pot, combine 4 cups of blackberry juice and 2 tablespoons of bottled lemon juice. Sprinkle the powdered fruit pectin over the surface and whisk to dissolve completely.4 cups blackberry juice, 1.75 oz powdered fruit pectin, 2 tablespoons bottled lemon juice
- Place the pot over high heat and bring the mixture to a full rolling boil, one that does not stop bubbling when you stir. Stir occasionally to prevent scorching.
- Once the juice and pectin mixture is at a rolling boil, add all 5 cups of granulated sugar at once, stirring constantly until fully dissolved. Stir in 1–2 teaspoons unsalted butter if using, to help reduce foaming.5 cups granulated sugar, 1 to 2 teaspoons unsalted butter
- Return the mixture to a hard rolling boil over high heat, stirring often. Once it reaches a full rolling boil that cannot be stirred down, begin timing and boil hard for 1–2 minutes, stirring constantly. The jelly will look glossy and slightly thickened. If desired, test for set by placing a small spoonful on a chilled plate, waiting 30 seconds, then running a finger through it; if it wrinkles slightly and holds a line, it’s ready.
- Remove the pot from the heat. Skim off any remaining foam from the surface of the jelly with a spoon, if desired. A small amount of foam left on top will not affect flavor or safety.
- Working quickly, use a canning funnel to ladle the hot blackberry jelly into hot jars, leaving 1/4 inch of headspace at the top. Run a clean knife or bubble remover tool around the inside of each jar to release any trapped air bubbles. Wipe jar rims with a clean, damp cloth to remove any spills.
- Place the lids centered on the jars, then screw on the bands until fingertip-tight—snug, but not overly tight.
- Place the filled jars onto the rack in a boiling-water canner, ensuring they are covered by at least 1 inch of water. Return the canner to a gentle boil, then process the jars for 10 minutes, adjusting processing time for altitude according to current USDA guidelines.
- Turn off the heat, remove the canner lid, and let the jars rest in the hot water for 5 minutes. Carefully lift the jars out using a jar lifter and place them on a towel-lined surface. Let cool undisturbed for 12–24 hours. After cooling, check the seals: the lids should be concave and should not flex up and down when pressed in the center. Wipe jars, label, and store.