Would you like to save this?
Woof Pupsicle Recipe
If your furry friend is panting on a hot afternoon, this Woof Pupsicle Recipe is the easiest, healthiest little frozen dog treats recipe to cool them down—with simple, real ingredients you probably already have in your kitchen.
What Is a Woof Pupsicle, Anyway?
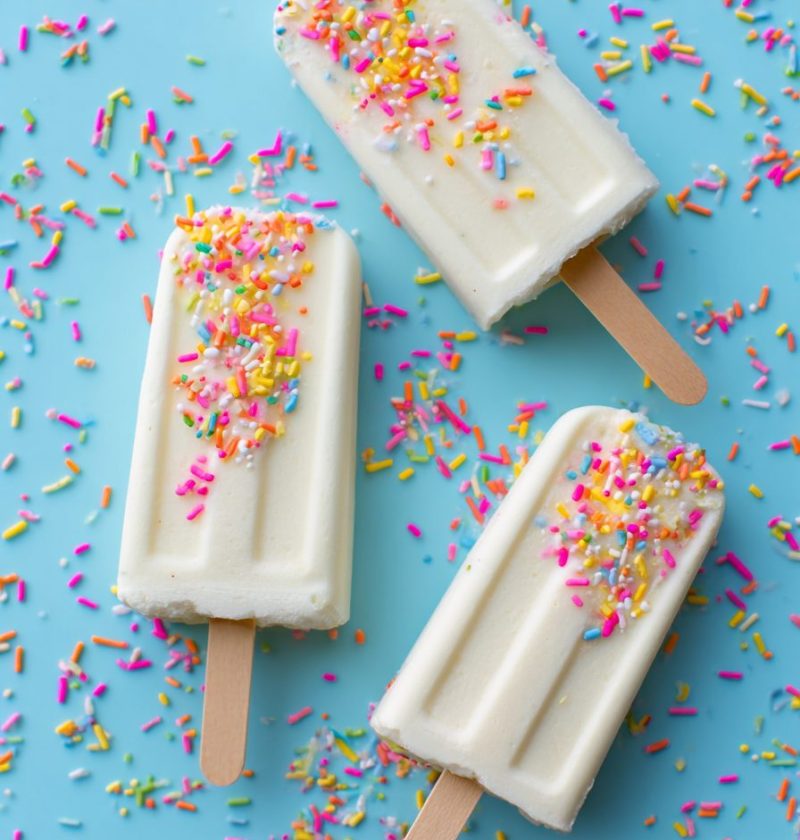
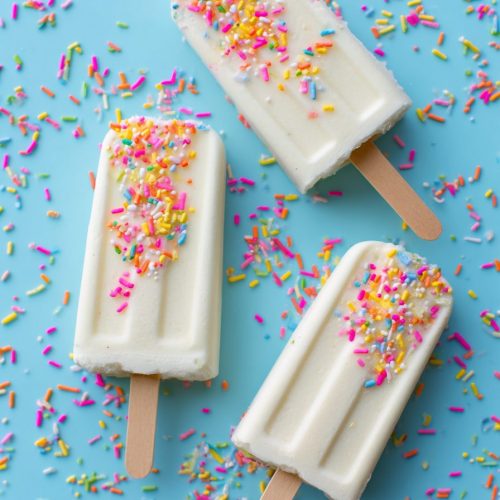
Think of this Woof Pupsicle Recipe as a dog-safe popsicle: creamy, cold, and full of pet-friendly flavor. These homemade pupsicle treats are made with peanut butter, banana, and plain yogurt—no added sugar, no mystery ingredients, and definitely no artificial colors.
I started making these frozen dog treats years ago when our old Lab, Daisy, struggled with the summer heat here in the Midwest. She loved being outside, but her energy would just wilt once July rolled in. One day, while I was blending a smoothie, she gave me those big brown eyes, and I thought, “Why am I not making a dog-safe version of this?”
Now these peanut butter dog popsicles are our go-to summer dog snack recipe. They’re quick, cheap, and honestly kind of adorable. I like to freeze them in small silicone molds for my grand-pup (yes, I’m that dog grandma), but you can also pour them into little paper cups with treat sticks for a classic pupsicle shape.
Because this is a pet safe popsicle recipe, we skip things dogs shouldn’t have—like added sugar, chocolate, artificial sweeteners, or too much salt—and lean into wholesome ingredients you’d feel good eating yourself. If you’ve been looking for healthy frozen dog snacks that don’t feel fussy, this might just become your new warm-weather ritual.
Why You’ll Love This Woof Pupsicle Recipe
Here’s why this one’s such a keeper:
- Simple, everyday ingredients – Banana, yogurt, and peanut butter; that’s it for the base.
- No baking, no cooking – It’s blend, pour, freeze—perfect for busy days or low-energy afternoons.
- Budget-friendly frozen dog treats recipe – Way cheaper than store-bought fancy dog ice pops.
- Customizable for different pups – Easy to tweak for sensitive tummies or picky eaters.
- Great for hot weather – A cooling summer dog snack recipe that encourages hydration.
- Portion-friendly – You control the size, from tiny training bites to full “popsicles.”
- Human-grade ingredients – Everything is safe enough that if your toddler steals a lick, it’s fine.
- Fun bonding ritual – Making DIY dog ice pops together can be a sweet family activity.
- Perfect for celebrations – Use them for “gotcha day,” dog birthdays, or backyard BBQs with pups invited.
Ingredients for Homemade Woof Pupsicles
This Woof Pupsicle Recipe is built on a classic banana yogurt dog treats combo, with peanut butter for flavor and a bit of healthy fat.
For the Base:
- 1 large ripe banana (or 2 small, very spotted bananas)
- Ripe bananas are sweeter and easier to mash; they also blend into a smoother texture.
- 1 cup plain, unsweetened yogurt
- Use plain Greek yogurt for extra creaminess and protein.
- Make sure it’s xylitol-free and with no added sugar or flavors.
- If your dog is very dairy-sensitive, you can use plain lactose-free yogurt or a dog-safe coconut yogurt alternative.
- ¼ cup natural peanut butter
- Choose a brand with just **peanuts (and maybe salt)**—absolutely no xylitol.
- Stir well so the oil is evenly blended for a smoother pupsicle.
- 2–4 tablespoons water or low-sodium chicken broth (as needed)
- Helps thin the mixture to pourable consistency.
- If using broth, make sure it’s onion- and garlic-free.
Optional Boosters (Pick 1–2 if you like):
- 1 tablespoon plain pumpkin puree (not pumpkin pie filling)
- Great for digestion and a favorite for sensitive tummies.
- 1 teaspoon ground flaxseed or chia seeds
- Adds a touch of fiber and healthy fats; just a little goes a long way.
- 1–2 fresh strawberries, Chopped
- Nice for color and a subtle fruity twist—avoid canned, sugary fruits.
Equipment Suggestions:
- Blender or food processor (a hand blender works too)
- Silicone molds, ice cube trays, or small paper cups
- Dog-friendly “sticks” like small dog biscuits, carrot sticks, or bully sticks (optional but cute)
- Measuring cups and spoons
- Spatula for scraping every last bit of goodness
Step-by-Step Directions (So Easy You’ll Memorize It)
-
Prep your ingredients
Peel the banana and break it into chunks. If your banana is frozen, let it sit for a few minutes so it blends more easily. Give your peanut butter a good stir so there are no big oily pockets. -
Add everything to the blender
In your blender or food processor, add the banana, plain yogurt, peanut butter, and 2 tablespoons of water or broth. If you’re using pumpkin, flax, or berries, toss those in now too. -
Blend until smooth and creamy
Blend on medium speed until the mixture is silky and pourable. You’re looking for a consistency like a smoothie—thick but still easy to pour. If it’s too thick or your blender is struggling, add 1 extra tablespoon of water or broth at a time. -
Taste-check for smell and texture (for you, not them!)
You don’t need to eat it, but give it a little sniff and a stir. It should smell like banana and peanut butter and feel smooth with no big lumps. If chunks of banana remain, give it another short blend so the frozen dog treats freeze evenly. -
Pour into molds or cups
Place your silicone molds, ice cube trays, or paper cups on a small baking sheet or tray (this makes transferring them to the freezer a lot less messy). Carefully pour or spoon the mixture into each cavity, leaving a tiny bit of space at the top for expansion while freezing. -
Add “sticks” if you’re using them
If you’d like the full pupsicle look, gently press a small dog biscuit, carrot stick, or chew into each mold. I usually insert them about halfway in so they stand up but don’t tip over. If your mixture is very thin, wait 20–30 minutes for it to start firming up, then add the sticks so they stay in place. -
Freeze until solid
Transfer the tray with molds to the freezer and freeze for at least 3–4 hours, or overnight for best results. Smaller ice cube molds will freeze faster; larger cups may need closer to 6 hours. -
Unmold and serve
Once fully frozen, pop the pupsicles out of the silicone molds or tear away the paper cups. If they’re stuck, you can briefly run the bottom of the mold under warm water to loosen them. Serve one Woof Pupsicle to your dog in a bowl or on a washable surface—they can get a bit drippy as they enjoy them. -
Store the extras
Place leftover pupsicles in a freezer-safe container or zip-top bag. Label it “Dog Treats” so no one mistakes them for dessert (though honestly, they’re perfectly safe for humans too).
Servings & Timing
- Yield: About 10–16 small pupsicles, depending on mold size (or 6–8 larger pops)
- Prep Time: 10 minutes
- Freeze Time: 3–6 hours, depending on size
- Total Time: About 10 minutes hands-on + freezing
This Woof Pupsicle Recipe is one of those set-it-and-forget-it projects: a quick burst of effort, then you’ve got healthy frozen dog snacks waiting in the freezer all week.
Fun Variations to Keep Tails Wagging
Once you’ve made this version a couple of times, you can play around with different flavors and textures. Think of it like building your dog’s own little frozen menu.
- Berry Banana Yogurt Dog Treats – Swap half the banana for ¼ cup blueberries or strawberries for a pretty purple or pink hue.
- Apple Crunch Pupsicles – Stir in 2 tablespoons of very finely chopped apple (peeled, no seeds) after blending for added texture.
- Coconut “Beach Day” Pupsicles – Replace half the yogurt with unsweetened coconut milk and skip the peanut butter for a lighter, tropical feel.
- Extra-Gentle Tummy Pupsicles – Use lactose-free plain yogurt, banana, and a spoonful of pumpkin puree; skip peanut butter if it tends to be rich for your dog.
- Savory Broth Dog Ice Pops – Blend plain yogurt with low-sodium, onion-free chicken broth and skip the banana for pups who prefer savory over sweet.
- Mini Training Bites – Freeze the mixture in very small silicone molds (like those for chocolates) and use as extra-special rewards for training in the heat.
Storage & Thawing Tips
These DIY dog ice pops are very forgiving, but a little strategy helps.
-
Freezer storage:
Keep pupsicles in an airtight container or freezer bag. They’ll stay fresh and tasty for up to 2 months, though my pack usually finishes them long before that. -
Preventing freezer burn:
Try to pack them snugly and squeeze out extra air in the bag. A double layer (bag inside a container) works well if your freezer is prone to frost. -
Serving from frozen:
Serve straight from the freezer—no need to thaw. If your dog is older or has dental issues, you can let a pupsicle sit at room temperature for 3–5 minutes to soften a bit. -
Make-ahead plan:
I like to make a big batch at the beginning of summer and refresh as needed. You can also freeze half the batch in small molds and half in bigger molds to have options for different treats.
Notes from My Kitchen (and Backyard)
A few things I’ve learned while testing and tweaking this Woof Pupsicle Recipe:
-
Start small if your dog is new to dairy.
Even plain yogurt can be a little rich for sensitive tummies. Begin with a tiny pupsicle and see how your dog does before offering more. -
Mind the peanut butter.
Always check the label for xylitol (sometimes listed as “birch sugar”) because it’s very dangerous for dogs. I like brands like Smucker’s Natural or 365 by Whole Foods that list only peanuts and maybe salt. -
Size matters.
Big dogs can handle full-sized pupsicles; small breeds usually do better with ice-cube-sized treats. You want them to enjoy the experience, not chase a giant ice block around the kitchen. -
Mess management.
These are best enjoyed outside on the deck, in the yard, or on a washable mat—especially with enthusiastic lickers. The banana yogurt dog treats mixture can leave little creamy spots on the floor. -
Adjust texture with Liquid.
If you prefer very firm pupsicles, keep the liquid amount low. If you want them a bit more slushy for dogs that don’t love chewing hard ice, add a touch more broth or water. -
Every dog is different.
Just like people, dogs have preferences. Some love peanut butter dog popsicles; others go wild for the savory broth version. Try a couple of flavors and see what makes your pup’s tail helicopter.
FAQs About Woof Pupsicle Recipe & Frozen Dog Treats
1. Are these Woof Pupsicles safe for all dogs?
Generally yes, as long as your dog isn’t allergic to any of the ingredients and tolerates small amounts of dairy. Always check with your vet if your dog has health conditions or a very sensitive stomach.
2. Can I make this Recipe Without yogurt?
Absolutely. You can replace the yogurt with extra banana and a bit more water or broth, or use a dog-safe, unsweetened coconut yogurt alternative for a dairy-free version.
3. How many pupsicles can my dog have in a day?
For most dogs, one small pupsicle per day is plenty. Think of these as treats, not a meal replacement—especially for smaller or less active pups.
4. My dog is overweight. Can they still have these?
Yes, in moderation. Choose the lower-fat, no-peanut-butter variation (banana, pumpkin, and yogurt or a light coconut yogurt) and make them in very small molds so the calories stay low.
5. Can humans eat these peanut butter dog popsicles too?
They’re made with human-grade ingredients, so yes! Just know they’re unsweetened and designed for dog palates, so they won’t taste like your usual dessert popsicle.
6. What if I don’t have a blender?
You can mash the banana very well with a fork and whisk it together with the yogurt and peanut butter. The texture might be a bit chunkier, but it still freezes into tasty homemade pupsicle treats.
7. My pupsicles are icy and hard, not creamy. What happened?
That usually means there’s more water than fat or solids. Try using Greek yogurt and natural peanut butter, and don’t thin the mixture too much with water or broth.
8. Can I add honey for extra sweetness?
Most dogs don’t need added sweetness, especially with a ripe banana in the mix. A tiny drizzle of honey is usually safe for healthy adult dogs, but skip it for puppies, diabetic dogs, or those with weight issues—and always confirm with your vet if you’re unsure.
Wrapping It Up: Cool Treats for Hot Dog Days
This Woof Pupsicle Recipe is such a simple way to say, “I love you, buddy,” on a hot day. With just a few wholesome ingredients and a little freezer time, you’ll have homemade pupsicle treats ready whenever your four-legged friend needs to cool down.
If you try these frozen dog treats, I’d love to hear how your pup liked them—tell me their name, their favorite flavor twist, and whether they’re a “chomp it whole” or “slow licker” type. And if you’re in the mood to keep spoiling your dog, explore more healthy frozen dog snacks and pet safe popsicle recipes in your kitchen; once you start, it’s honestly pretty fun to play “doggie ice cream chef.”
Woof Pupsicle Recipe
Ingredients
- 1 large ripe banana or 2 small, very spotted bananas; peeled and broken into chunks
- 1 cup plain unsweetened yogurt Greek yogurt preferred; xylitol-free, no added sugar or flavors; can use lactose-free or dog-safe coconut yogurt if needed
- 1/4 cup natural peanut butter ingredients should be just peanuts (and maybe salt); absolutely no xylitol; stirred well
- 2-4 tablespoons water or low-sodium chicken broth as needed to reach a pourable, smoothie-like consistency; broth must be onion- and garlic-free
- 1 tablespoon plain pumpkin puree optional; not pumpkin pie filling; supports digestion
- 1 teaspoon ground flaxseed or chia seeds optional; adds fiber and healthy fats
- 1-2 fresh strawberries optional; chopped; avoid canned or sugary fruits
- small dog biscuits, carrot sticks, or bully sticks optional; used as "sticks" for pupsicles
Instructions
- Peel the banana and break it into chunks. If using a frozen banana, let it sit for a few minutes so it blends more easily. Stir the natural peanut butter well so there are no large oily pockets.1 large ripe banana, 1/4 cup natural peanut butter
- In a blender or food processor, add the banana chunks, plain yogurt, natural peanut butter, and 2 tablespoons of water or low-sodium, onion-free chicken broth. If using pumpkin puree, ground flaxseed or chia seeds, or chopped strawberries, add them now.1 large ripe banana, 1 cup plain unsweetened yogurt, 1/4 cup natural peanut butter, 2-4 tablespoons water or low-sodium chicken broth, 1 tablespoon plain pumpkin puree, 1 teaspoon ground flaxseed or chia seeds, 1-2 fresh strawberries
- Blend on medium speed until the mixture is smooth, creamy, and pourable—similar to a thick smoothie. If the mixture is too thick or the blender struggles, add more water or broth 1 tablespoon at a time until it reaches a pourable consistency.
- Check the mixture by smell and texture. It should smell like banana and peanut butter and feel smooth, with no large banana chunks. If chunks remain, blend again briefly for an even freeze.
- Place silicone molds, ice cube trays, or small paper cups on a baking sheet or tray for easy transfer. Pour or spoon the mixture into each cavity, leaving a little space at the top for expansion as it freezes.
- If you want classic pupsicle shapes, gently press a small dog biscuit, carrot stick, or bully stick into each mold, inserting halfway so it stands upright. If the mixture is very thin, freeze for 20–30 minutes first, then add the sticks so they stay in place.small dog biscuits, carrot sticks, or bully sticks
- Transfer the tray with filled molds to the freezer. Freeze for 3–4 hours or until completely solid. Smaller molds or ice cubes will freeze faster; larger paper cups may take up to 6 hours.
- Once fully frozen, remove pupsicles from the molds or peel away the paper cups. If they are stuck, briefly run the bottoms of the molds under warm water to loosen. Serve one Woof Pupsicle to your dog in a bowl or on a washable surface, as they may drip while your dog enjoys them.
- Place remaining pupsicles in a freezer-safe container or zip-top freezer bag. Label clearly (e.g., "Dog Treats") and store in the freezer for up to 2 months.
Notes
- Berry Banana Yogurt Dog Treats: Replace half the banana with 1/4 cup blueberries or strawberries.
- Apple Crunch Pupsicles: Stir in 2 tablespoons very finely chopped, peeled apple (no seeds) after blending.
- Coconut “Beach Day” Pupsicles: Replace half the yogurt with unsweetened coconut milk and omit peanut butter.
- Extra-Gentle Tummy Pupsicles: Use lactose-free yogurt, banana, and a spoonful of pumpkin puree; skip peanut butter.
- Savory Broth Dog Ice Pops: Blend plain yogurt with low-sodium, onion-free chicken broth and omit banana.
- Mini Training Bites: Freeze in very small molds and use as high-value rewards in hot weather. Tips:
- Start with a small portion if your dog is new to dairy and monitor their digestion.
- Always confirm peanut butter is xylitol-free (sometimes labeled as birch sugar).
- Adjust portion size to your dog’s size and calorie needs: small dogs do best with ice-cube-sized treats.
- These treats can be messy; serve outside or on an easy-to-clean surface.
- For firmer pupsicles, use less liquid; for a softer, slushier texture, add a bit more water or broth. Safety & FAQs (Summary):
- Suitable for most healthy dogs that tolerate dairy and are not allergic to any ingredients. When in doubt, ask your vet.
- Can be made dairy-free by using extra banana and water/broth or a dog-safe coconut yogurt alternative.
- Treats should not replace meals; for most dogs, one small pupsicle per day is enough.
- For overweight dogs, use banana, pumpkin, and light yogurt or coconut yogurt, in very small molds.
- Made with human-grade ingredients and technically safe for people, but unsweetened and formulated for dogs.
- If you don’t have a blender, mash banana very well and whisk everything together; texture will be a bit chunkier.
- If pupsicles freeze very icy and hard, you likely used too much liquid; next time, use Greek yogurt and keep added water/broth to a minimum.