Would you like to save this?
Royal Icing Recipe Without Meringue Powder (Glossy, Simple, and Perfect for Cookies)
If you’ve been hunting for a foolproof Royal Icing Recipe Without Meringue Powder that’s glossy, smooth, and dries hard enough for cookie decorating, pull up a chair—this one’s been my go‑to for years.
What Makes This Royal Icing Recipe Without Meringue Powder Special?
This royal icing recipe is made with real egg whites instead of meringue powder, so it’s classic, shiny, and wonderfully stable. It’s the kind of homemade royal icing my mother used when I was a little girl “helping” her decorate sugar cookies at the kitchen table—usually with more sprinkles on the floor than on the cookies.
If you’ve ever felt overwhelmed by royal icing recipes, especially those that call for special ingredients, this royal icing without meringue powder is your new baking buddy. The base is simple: egg whites, powdered sugar, and a splash of flavor. That’s it. No mysterious powders, no fancy tools.
This icing is ideal for:
- Icing for cookies and sugar cookies for the holidays
- Birthday cookie decorating parties with kids
- Gingerbread houses (the “glue” holds like a dream)
- Simple, shiny icing that dries firm but not rock‑hard
Health‑wise, this is still a treat—let’s be honest—but it uses simple, recognizable ingredients. Since we’re working with egg white royal icing, I’ll share tips to keep it as safe and fresh as possible, too.
Why You’ll Love This Royal Icing Recipe Without Meringue Powder
- No special ingredients needed – No meringue powder, no hunting the baking aisle; just egg whites, powdered sugar, and a few pantry basics.
- Glossy and professional-looking – This glossy cookie icing dries with a beautiful sheen that makes your cookies look bakery‑worthy.
- Hard‑drying but not tooth‑breaking – Once it dries, this hard drying icing holds detail but still has a pleasant bite.
- Perfect for sugar cookie decorating – Use it as royal icing for sugar cookies, gingerbread, or any cut‑out cookie.
- Easy to adjust thickness – One batch, endless uses: thick for piping details, thinner for smooth cookie icing and flooding.
- Customizable flavors – Add vanilla, almond, lemon, or even a touch of cocoa for fun flavor twists.
- Colors like a dream – Gel food coloring blends in smoothly without thinning your decorating icing recipe.
- Great for beginners and kids – If you can whisk, you can make this easy royal icing recipe—no pastry school required.
Ingredients for Egg White Royal Icing (No Meringue Powder)
Here’s what you’ll need to make this simple royal icing. Measure fairly accurately; royal icing can be a little fussy if things are very off, but it’s also easy to fix.
- 3 large egg whites, room temperature
- Use very fresh eggs. Room temperature egg whites whip more easily and give a smoother icing.
- 4 – 4½ cups (480–540 g) powdered sugar, sifted
- Also called confectioners’ sugar. Sifting helps you avoid lumps in your icing.
- 1 teaspoon pure vanilla extract
- For classic flavor; use clear vanilla if you want a bright white icing.
- ¼ teaspoon almond extract (optional, but lovely)
- Adds that bakery‑style flavor; skip if there are nut allergies.
- 1–2 teaspoons fresh lemon juice (optional)
- Brightens the flavor and cuts the sweetness a bit; also helps the icing set.
- Pinch of fine sea salt
- Just enough to balance the sweetness—don’t skip it.
- Gel food coloring, as desired
- Gel or paste colors (like AmeriColor or Wilton) work best and don’t thin your royal icing.
Substitution Notes:
- If you don’t use raw eggs, you can substitute 3 tablespoons pasteurized liquid egg whites per egg (9 tablespoons total) and make the recipe as written.
- For a subtle citrus version, swap lemon extract for the almond extract and skip the vanilla, or do a half‑and‑half blend.

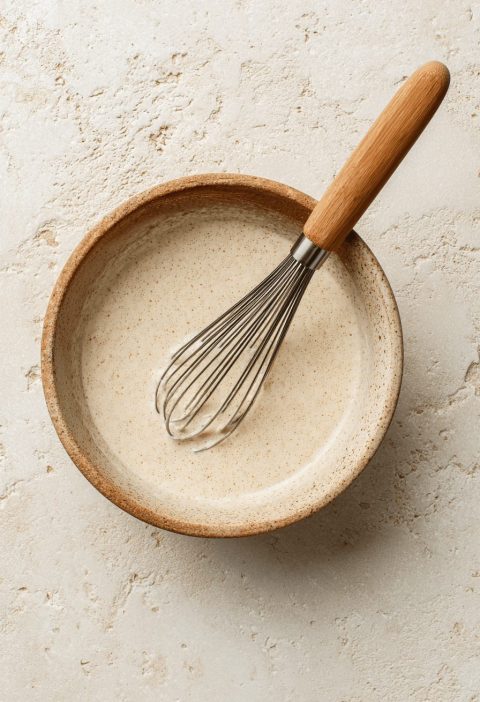
How to Make Royal Icing Without Meringue Powder (Step‑by‑Step)
1. Start with clean, grease‑free tools
Make sure your mixing bowl and whisk or mixer attachments are completely clean and free from any grease or oil. Even a hint of fat can prevent the egg whites from whipping properly and your homemade royal icing will be too thin and dull. Wipe everything with a little vinegar and dry if you’re unsure.
2. Whisk the egg whites to frothy
Add the egg whites (or liquid egg whites) to your mixing bowl. With a stand mixer fitted with the whisk attachment or a hand mixer, beat on medium speed until the egg whites look foamy and light—about 1–2 minutes. You’re not trying for stiff peaks, just a nice froth.
3. Add flavor and salt
Mix in the vanilla extract, almond extract (if using), lemon juice (if using), and a pinch of salt. Beat briefly to combine. This infuses the egg white mixture so the flavor spreads evenly throughout the icing.
4. Slowly add the powdered sugar
Turn the mixer to low speed and start adding the sifted powdered sugar, about ½ cup at a time. Let each addition mix in before adding more. This keeps the icing smooth and prevents a sugar “cloud” from coating your kitchen—been there, done that.
5. Beat until thick, shiny, and smooth
Once all the powdered sugar is in, increase the speed to medium‑high. Beat for 3–5 minutes, scraping the sides and bottom of the bowl once or twice, until the icing is thick, glossy, and holds soft peaks.
- For stiff piping consistency (for outlines and details), the icing should hold a peak that only slightly bends at the tip.
- If it looks dull or grainy, beat it a bit longer; if it’s very stiff and chunky, add a teaspoon of water at a time.
6. Adjust consistency for your needs
This is the part that makes royal icing for sugar cookies feel like magic. You can adjust one batch to several consistencies:
- Stiff consistency – Great for fine details, writing, or “gluing” gingerbread houses.
- Medium consistency – Good for borders and basic designs.
- Flood consistency – Thinner icing that spreads to a smooth layer for filling in cookies.
To thin the icing:
- Add water ½ teaspoon at a time, mixing well after each addition.
- For flood icing, you usually want a “10–15 second consistency”: drag a knife through the icing in the bowl; if the line disappears in about 10–15 seconds, you’re good.
To thicken the icing:
- Sift in 1–2 tablespoons powdered sugar at a time until it holds its shape again.
7. Color the icing
Divide the icing into small bowls for each color. Add gel food coloring using a toothpick or a small squeeze—go slowly since colors deepen as they sit. Stir gently to avoid adding too many air bubbles.
If you’re making white icing, you’re done. For deep colors (red, black), make the icing a bit ahead; the color will intensify over an hour or two, which means you can use less coloring.
8. Cover to prevent crusting
Royal icing tends to dry out and form a crust quickly. Whenever you’re not using it:
- Press a piece of plastic wrap directly onto the surface of the icing in the bowl, and
- Keep the bowl covered with a towel or lid.
The same goes for piping bags—if you’re pausing, tuck the tip into a damp paper towel or cover the bag with plastic wrap.
Servings & Timing
- Yield: Enough icing for about 24–36 medium sugar cookies, depending on how heavily you decorate
- Prep Time: 15–20 minutes
- Rest Time: 15 minutes (optional, for air bubbles to settle and colors to deepen)
- Total Time: 20–35 minutes
If you’re decorating a big batch of cookies for Christmas or a bake sale, you can double this recipe easily—just use a large stand mixer bowl.
Fun Variations on This Simple Royal Icing
Once you’ve got this base royal icing recipe without meringue powder down, you can start playing. Here are some of my favorite twists:
- Citrus Kiss Icing – Replace vanilla with lemon or orange extract and add extra lemon juice for a bright, zesty cookie decorating icing.
- Warm Almond Bakery Icing – Use all almond extract (no lemon) for that nostalgic bakery sugar cookie flavor.
- Chocolate Royal Icing – Whisk 2–3 tablespoons unsweetened cocoa powder into the powdered sugar and add a touch more vanilla.
- Spiced Holiday Icing – Add a pinch of cinnamon and nutmeg for decorating gingerbread or fall‑spiced cookies.
- Gluten‑Free and Dairy‑Free – This recipe is naturally gluten‑free and dairy‑free; just double‑check your extracts and coloring are certified gluten‑free.
- Pastel Easter Icing – Use less gel coloring and add a touch of lemon extract for soft pastel cookies in spring.
How to Store Royal Icing Without Meringue Powder
Because this is an egg white royal icing, storage matters. Here’s how to keep it safe and workable.
-
Short‑term storage (same day):
- Keep the icing covered at room temperature for up to 4 hours while decorating. Make sure it’s tightly covered so it doesn’t crust.
-
Refrigerator storage:
- Transfer icing to an airtight container, press plastic wrap directly on the surface, and refrigerate for up to 3 days.
- Before using, bring to room temperature and beat briefly with a spoon or mixer to restore the smooth texture.
-
Freezer storage:
- You can freeze egg white royal icing in an airtight container for up to 1 month, but the texture may change slightly.
- Thaw overnight in the fridge, then bring to room temperature and whisk well.
-
Make‑ahead tips:
- You can make this icing a day before decorating; in fact, the color often improves.
- Store colored icing in piping bags or containers, covered tightly. Re‑stir gently before using to remove any separation.
No reheating is needed—just bring it back to room temperature and stir.
Notes & Personal Tips from My Kitchen
- Safety note: If you’re serving this royal icing without meringue powder to pregnant people, very young kids, or anyone with a compromised immune system, use pasteurized egg whites. Many grocery stores sell them in cartons right next to regular eggs.
- Don’t fear the thickness: New bakers often think their icing is “too thick” and add a lot of water—then it won’t hold its shape. Always thin slowly. You can fix thick icing; runny icing is harder to bring back.
- Test one cookie first: When you think you’ve got the right icing consistency, decorate one cookie as a test. Let it sit for 10–15 minutes. If the edges hold and the top is smoothing nicely without running off, you’re set.
- Use squeeze bottles for kids: If you’re decorating with children, filling small squeeze bottles instead of piping bags gives them more control and less mess. (Also easier on little hands.)
- Drying time: Let decorated cookies dry, uncovered, at room temperature for at least 8–12 hours, or overnight. Then you can stack them in cookie tins or gift boxes.
- Humidity matters: On sticky, humid days, royal icing may take longer to dry and might not get as hard. A fan on low near (but not directly on) the cookies helps.
FAQs About Royal Icing Recipe Without Meringue Powder
1. Is it safe to eat royal icing made with raw egg whites?
If you use very fresh eggs and store the icing properly, many home bakers have used it safely for generations—but for extra safety, use pasteurized egg whites from a carton.
2. My icing is too runny. How do I fix it?
Whisk in more sifted powdered sugar, 1–2 tablespoons at a time, until it holds its shape and thickens to your desired consistency.
3. My royal icing has bubbles. What should I do?
After mixing and coloring, let the icing sit for about 15 minutes, then gently stir and tap the bowl on the counter to bring bubbles to the surface. You can also pop visible bubbles on cookies with a toothpick while the icing is still wet.
4. How long does royal icing take to dry on cookies?
Usually 8–12 hours at room temperature for a firm top, and up to 24 hours for completely dry, stackable cookies, depending on thickness and humidity.
5. Can I leave royal icing at room temperature overnight?
The decorated cookies can sit out overnight to dry. The icing itself is better kept refrigerated if you’re not actively decorating, especially if it’s warm in your kitchen.
6. Why did my royal icing look dull instead of shiny?
Over‑mixing, under‑mixing, or adding too much water can all reduce shine. Beat it until smooth and glossy, then avoid thinning it too far.
7. Can I make this royal icing recipe without meringue powder vegan?
Classic royal icing relies on egg whites, so this version isn’t vegan. For a vegan option, you’d need an aquafaba‑based recipe, which is a different method.
8. Can I flavor royal icing without changing the color?
Yes—use clear extracts (clear vanilla, clear almond) and avoid dark liquids like regular vanilla if you want a bright white icing.
Wrapping It Up: Your New Go‑To Cookie Decorating Icing
This Royal Icing Recipe Without Meringue Powder is the same kind of simple, trusty recipe I’ve been pulling out for Christmas cookie trays, Valentine hearts, and birthday cookie favors for decades. It’s glossy, pipeable, and easy to flavor and color exactly how you like it.
Try this royal icing without meringue powder the next time you bake sugar cookies, then come back and tell me how your decorating went—what worked, what didn’t, and which colors you loved. And if you’re in the mood to keep baking, you might like pairing this with a soft cut‑out sugar cookie recipe or a good old‑fashioned gingerbread cookie for the holidays.

Royal Icing Recipe Without Meringue Powder
Ingredients
- 3 large egg whites room temperature; very fresh, or use pasteurized liquid egg whites
- 4-4 1/2 cups powdered sugar 480–540 g, sifted; also called confectioners’ sugar
- 1 teaspoon pure vanilla extract use clear vanilla for bright white icing
- 1/4 teaspoon almond extract optional; skip if there are nut allergies
- 1-2 teaspoons fresh lemon juice optional; brightens flavor and helps icing set
- 1 pinch fine sea salt balances sweetness
- Gel food coloring as desired; gel or paste colors so icing doesn’t thin
- 9 tablespoons pasteurized liquid egg whites optional substitution for the 3 egg whites (3 Tbsp per egg)
Instructions
- Ensure your mixing bowl and whisk or mixer attachments are completely clean and free of any grease or oil. If unsure, wipe them with a little vinegar and dry thoroughly. Any fat can prevent the egg whites from whipping properly and will make the icing too thin and dull.
- Add the egg whites (or pasteurized liquid egg whites) to the mixing bowl. Using a stand mixer with the whisk attachment or a hand mixer, beat on medium speed until the egg whites are foamy and light, about 1–2 minutes. You are aiming for frothy, not stiff peaks.3 large egg whites, 9 tablespoons pasteurized liquid egg whites
- Mix in the vanilla extract, almond extract (if using), lemon juice (if using), and a pinch of fine sea salt. Beat briefly until evenly combined so the flavor is distributed throughout the icing.1 teaspoon pure vanilla extract, 1/4 teaspoon almond extract, 1-2 teaspoons fresh lemon juice, 1 pinch fine sea salt
- Turn the mixer to low speed. Add the sifted powdered sugar about 1/2 cup at a time, letting each addition fully incorporate before adding more. This keeps the icing smooth and helps avoid a cloud of sugar in your kitchen.4-4 1/2 cups powdered sugar
- Once all of the powdered sugar has been added, increase the mixer speed to medium-high. Beat for 3–5 minutes, scraping down the sides and bottom of the bowl once or twice, until the icing is thick, glossy, and holds soft peaks. For stiff piping consistency (outlines and details), the icing should hold a peak that only slightly bends at the tip. If it looks dull or grainy, beat a bit longer. If it is very stiff and chunky, add water 1 teaspoon at a time until smooth.4-4 1/2 cups powdered sugar
- Adjust the icing to the consistency you need: leave it thick for stiff piping and gingerbread house “glue,” thin slightly for medium consistency (borders and simple designs), or thin further for flood icing to fill and smooth over cookies. To thin, add water 1/2 teaspoon at a time, mixing well after each addition, until you reach about a 10–15 second consistency for flooding (a line drawn through the icing disappears in 10–15 seconds). To thicken, sift in additional powdered sugar 1–2 tablespoons at a time until the icing holds its shape.4-4 1/2 cups powdered sugar
- Divide the icing into separate bowls for each color. Add gel food coloring a little at a time with a toothpick or a small squeeze, stirring gently until the color is uniform. Go slowly—colors deepen as they sit. For deep shades like red or black, make the icing ahead of time to allow the color to intensify so you can use less coloring. Leave some icing white if desired.Gel food coloring
- Royal icing crusts quickly when exposed to air. Whenever you are not actively using it, press plastic wrap directly onto the surface of the icing in the bowl and then cover the bowl with a lid or towel. For piping bags, tuck the tips into a damp paper towel or cover with plastic wrap to keep the icing from drying out.
- Let the mixed and colored icing rest for about 15 minutes to allow air bubbles to rise to the surface and for colors to deepen slightly. Gently stir and tap the bowl on the counter to release bubbles before transferring the icing to piping bags or squeeze bottles for decorating.